
Remix an Image With AI: Steps, Prompts and Fixes
The photo is close, but the background or style does not fit the next post. Remix it with AI instead of starting over. Keep the product recognizable, change the parts that should change, and compare a few versions before you publish.
TL;DR:
Remixing an image with AI means keeping the original photo and changing only what you describe, such as the background, color, mood, or layout. Upload a clear source, say what should stay and what should change, then compare the results. Check that the product still looks like your product before you use the new image.
Say a product photo looks great, but the background clashes with your campaign. Or last year's social post needs a refresh before it goes out again. Reshooting takes time and money, which is why plenty of people now remix an image with AI instead. You keep the original as the base and change the colors, mood, or layout with a short text prompt. Below are the steps, prompt examples, and fixes for when the subject gets warped, so you can remix an image with AI and still end up with a product that looks like your product.
What Does It Mean to Remix an Image With AI?
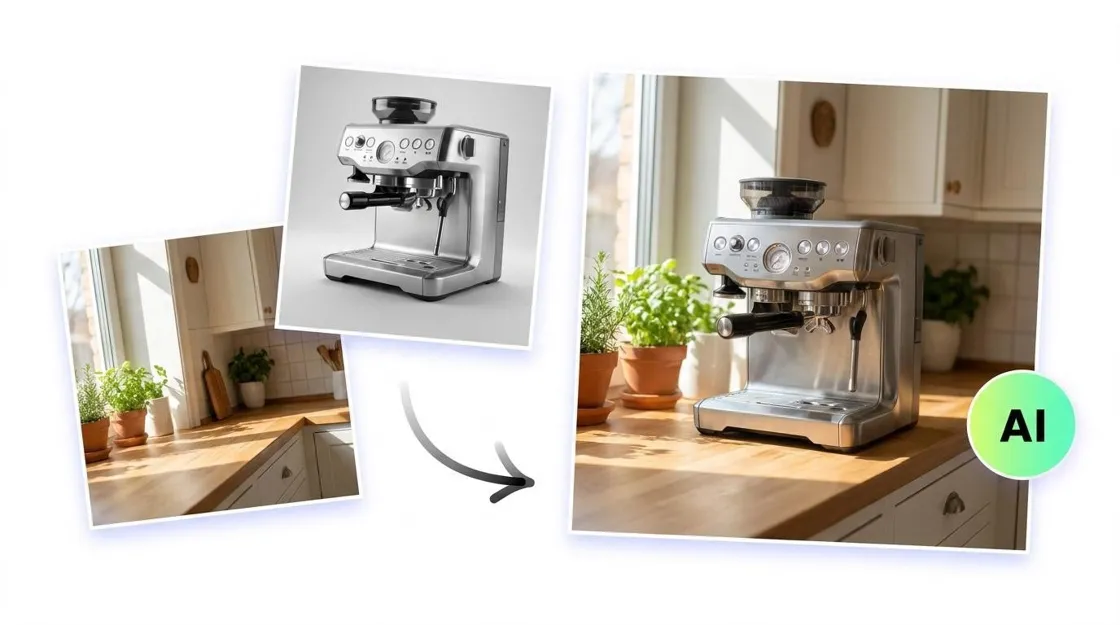
To remix an image with AI is to hand a tool an existing picture and ask it to redo parts of it. Maybe the studio backdrop becomes a kitchen counter. Maybe the lighting turns warmer, or the whole shot gets an illustrated look. The original works as a guide, so the subject stays recognizable while the things you asked about shift. A photo remixer combines your image with a written prompt and returns a new version aimed at your campaign.
AI Image Remixing vs. Traditional Editing vs. Text-to-Image
Not every edit needs the same tool, and picking the wrong one eats up hours. Here's how AI remixing stacks up against the two methods people usually compare it to.
|
Approach |
Starting point |
How changes are made |
Best suited for |
|---|---|---|---|
|
Traditional photo editing |
An existing image |
Manual adjustments, selections, masks, and retouching |
Precise corrections and detail-level control |
|
Text-to-image AI |
A written concept |
AI generates an image from a prompt |
Creating a visual from scratch |
|
AI image remixing |
An existing image plus instructions |
AI reinterprets the image according to the prompt and available controls |
Exploring new versions of an existing visual |
What Parts of an Image Can AI Remix?
When you remix an image, you do not have to change everything at once. Isolate specific variables to build exactly the assets your campaign requires.
-
Background and setting: A plain white backdrop is the easiest thing to swap. With an AI change background step, the same product can sit on a marble countertop on Monday and a sunny beach on Friday, with no location shoot for each new season.
-
Lighting and mood: Flat studio lights can make a good product look cheap. Try warm golden hour, hard dramatic shadows, or a moody evening glow instead. A remix photo editor can also add believable reflections and tune how strong the highlights are, and shoppers tend to read all of that as quality.
-
Color and style: Planning ad creatives for a holiday sale? Run an image filter or shift the color grading toward warm winter tones, then keep the original palette as a second version for A/B testing.
-
Objects and surroundings: Props tell the buyer how big the product is and what it's for. Ask for fresh ingredients next to a sauce jar, a cosmetic smear beside a lipstick, or a bag on a café chair. Add, remove, or reshape the extras until the scene feels alive.
-
Composition and framing: Stories, banners, and square carousels all want different crops. Leave empty space on one side, so the headline and the call to action button have somewhere to go. If the original is too tight, use combine images or a remix image tool to extend the background and keep a safe margin around the text.
Results will vary depending on your software. If you need precise control over a specific area, check whether your chosen tool supports masking or structural matching rather than relying on a text prompt alone.
How to Remix an Image With AI in 3 Steps
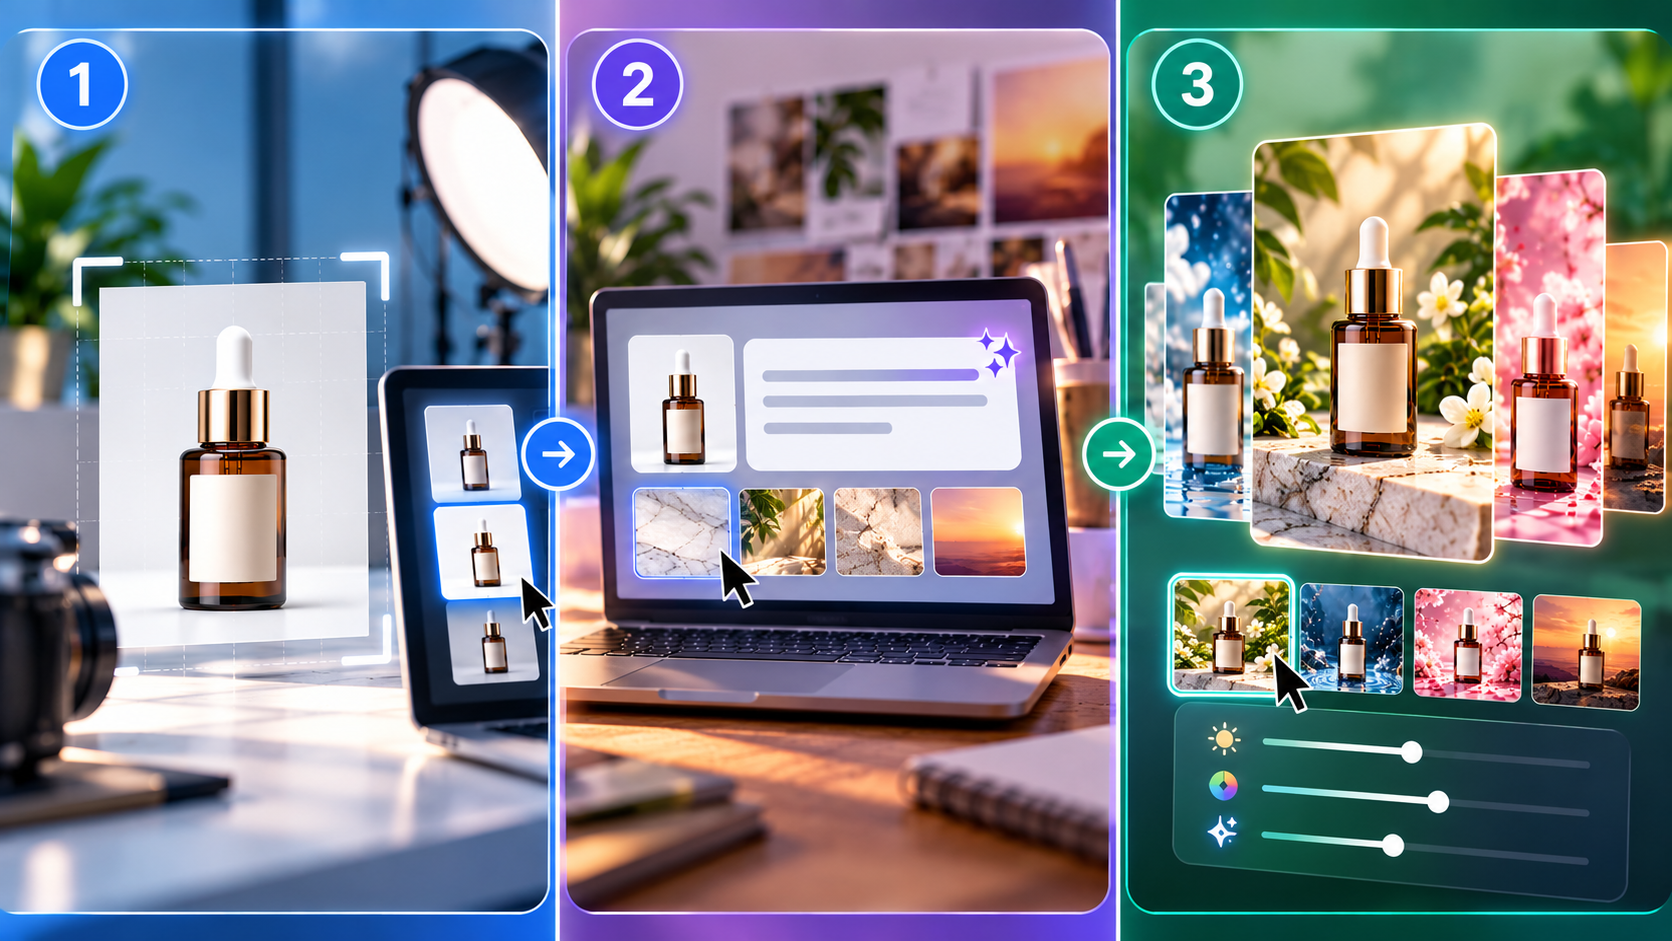
The process is shorter than most people expect. If you're wondering how to remix photos, it comes down to uploading a reference image, describing what should change, then generating and fixing whatever looks off. The details inside each step are where the quality comes from, so follow them in order and you'll get marketing images you can actually use, whichever tool you're using.
Step 1: Upload a Clear Source Image
Start with a photo where the subject is sharp and well lit. A blurry or heavily filtered file gives the tool very little to read, and it usually shows in the output. Camera angle matters too, because AI can't turn a straight-on shot into a top-down one. Keep an untouched copy of the original so you have something to compare against later.
Step 2: Describe the Remix You Want
Say what should change and what should stay put. "Make it look nicer" gives the tool nothing to work with. Compare that with "keep the bottle exactly as is, place it on a marble counter, soft morning light from the left." Name the surface, the light direction, and the mood. If the product has a label or logo you can't afford to lose, mention it in the prompt. Most people who struggle with how to remix photos skip this part, so be specific about the surface, the light, and what must stay untouched.
Step 3: Generate, Compare, and Refine
Run the first batch, then put the results next to your original and check the product edges and brand colors. Expect to go a round or two before something works. When a result is close, change one thing in the prompt rather than rewriting all of it. Once you've picked a winner, add your campaign copy in an image text editor and export it.
5 Prompts You Can Copy to Remix an Image With AI
Using the right words stops the AI from altering your core product. Copy these tool-agnostic prompt templates into your chosen AI image remixer and swap the bracketed text for your own details.
-
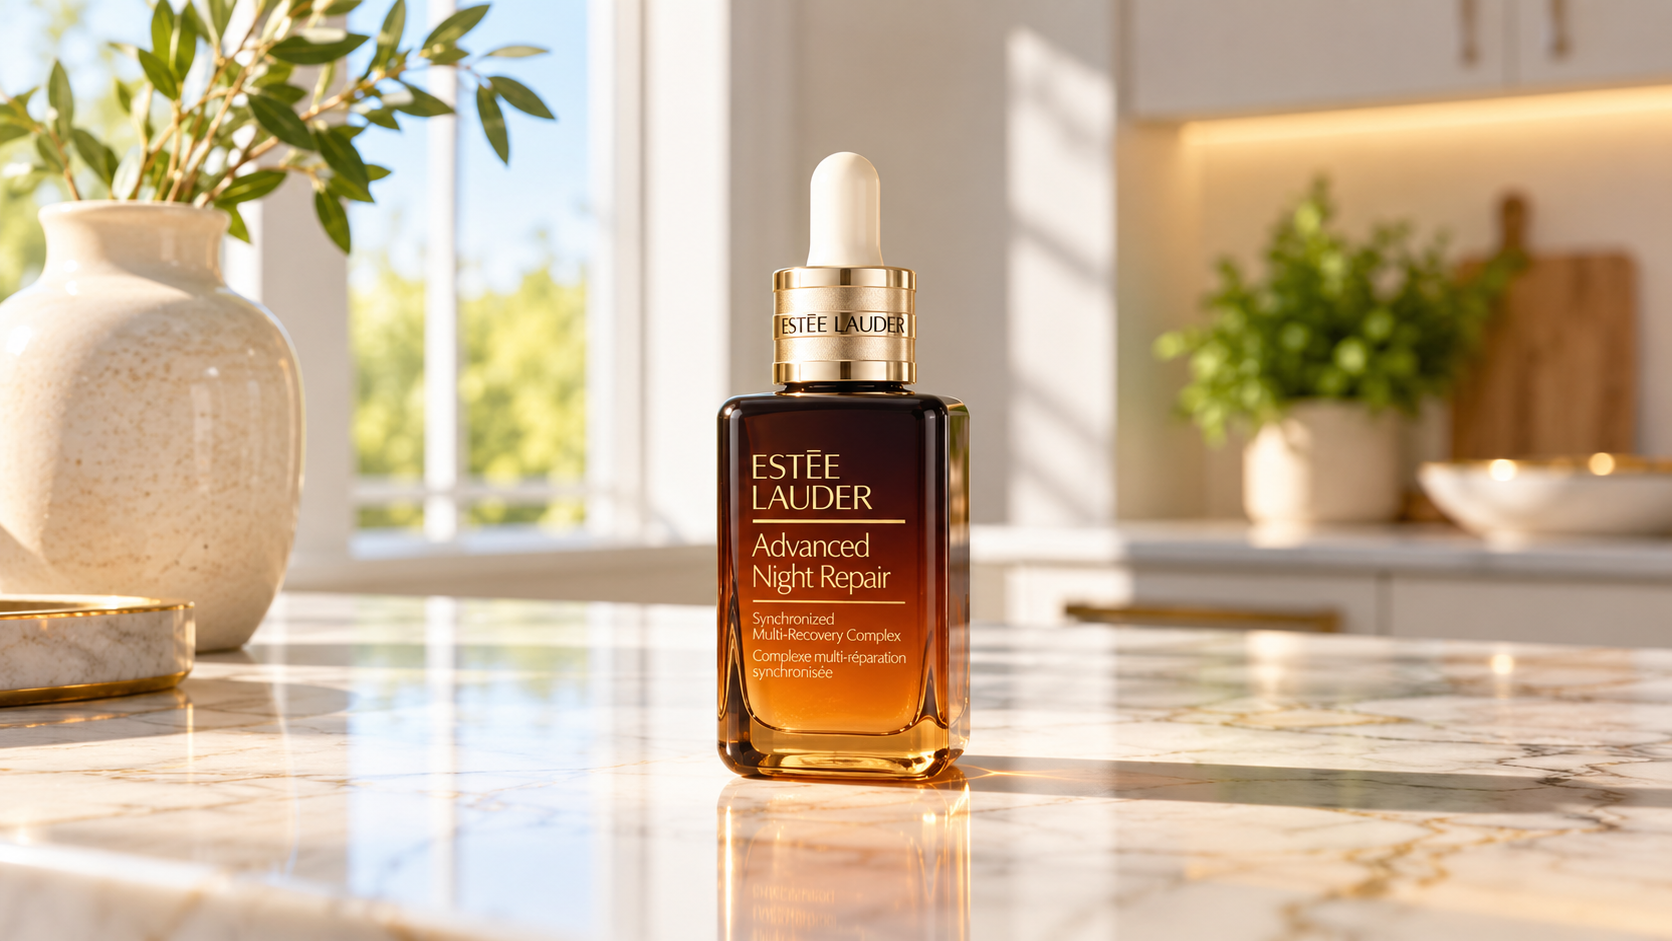
The Premium E-commerce Lifestyle: Keep the [product] exactly as it is, with the same shape, label, and color. Put it on a [white marble kitchen island] with soft morning light coming in from a window on the left. Natural shadows fall to the right. Photorealistic, like a magazine editorial shot on a 35mm lens.
-
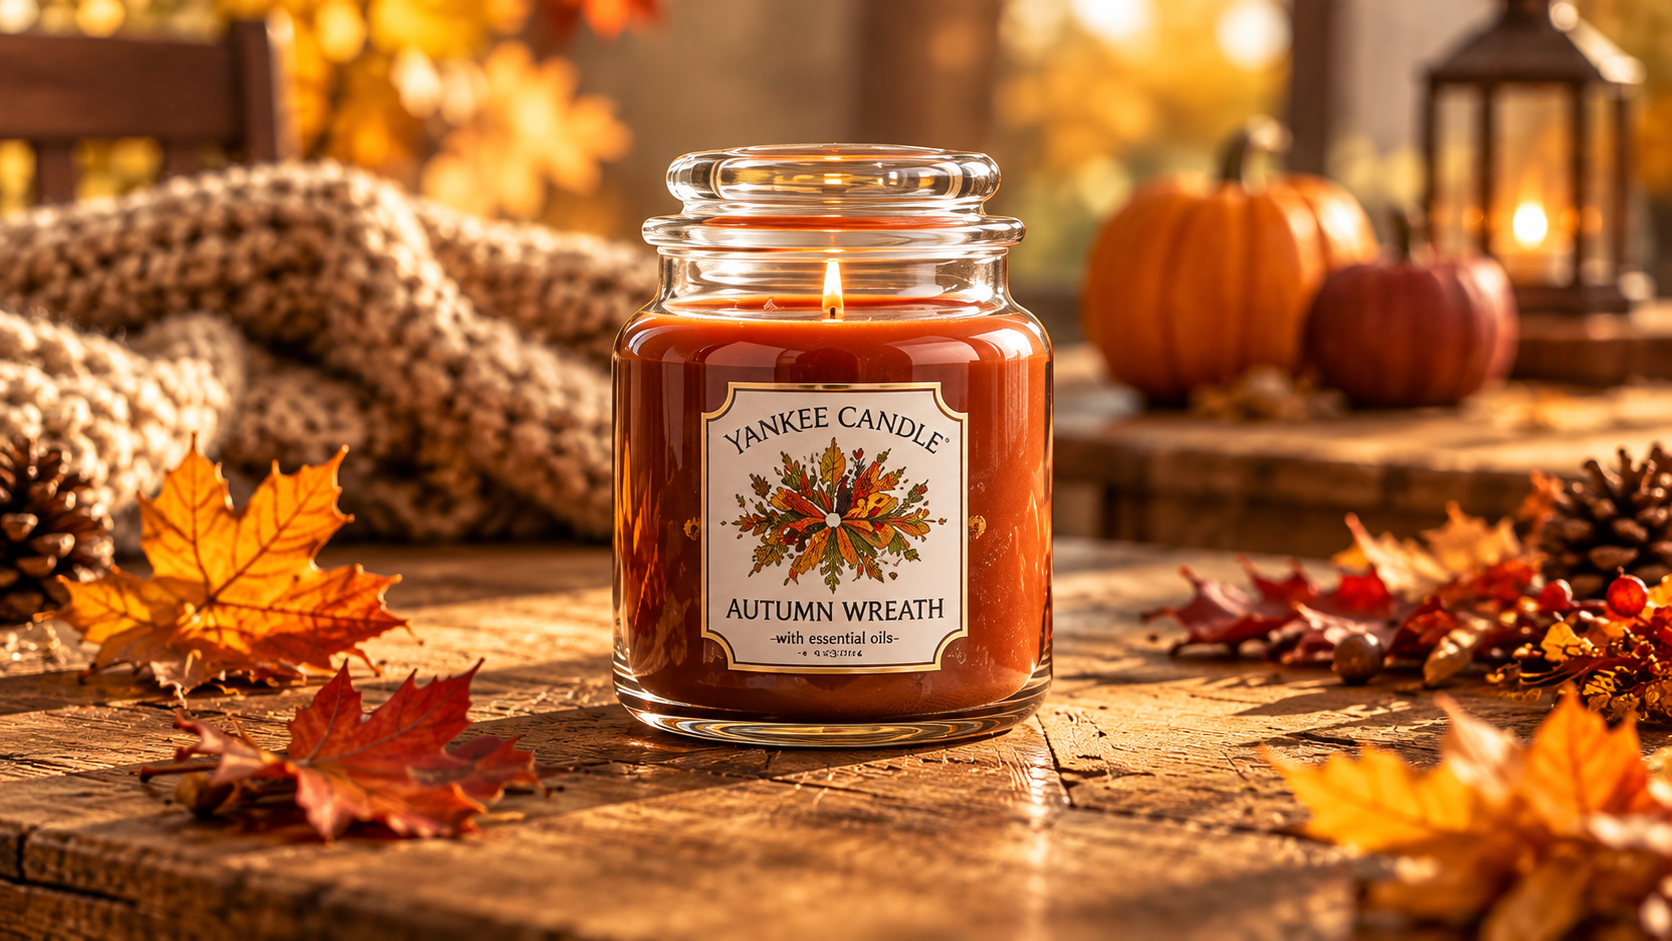
The Seasonal Update: Same product, new season. Set it on a [rustic oak table] on an [autumn afternoon] with a few [maple leaves] near its base. Warm amber light, a softly blurred background, and the product in sharp focus.
-
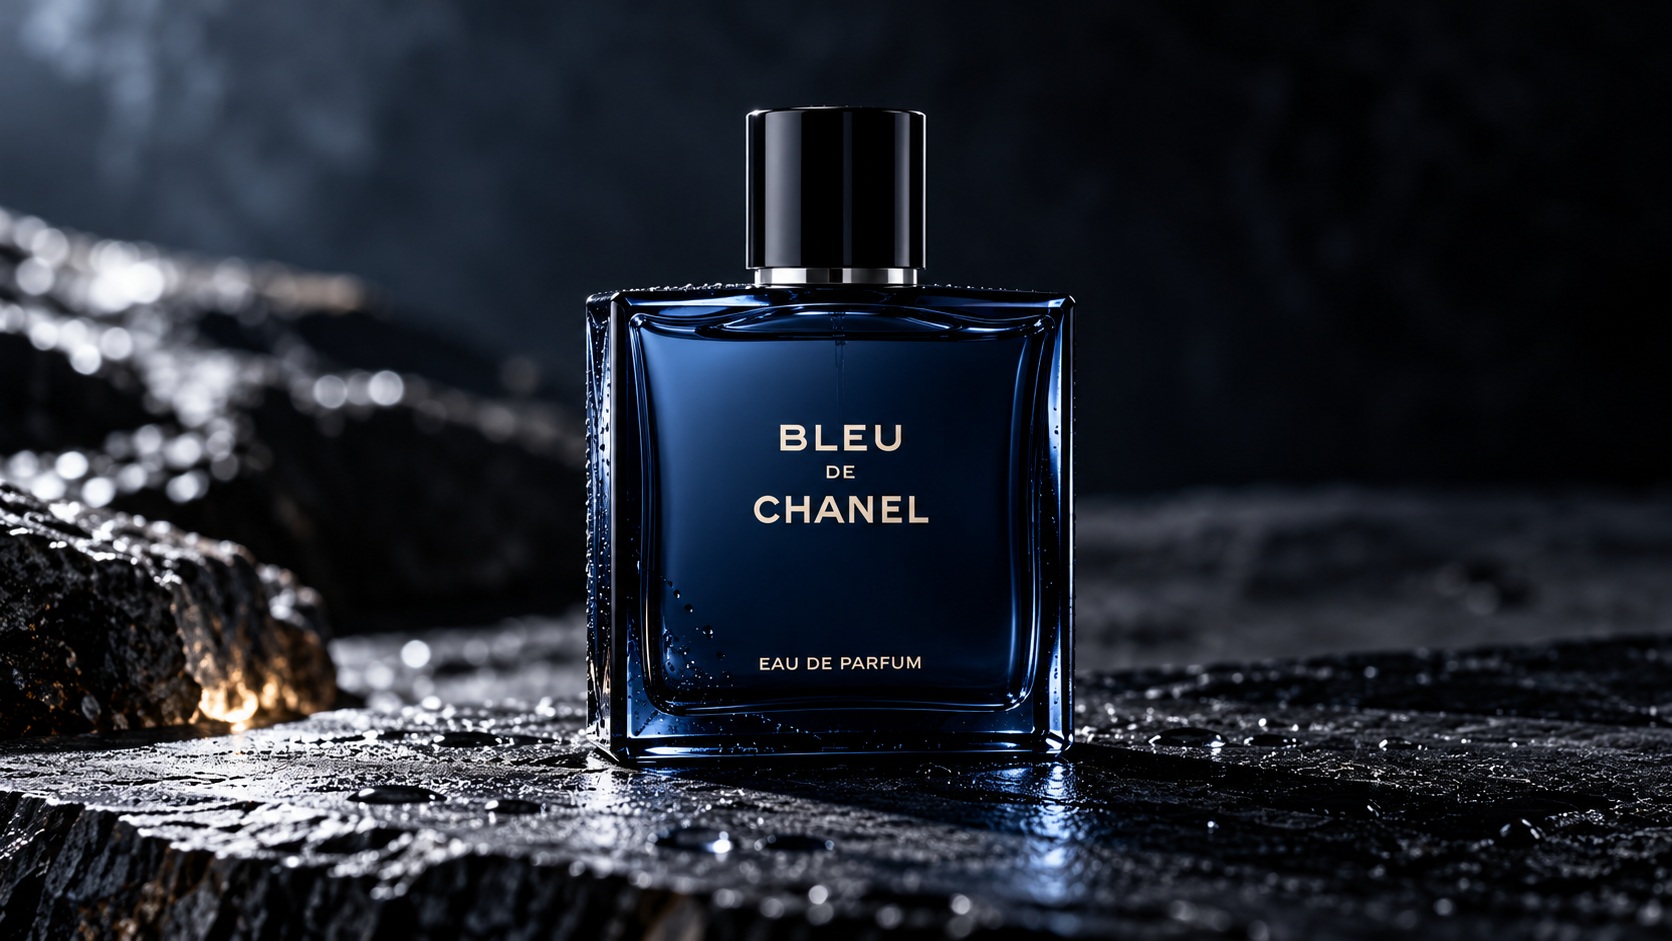
The Texture and Material Swap: Replace only the surface under the product with [rough dark slate]. Add [a few water droplets and a little condensation] around the base. Strong side lighting, high contrast. Don't touch the label or the colors.
-
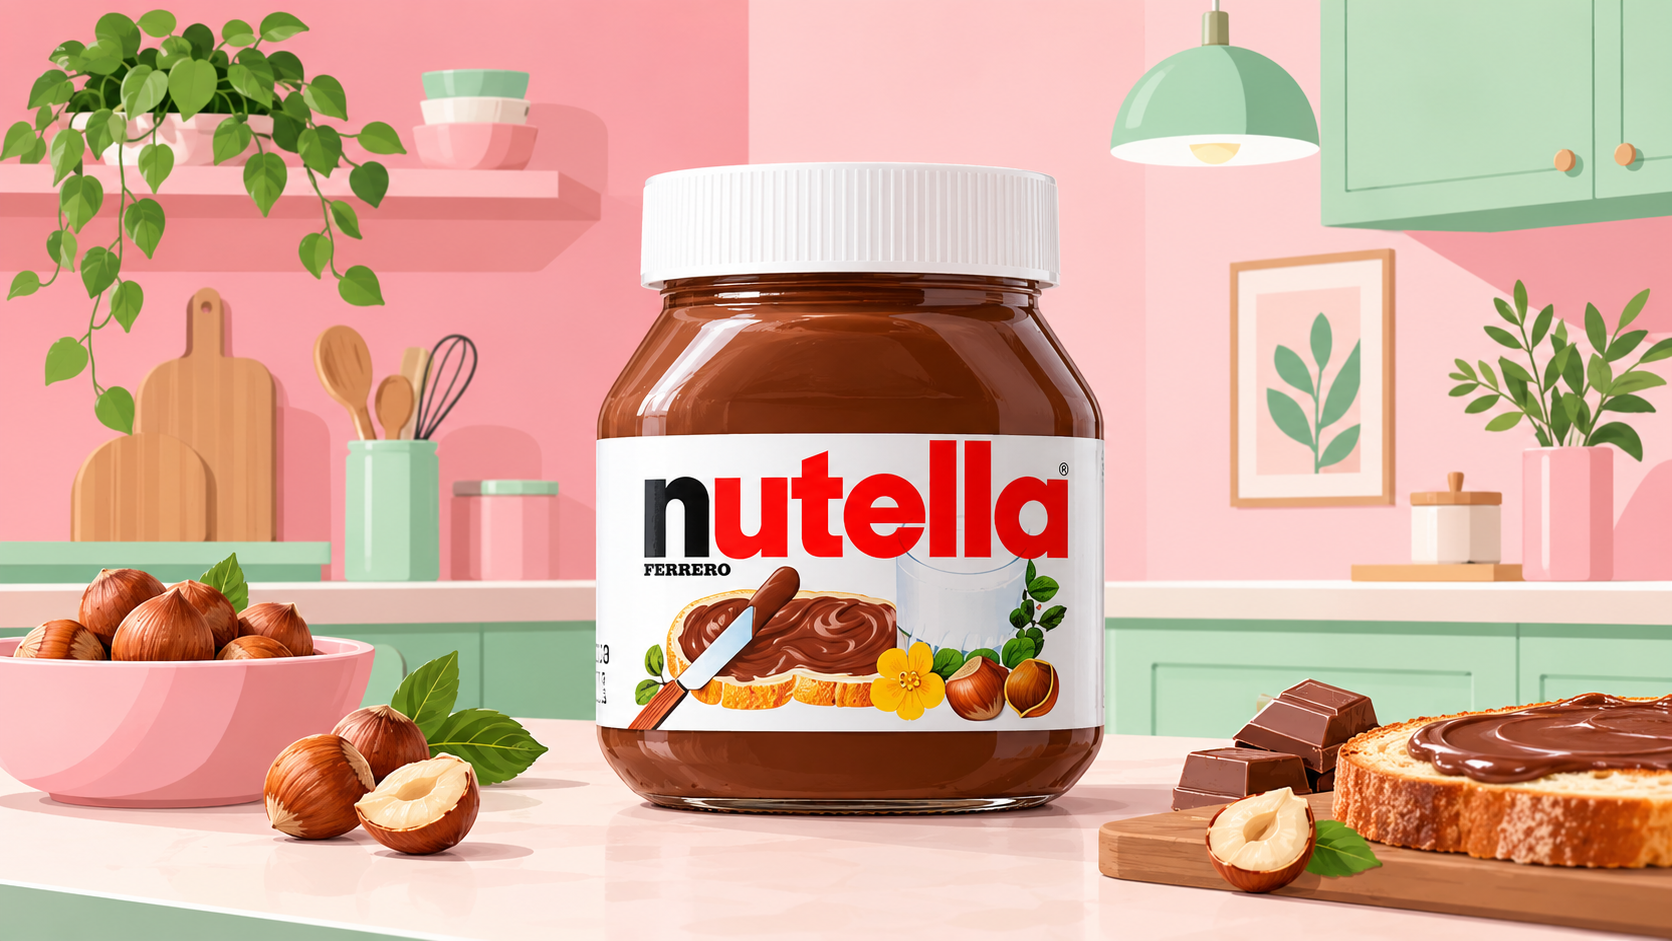
The Artistic Conversion: Redraw everything around the product as a [flat vector illustration] in [pastel pink and mint green], with clean lines and a plain solid backdrop. The product itself stays photographic and keeps its original shape.
-
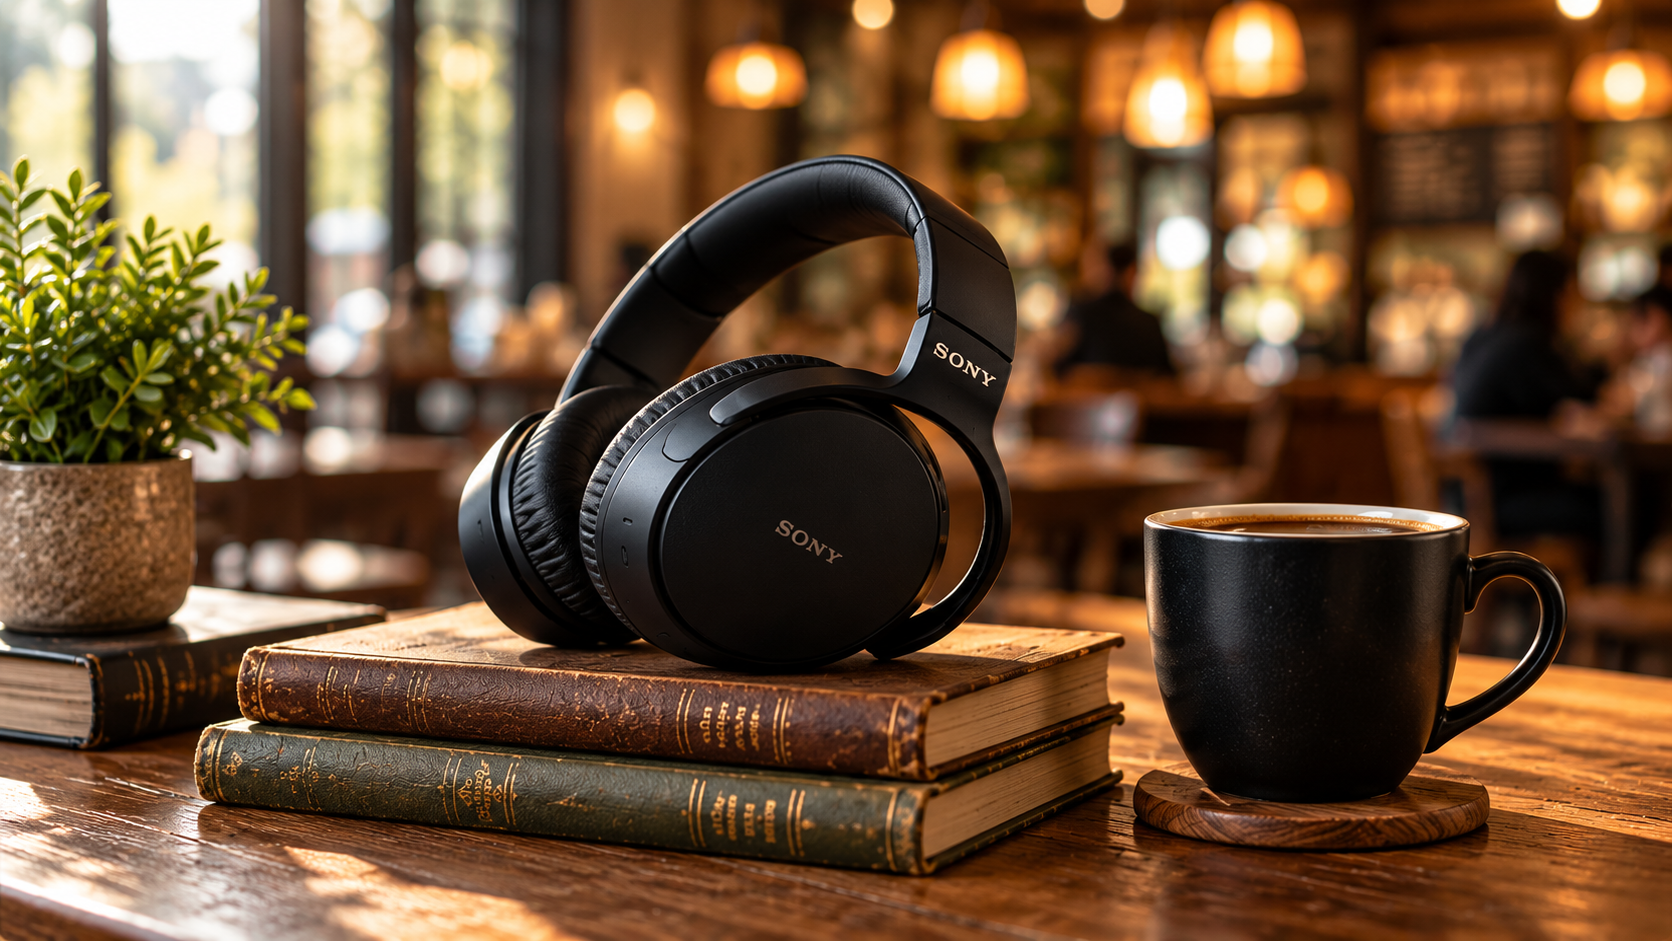
The Context and Scale Anchor: Rest the product on [a stack of vintage hardcover books] next to [a ceramic cup of black coffee]. Behind them, a blurred cafe interior with heavy bokeh, so the eye goes straight to the product. Keep its size believable next to the cup.
What Can You Create With an AI Image Remixer?
An AI image remixer unlocks several use cases for ecommerce brands and marketers who need to produce high volumes of content.
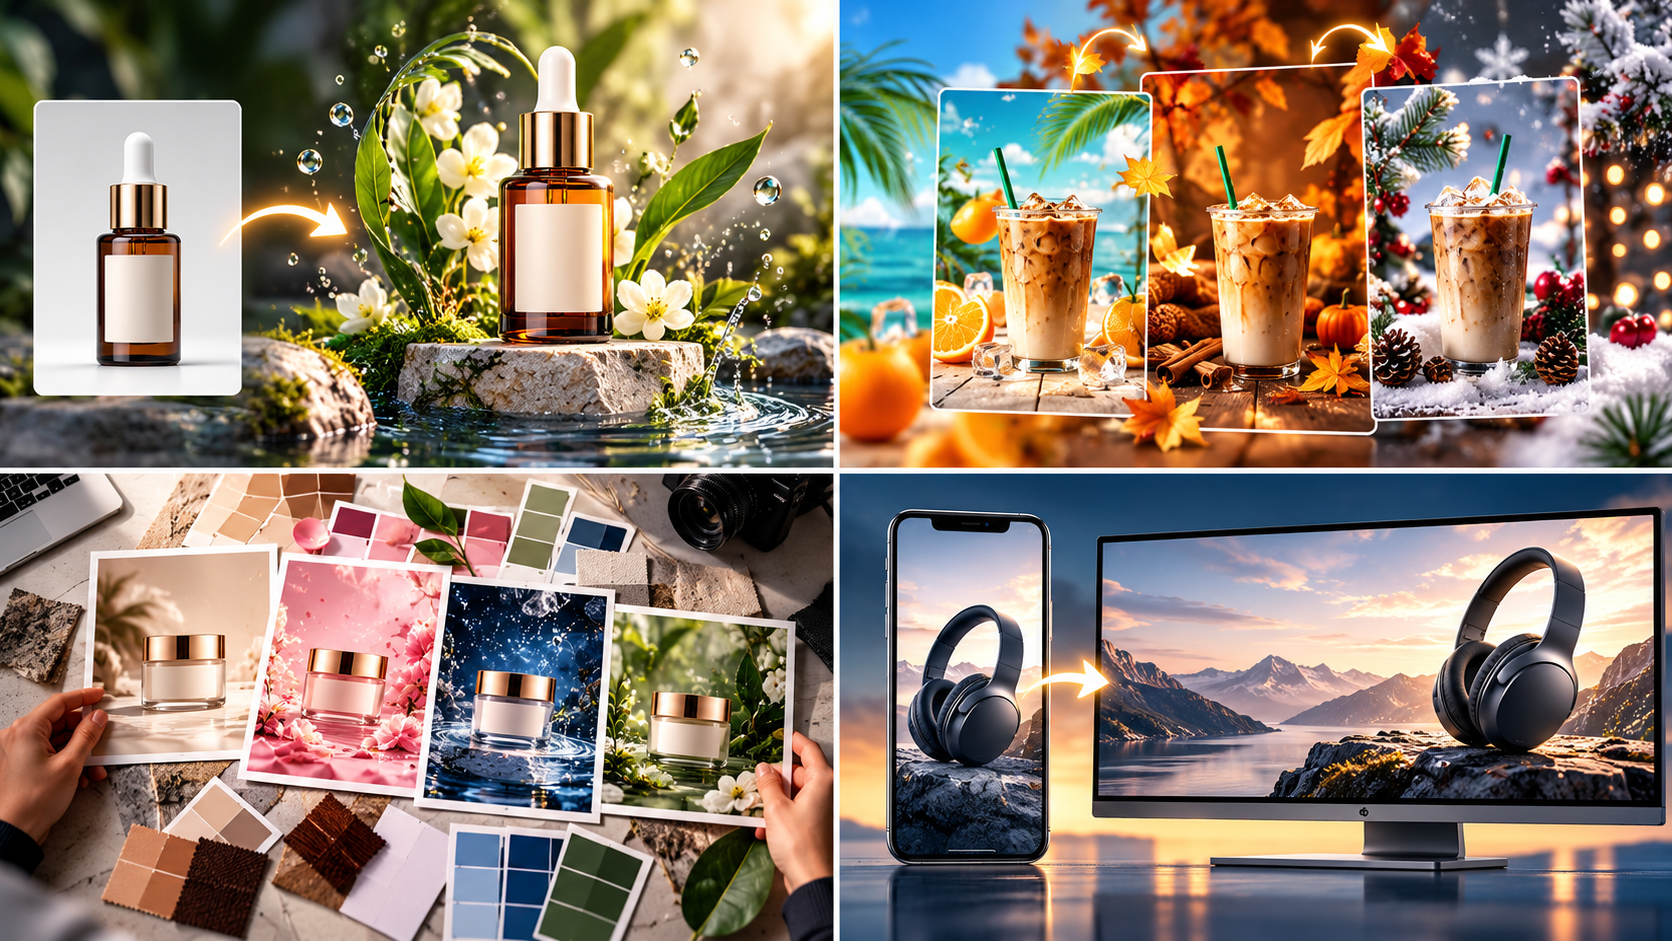
Turn a Product Photo Into a Campaign-Ready Scene
You can take a basic flat lay or transparent PNG and generate an immersive environment around it. This workflow allows you to scale up from one basic shot to ten different lifestyle contexts, acting as a highly efficient product listing generator for your website product pages.
Give Old Social Media Images a New Context
Content goes stale quickly on social platforms. You can take an image that performed well last year and update its seasonal elements to make it relevant for a new promotional push.
Test a Visual Direction Before Committing to Production
Before you spend budget on a physical photoshoot, use an image remix tool to visualize different creative angles. You can generate mood boards featuring your actual product to get stakeholder approval on a specific visual direction.
Rework an Image for a Different Layout or Placement
Sometimes a vertical photo needs to become a horizontal web banner. You can remix the background to expand the surroundings or run a resize image workflow to fit specific platform requirements without distorting your main subject.
How to Remix an Image With Designkit in 3 Steps
Designkit is an AI marketing agent built for e-commerce. Its image remix workflow lets you upload a hit reference along with your product photo to generate new backgrounds, styles, and variations. This approach helps you reduce product content production costs by minimizing the need for physical photo shoots. You also improve image output efficiency, allowing you to scale from editing single images to batch processing up to twenty references at once. Ultimately, this enhances your ability to adapt visuals for different markets and platforms. Follow the workflow below to build multiple listing-ready assets.
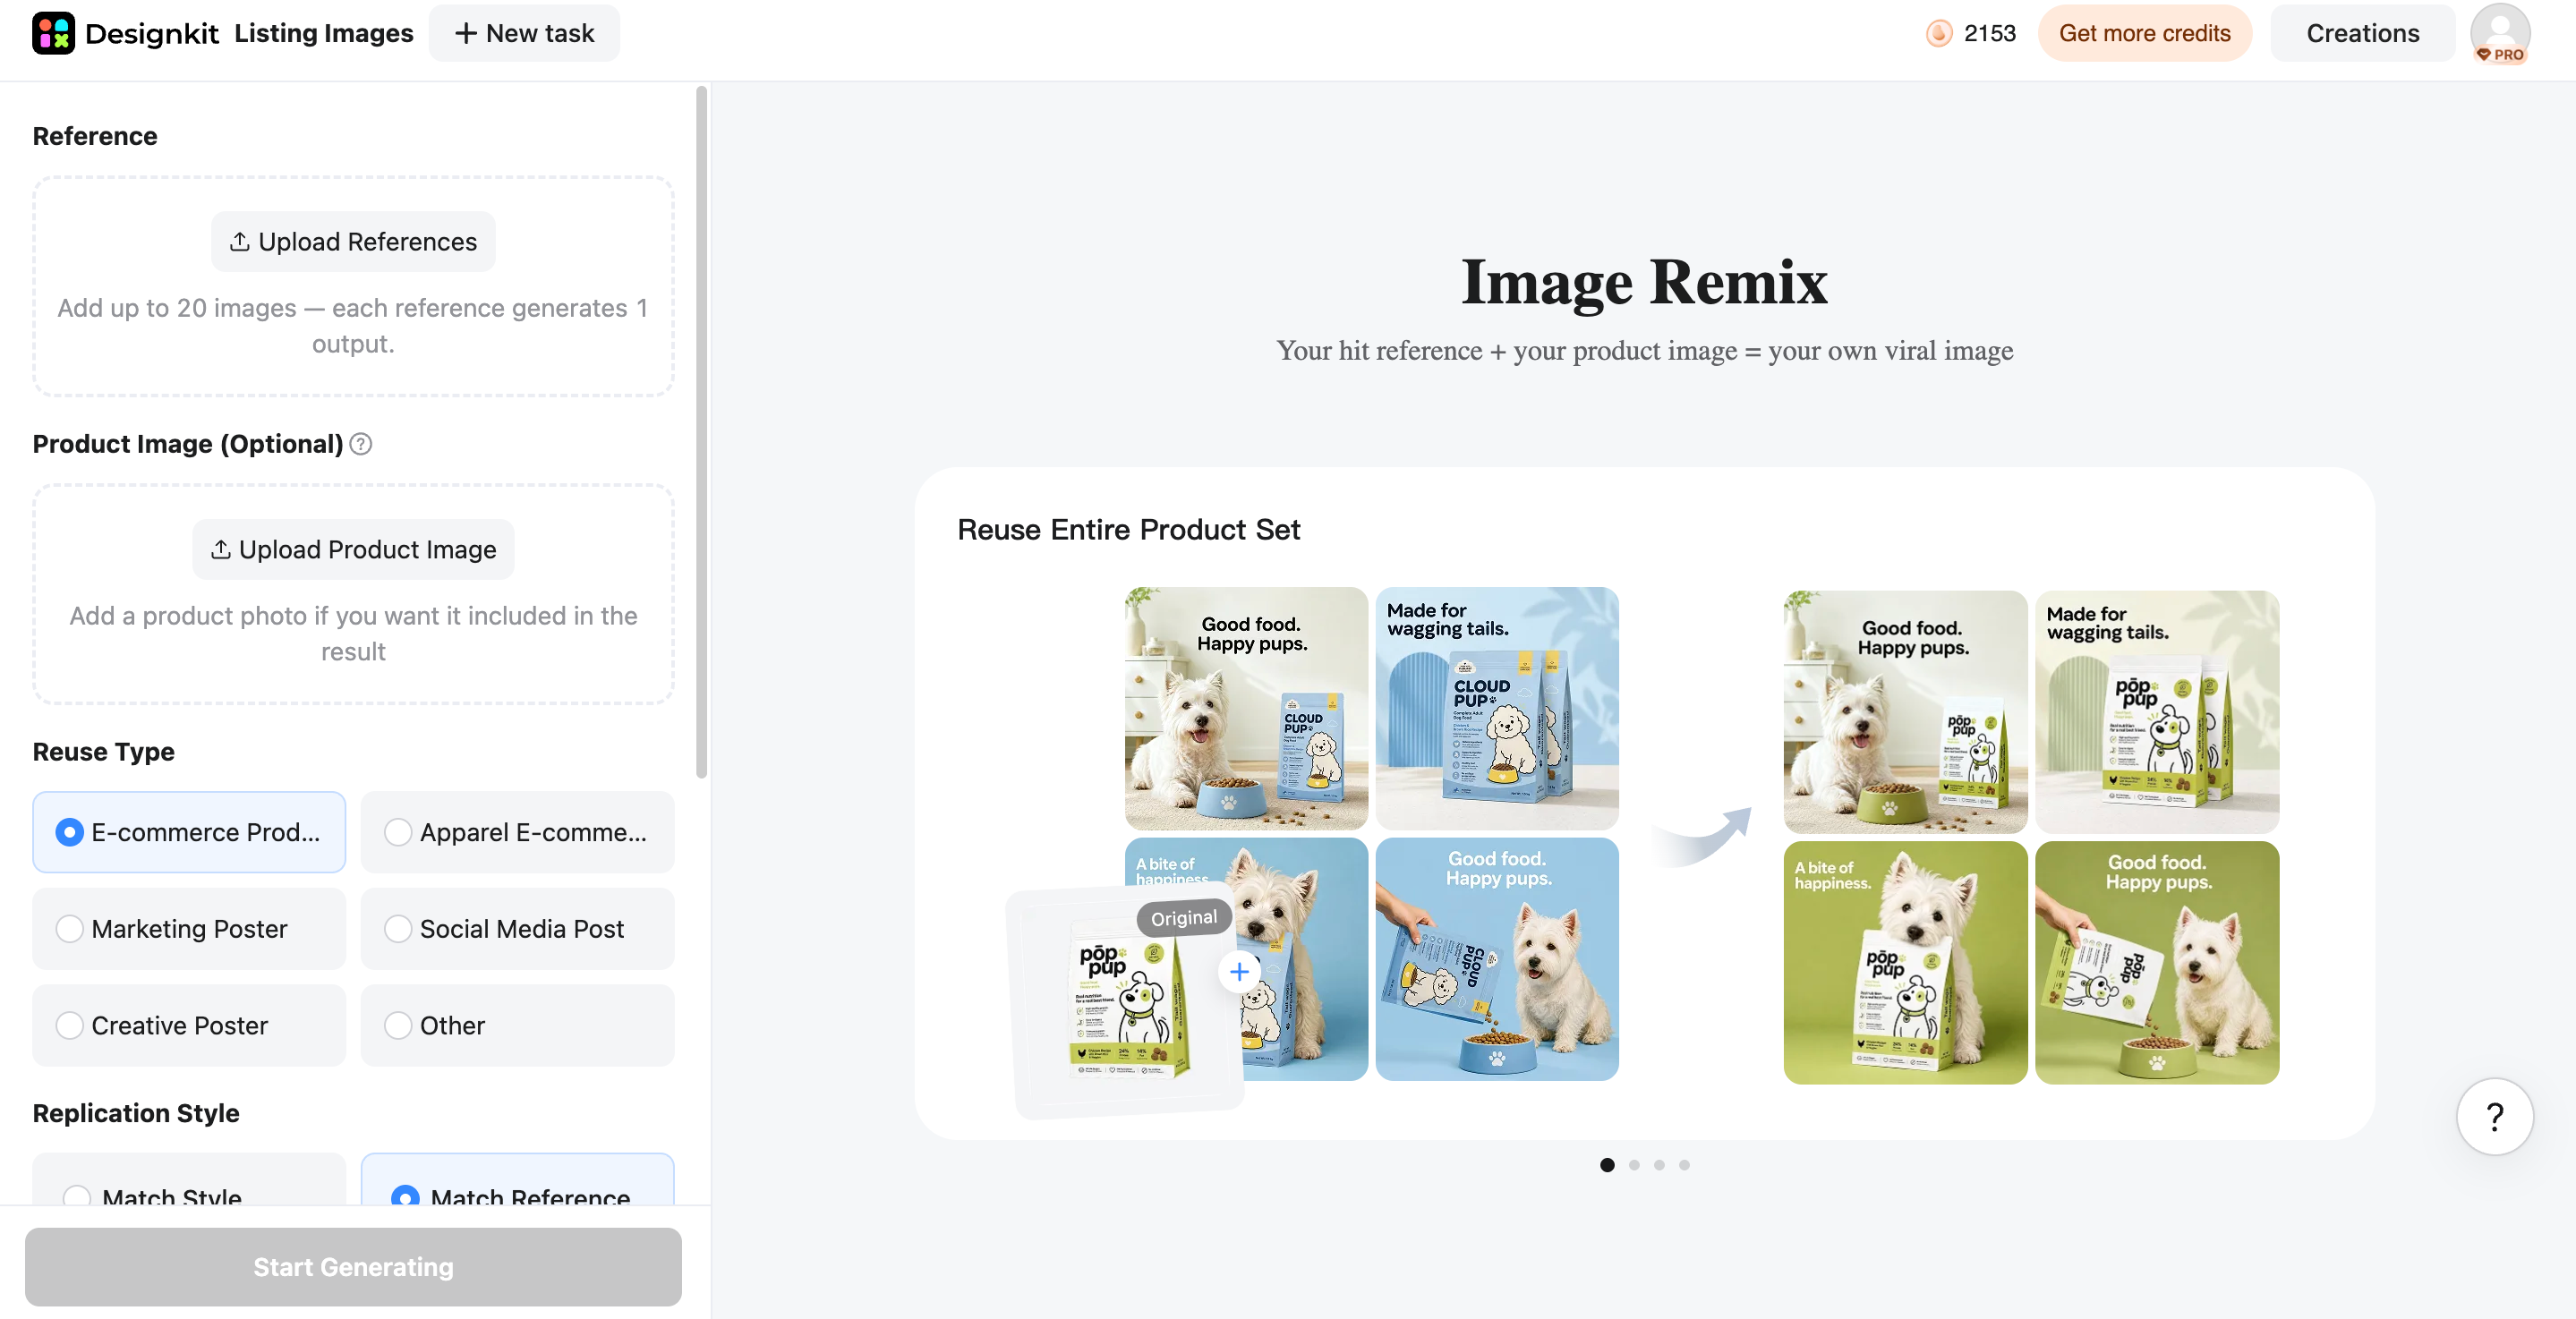
Step 1: Upload Your Reference and Product Images
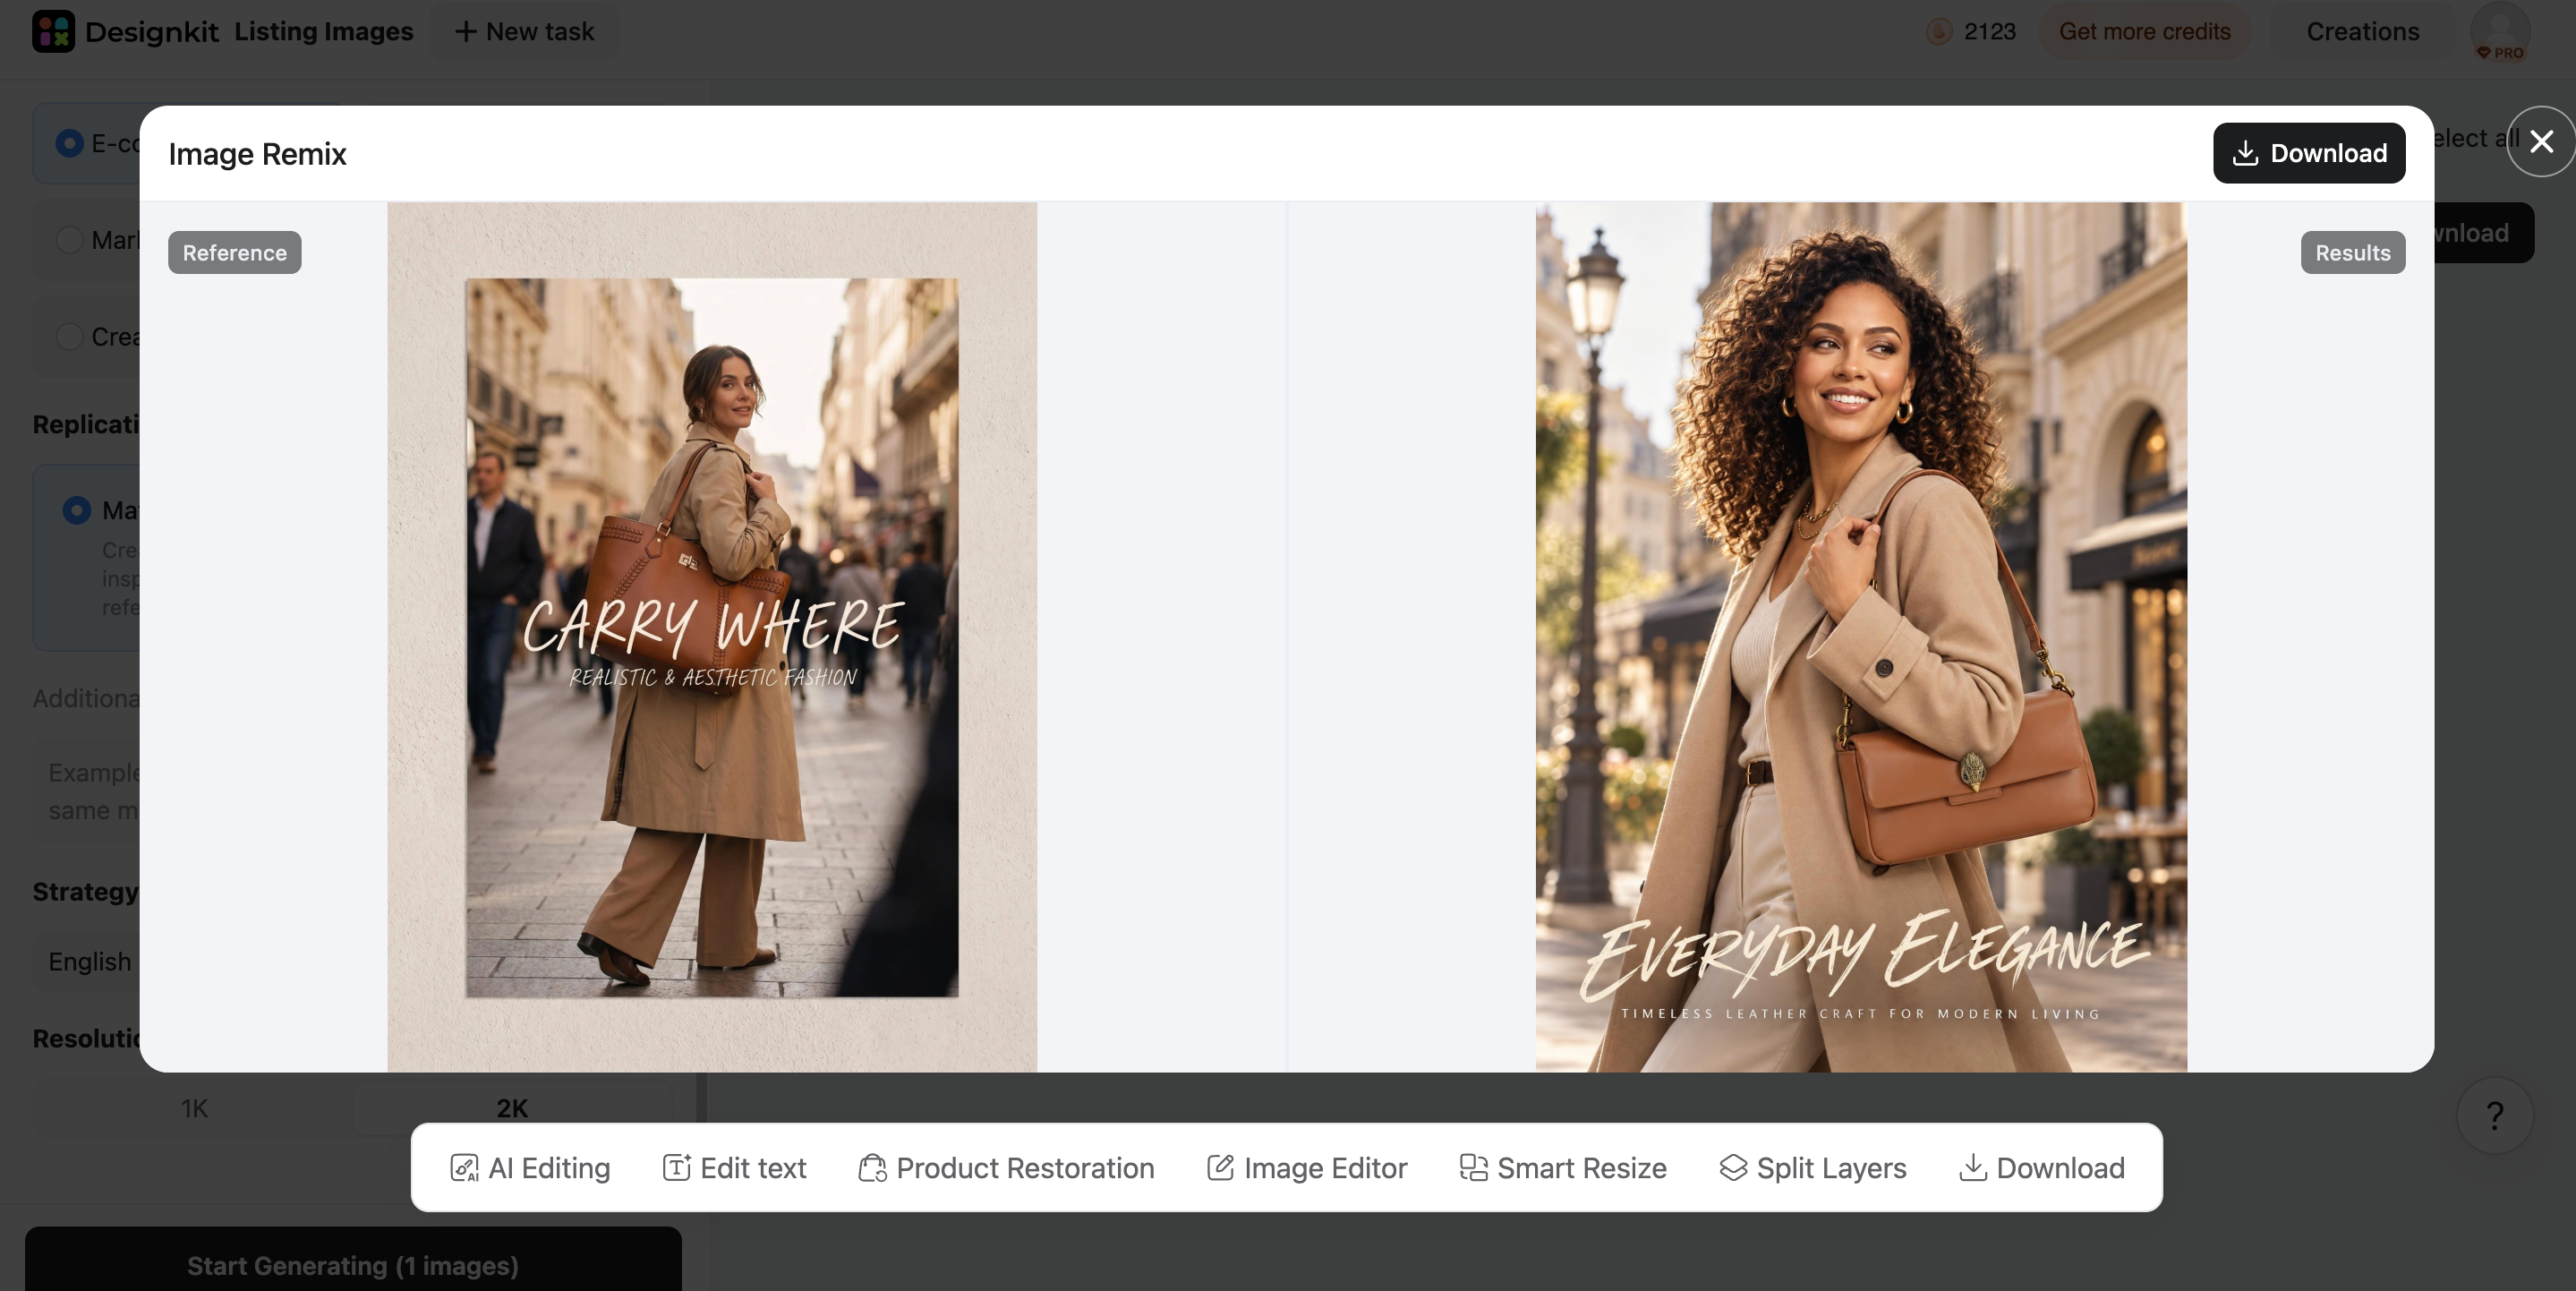
In the left panel, click Upload References and add the shots you want to borrow from. The limit is 20, and each reference gets its own output. Then click Upload Product Image and add your item, so the tool knows what to place into those scenes.
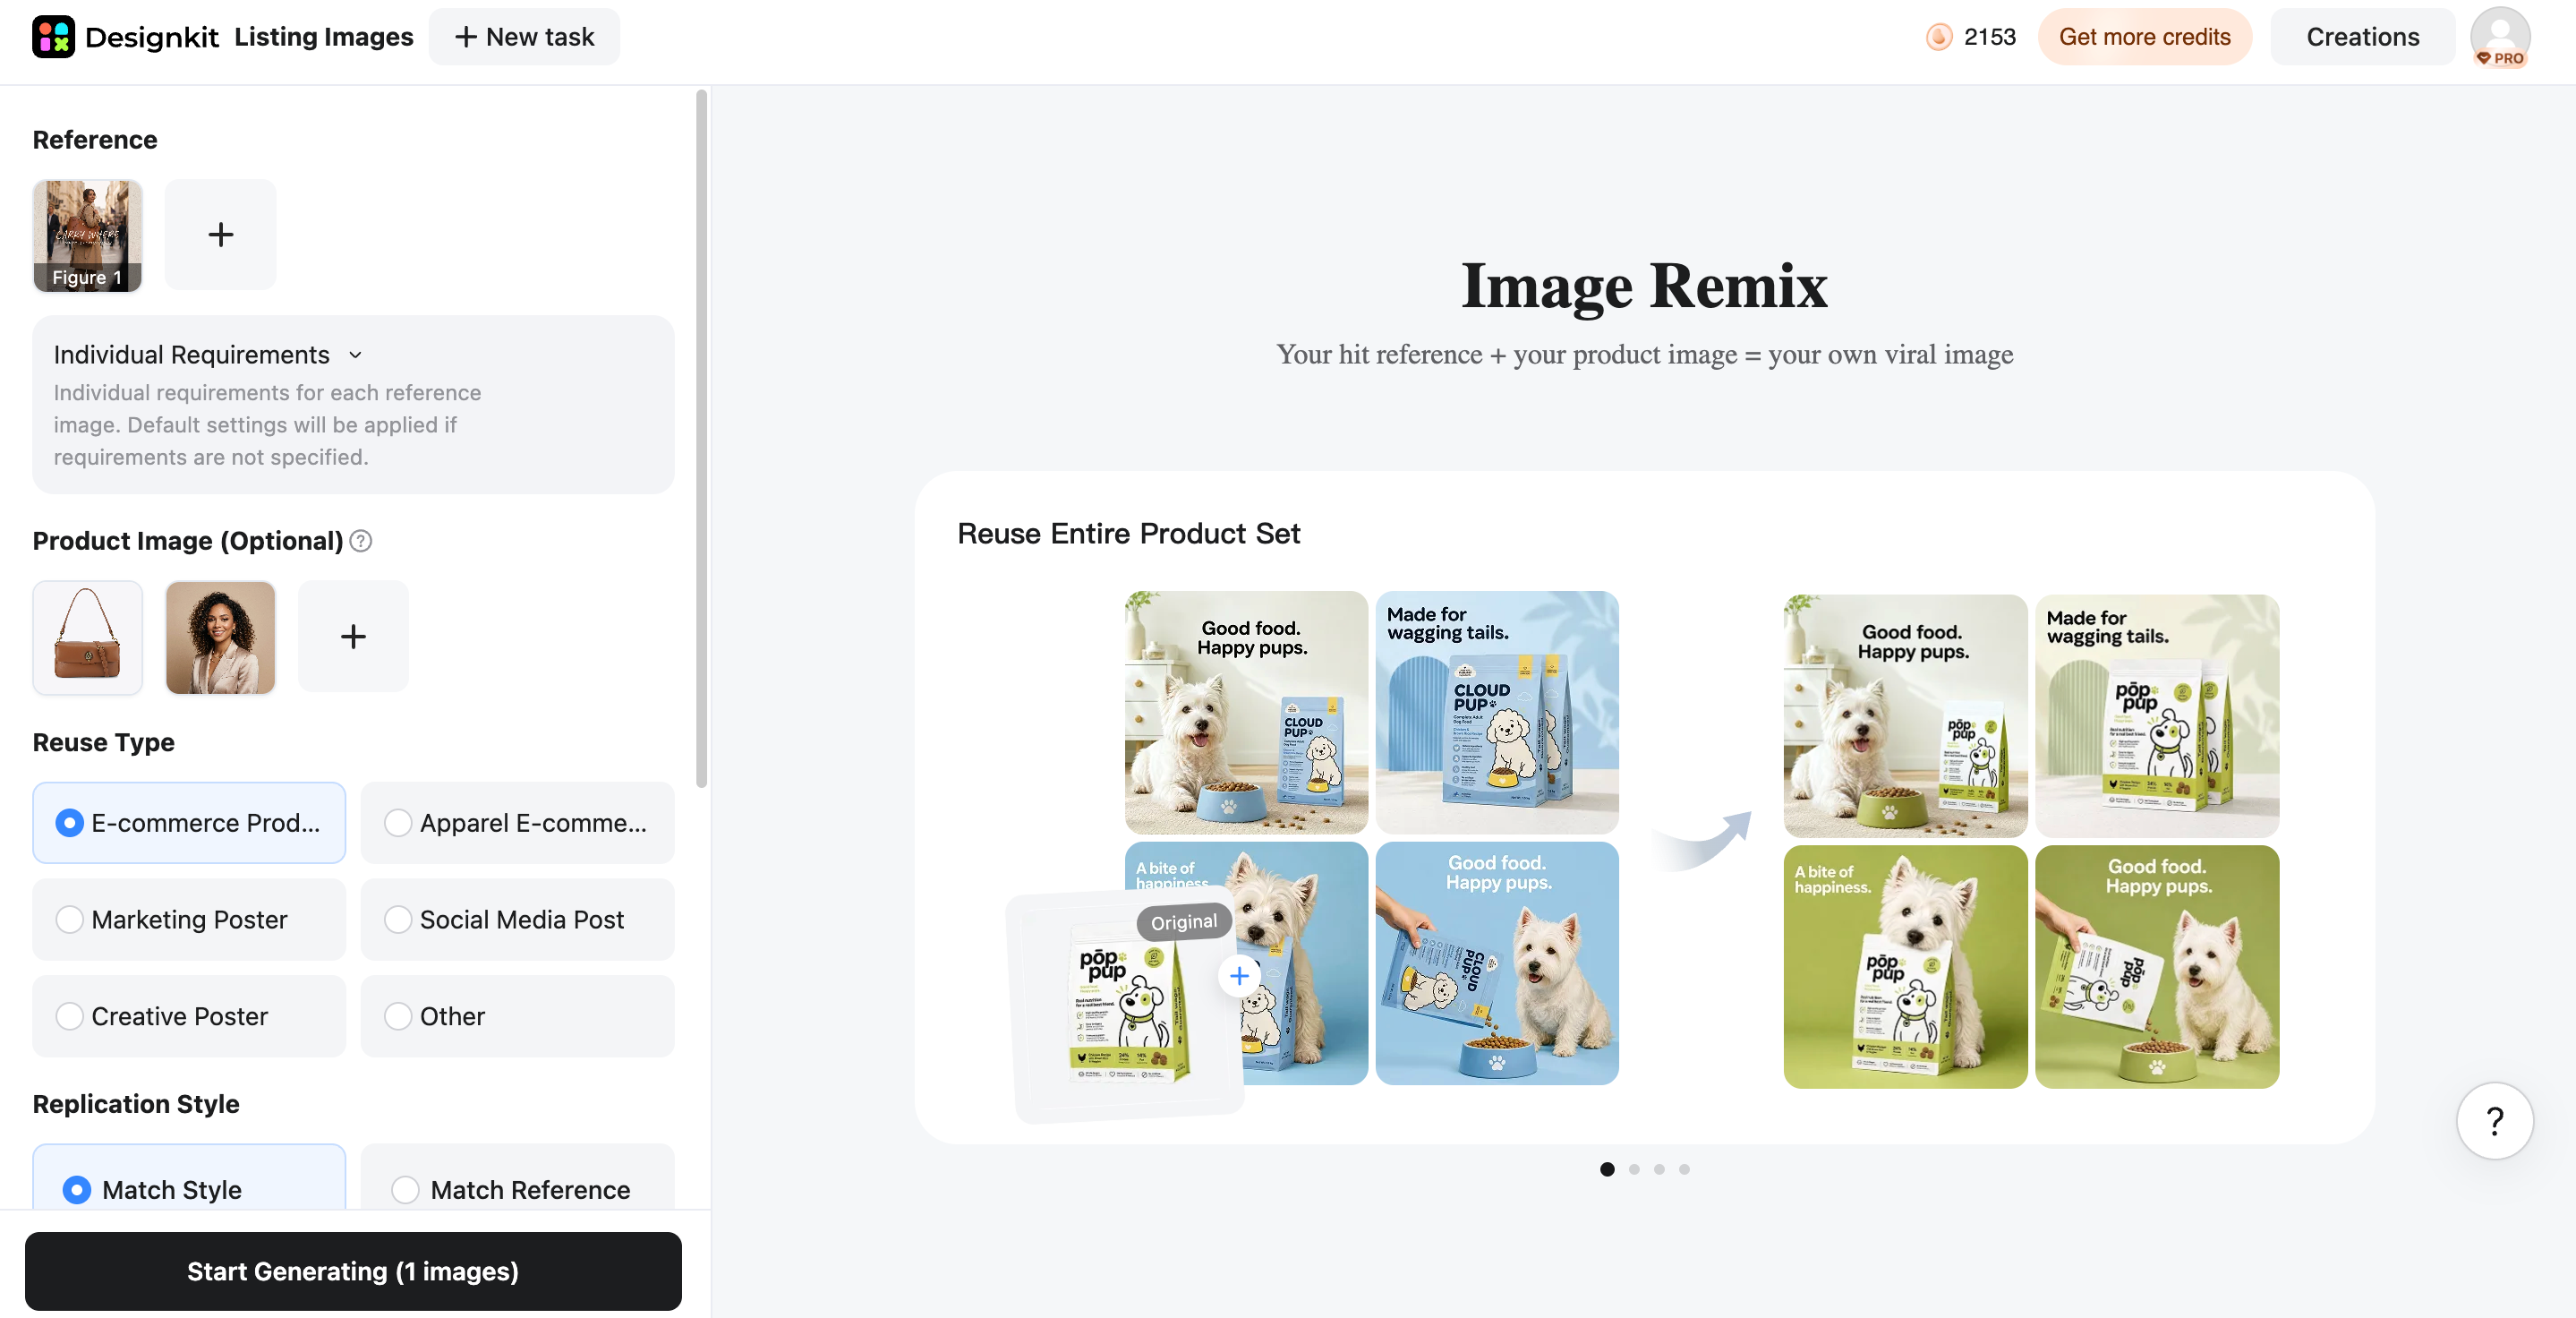
Step 2: Configure Your Settings and Directions
Scroll to Reuse Type and choose where the image is headed, such as an E-commerce Product listing or a Social Media Post. Next comes Replication Style. Match Style borrows the general look and mood of a reference, while Match Reference follows its layout much more closely. If you want a loose, inspired-by result, go first. If you need the same composition as a reference that already converts well, pick the second. Anything non-negotiable, like exact brand colors or a banned background, goes in the Additional instructions box.
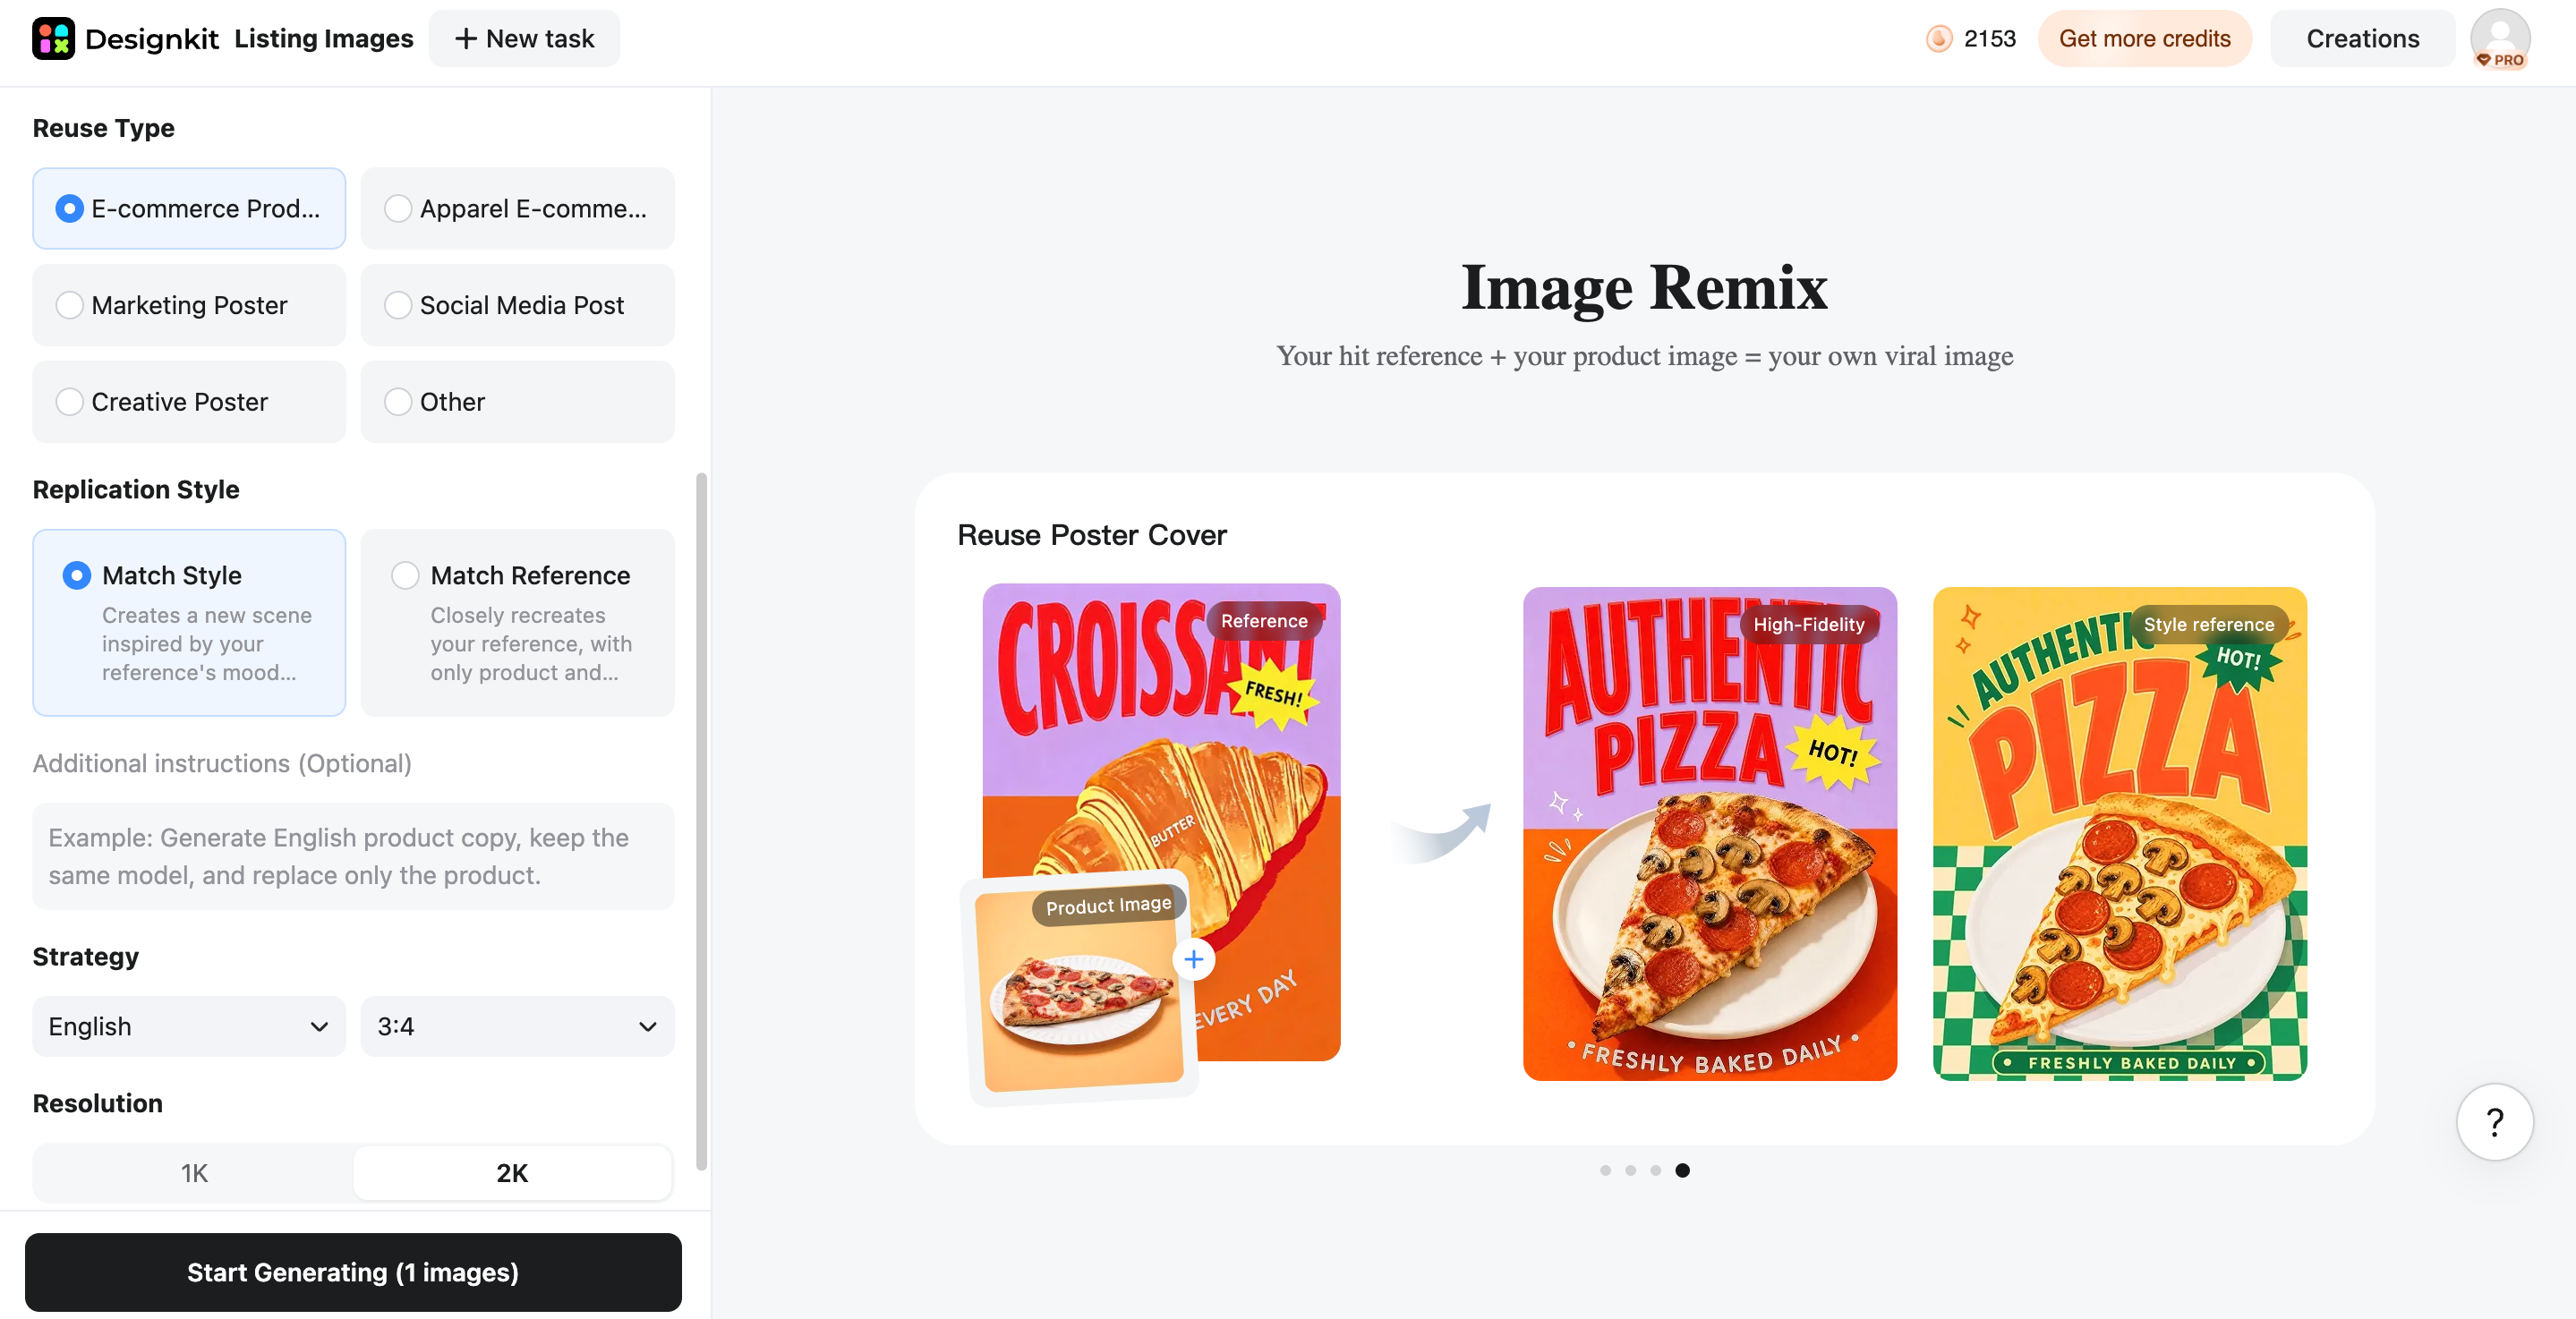
Step 3: Generate and Review Your Campaign Assets
Click Start Generatingto start remixing your image. Preview and check the finished image. For further editing, use the tools inside to refine more. Click "Download" to export your remixed image and use it everywhere.
Common AI Image Remix Problems and How to Fix Them
Even the best platforms require some manual refinement. Here are common issues you might face during an AI remix photo workflow and how to fix them.
|
Problem |
Likely Cause |
What to Try |
Similarity / Strength Control |
|---|---|---|---|
|
The subject looks different from the original |
The prompt asks for a broad transformation |
Name the details to preserve (product shape, label, facial features) and raise the similarity setting if your tool has one |
Increase the reference image weight or similarity slider to 75–85% to lock down the subject. |
|
The background looks artificial |
The scene lacks lighting or perspective cues |
Describe the surface, light direction, shadows, and camera angle; turn on structure matching if available |
Keep structure matching enabled if your tool provides a depth or edge-detection toggle. |
|
Brand colors have changed |
Style or lighting instructions overpowering the palette |
Specify the colors to retain and compare them against the original; reduce style strength slightly |
Lower the stylistic influence parameter slightly so the model respects original hex codes or tones. |
|
The result looks too stylized |
The artistic direction is too strong |
Request a more restrained photographic look and lower the style blend |
Drop the style blending slider down and lean entirely on descriptive text prompts. |
|
The composition does not fit the target format |
The prompt doesn't say where the subject should sit |
Specify centered or side placement, a tighter crop, or negative space for copy; set the aspect ratio before generating |
Adjust the aspect ratio settings before running the remix to prevent automatic edge warping. |
|
Small details look distorted |
The model has reinterpreted fine details |
Try a more conservative transformation, or fix the area in an AI photo editor |
Use an image remix feature with a higher denoising threshold to preserve crisp edges. |
|
The new image feels unrelated to the original |
Too many major elements changed at once |
Change one dimension at a time and keep similarity high |
Dial up the source image fidelity parameter and isolate changes to background or lighting only. |
Final Thoughts
A single good photo can cover a lot more ground than most people expect. Change the background for a seasonal push, swap the lighting for a different mood, or restyle it entirely for a test ad. The trick is to be specific about what stays fixed and to change one thing at a time. Designkit's image remix feature handles the batch side of this, so you can run a set of references in one go instead of redoing the work image by image. Take the photo you already have and try one remix this week. You'll see quickly whether the direction is worth building on.
Frequently Asked Questions
Can a photo remixer preserve important image details?
What makes an AI image remixer prompt work better?
Being specific about lighting, camera angle, and material textures yields better results. Instead of simply saying to make a beach scene, describe a wooden table on a sunny beach, sharp focus, natural daylight, and soft shadows. With Designkit, you can combine these descriptive prompts with your uploaded product image to generate highly accurate marketing assets.
Can an AI image remixer create product photo variations?
Absolutely. You can take a single transparent product shot and generate dozens of variations for A/B testing. Designkit allows you to seamlessly place your item in a kitchen, a bathroom, or a minimalist studio to see which environment drives a higher conversion rate for your ad campaigns.
What source quality works best for an image remixer?
Sharp and well lit. A white-background product shot or a simple flat lay is ideal, because the edges are easy to read and the new scene sits around it cleanly. Blur, heavy filters, and harsh shadows all cause trouble. Resolution matters more than people think, since a small, compressed file loses the fine detail that makes a remix look believable.
Can I change only the background without changing the subject?
Yes. Most modern AI photo editor tools include background removal and replacement features. You remix an image with AI by masking the main subject to protect it completely while prompting the AI to generate an entirely new backdrop.
You May Also Like

How to Remove Background in PowerPoint: Easy Guide

Fotor Watermark Remover Review: Quality & Alternatives

Fotor Background Remover Review: Features, Pricing & Alternatives

How to Make a TikTok Slideshow: Photo Posts & Video Slideshows

How to Add a Shadow in Photoshop | Realistic Product Photo Guide

Remix an Image With AI: Steps, Prompts & Tips
Remove.bg Shutting Down Dec 1, 2026: What Users Are Saying

7 Best Remove.bg Alternatives in 2026: Free & Paid Tools
Instagram Carousel: What It Is, How to Post & Create One
Nano Banana Prompts: 20+ Examples for Better AI Images

Ideogram AI Review 2026: Features, Pricing & Alternatives
Free Mac Photo Editor: 5 Tools Compared for Mac Users
How to Crop a Photo Into a Circle Online (Keep Quality)
How to Make an Image Transparent Online (AI Guide)
Pixlr Background Remover Review 2026: Features, Pricing & Alternatives
How to Fix Overexposed Photos: Recover Highlights Fast
OpenArt AI Review 2026: Features, Pricing & Alternatives
Best AI Headshot Generator: 9 Tools Compared for 2026
Best Stencil Maker Tools 2026: Turn Photos Into Stencils
Pixelbin Watermark Remover Review: Image & Video Results Tested
How to Make a Sticker on iPhone: Easy Step by Step Guide
Best AI Logo Generator in 2026: 10 Tools Compared
How to Turn a Photo Into a Cartoon: A Beginner-Friendly Guide
Landscape vs Portrait: Key Differences & Best Uses in 2026
How to Remove Watermark From Photo: AI, Photoshop & More
How to Fix Pixelated Photos: Photoshop, AI Tools & Tips
Bing Image Creator: How It Works, Features, Uses & Alternatives
How to Remove People from Photos with AI: A Step-by-Step Guide
How to Increase Image Resolution: AI, Photoshop & PPI
How to Add Text to a Photo: 8 Tips for Better Results
How to Fix Grainy Photos: Easy Ways to Clear Images
Creative Profile Picture Ideas for Every Style and Platform
Evoto AI Review 2026: Features, Pricing, Pros & Cons
Pixlr Photo Editor Review: Features, Pricing & Alternatives
Best AI Image Extender Tools in 2026: Expand Photos with AI
How to Make a Collage on iPhone: Easy Guide for 2026
How to Sharpen an Image in Photoshop (Smart Sharpen and Unsharp Mask)
Best Image Background Remover Tools in 2026: AI Tools Compared
How to Make Transparent Background in Paint: Step-by-Step Guide
How to Resize an Image: Best Methods, Tools & Quality Tips
Best AI Image Generator Tools in 2026: Top AI Platforms Compared

Remove.bg Review 2026: Features, Pricing & Is It Worth It?
Luminar Neo Photo Editor Review 2026: AI Features, Price & Pros
How to Post Multiple Photos on Instagram (2026 Guide)
25 Facebook Cover Photo Ideas for Personal & Business Pages
What Is a PFP? Meaning, Examples & How to Create One
Can You Edit an Instagram Post After Posting?
11 Best Canva Alternatives in 2026 for AI Design & Marketing

8 Best Midjourney Alternatives in 2026: Features, Pricing & Comparison
How to Restore Old Photos: AI Tools, Tips & Best Methods
Pixelcut AI Review 2026: Features, Pricing, Pros, Cons & Alternatives
How to Apply Watermark to Photos: Methods, Tips & AI Tools
How to Remove a Background in Illustrator: 4 Easy Methods
How to Change Background Color on Instagram Story (Easy Guide)
8 Best AI Poster Generators in 2026: Create Posters Faster with AI
10 Best AI Image Enhancers in 2026: Tested & Compared
10 Best AI Image Editors in 2026: Features, Pricing & Comparison
7 Best AI Background Changer in 2026: Remove & Replace Photo Backgrounds
Luminar Neo vs Lightroom: Features, Pricing & Comparison 2026
Kittl Review 2026: Is It Worth It? Features & Pricing
How to Make a Blurry Image Clear: 5 AI & Manual Ways
How to Remove Background on iPhone: 5 Easy Methods (2026)
Photoroom Background Remover Review 2026: Features & Alternatives
How to Remove Background in Canva: A Step-by-Step Guide
How to Remove Background in GIMP: Beginner-Friendly Guide
Funny Dog Memes to Try: Doge Meaning and 10 Original Ideas
Back to School Checklist 2026: Supplies, Timeline, and Planning
Recraft AI Review 2026: Features, Pricing, Pros, Cons & Alternatives
How to Make an Image Transparent in Google Slides: Opacity & Background Removal

VanceAI Photo Enhancer Review: Features, Pricing & Alternatives in 2026
What Does Emojify Mean? Text, Photos, & Emoji Art Explained
Top 8 Online Background Removers for Ecommerce Photos (2026)
How to Remove Background in Photoshop: 7 Easy Methods
6 Best AI Image Upscalers 2026: Tools Tested & Compared
Project Indigo Review: Is It Better Than iPhone Camera?
How Big Is an 8x10 Photo? Size, Pixels & Frame Guide
How Big Is a 4x6 Photo? Dimensions, Pixels & Printing Tips
Picsart AI Review: Features, Pricing, Pros, Cons & Alternatives
Lovart AI Review: AI Design Agent Features, Pricing & Alternatives
Fotor AI Image Generator Review: Features, Pricing & Alternatives
How to Add Emoji to Photo Online for Free
Emoji Wallpaper Ideas & How to Make One Online (2026)
Minimalist Poster Design: How to Make a Clean Poster (2026)
How to Make a Custom Poster That Is Ready to Print
Instagram Image Size Guide 2026: Post, Reel, Story & Carousel Specs
LinkedIn Image Size Guide: Profile, Post & Banner Dimensions
YouTube Profile Image Size: Best Dimensions & Safe Area 2026
How to Edit Amazon Product Photos That Boost Sales Fast
Create More From the Images You Already Have
Upload the photo you already have in Designkit and remix it into a version for the next post. Try a new background or style, then keep the result that still looks like your product.