
How to Fix Pixelated Photos and Improve Image Quality
Fix pixelated photos with practical methods, from AI enhancement and Photoshop edits to Designkit's image tools. Learn how to make images clearer for social media, websites, and ecommerce.
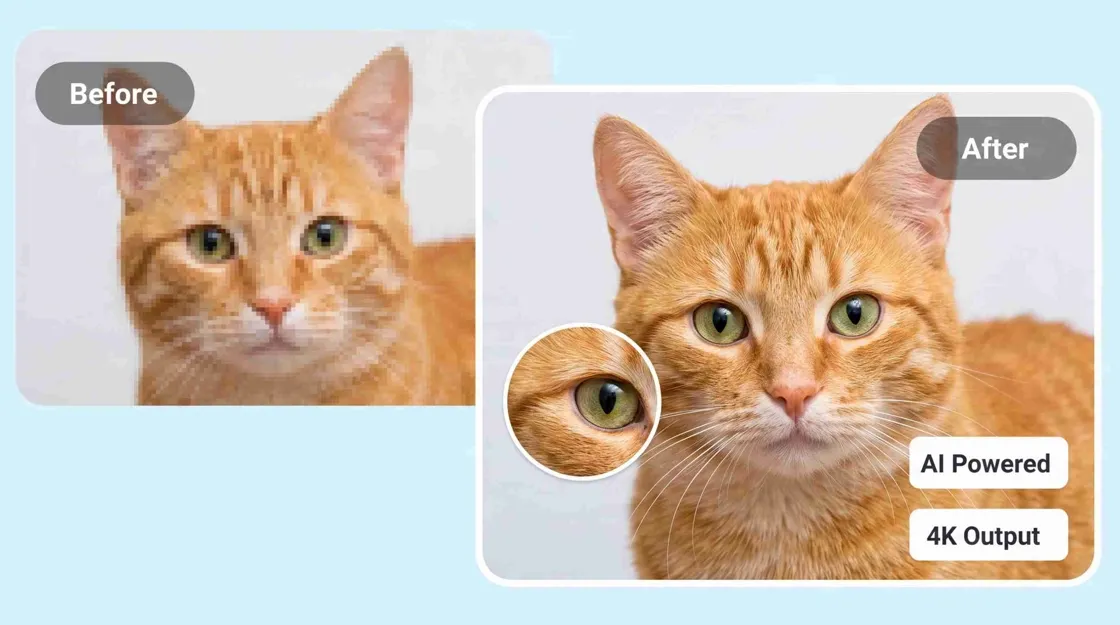
Sometimes, pixelation can make key details in photos appear blocky, jagged, and fuzzy, and this is often more obvious after an image is enlarged, cropped, saved, or compressed many times. Want to know how to fix pixelated photos? The best way to do it is determined by how much detail is still left in the original file. If the image is mildly pixelated, careful sharpening and noise reduction might help. If it is severely pixelated, AI enhancement or Photoshop resampling tools might help. In this guide, you will learn how to fix pixelated images, reduce visible artifacts, improve image clarity, and prepare photos for websites, social media, e-commerce listings, and other digital uses.
Why do photos become pixelated?
Pixelation is when there are not enough pixels in an image to show details clearly, so you get blocky or jagged edges and textures. Cropping too much, digital zooming, compression, or enlarging a photo that has a low resolution can all make a photo look pixelated. Editing and AI enhancement can help to minimize pixelation and help make the image look sharper, but it is not always possible to recover details that were lost entirely from the original image.
What causes pixelation in photos?
Common causes are low-resolution source files, aggressive cropping, digital zoom, compression and upsizing images larger than their original size. Saving an already compressed image more than once may also introduce some more artifacts. A small photo you downloaded from a messaging app may look good on a phone, but will look very pixelated if you use it as a banner on a website. Similarly, if you crop too tightly on a small portrait, there won't be enough pixels left to show facial detail clearly.
Can you completely remove pixelation from an image?
Not all the time. If the image information is missing, it is impossible to reverse the pixelation perfectly. The original info is gone. Enhancement tools can make a guess and restore plausible details but cannot ensure that all the restored features coincide with the original. The goal is normally to reduce the appearance of pixelation and increase clarity, not to assume that poor quality images can always be restored perfectly.
Pixelation vs blur: What's the difference?
Pixelation makes an image look blocky or jagged because there are not enough pixels to show details clearly. Blur makes details look soft or out of focus. Upscaling and artifact reduction techniques are often used to improve pixelated images, while sharpening or deblurring might be more suitable for blurry images.
|
Aspect |
Pixelation |
Blur |
|---|---|---|
|
Appearance |
Looks blocky, jagged, or made of visible squares. |
Looks soft, hazy, or lacking sharp edges. |
|
Main cause |
Low resolution, excessive cropping, digital zoom, or enlargement. |
Camera movement, incorrect focus, motion, or soft image processing. |
|
Effect on details |
Some pixel-level information is lost or becomes highly visible. |
Details remain but appear softened or less defined. |
|
Best approach |
AI upscaling, resampling, and artifact reduction can help improve clarity. |
Sharpening and AI deblurring may help restore edge definition. |
|
Restoration limits |
Missing pixels cannot always be accurately recreated. |
Severe blur may also be difficult to reverse if important details are completely lost. |
What actually works when you fix a pixelated image?
Different levels of pixelation require different solutions. There is no single tool that works perfectly for every situation, so choosing the right approach can save time and prevent further quality loss.
|
Situation |
Recommended Approach |
What to Expect |
|---|---|---|
|
Slight pixelation after resizing |
Basic sharpening, noise reduction, contrast adjustments |
Can improve clarity without major changes |
|
Low-resolution photo used for a larger display |
AI upscaling or Photoshop enlargement |
Can create a cleaner, higher-resolution appearance |
|
Compression artifacts from repeated saving |
Artifact reduction and image enhancement |
Can reduce visible blocks and distortion |
|
Product images for ecommerce |
AI enhancement plus careful visual review |
Helps create cleaner listing-ready visuals |
|
Extremely small or damaged images |
Advanced AI tools or replacement with a better source |
Recovery may still be limited |
How to fix pixelated photos and improve image quality
The right way to fix pixelated photos depends on the level of quality loss and your final use case. Minor pixelation can often be improved with basic edits, while heavily pixelated images may need AI enhancement or advanced editing tools.
Reduce pixelation with basic photo adjustments
For slightly pixelated photos, simple adjustments may be enough to improve clarity. Noise reduction, contrast adjustments, and careful sharpening can make images look cleaner without heavily changing the original.
Step 1: Reduce noise and compression artifacts
Remove visible noise or compression issues before sharpening. A cleaner image base helps prevent pixelation from becoming more noticeable during editing.
Step 2: Adjust contrast and clarity
Make small adjustments to contrast and clarity to improve visual definition. Avoid increasing these settings too much, as it can make edges look harsh.
Step 3: Apply light sharpening
Use sharpening carefully to enhance important details. Excessive sharpening can highlight pixel blocks and create unnatural outlines.
Fix pixelated photos in Photoshop
Photoshop offers more control for users who want to manually improve pixelated images. By combining resizing, resampling, noise reduction, and sharpening, you can achieve better results while controlling each adjustment.
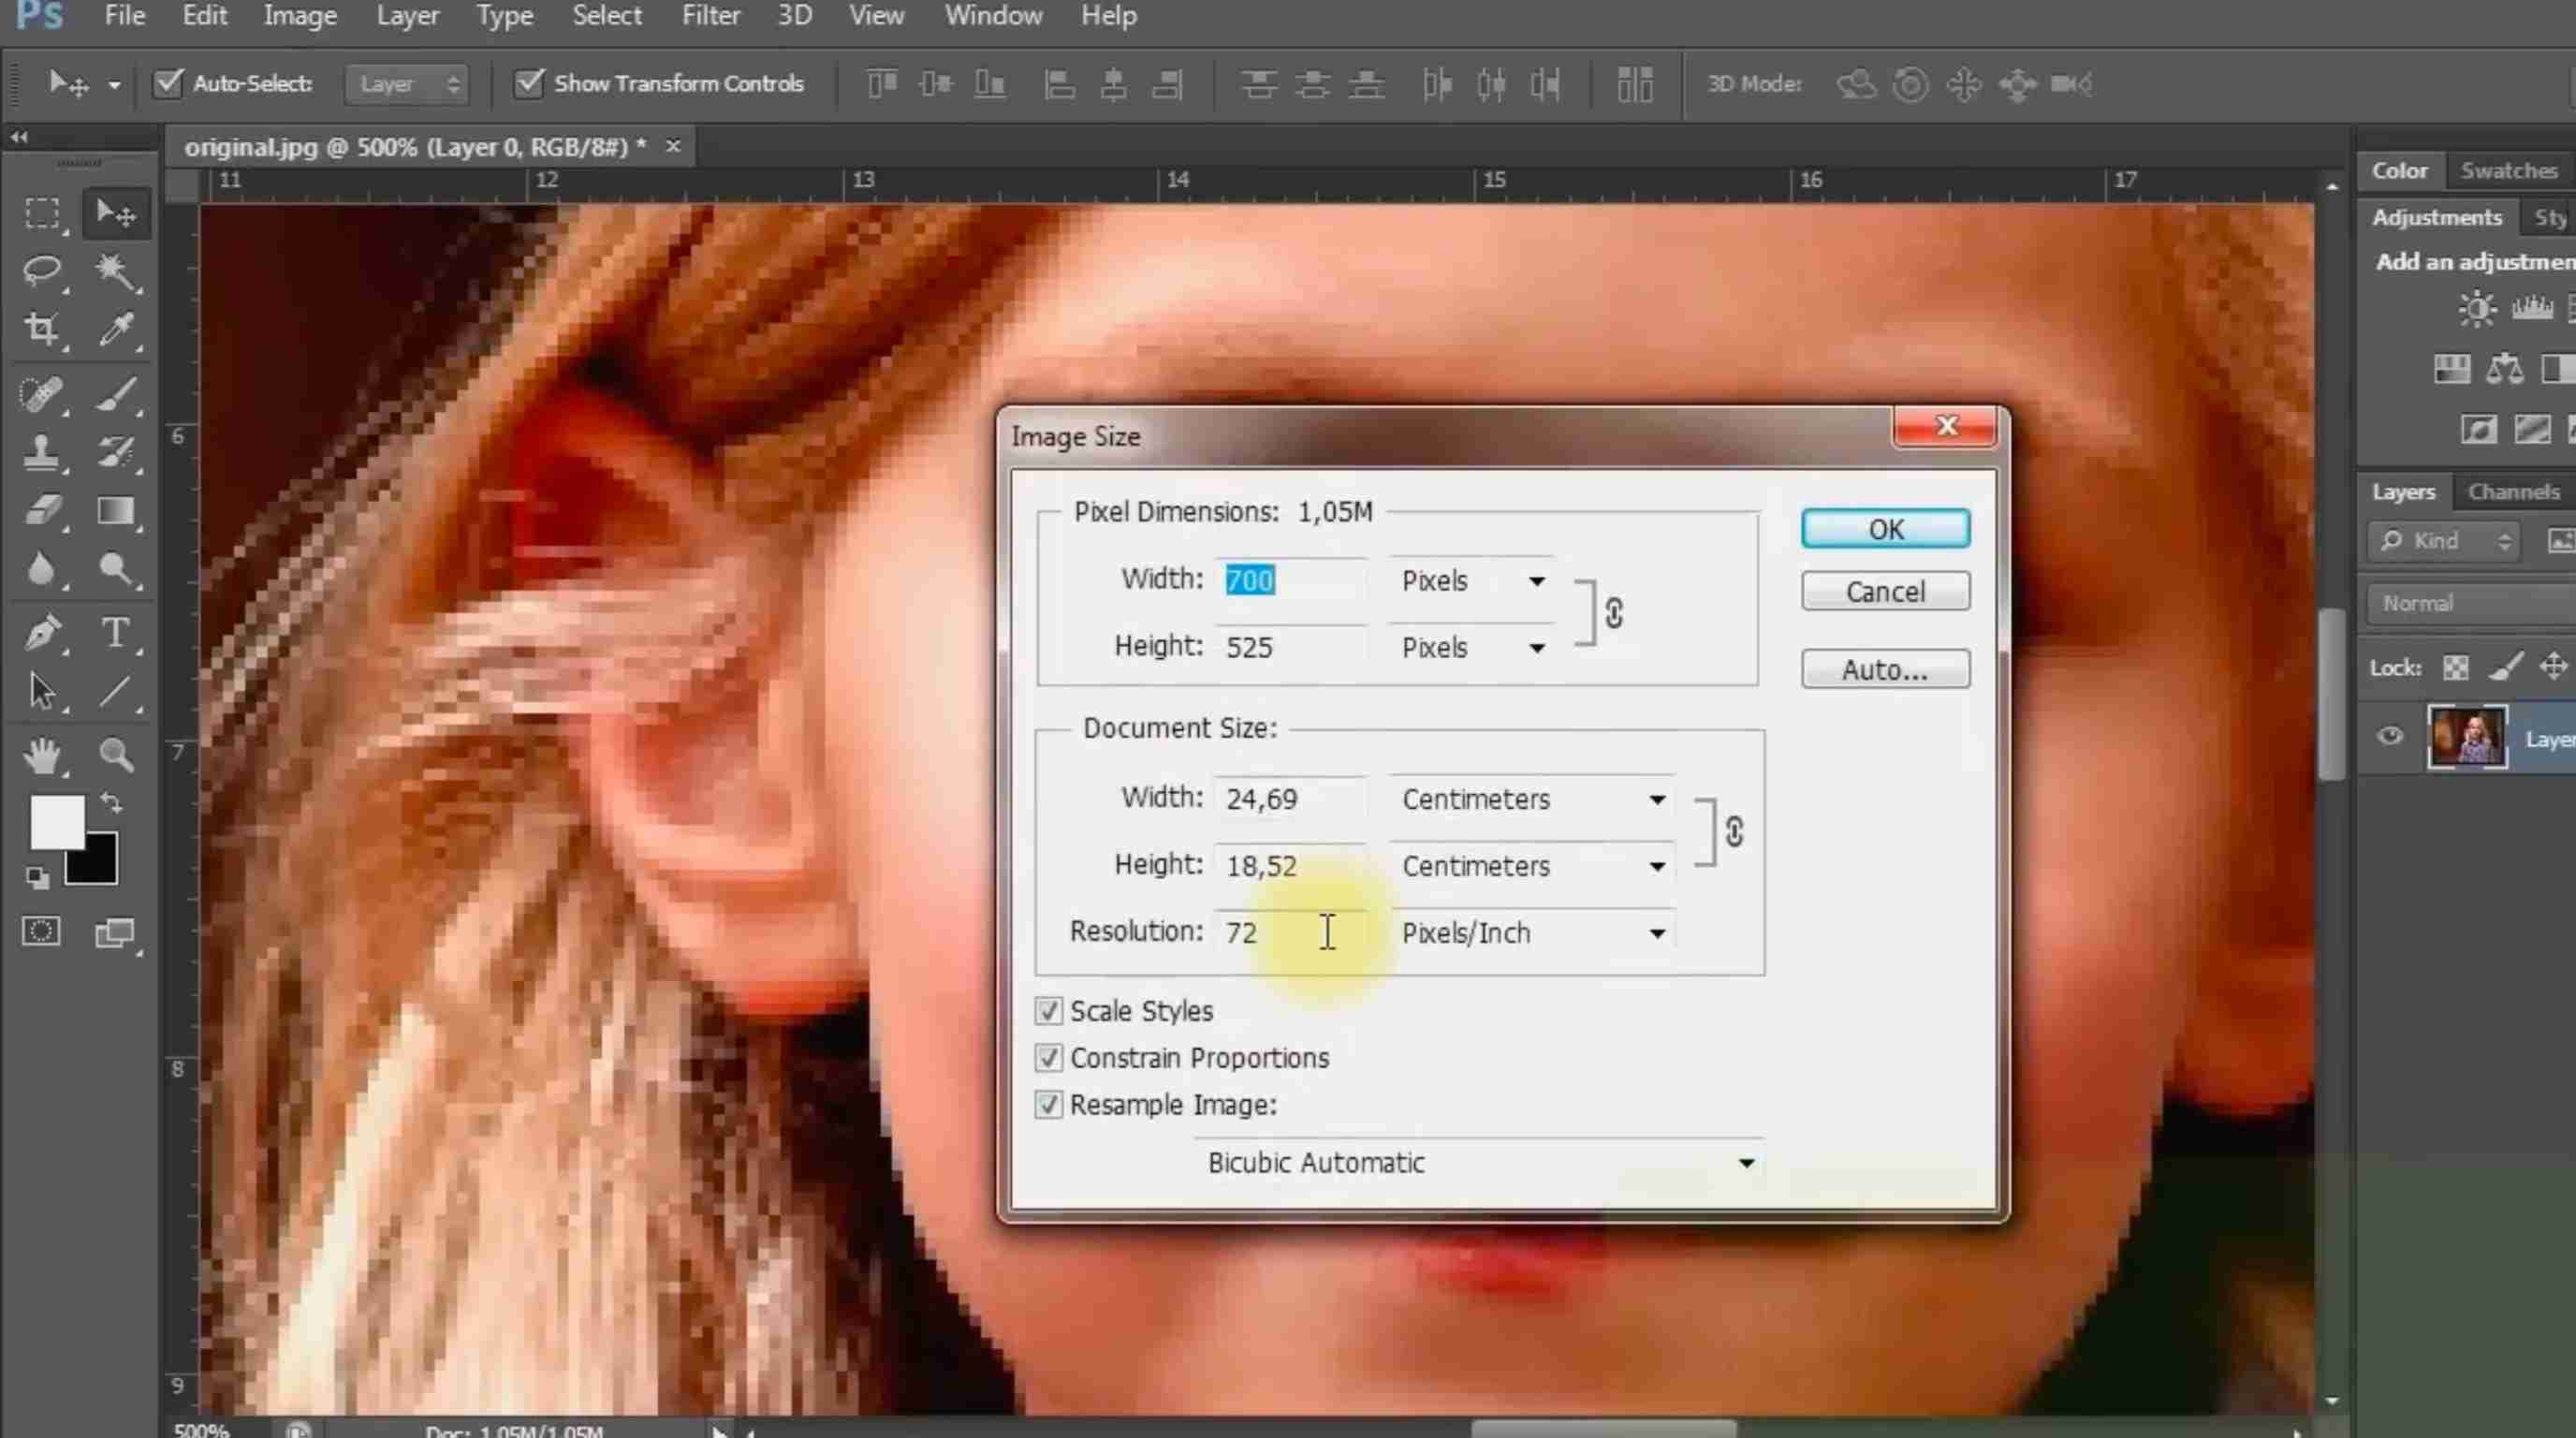
Step 1: Open the original image and check resolution
Use the highest-quality file available before editing. Check the image size first to understand how much enlargement the photo can handle.
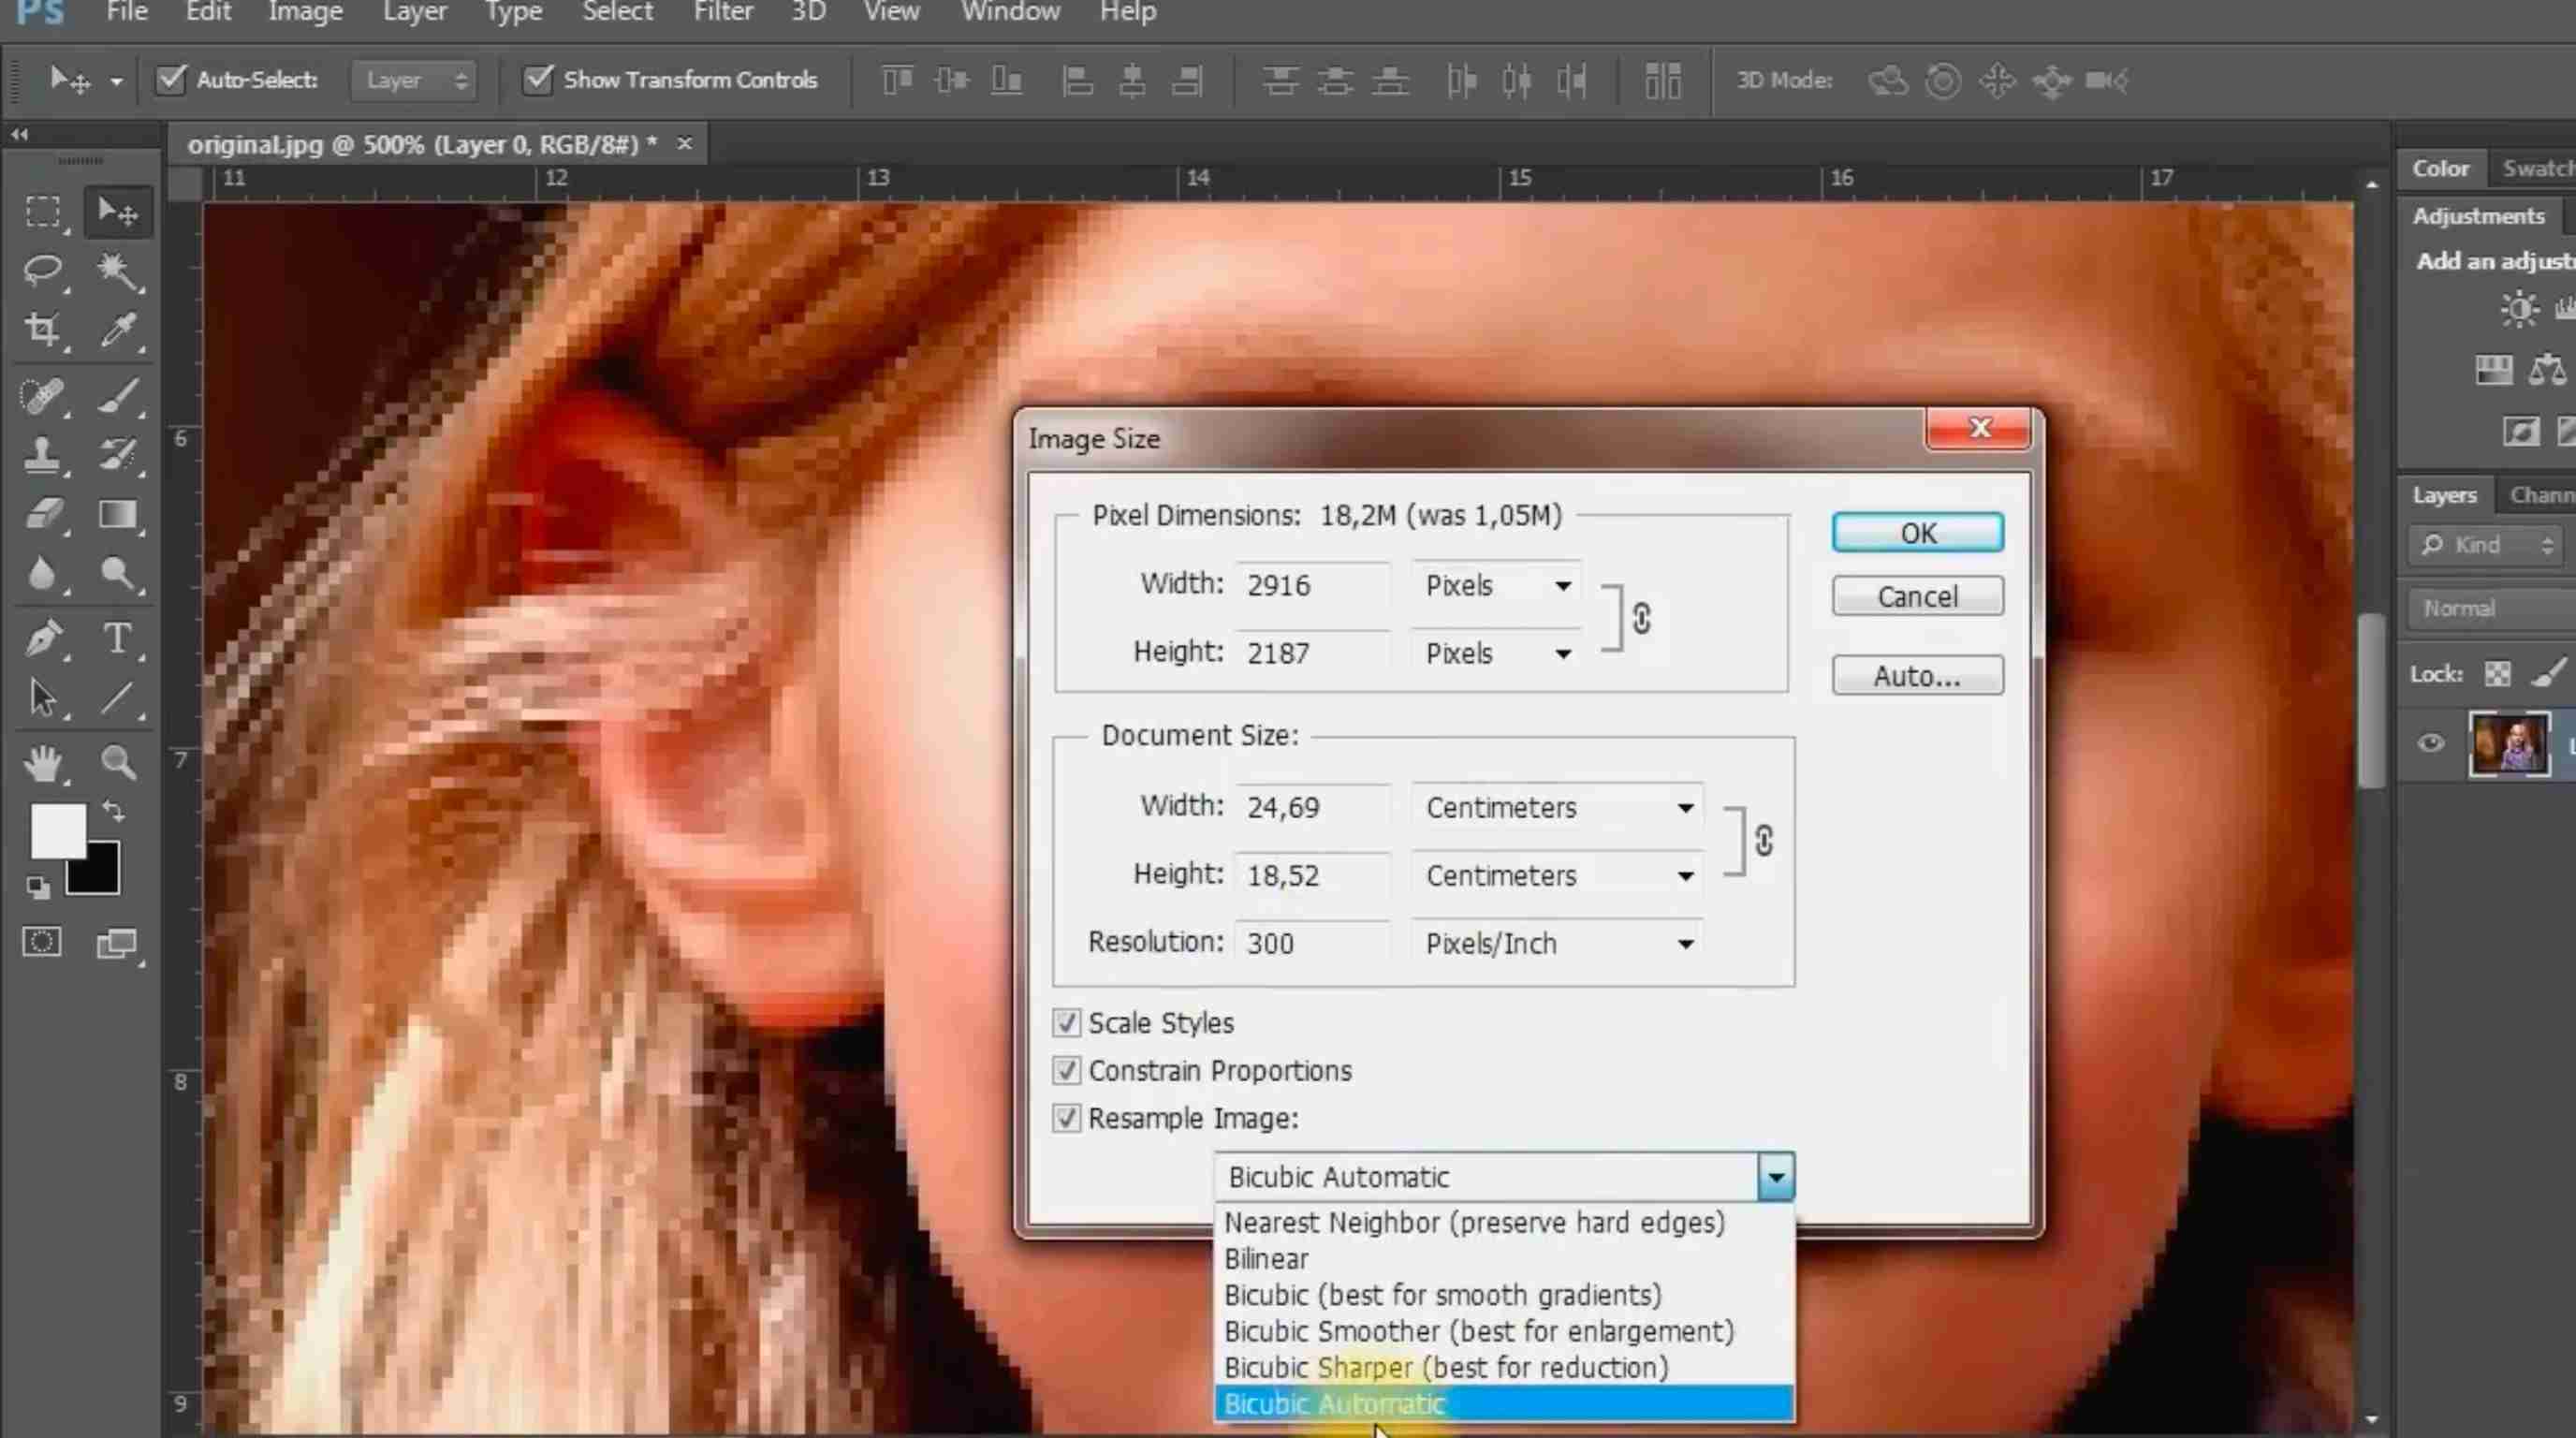
Step 2: Resize the image with proper resampling
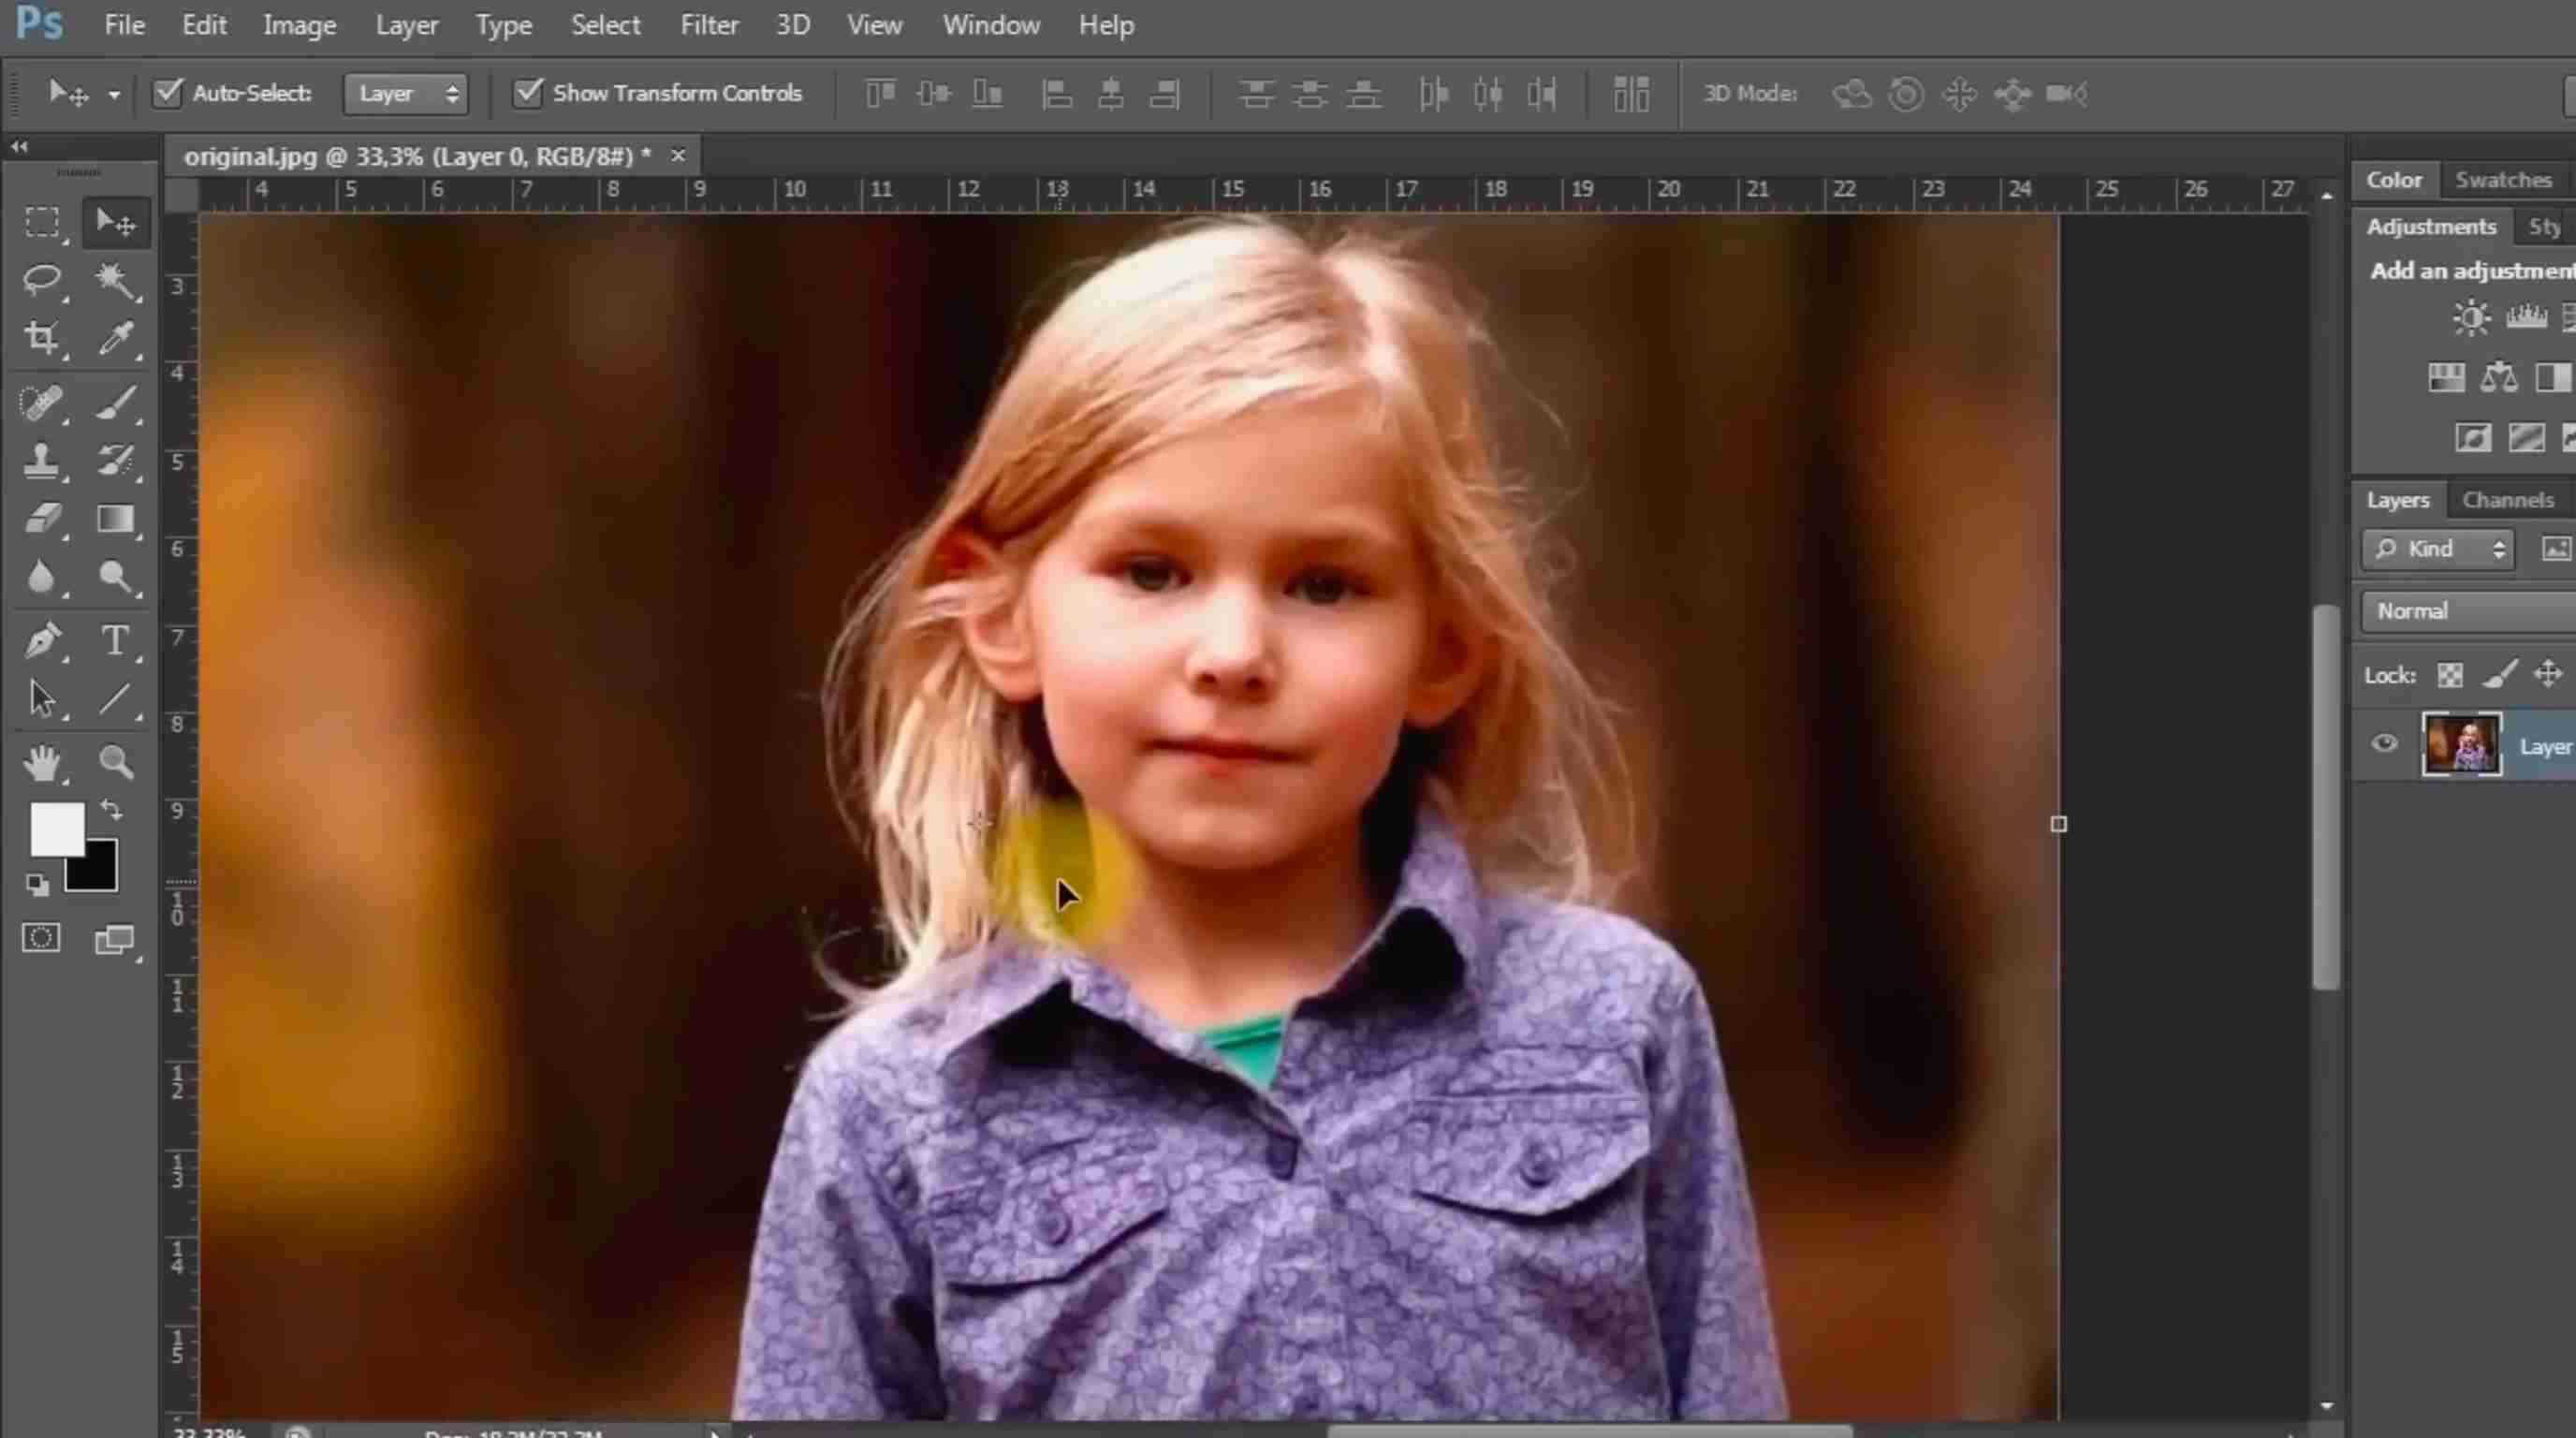
Use Photoshop's resampling options when enlarging an image instead of simply stretching pixels. AI-powered options like Super Resolution can help create a cleaner enlarged version.
Step 3: Reduce artifacts and sharpen carefully
Apply noise reduction if needed, then use sharpening tools to improve edge definition. Check the image at 100% zoom to make sure details remain natural.
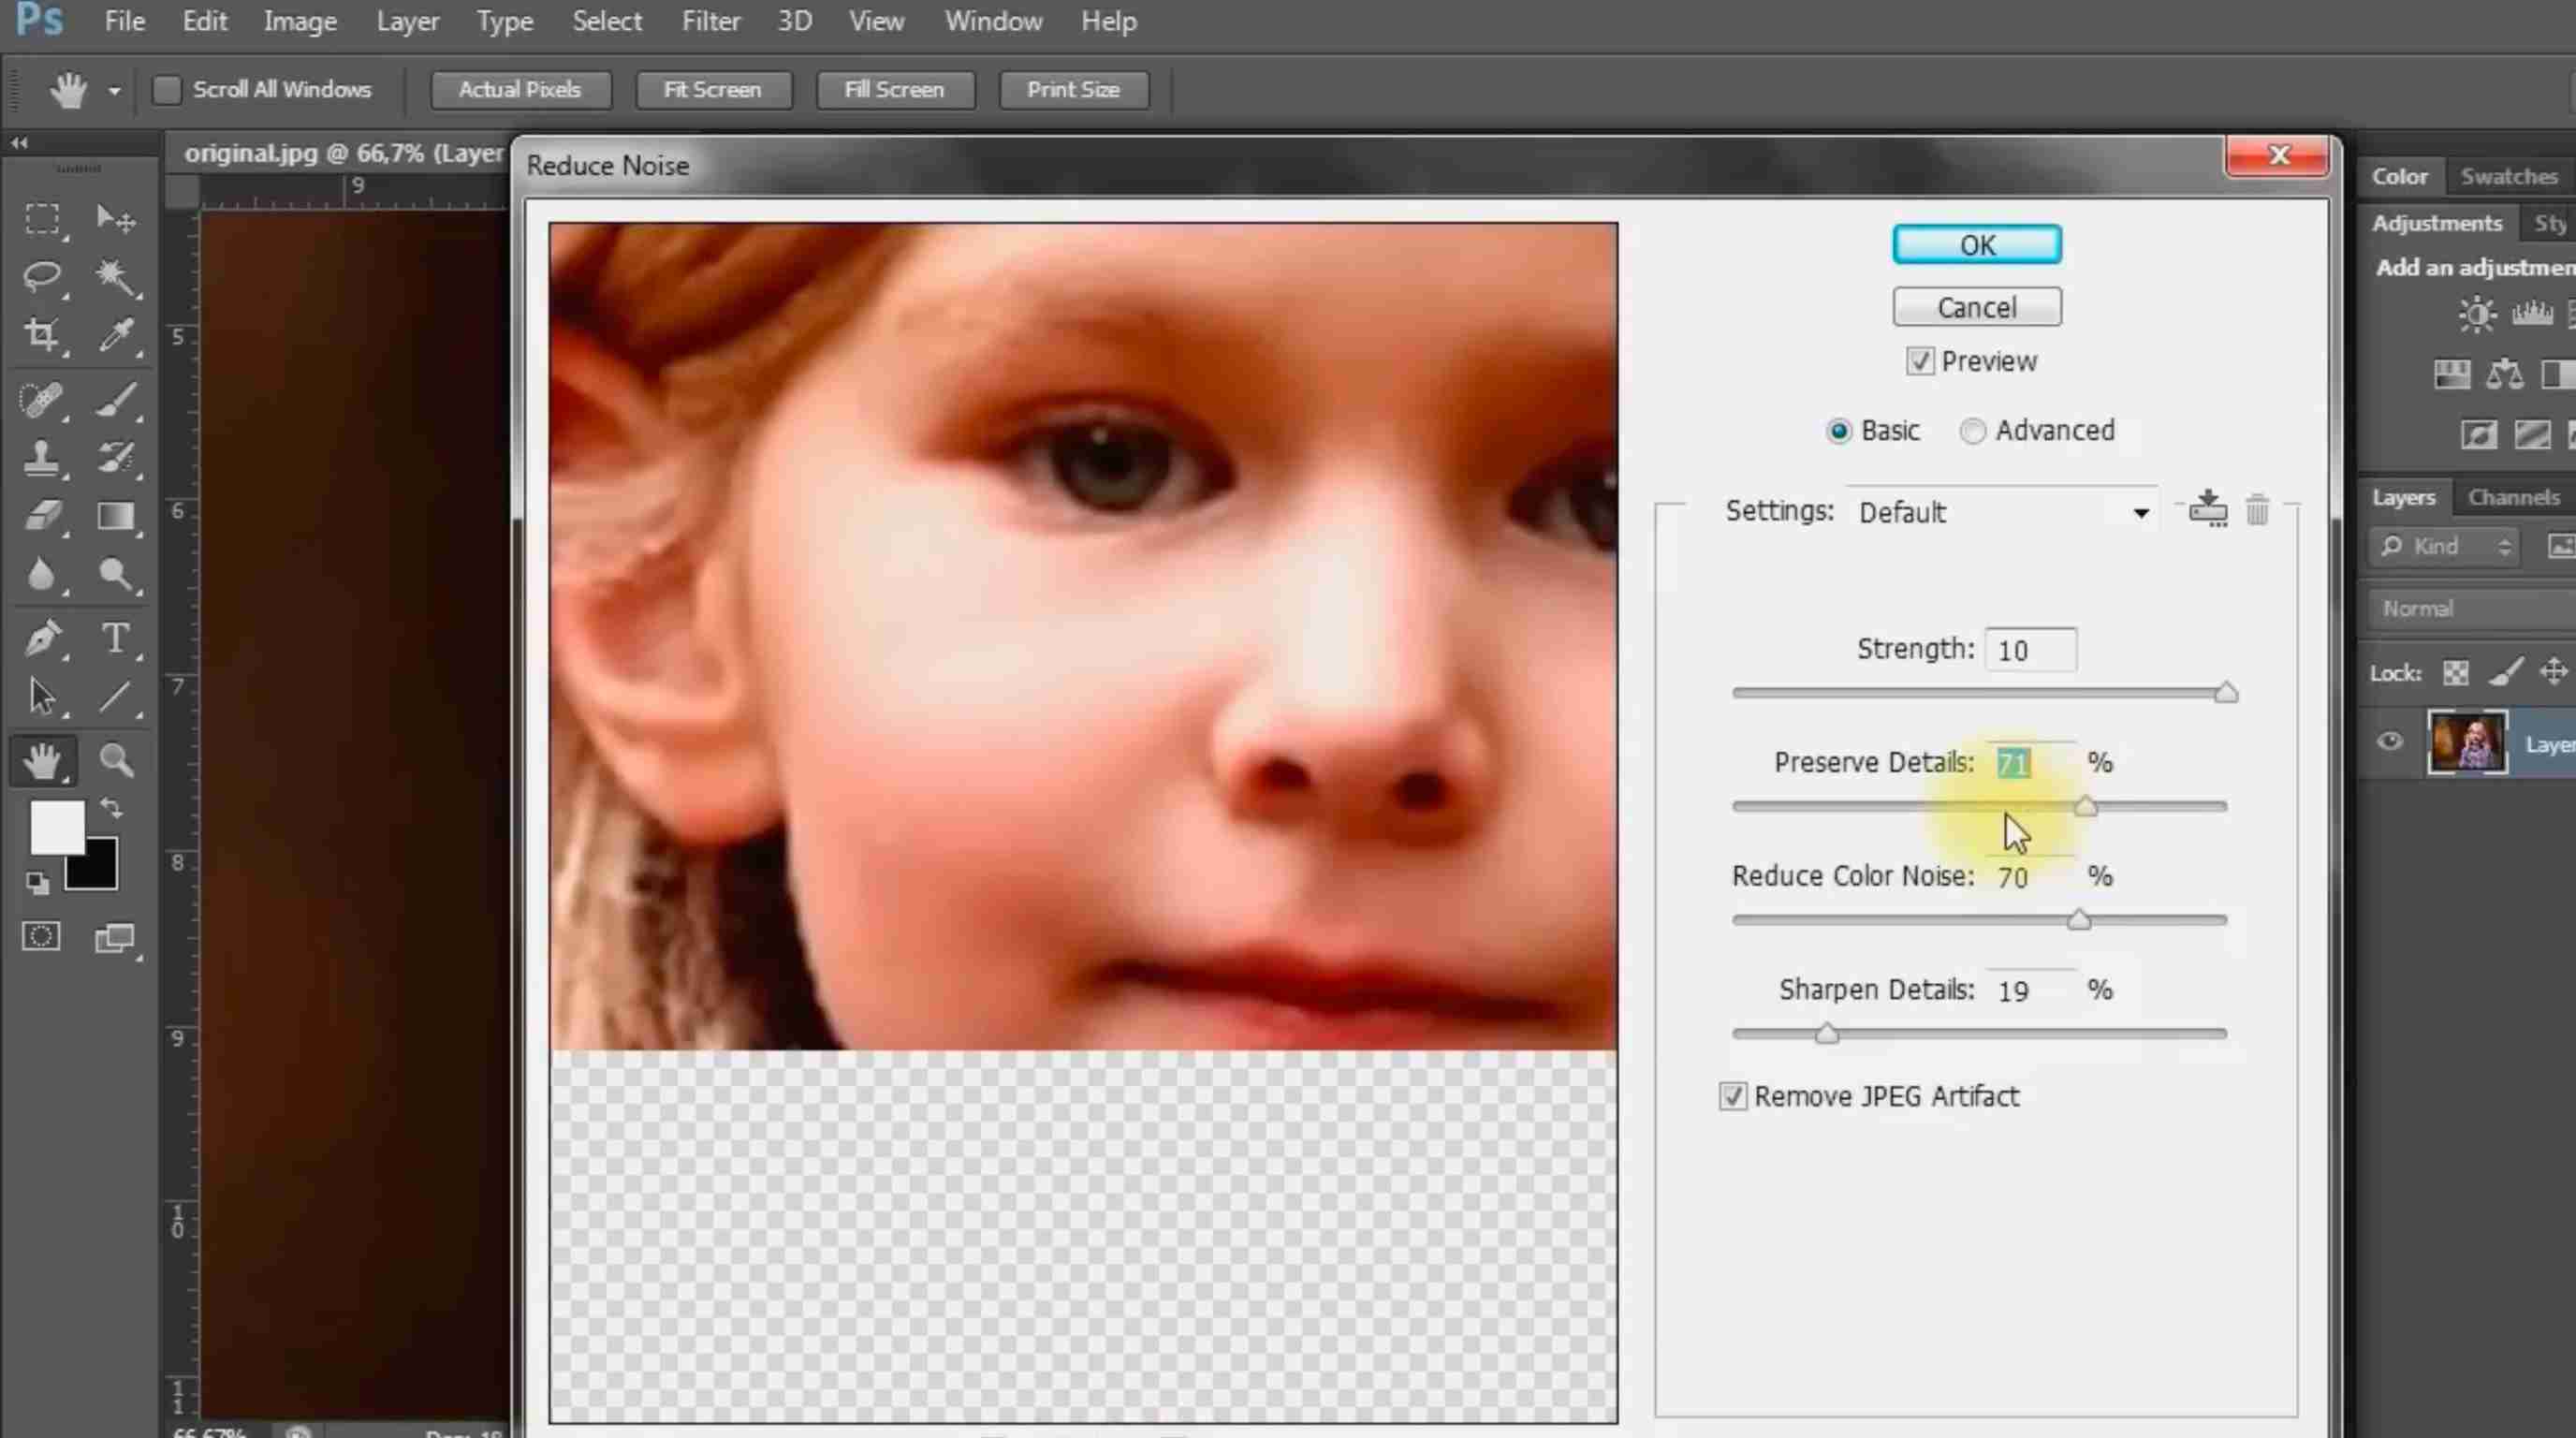
Step 4: Export with the right settings
Choose the correct file format and quality settings for your final use. Proper export settings help prevent additional compression and quality loss.
Fix pixelated images with AI enhancement
AI enhancement is a simple way to improve pixelated photos by increasing resolution, sharpening details, and reducing visible artifacts. It works best when the original image still contains enough information for the AI to refine.
Step 1: Upload the pixelated image
Upload your pixelated image to the AI image enhancer tool. Avoid screenshots or compressed copies, as they provide less image data for enhancement.
Step 2: Apply AI enhancement
Select an enhancement level based on your image quality and intended use. Higher upscaling levels can help prepare images for larger displays, websites, or product listings.
Step 3: Review and check the result
Check important details such as faces, text, and edges before exporting. If the result looks unnatural, adjust the enhancement settings or try a different version.
Improve pixelated photos faster with Designkit
If you need a faster way to improve low-quality images, Designkit helps you enhance pixelated photos in one streamlined workflow. Its AI image enhancer improves sharpness, resolution, and visible details, while the AI photo editor lets you make additional adjustments after enhancement. This makes it easier to prepare clearer visuals for social media, websites, product listings, and other digital uses without switching between multiple tools.
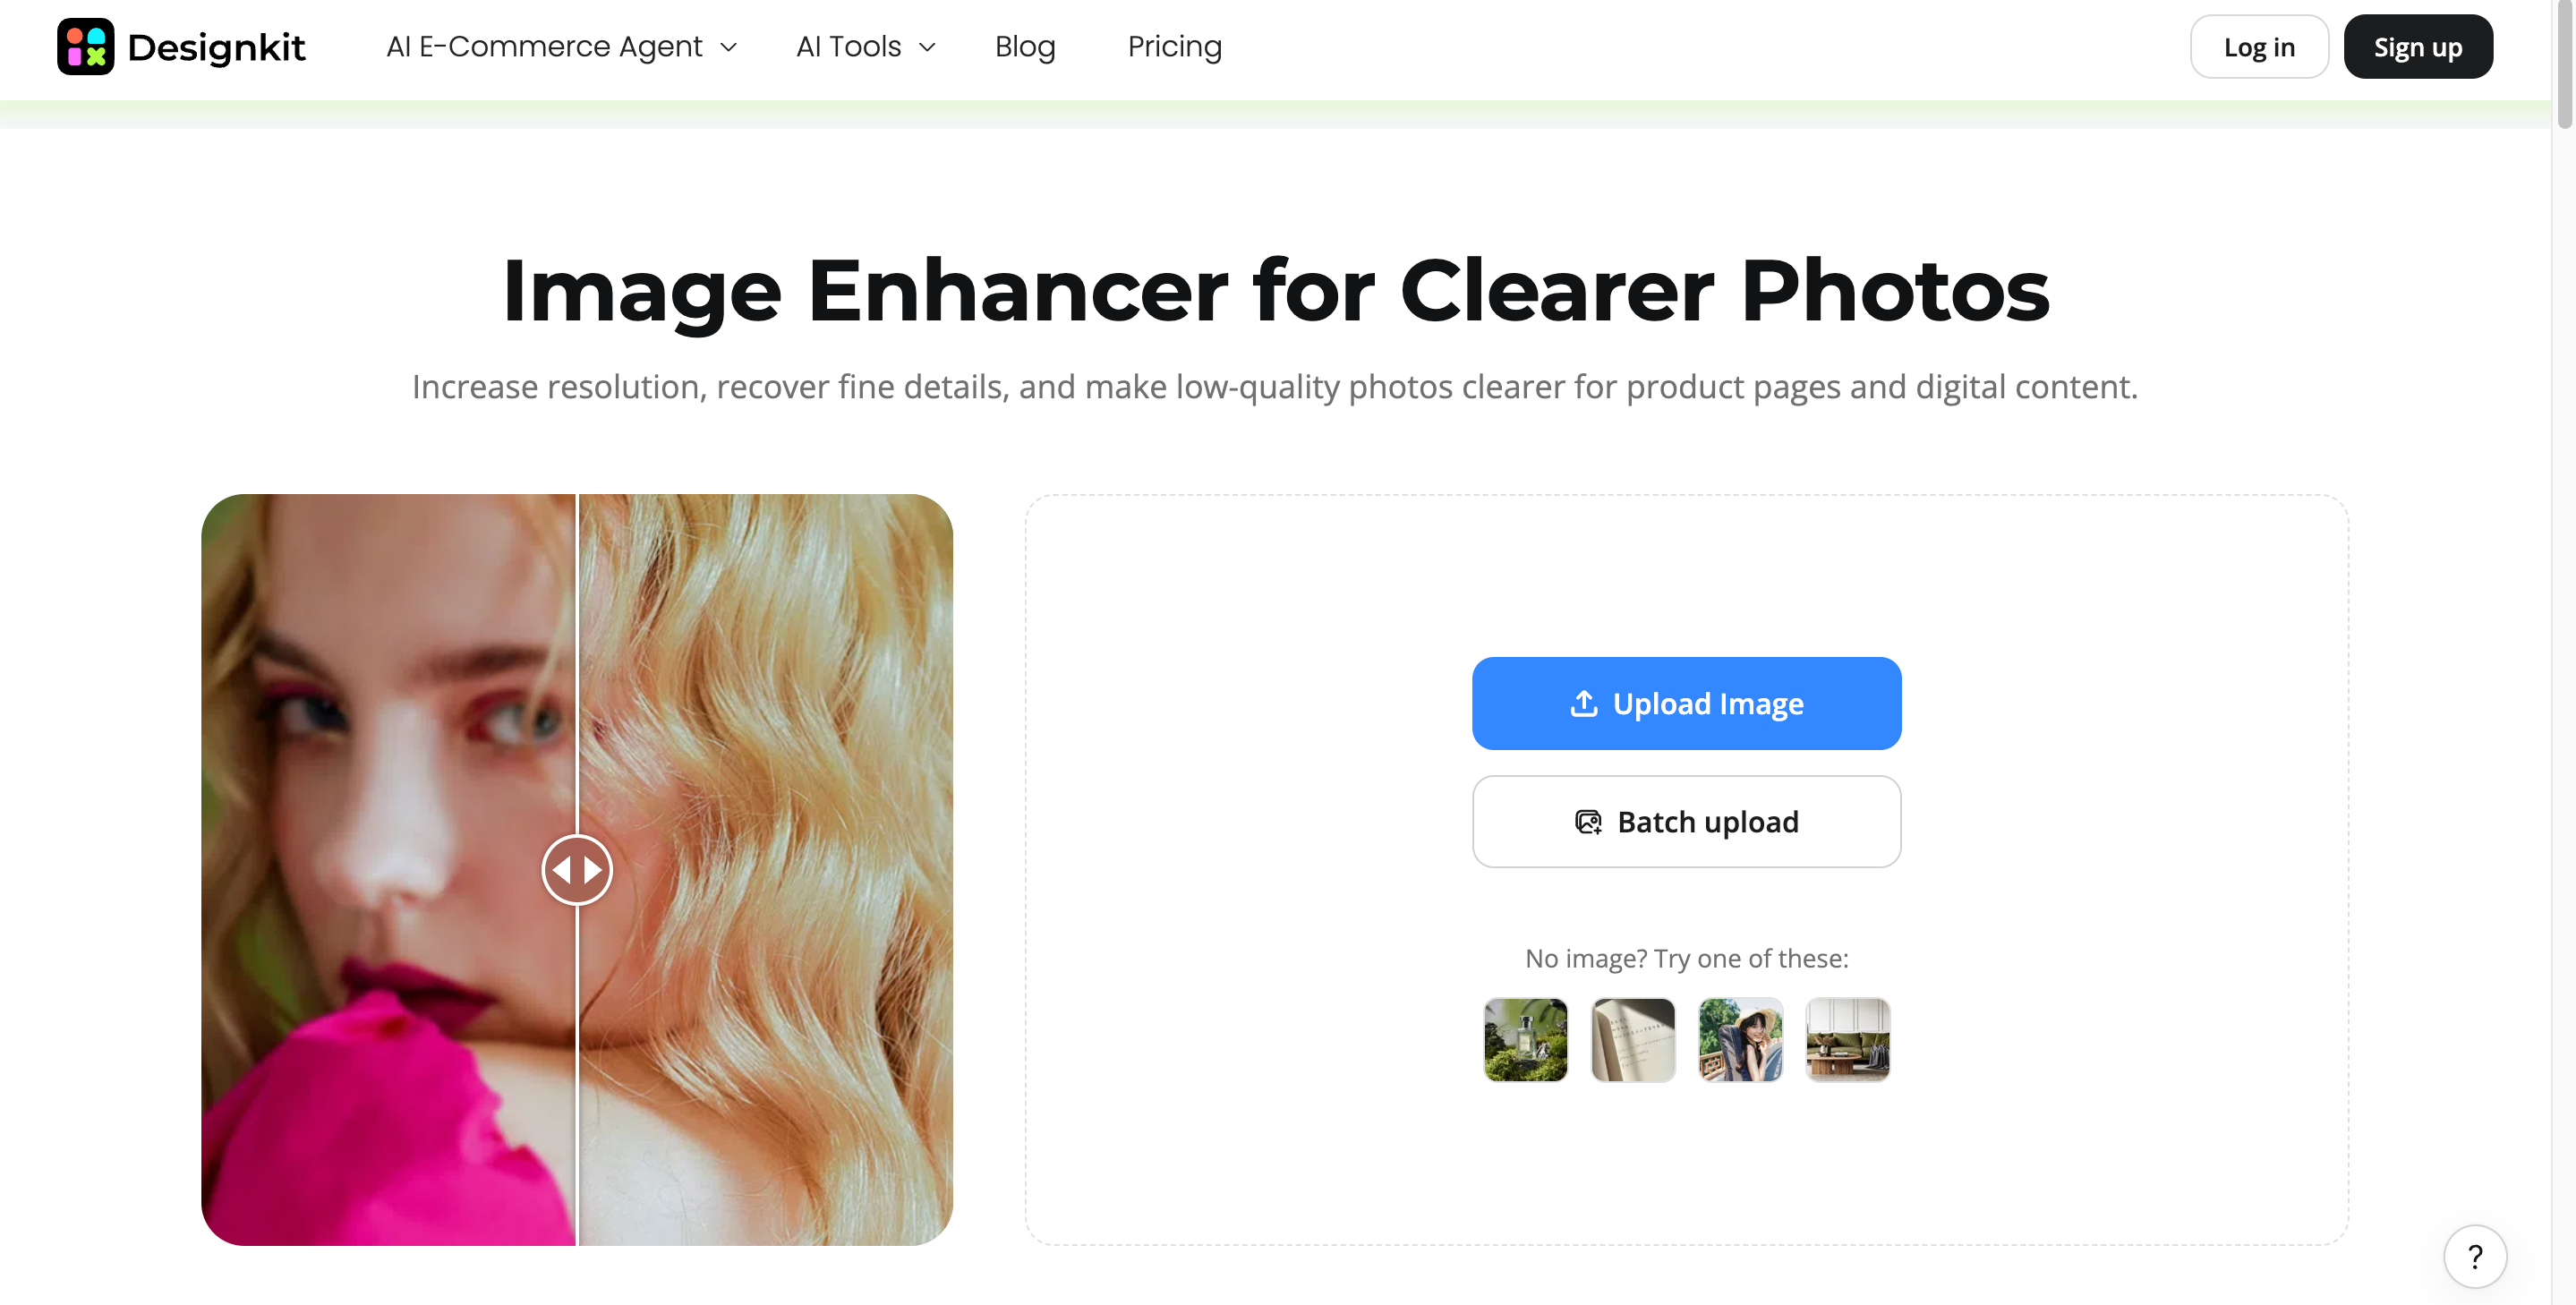
How to improve pixelated images with Designkit
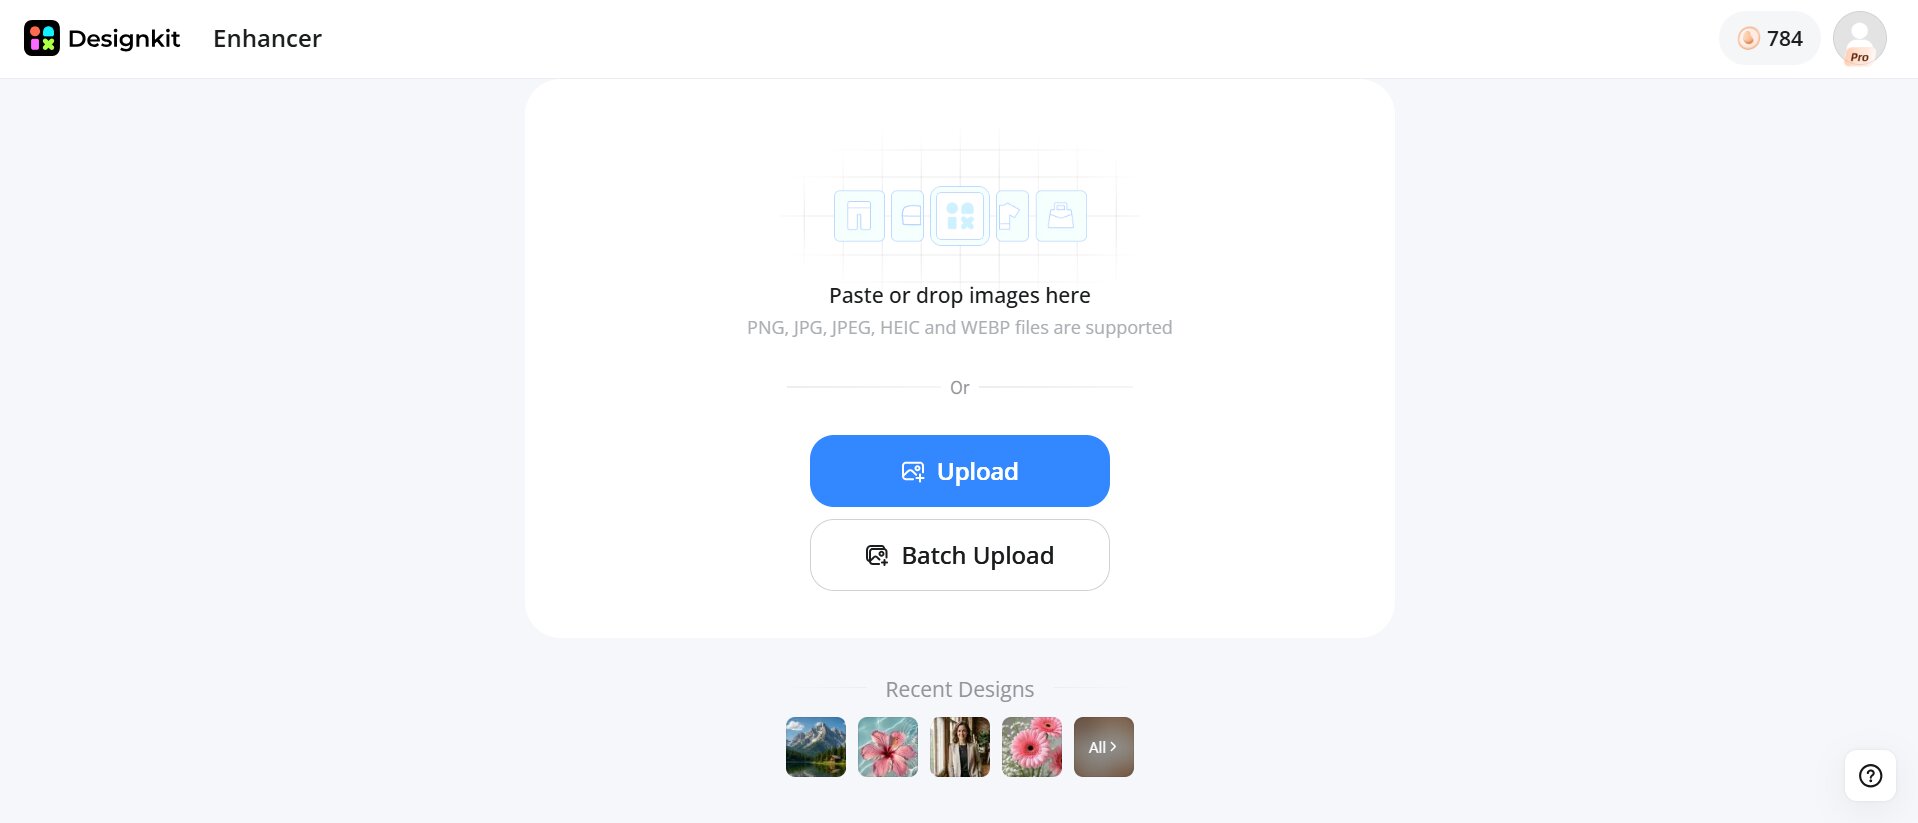
Step 1: Upload your photo
Upload your pixelated image to Designkit's AI image enhancer. Use the highest-quality version available to give the tool more details to work with and achieve a better enhancement result.
Step 2: Enhance and refine the image
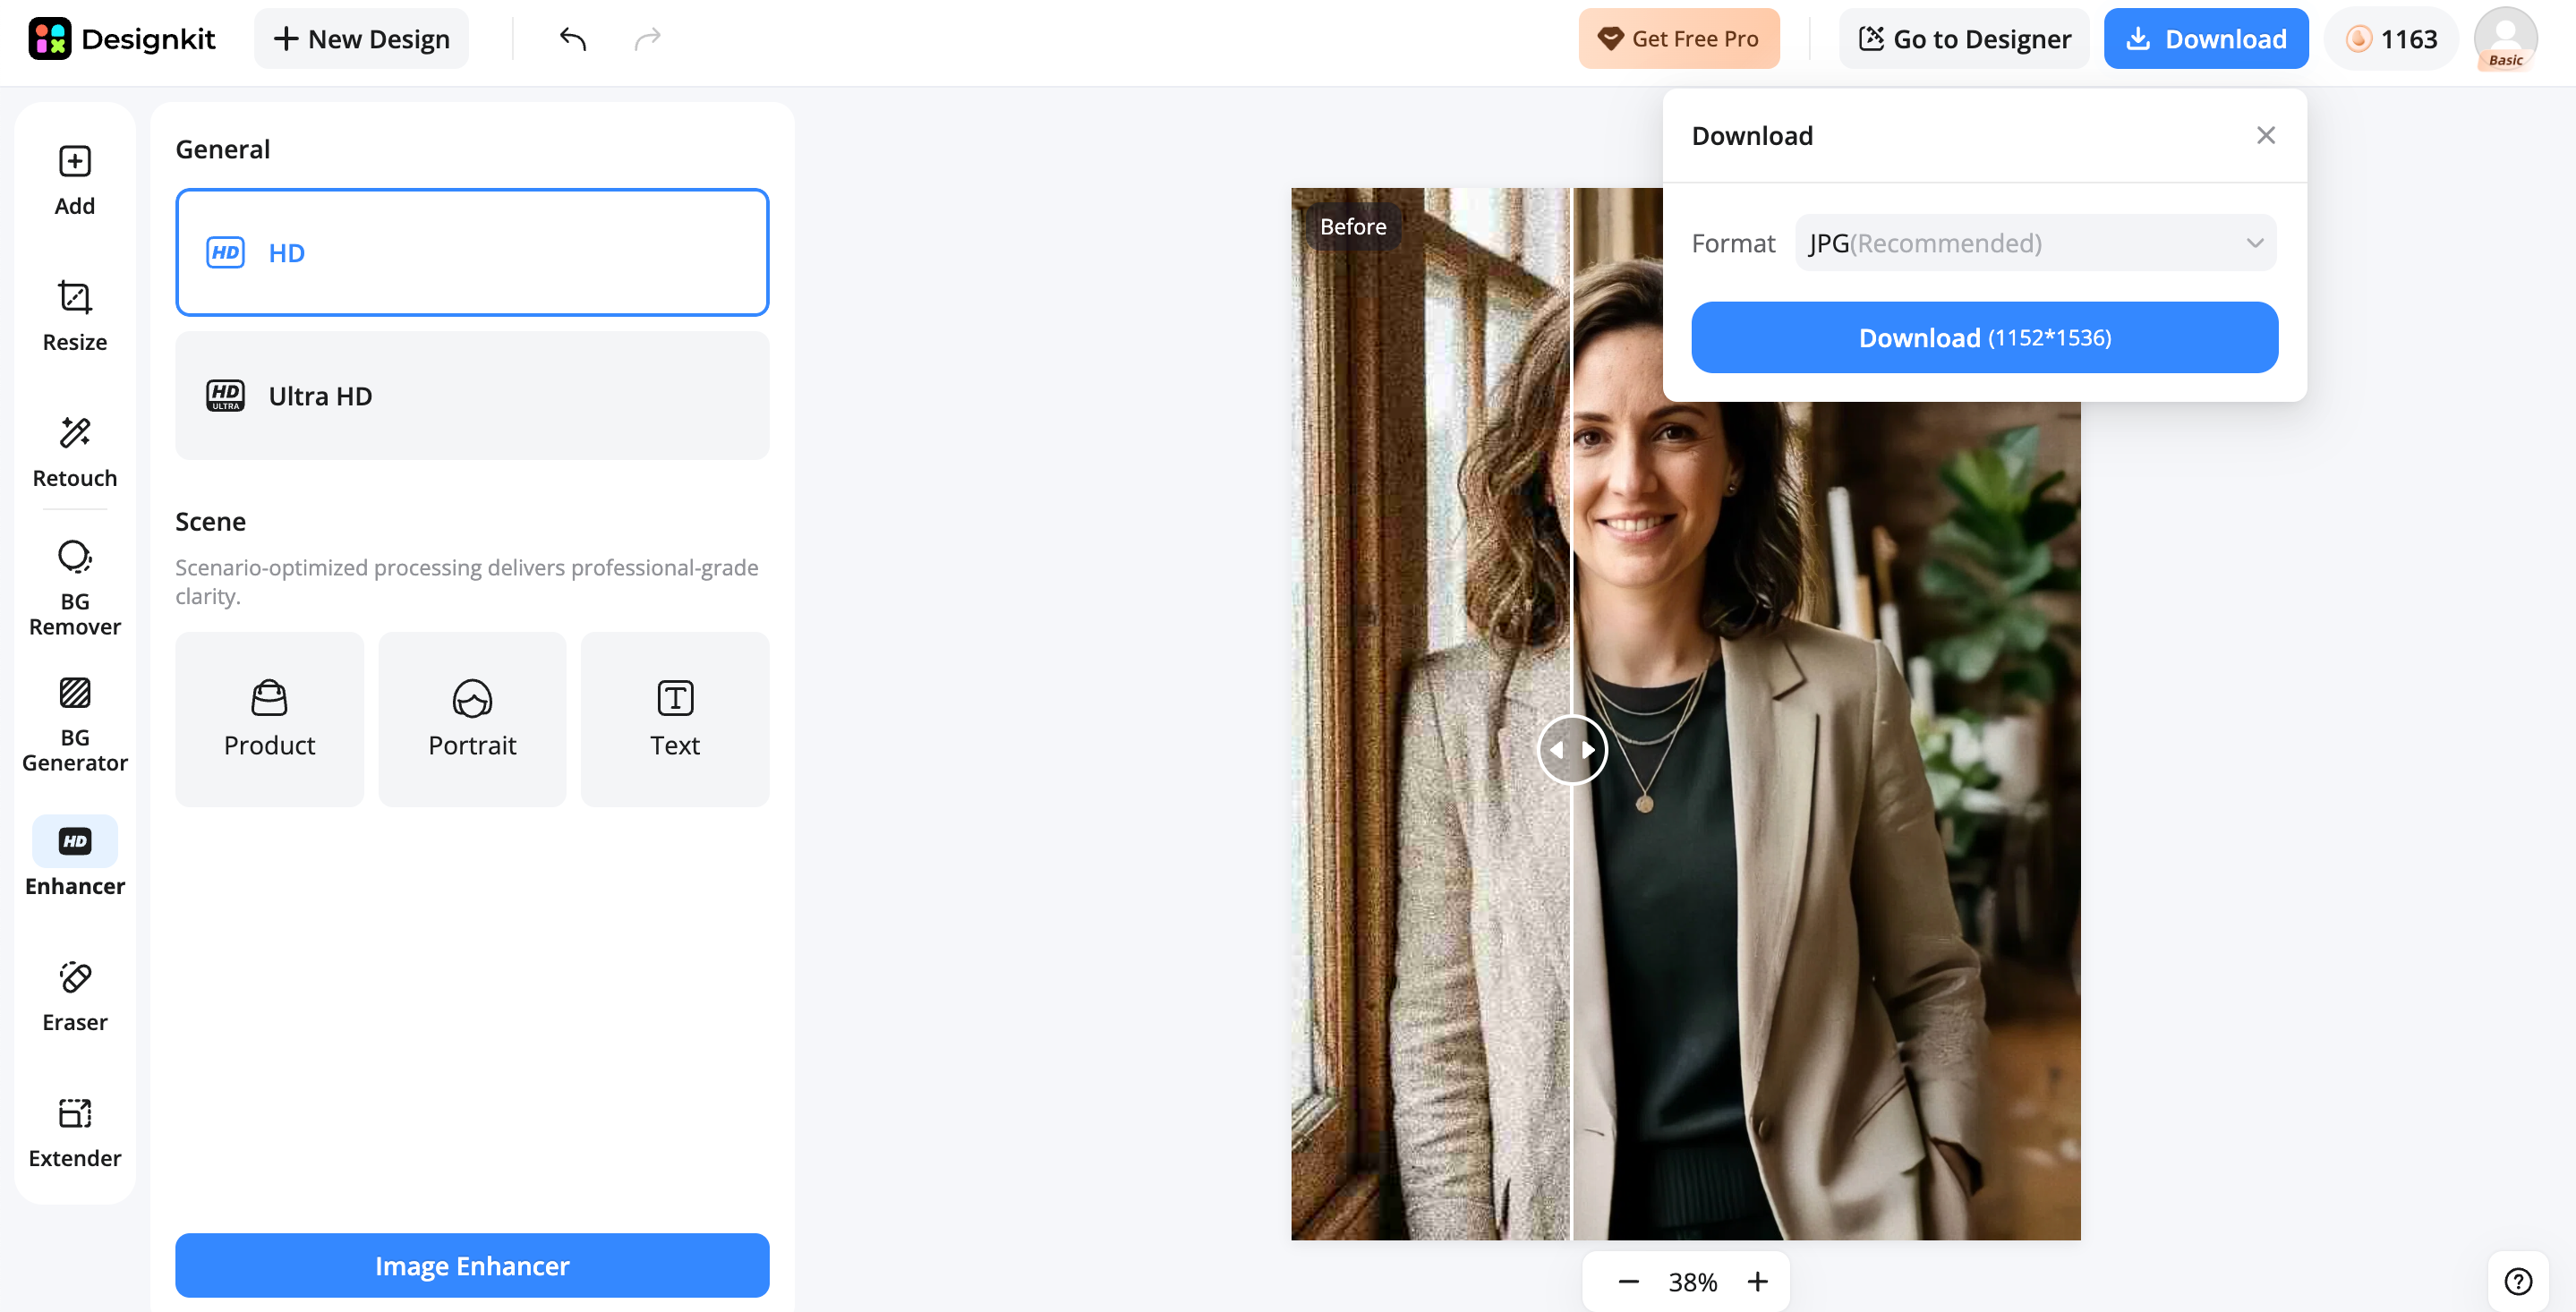
Choose the enhancement option and preview the improved result. Designkit helps increase image clarity, improve sharpness, and reduce the appearance of quality issues while keeping the original subject recognizable.
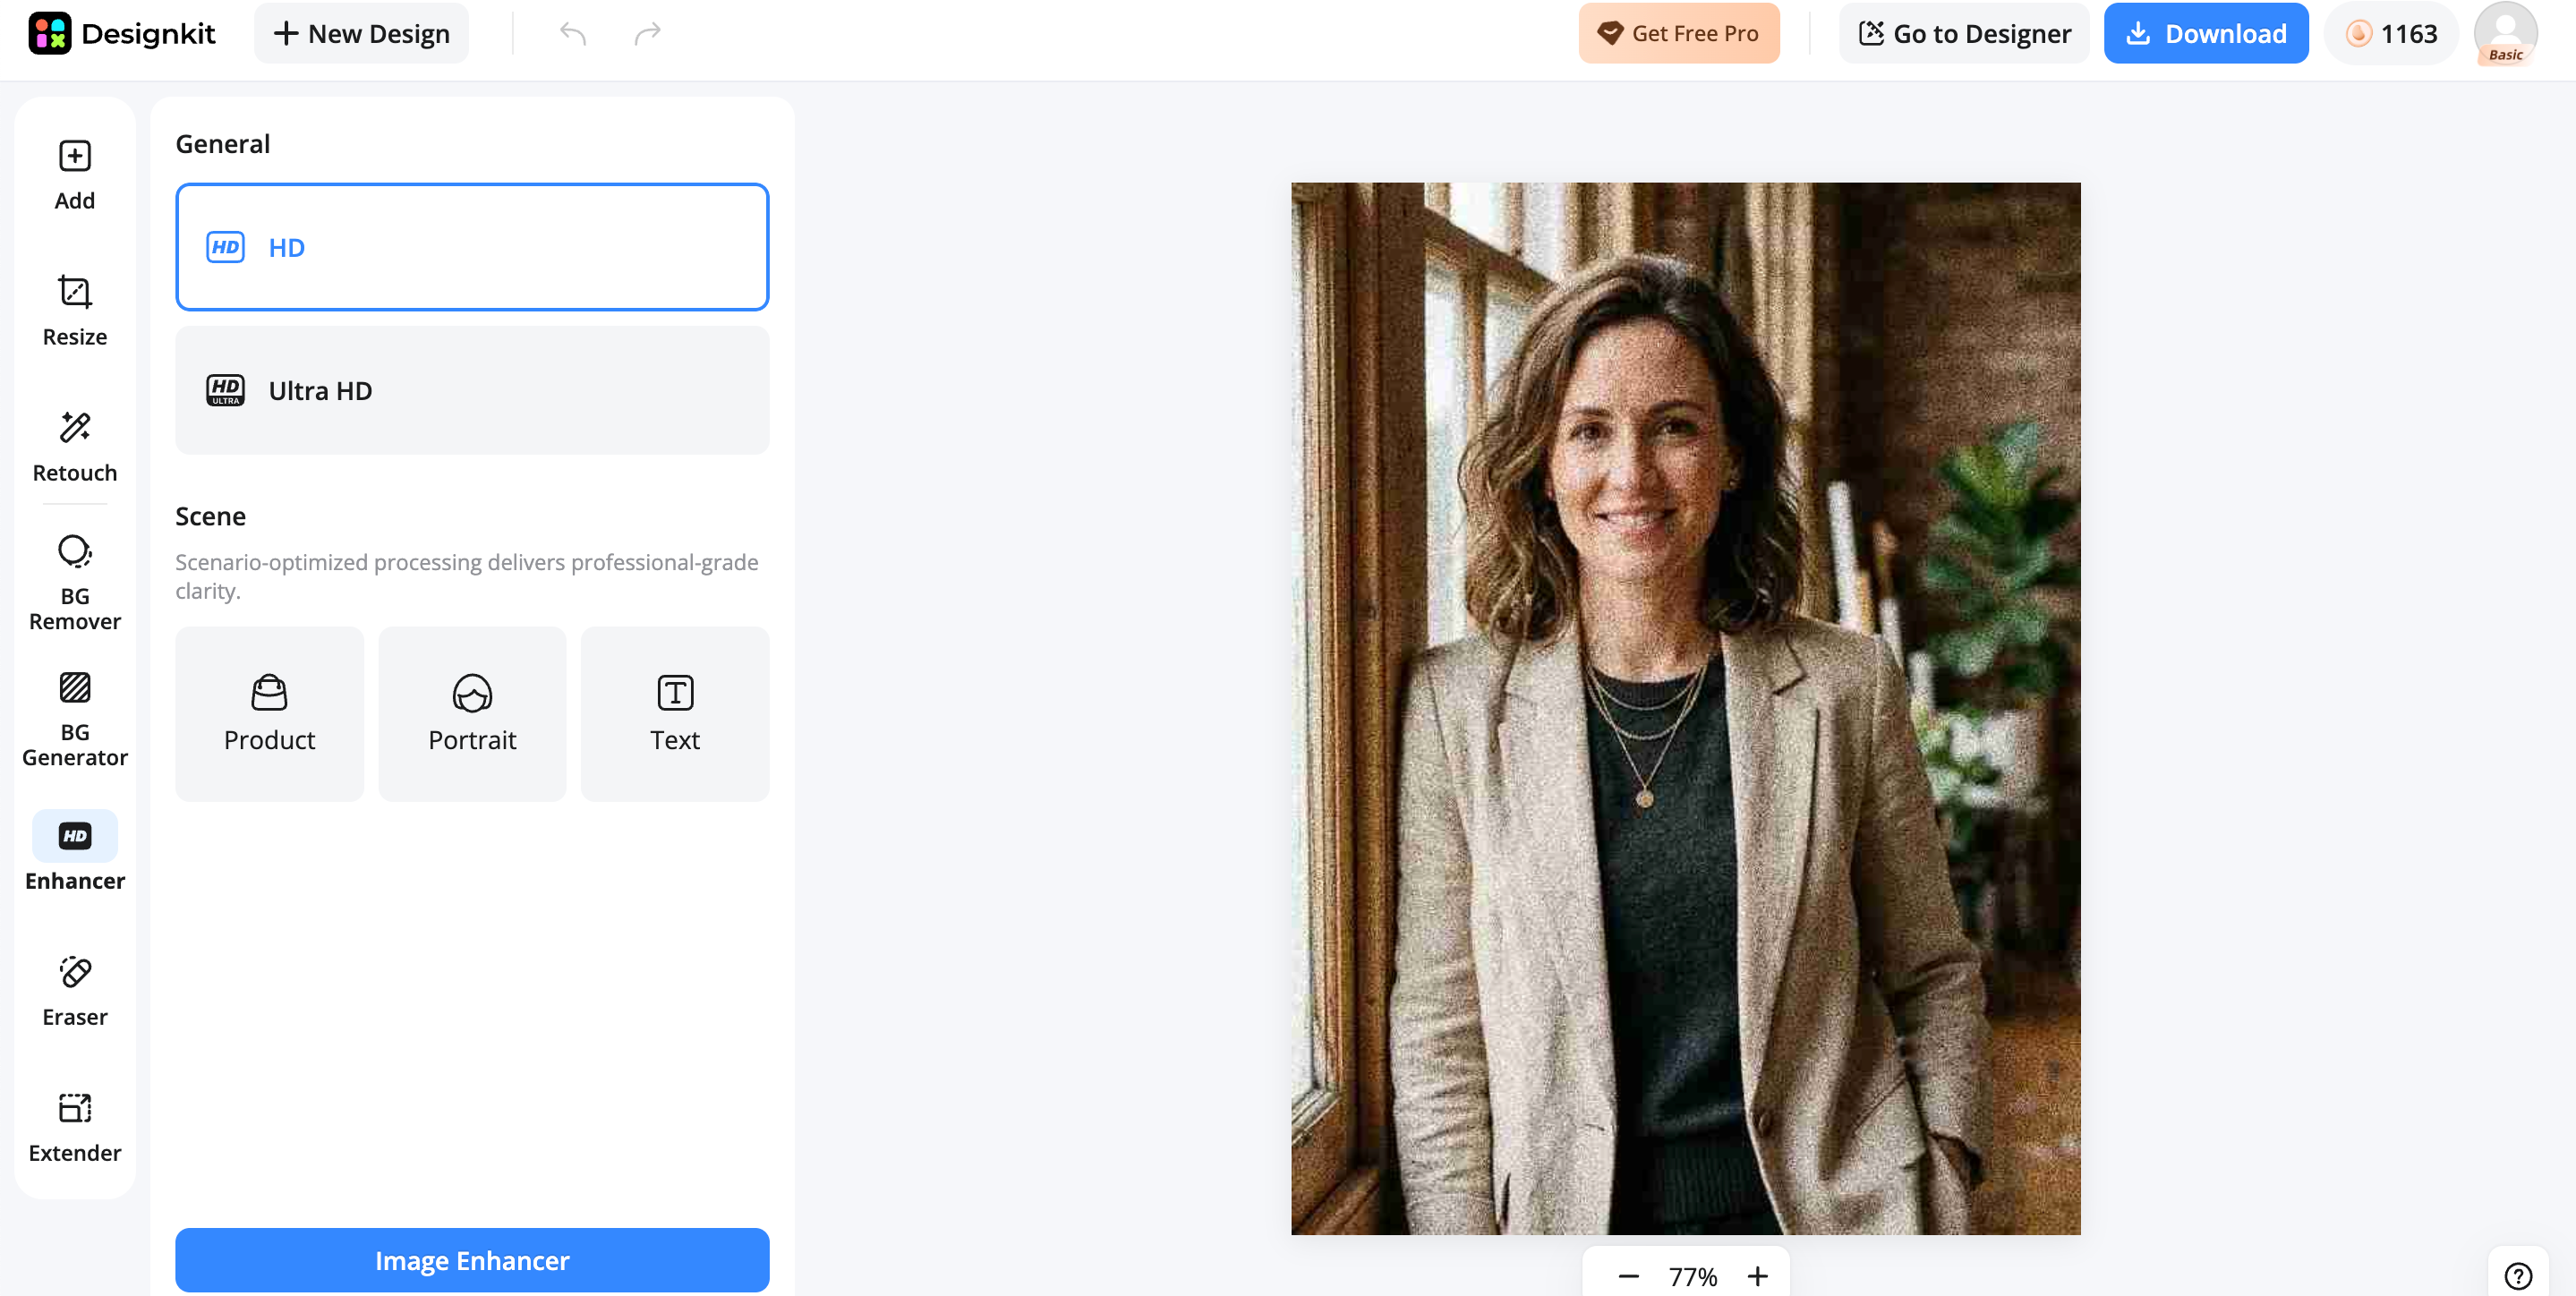
Step 3: Export the enhanced image
Review the enhanced image before exporting. Check important details such as faces, text, product edges, and fine textures to ensure the final image looks natural and ready for your intended use.
Why choose Designkit to fix pixelated photos
-
AI image enhancer: Improve image clarity, sharpness, and visible details to make pixelated photos look cleaner and more refined.
-
Image upscaler: Increase image resolution with advanced upscaling options to create larger visuals with better quality.
-
AI photo editor: Fine-tune enhanced images with additional adjustments to improve lighting, color, and overall appearance.
-
Background remover: Remove distracting backgrounds from enhanced photos to create cleaner, subject-focused visuals.
-
AI object remover: Remove unwanted objects or distractions from a photo and create a cleaner final image.
-
AI background generator: Create a new background when the original setting no longer suits the image or intended use.
Tips to prevent photos from becoming pixelated
Fixing a pixelated photo is useful, but preventing quality loss in the first place is usually easier. Good file management, correct export settings, and using the right image size can help maintain image clarity.
Use the original or highest-quality image
Always edit the original photo whenever possible instead of screenshots, previews, or compressed copies from messaging apps. A higher-quality source contains more visual information, giving editing tools a better foundation to improve the image. For ecommerce sellers, photographers, and content creators, keeping a master file and exporting different versions for each platform can prevent unnecessary quality loss.
Avoid repeated cropping and compression
Every time an image is cropped heavily or saved with strong compression, some visual information can be lost. Re-editing the same compressed file repeatedly may introduce more artifacts and reduce image quality. Keep an original version of your image and create separate copies for websites, social media, advertisements, or product listings.
Choose the right image size and format
Uploading an image that is too small for its intended purpose often leads to unwanted enlargement and pixelation. Before exporting, check the required dimensions for your platform, whether it is a website, marketplace listing, social media post, or printed material. Using the correct resolution and file format reduces the need for future resizing and helps your photos stay sharper.
Final thoughts
Fixing pixelated photos starts with understanding why the image lost quality and choosing the right solution. Simple adjustments may work for minor issues, while AI enhancement or Photoshop can help improve more damaged images. However, no tool can fully recover details that were never captured. The best results come from using high-quality source files and improving images before they are enlarged or compressed repeatedly.
For a faster workflow, Designkit combines AI enhancement and photo editing tools in one place, helping you create clearer, more polished visuals for ecommerce, websites, and social media
Frequently Asked Questions
Why does my photo look pixelated after resizing?
Can I fix a pixelated photo without Photoshop?
Yes. If the pixelation is mild, simple adjustments like reducing noise and applying light sharpening may help. For faster results, Designkit's AI image enhancer can automatically improve resolution, clarity, and visible details without requiring advanced editing skills.
Why do my product photos look pixelated on ecommerce listings?
Product images often become pixelated when low-resolution photos are enlarged to meet marketplace requirements. For ecommerce sellers, using clearer product images is important because image quality directly affects how customers understand the product. Designkit can help enhance product photos, improve details, and prepare cleaner visuals for product listings.
How can I fix a pixelated image from WhatsApp or social media?
Images shared through messaging apps or social platforms are often compressed to reduce file size, which can remove important details. Try to locate the original image whenever possible before editing. If the original file is unavailable, Designkit can help improve the appearance of compressed images, although the final quality depends on how much information remains.
Can Designkit improve multiple pixelated photos at once?
Yes. If you need to enhance many images, processing them individually can take a lot of time. Designkit supports batch workflows, allowing creators and businesses to improve multiple photos more efficiently while maintaining a consistent visual style.
What is the fastest way to improve a pixelated photo?
The fastest method depends on the image quality and your goal. For quick improvements, an AI image enhancer can increase clarity and reduce visible artifacts in a few steps. Designkit combines enhancement, editing, and background tools in one place, making it easier to turn low-quality images into usable visuals for ecommerce, websites, and social media.
You May Also Like
Remove.bg Shutting Down Dec 1, 2026: What Users Are Saying

7 Best Remove.bg Alternatives in 2026: Free & Paid Tools

Instagram Carousel: What It Is, How to Post & Create One

Nano Banana Prompts: 20+ Examples for Better AI Images

Ideogram AI Review 2026: Features, Pricing & Alternatives

Free Mac Photo Editor: 5 Tools Compared for Mac Users

How to Crop a Photo Into a Circle Online (Keep Quality)

How to Make an Image Transparent Online (AI Guide)

Pixlr Background Remover Review 2026: Features, Pricing & Alternatives

How to Fix Overexposed Photos: Recover Highlights Fast

OpenArt AI Review 2026: Features, Pricing & Alternatives

Best AI Headshot Generator: 9 Tools Compared for 2026

Best Stencil Maker Tools 2026: Turn Photos Into Stencils

Pixelbin Watermark Remover Review: Image & Video Results Tested

How to Make a Sticker on iPhone: Easy Step by Step Guide

Best AI Logo Generator in 2026: 10 Tools Compared

How to Turn a Photo Into a Cartoon: A Beginner-Friendly Guide

Landscape vs Portrait: Key Differences & Best Uses in 2026

How to Remove Watermark From Photo: AI, Photoshop & More

How to Fix Pixelated Photos: Photoshop, AI Tools & Tips

Bing Image Creator: How It Works, Features, Uses & Alternatives

How to Remove People from Photos with AI: A Step-by-Step Guide

How to Increase Image Resolution: AI, Photoshop & PPI

How to Add Text to a Photo: 8 Tips for Better Results

How to Fix Grainy Photos: Easy Ways to Clear Images

Creative Profile Picture Ideas for Every Style and Platform

Evoto AI Review 2026: Features, Pricing, Pros & Cons

Pixlr Photo Editor Review: Features, Pricing & Alternatives

Best AI Image Extender Tools in 2026: Expand Photos with AI

How to Make a Collage on iPhone: Easy Guide for 2026

How to Sharpen an Image in Photoshop (Smart Sharpen and Unsharp Mask)

Best Image Background Remover Tools in 2026: AI Tools Compared

How to Make Transparent Background in Paint: Step-by-Step Guide

How to Resize an Image: Best Methods, Tools & Quality Tips

Best AI Image Generator Tools in 2026: Top AI Platforms Compared

Remove.bg Review 2026: Features, Pricing & Is It Worth It?

Luminar Neo Photo Editor Review 2026: AI Features, Price & Pros

How to Post Multiple Photos on Instagram (2026 Guide)

25 Facebook Cover Photo Ideas for Personal & Business Pages

What Is a PFP? Meaning, Examples & How to Create One

Can You Edit an Instagram Post After Posting?

11 Best Canva Alternatives in 2026 for AI Design & Marketing

8 Best Midjourney Alternatives in 2026: Features, Pricing & Comparison

How to Restore Old Photos: AI Tools, Tips & Best Methods

Pixelcut AI Review 2026: Features, Pricing, Pros, Cons & Alternatives

How to Apply Watermark to Photos: Methods, Tips & AI Tools

How to Remove a Background in Illustrator: 4 Easy Methods

How to Change Background Color on Instagram Story (Easy Guide)

8 Best AI Poster Generators in 2026: Create Posters Faster with AI

10 Best AI Image Enhancers in 2026: Tested & Compared

10 Best AI Image Editors in 2026: Features, Pricing & Comparison

7 Best AI Background Changer in 2026: Remove & Replace Photo Backgrounds

Luminar Neo vs Lightroom: Features, Pricing & Comparison 2026

Kittl Review 2026: Is It Worth It? Features & Pricing

How to Make a Blurry Image Clear: 5 AI & Manual Ways

How to Remove Background on iPhone: 5 Easy Methods (2026)

Photoroom Background Remover Review 2026: Features & Alternatives

How to Remove Background in Canva: A Step-by-Step Guide

How to Remove Background in GIMP: Beginner-Friendly Guide

Funny Dog Memes to Try: Doge Meaning and 10 Original Ideas

Back to School Checklist 2026: Supplies, Timeline, and Planning

Recraft AI Review 2026: Features, Pricing, Pros, Cons & Alternatives

How to Make an Image Transparent in Google Slides: Opacity & Background Removal

VanceAI Photo Enhancer Review: Features, Pricing & Alternatives in 2026

What Does Emojify Mean? Text, Photos, & Emoji Art Explained

Top 8 Online Background Removers for Ecommerce Photos (2026)

How to Remove Background in Photoshop: 7 Easy Methods

6 Best AI Image Upscalers 2026: Tools Tested & Compared

Project Indigo Review: Is It Better Than iPhone Camera?

How Big Is an 8x10 Photo? Size, Pixels & Frame Guide

How Big Is a 4x6 Photo? Dimensions, Pixels & Printing Tips

Picsart AI Review: Features, Pricing, Pros, Cons & Alternatives

Lovart AI Review: AI Design Agent Features, Pricing & Alternatives

Fotor AI Image Generator Review: Features, Pricing & Alternatives

How to Add Emoji to Photo Online for Free

Emoji Wallpaper Ideas & How to Make One Online (2026)

Minimalist Poster Design: How to Make a Clean Poster (2026)

How to Make a Custom Poster That Is Ready to Print

Instagram Image Size Guide 2026: Post, Reel, Story & Carousel Specs

LinkedIn Image Size Guide: Profile, Post & Banner Dimensions

YouTube Profile Image Size: Best Dimensions & Safe Area 2026

How to Edit Amazon Product Photos That Boost Sales Fast
Make Pixelated Photos Clearer With AI
Improve low-quality images with AI-powered enhancement tools. Create sharper photos, cleaner product visuals, and better digital content faster with Designkit.
