
How to Make a Blurry Image Clear: Methods for Every Blur Type
Learn how to make a blurry image clear with AI and manual methods. Match the fix to your blur type, then turn crisp photos into listing-ready creatives.
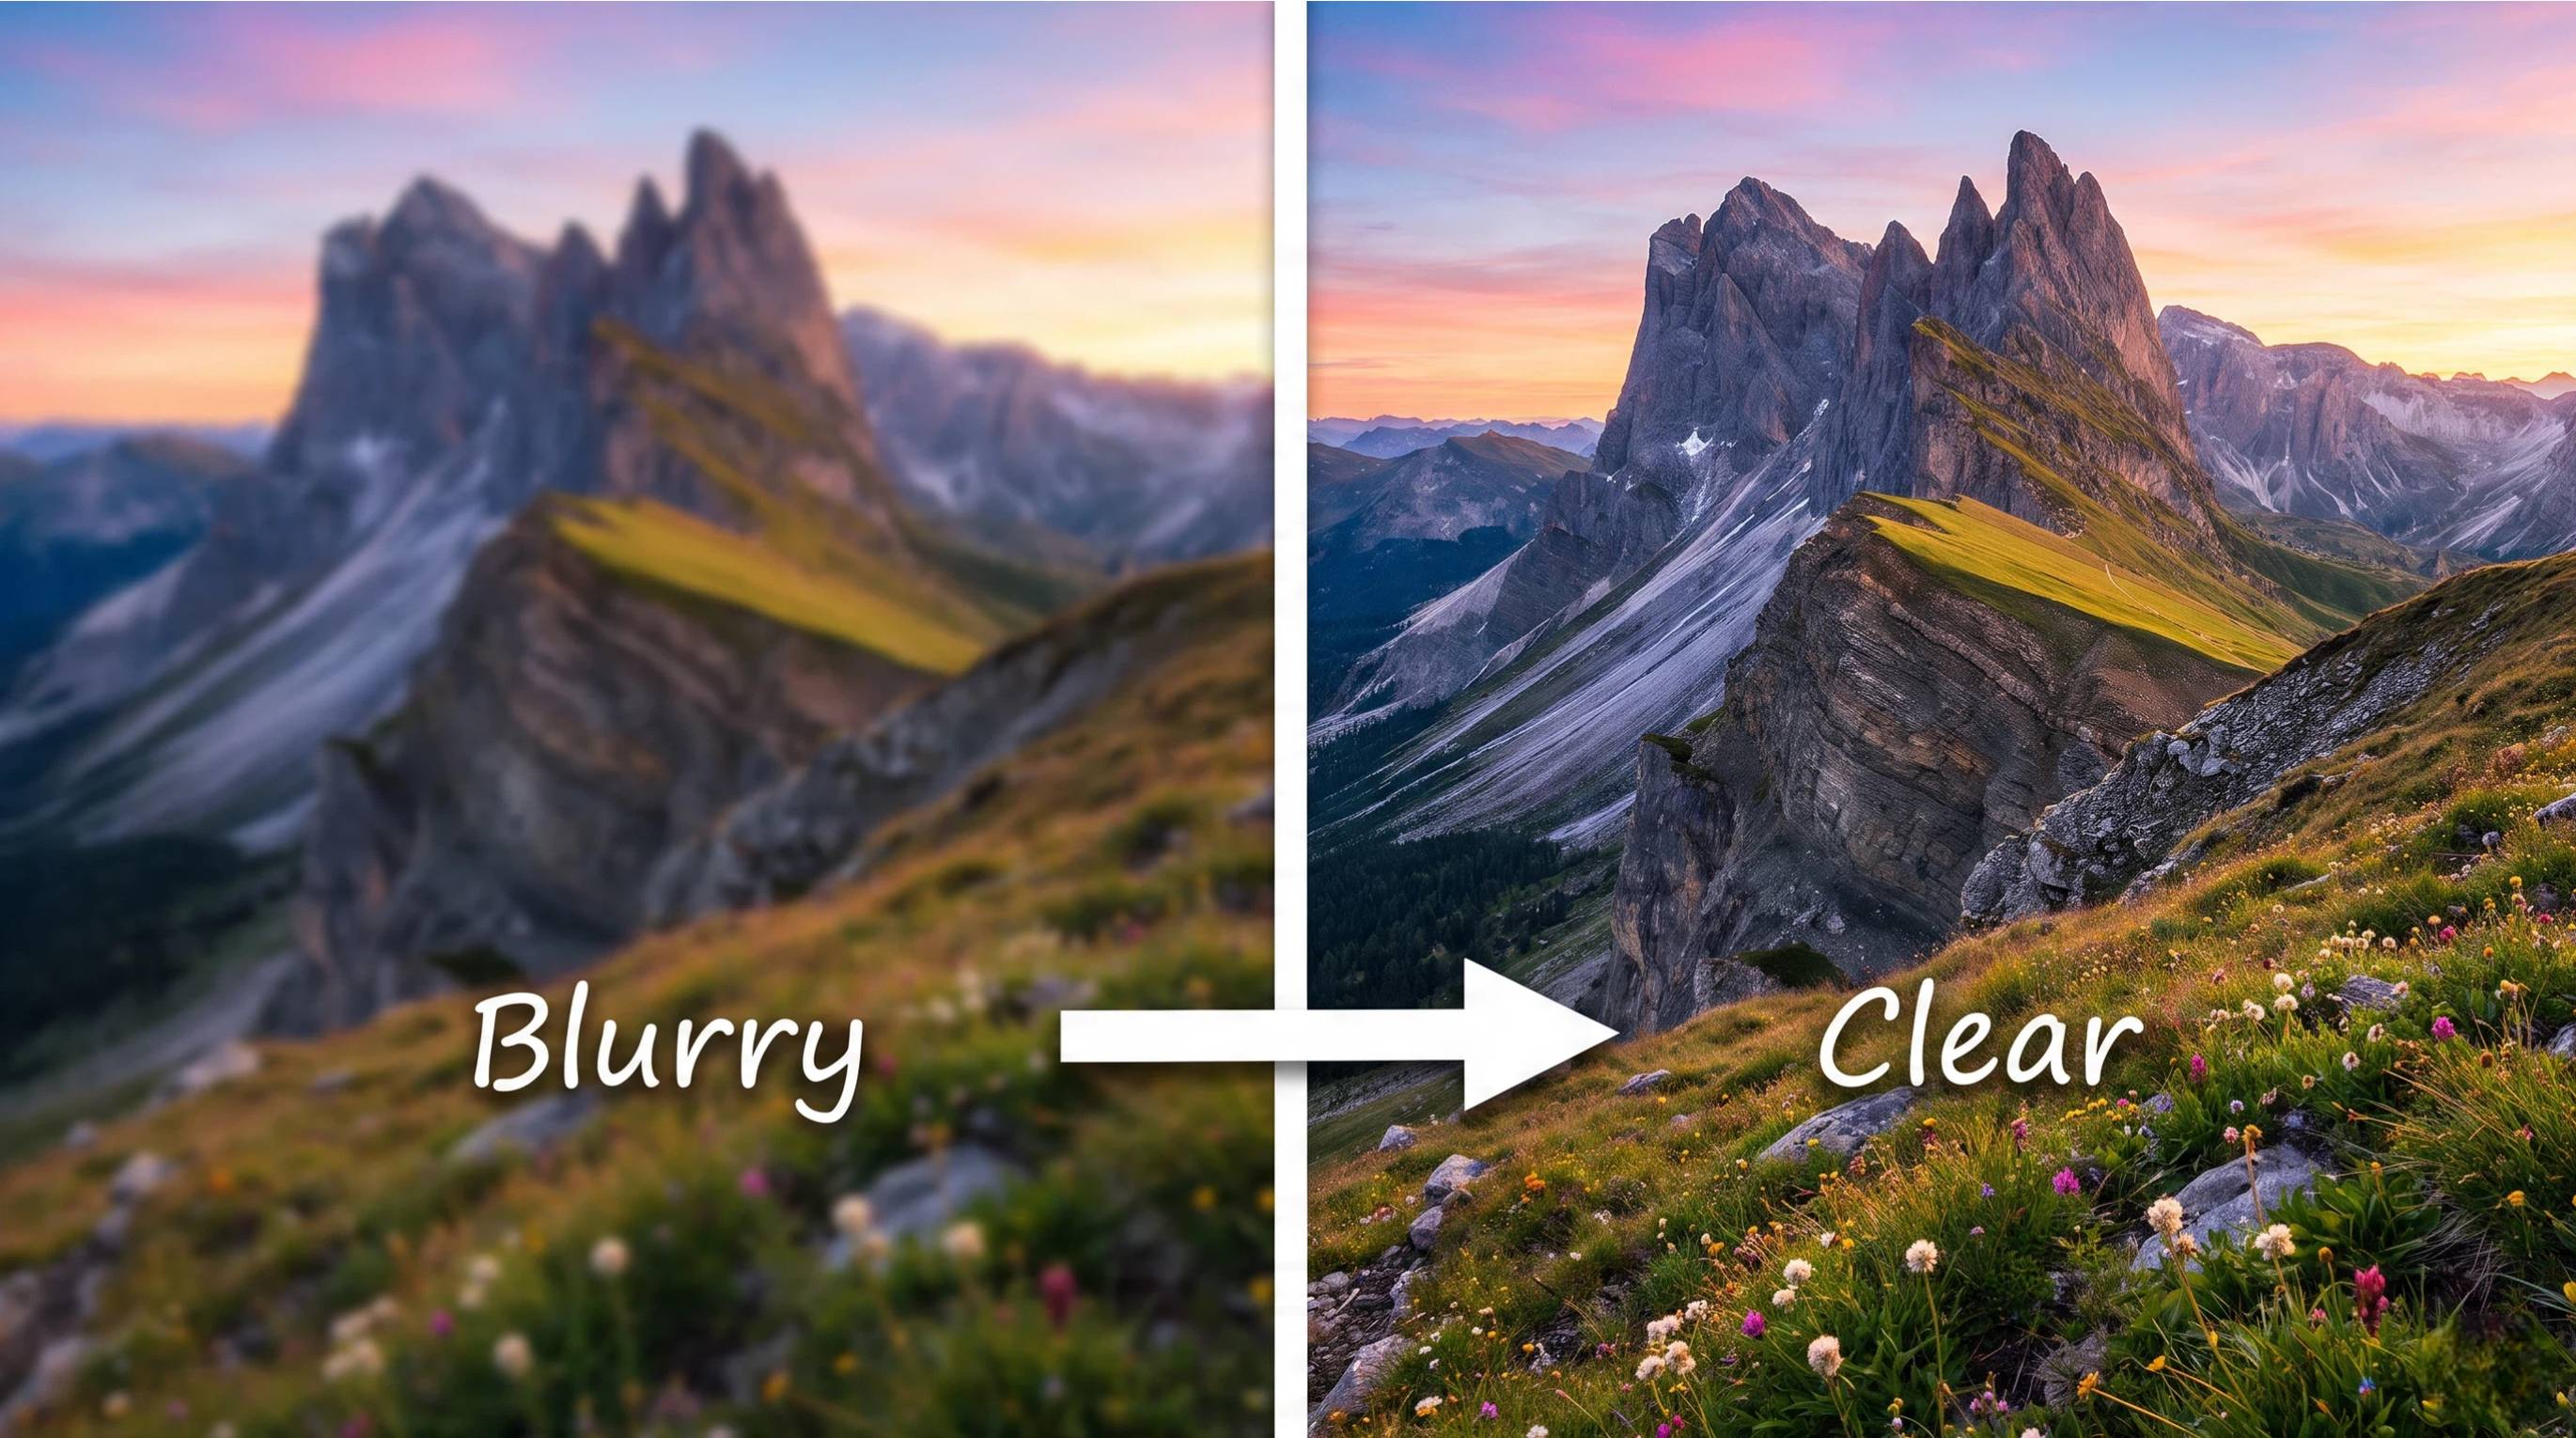
Blurry photos aren't all caused by the same problem, so a single "unblur" tool won't always deliver the best results. Motion blur, missed focus, low resolution, and compression each require a different approach to restore image quality. For businesses, sharp images are essential because clear product photos build trust and improve purchase decisions.
In this guide, you'll learn how to identify the type of blur affecting your image, compare AI-powered enhancement with Photoshop techniques, and choose the right method for your needs. You'll also discover how to prepare your restored images for websites, marketplaces, and social media.
Why Do Images Become Blurry?
Before deciding how to fix blurry image problems, it's important to understand what caused the loss of sharpness. Different types of blur require different editing techniques, so identifying the source helps you choose the most effective solution.
Motion Blur
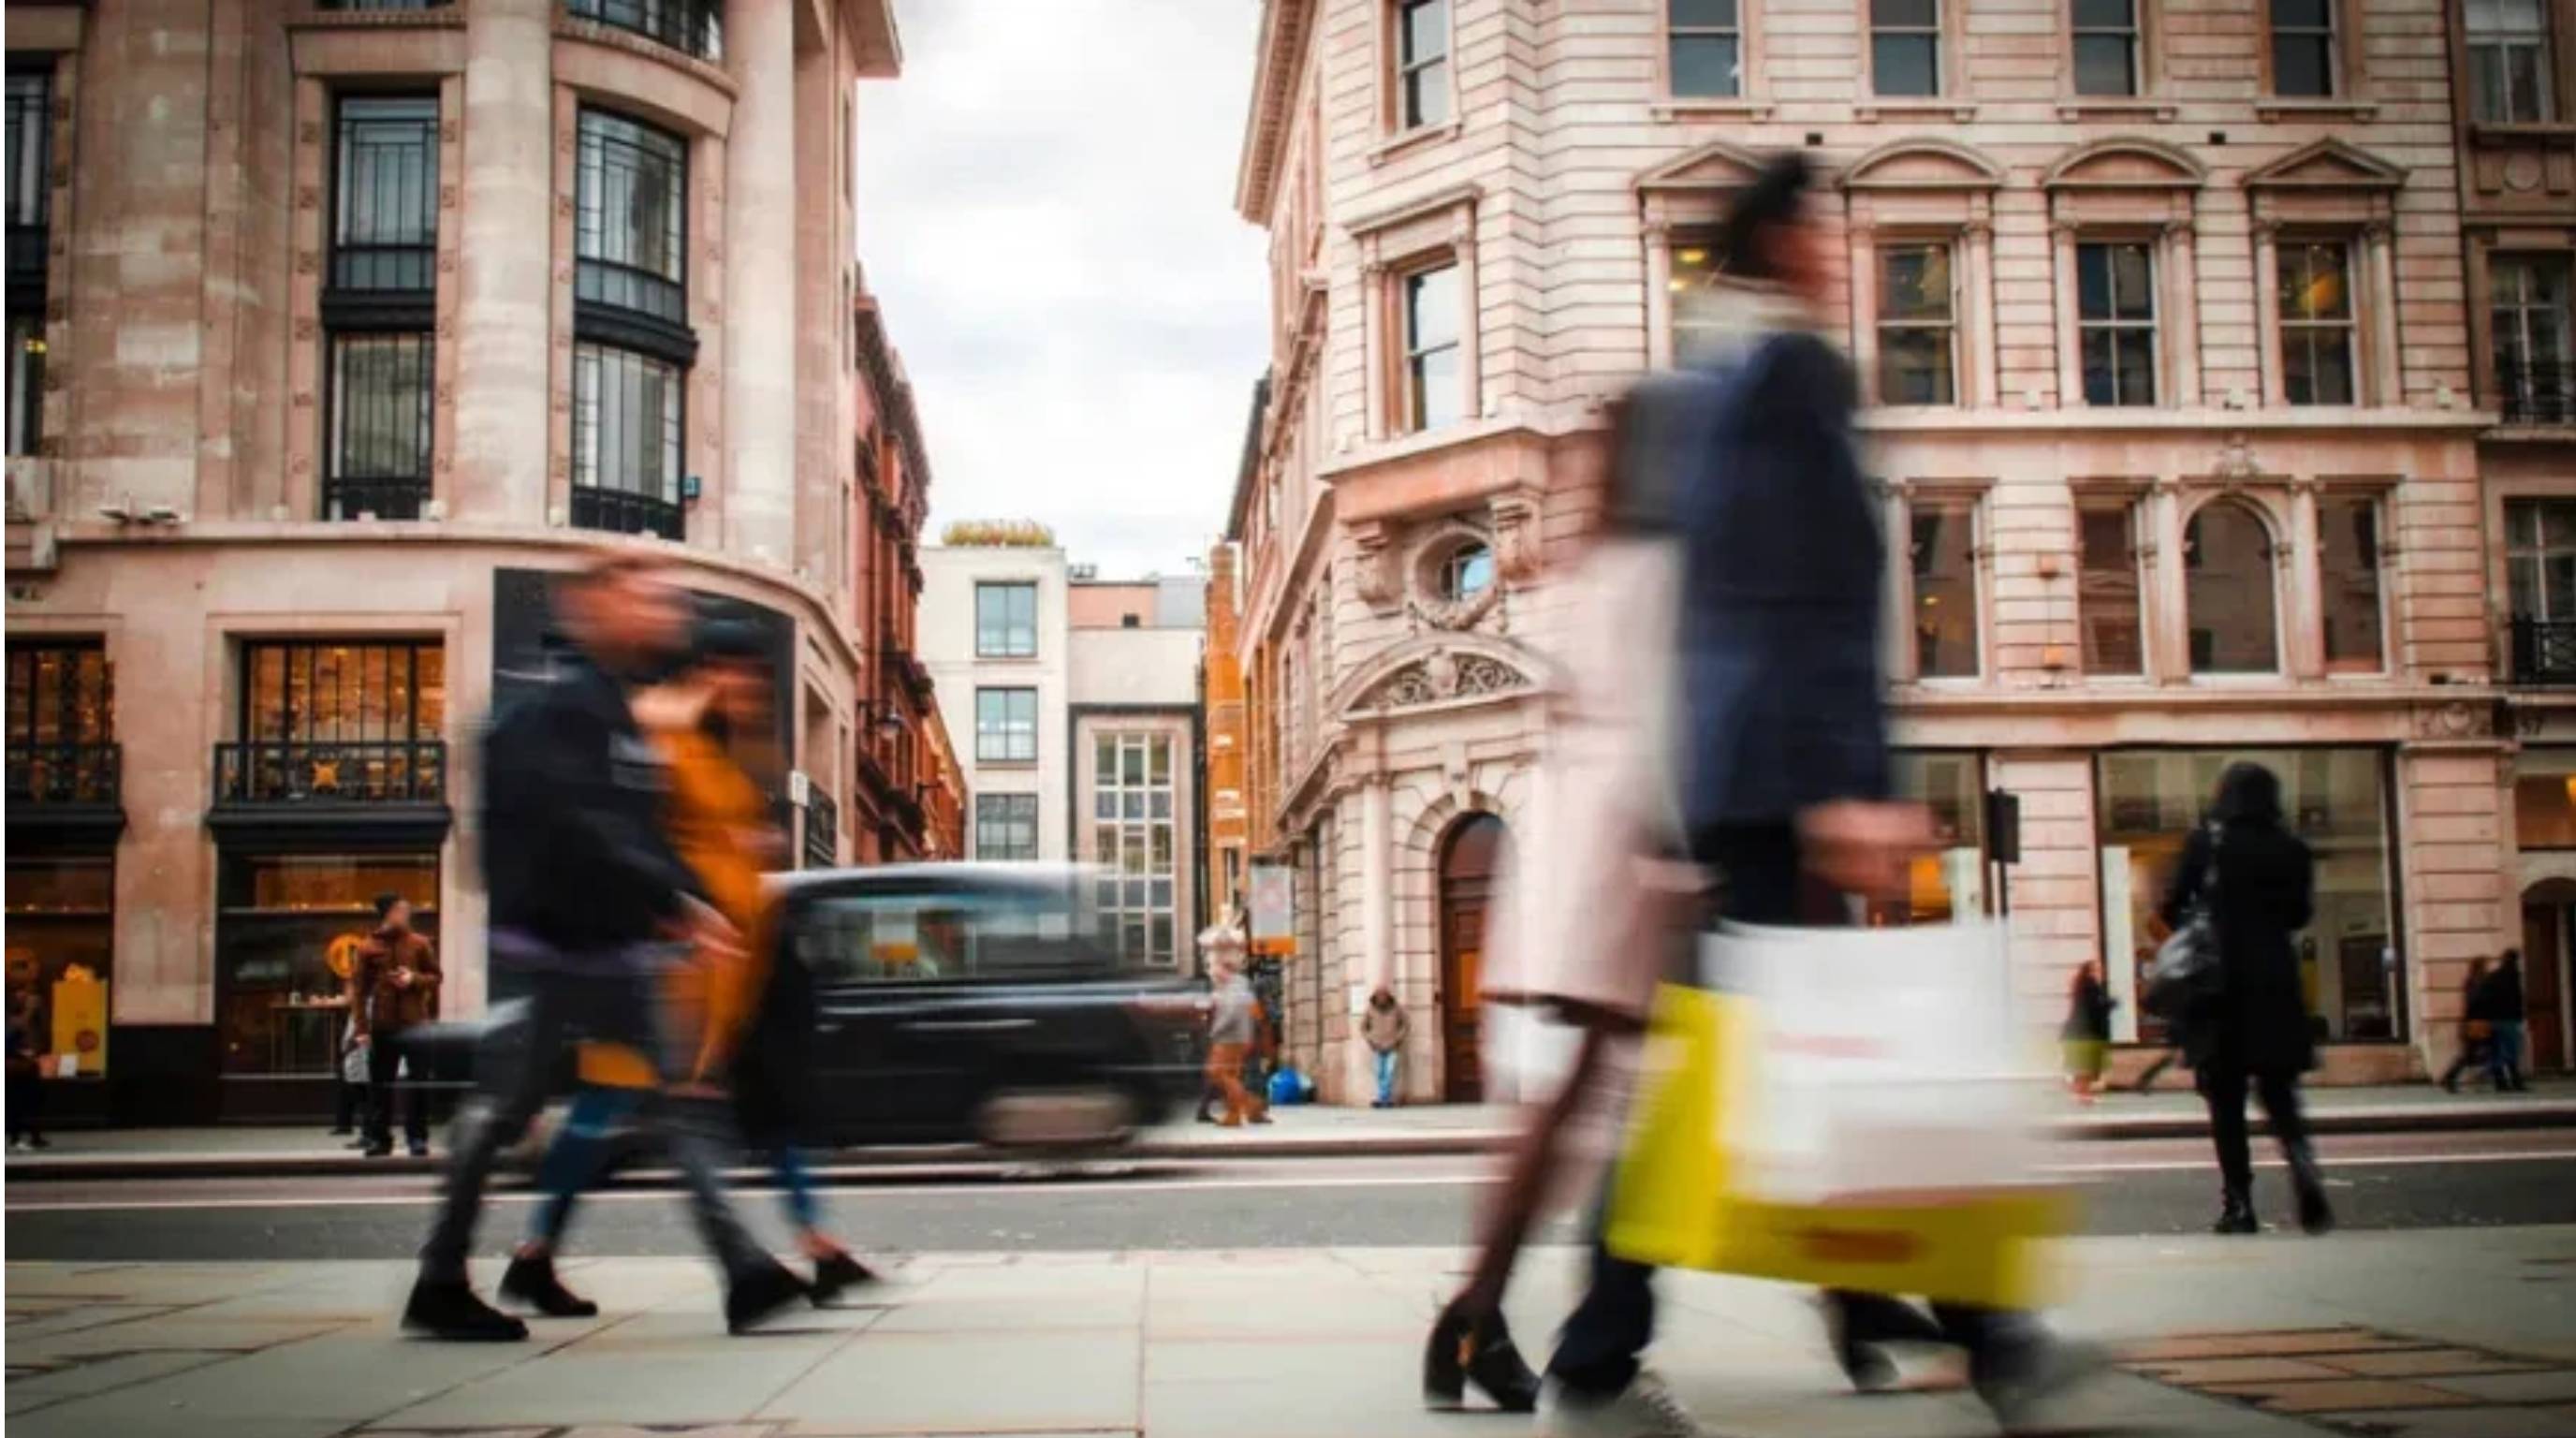
Motion blur occurs when the camera or subject moves during exposure. Instead of crisp edges, the movement creates streaks or smearing that reduce overall sharpness and detail.
Focus Problems
If the camera focuses on the wrong subject or uses a very shallow depth of field, the main subject appears soft while other areas remain sharp. This is a common reason people search for how to make a blurry picture clear.
Low Resolution
Small images often become blurry when enlarged because they don't contain enough original detail. AI enhancement can help make an image less blurry, but it cannot fully recreate information that was never captured.
Compression and Noise
Heavy JPEG compression removes fine details, while low-light photography introduces digital noise that reduces perceived sharpness. Together, these issues make images appear softer even when they are technically in focus.
Which Blur Types Can Actually Be Fixed?
Not every blurry image can be fully restored. The amount of improvement depends on the type and severity of the blur. The table below shows which problems AI and editing tools can realistically improve—and where expectations should remain realistic.
|
Blur Type |
Best Solution |
Realistic Expectation |
|---|---|---|
|
Low-resolution images |
AI image upscaling |
Can add usable detail; not print-perfect from tiny files |
|
Slightly out-of-focus photos |
AI unblur or Smart Sharpen |
Mild cases improve; severe defocus stays limited |
|
Camera shake blur |
Deblur AI or Photoshop Shake Reduction |
Often fixable when shake is moderate |
|
Soft-looking images |
Clarity, contrast, controlled sharpening |
Good gains without inventing missing detail |
|
Noisy low-light photos |
AI noise reduction + light sharpening |
Cleaner look; watch for plastic skin |
|
Severely blurred images |
AI restoration |
Limited; treat as salvage, not full recovery |
How to Make a Blurry Image Clear: 5 Effective Methods
Different types of blur require different fixes. Start with the simplest method that matches your image, then move to more advanced tools if additional detail or sharper edges are needed.
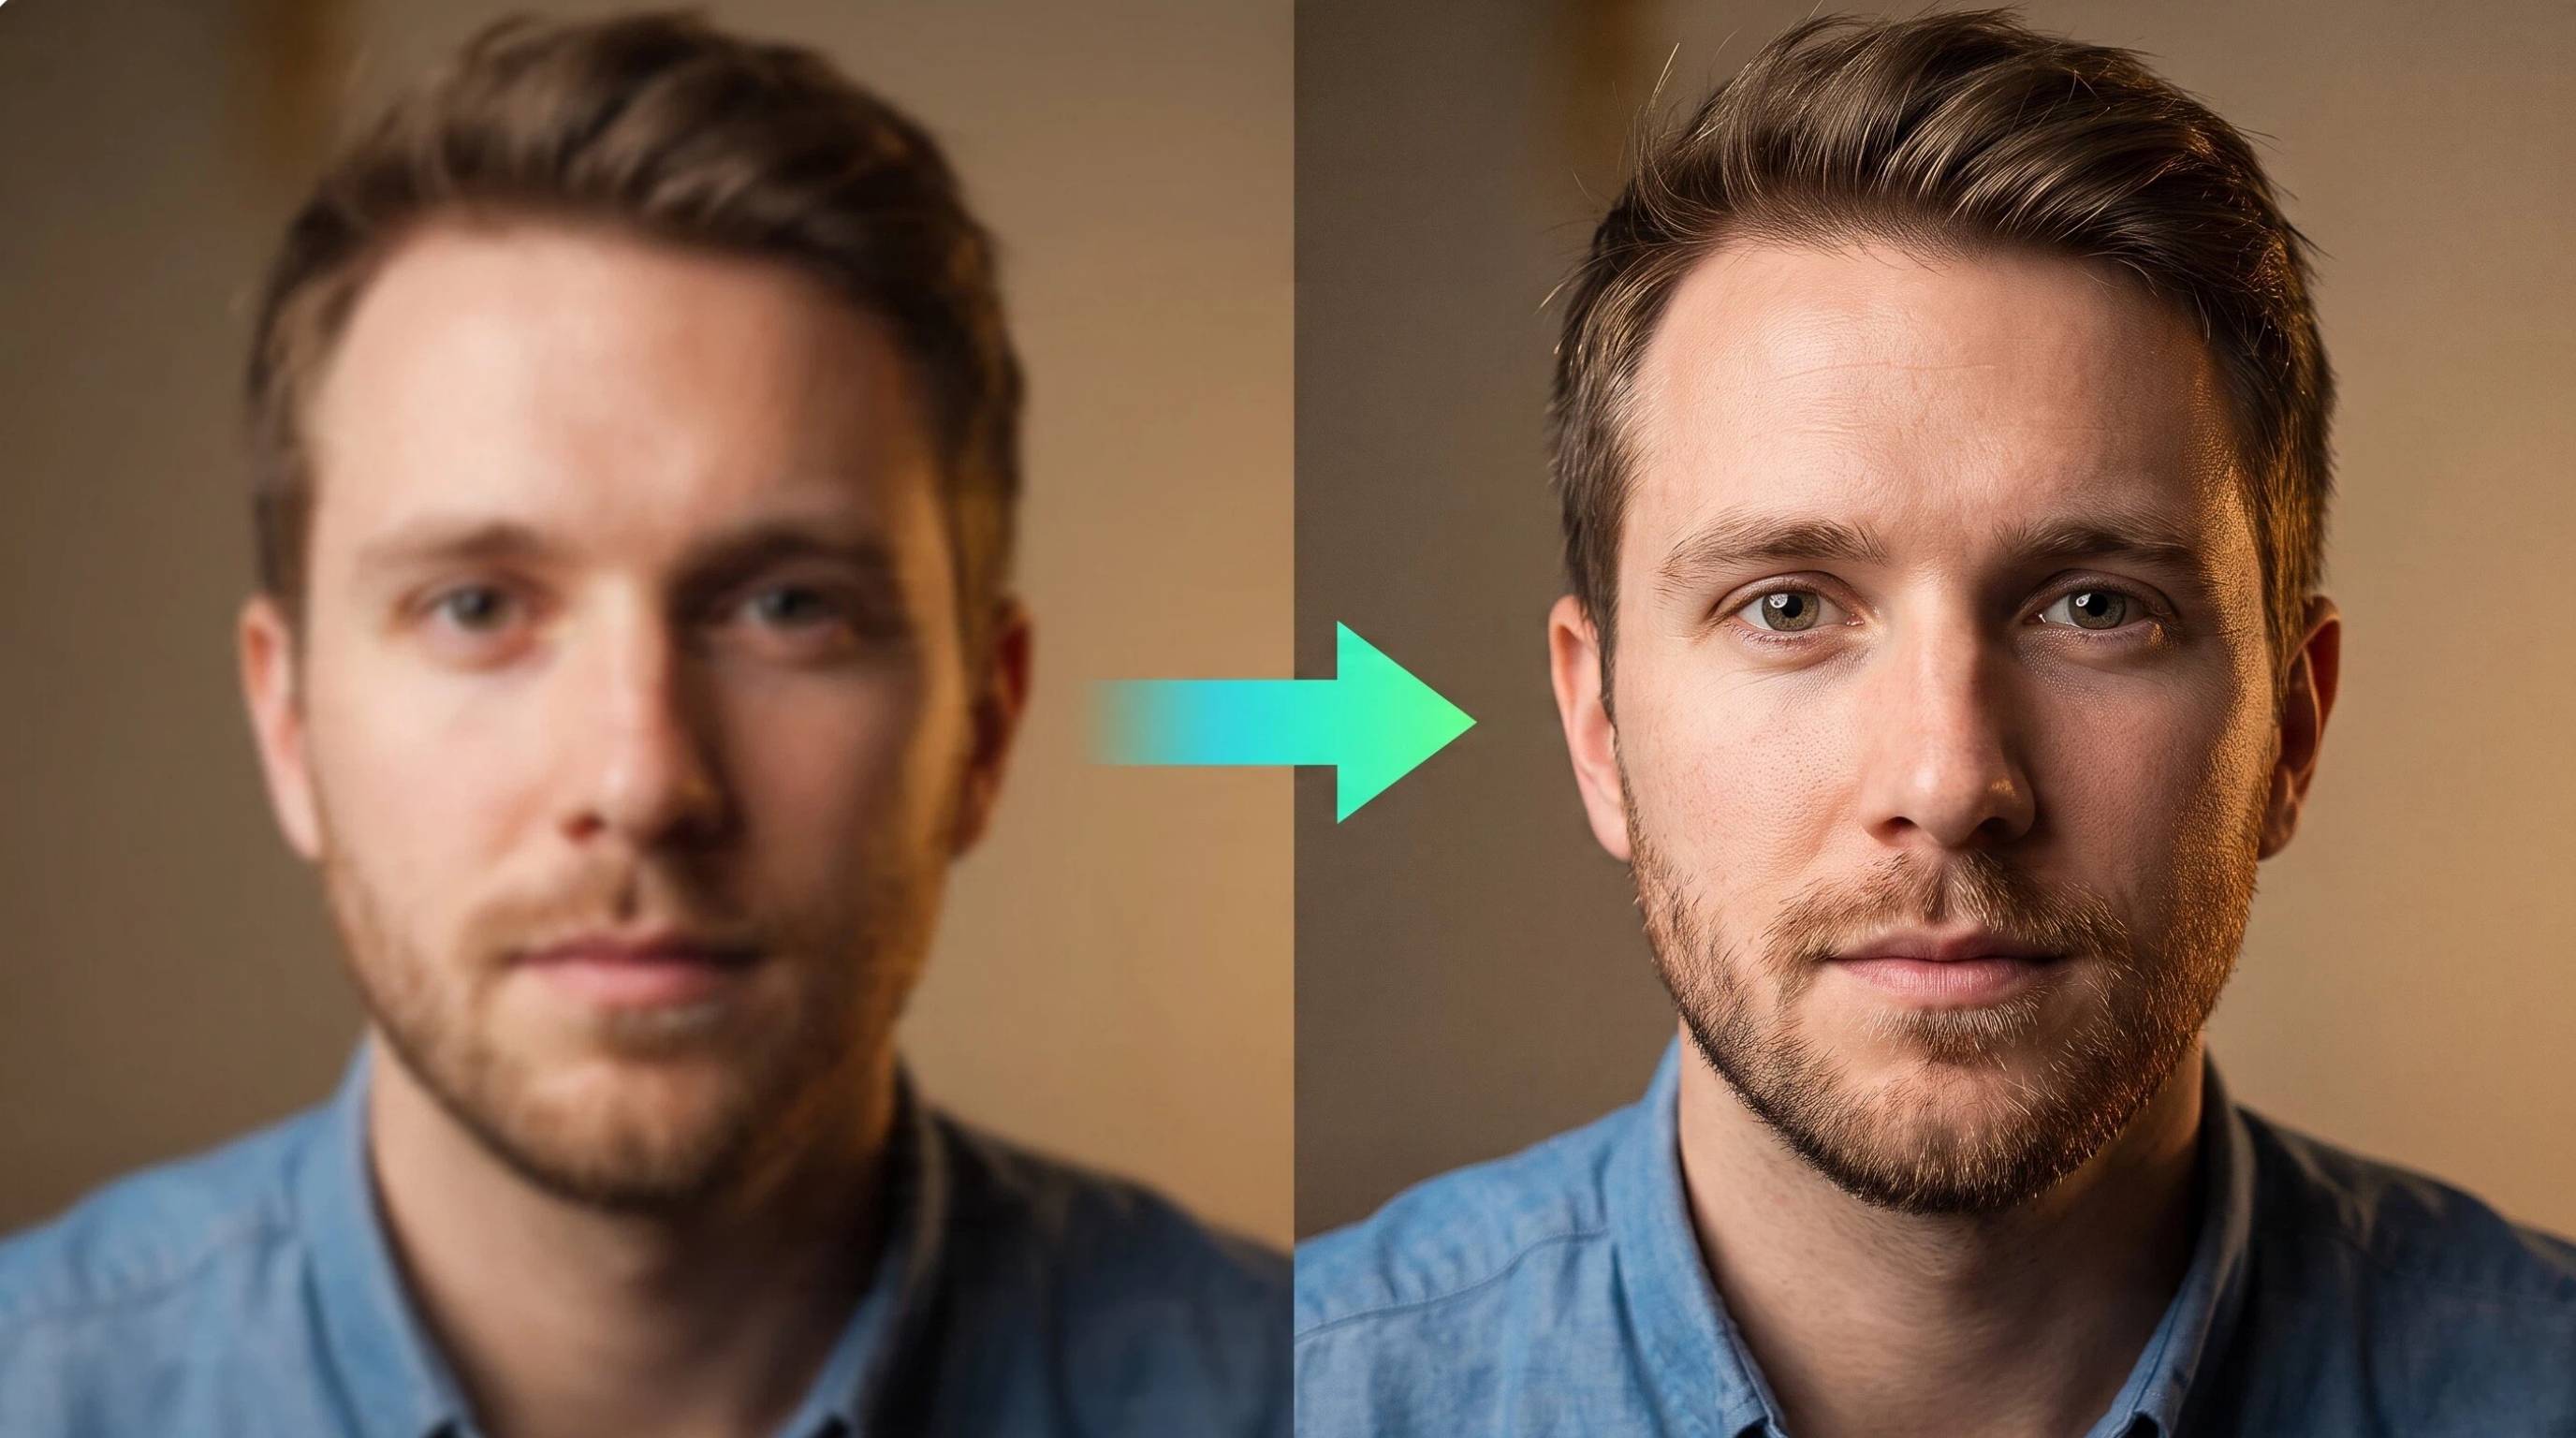
Method 1: Use an AI Unblur Tool (Fastest Option)
-
Upload your image to an AI unblur tool.
-
Select the Deblur or Enhance option.
-
Compare the before-and-after preview.
-
Best for mild motion blur and general softness.
-
It can enhance a blurry picture, but extreme blur has limited recovery.
Method 2: Use AI Image Upscaling for Low-Resolution Photos
-
Upload a small or pixelated image.
-
Start with 2× upscaling.
-
Review the result at 100% zoom.
-
Use 4× only if more resolution is needed.
-
This helps make an image more clear when the issue is low resolution rather than poor focus.
Method 3: Sharpen or Deblur in Photoshop
-
Use Smart Sharpen for mild softness.
-
Select Lens Blur or Motion Blur mode when appropriate.
-
Apply Shake Reduction for camera shake.
-
Use High Pass on a duplicate layer with Overlay or Soft Light.
-
Edit as a Smart Object whenever possible to remove blur from photo non-destructively.
Method 4: Adjust Details in Lightroom
-
Open the Detail panel.
-
Adjust Amount, Radius, Detail, and Masking.
-
Apply Denoise for noisy images before sharpening.
-
Increase sharpness gradually to avoid artifacts.
-
This workflow can effectively unblur image files with mild softness.
Method 5: Try a Free or Browser-Based Unblur Tool First
-
Upload your image to a free online tool.
-
Run the automatic enhancement or sharpening feature.
-
Compare the preview before downloading.
-
If the results remain soft, switch to AI or Photoshop.
-
A basic blur remover can quickly unblur a picture for light editing needs.
How to Improve a Blurry Image When Full Recovery Isn't Possible
When an image can't be fully restored, the goal shifts from perfect recovery to making it look cleaner and more usable. These techniques can improve the overall appearance without introducing excessive artifacts.
Crop Strategically
Crop the image to focus on the sharpest area and remove blurry edges that distract from the subject. This is often the simplest way to make a blurry picture clear enough for web or social media use.
Improve Contrast and Clarity
Increase local contrast and clarity gradually to bring out existing details. Small adjustments can enhance a blurry picture, but avoid pushing the settings too far, as this may create halos or unnatural textures.
Adjust Lighting
Lift shadow details, reduce harsh highlights, and fine-tune exposure to improve visual definition. Better lighting adjustments can make important features easier to see even when the image isn't perfectly sharp.
Replace Background
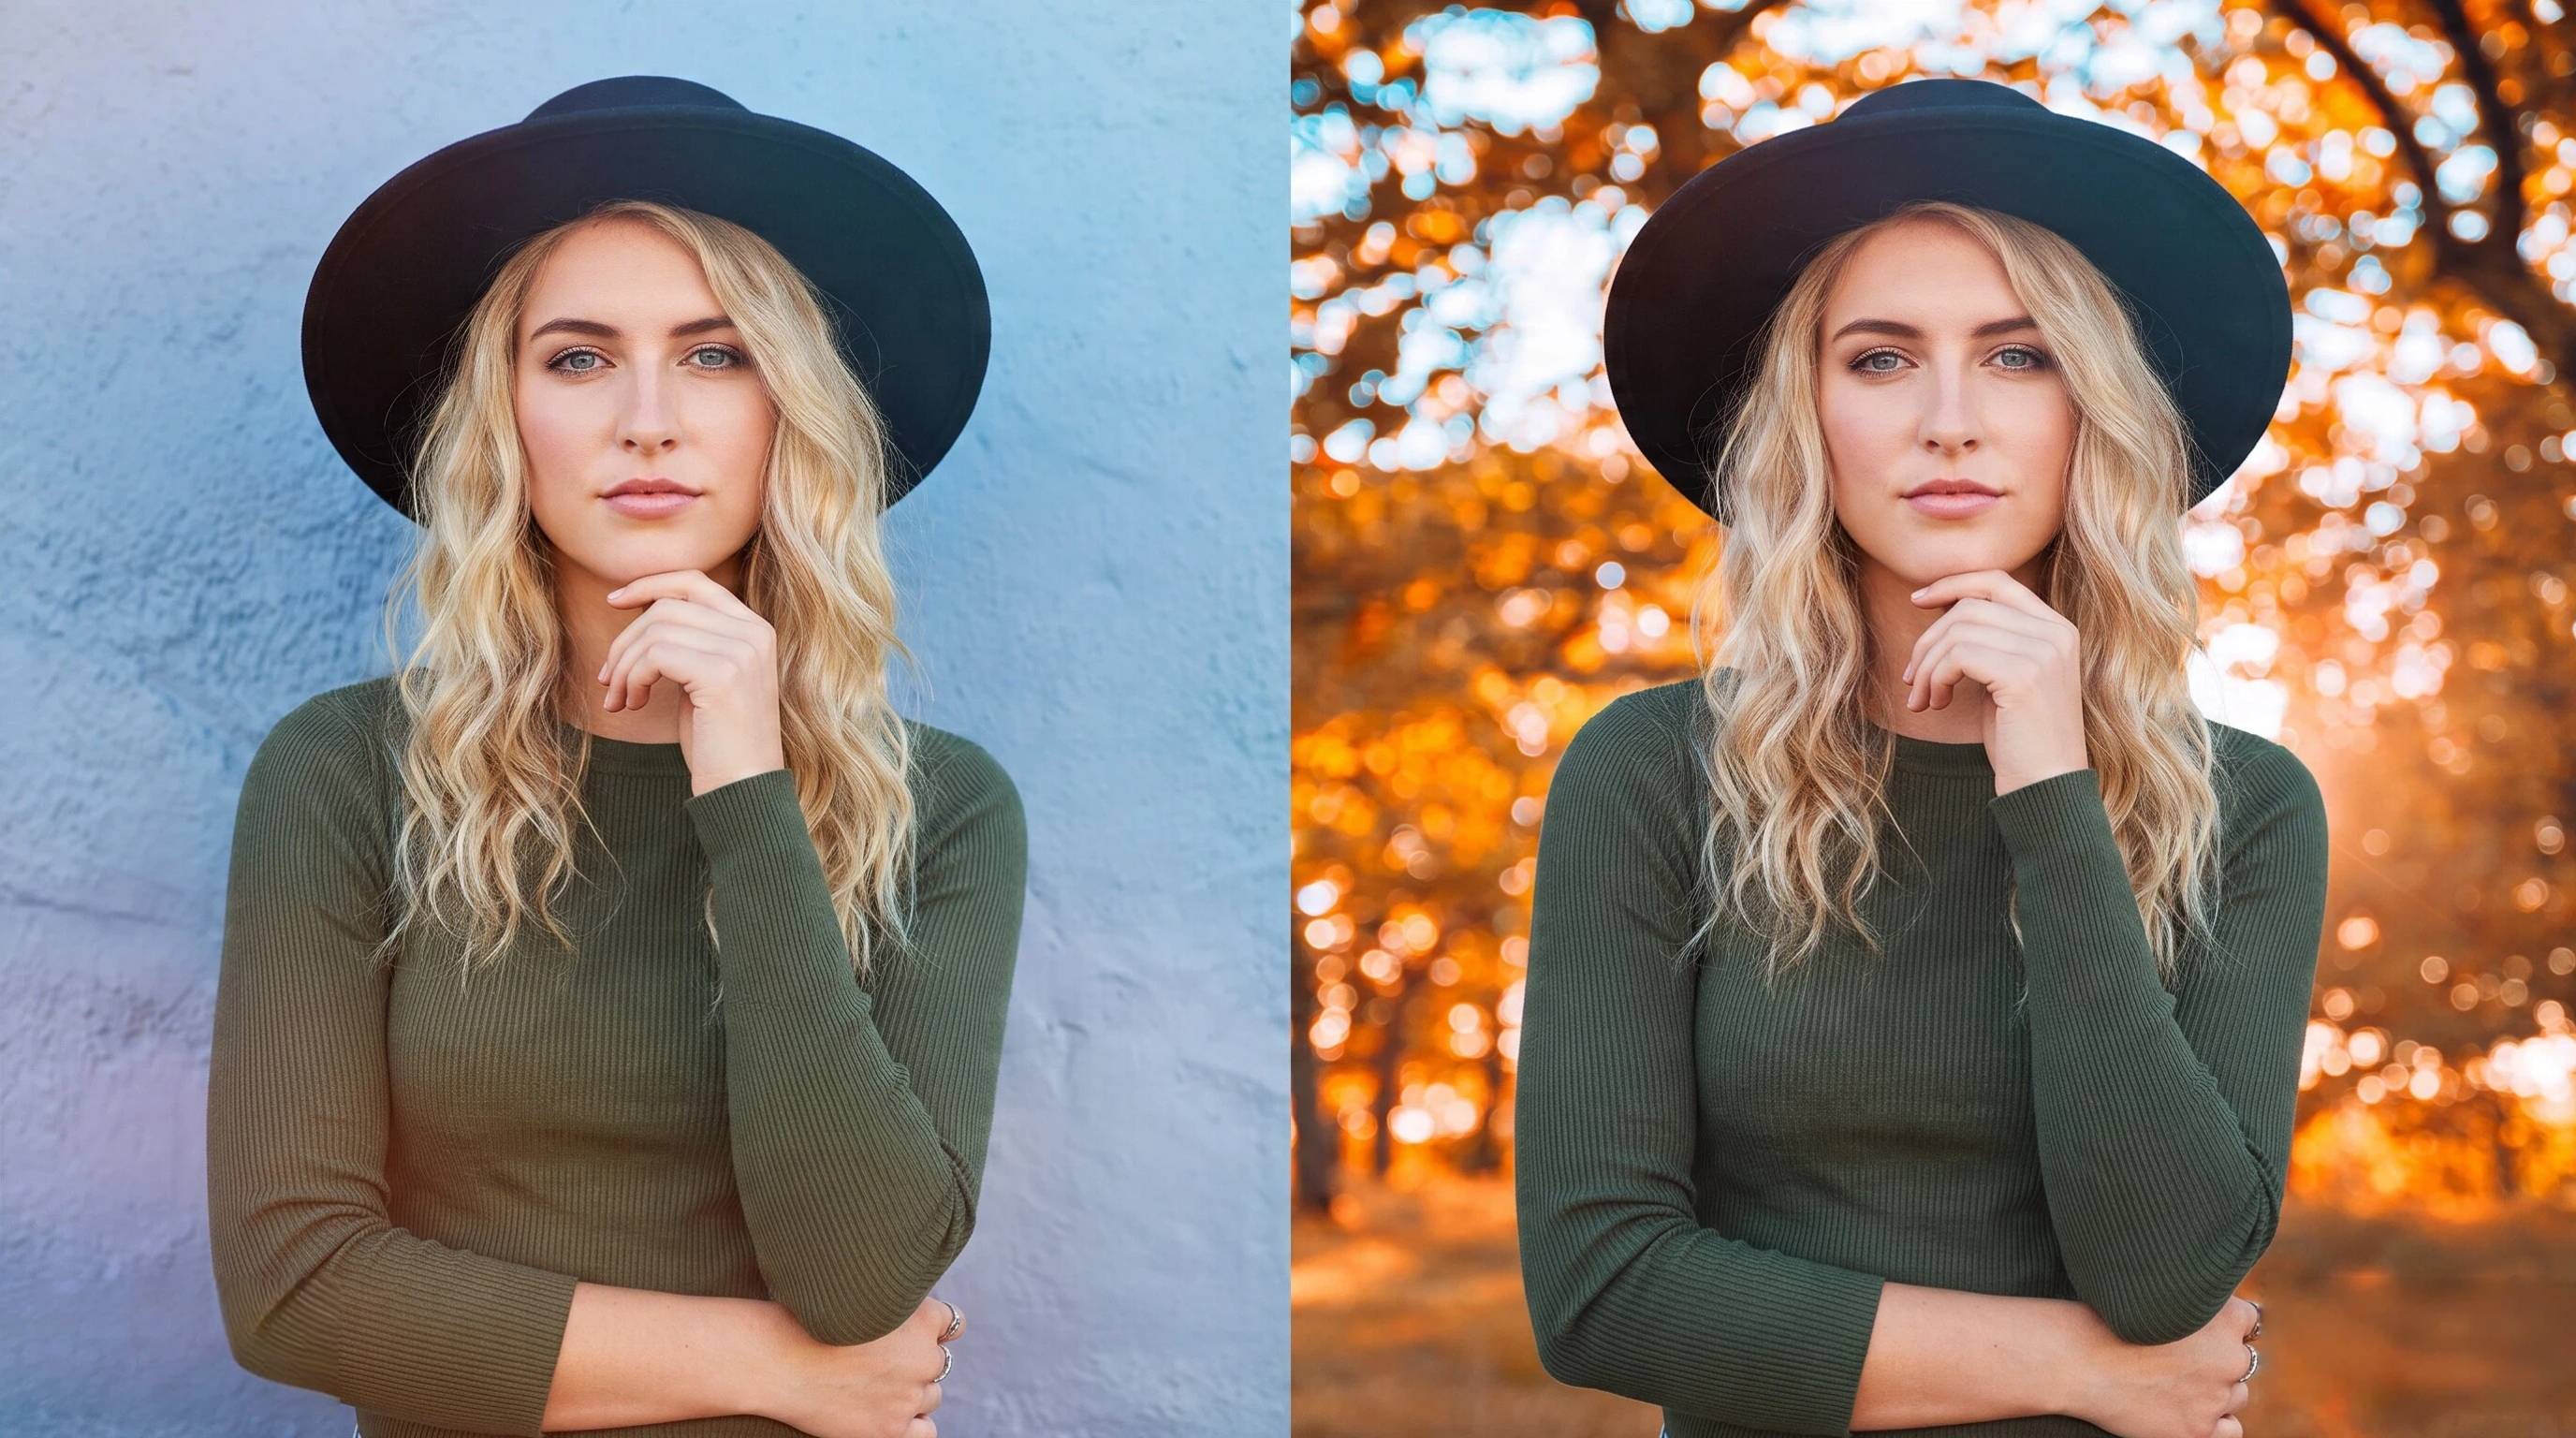
If the subject is acceptable but the background looks distracting, isolate the subject and place it on a clean background. This can make an image less blurry overall by directing attention to the sharpest part of the photo and creating a more polished final result.
Common Mistakes When Fixing Blurry Images
Using the right technique is just as important as using the right tool. Avoid these common mistakes to achieve sharper, more natural-looking results.
Using the Wrong Method for Blur Type
Different blur types require different fixes. AI upscaling works well for low-resolution images, while camera shake or focus issues often need dedicated deblurring tools. Choosing the correct method is the first step in making a photo less blurry.
Over-Sharpening Images
Applying too much sharpening can create halos, noisy textures, and unnatural edges. Increase sharpness gradually and review the image at 100% zoom to ensure it still looks realistic instead of trying to make the image not blurry with excessive effects.
Expecting AI to Recover Missing Details
AI can reconstruct and enhance existing information, but it cannot perfectly restore details that were never captured. Set realistic expectations when using an AI unblur image tool, especially with severely blurred or heavily compressed photos.
Ignoring Lighting and Composition
A blurry image often benefits from better exposure, contrast, or cropping in addition to sharpening. Improving these elements can make the subject appear clearer and produce better results when enhancing blurry photos.
Editing Every Image Manually When Batch Tools Fit
If you're working with large image collections, editing every file individually wastes time. Batch processing tools can apply consistent enhancements across multiple photos, making them a better choice for ecommerce catalogs, marketing assets, and large photo libraries.
Turn Clear Photos Into Listing Creatives with Designkit
Restoring clarity is only the first step. Once your image is sharp enough to use, Designkit helps ecommerce teams transform simple product photos into listing-ready visuals with enhanced backgrounds, lifestyle scenes, and multi-channel creative assets. It focuses on the production workflow after image improvement, not on replacing dedicated deblur tools or acting as a specialist solution for severe motion blur and extreme camera shake recovery.
How to Fix Blurry Images and Turn Them into Listing Creatives
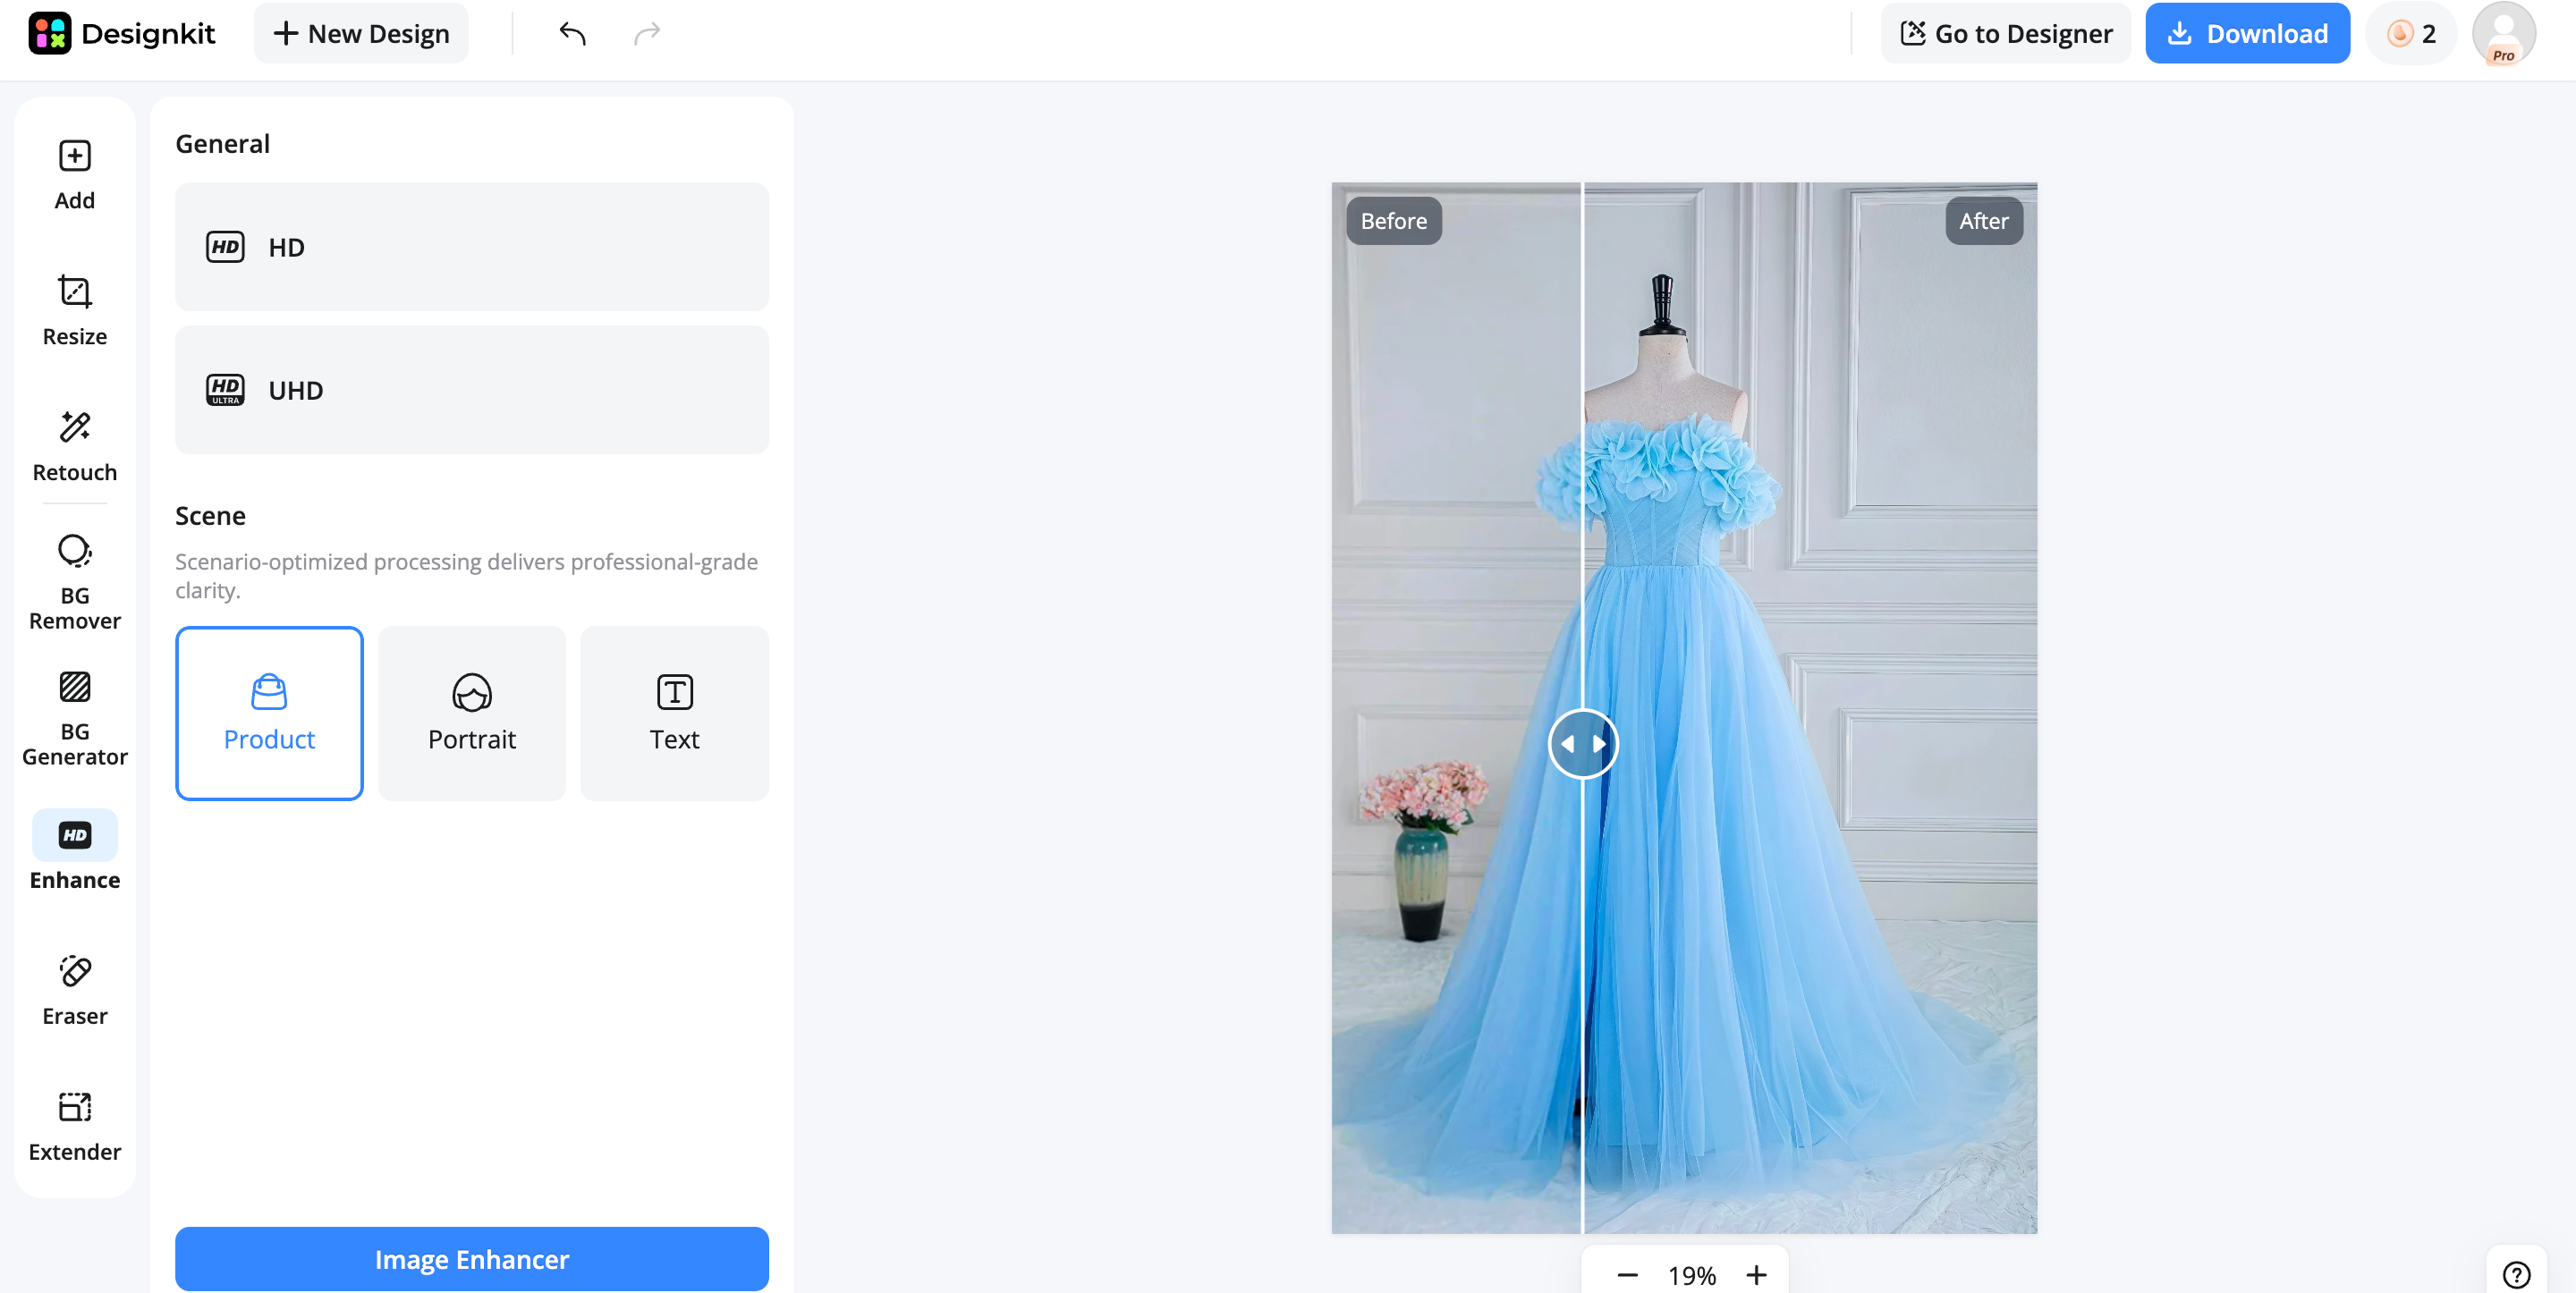
Step 1: Upload and Enhance Your Images
Upload product photos; run AI enhance/light cleanup for soft or low-detail shots, or import files already fixed in Photoshop or an unblur tool.
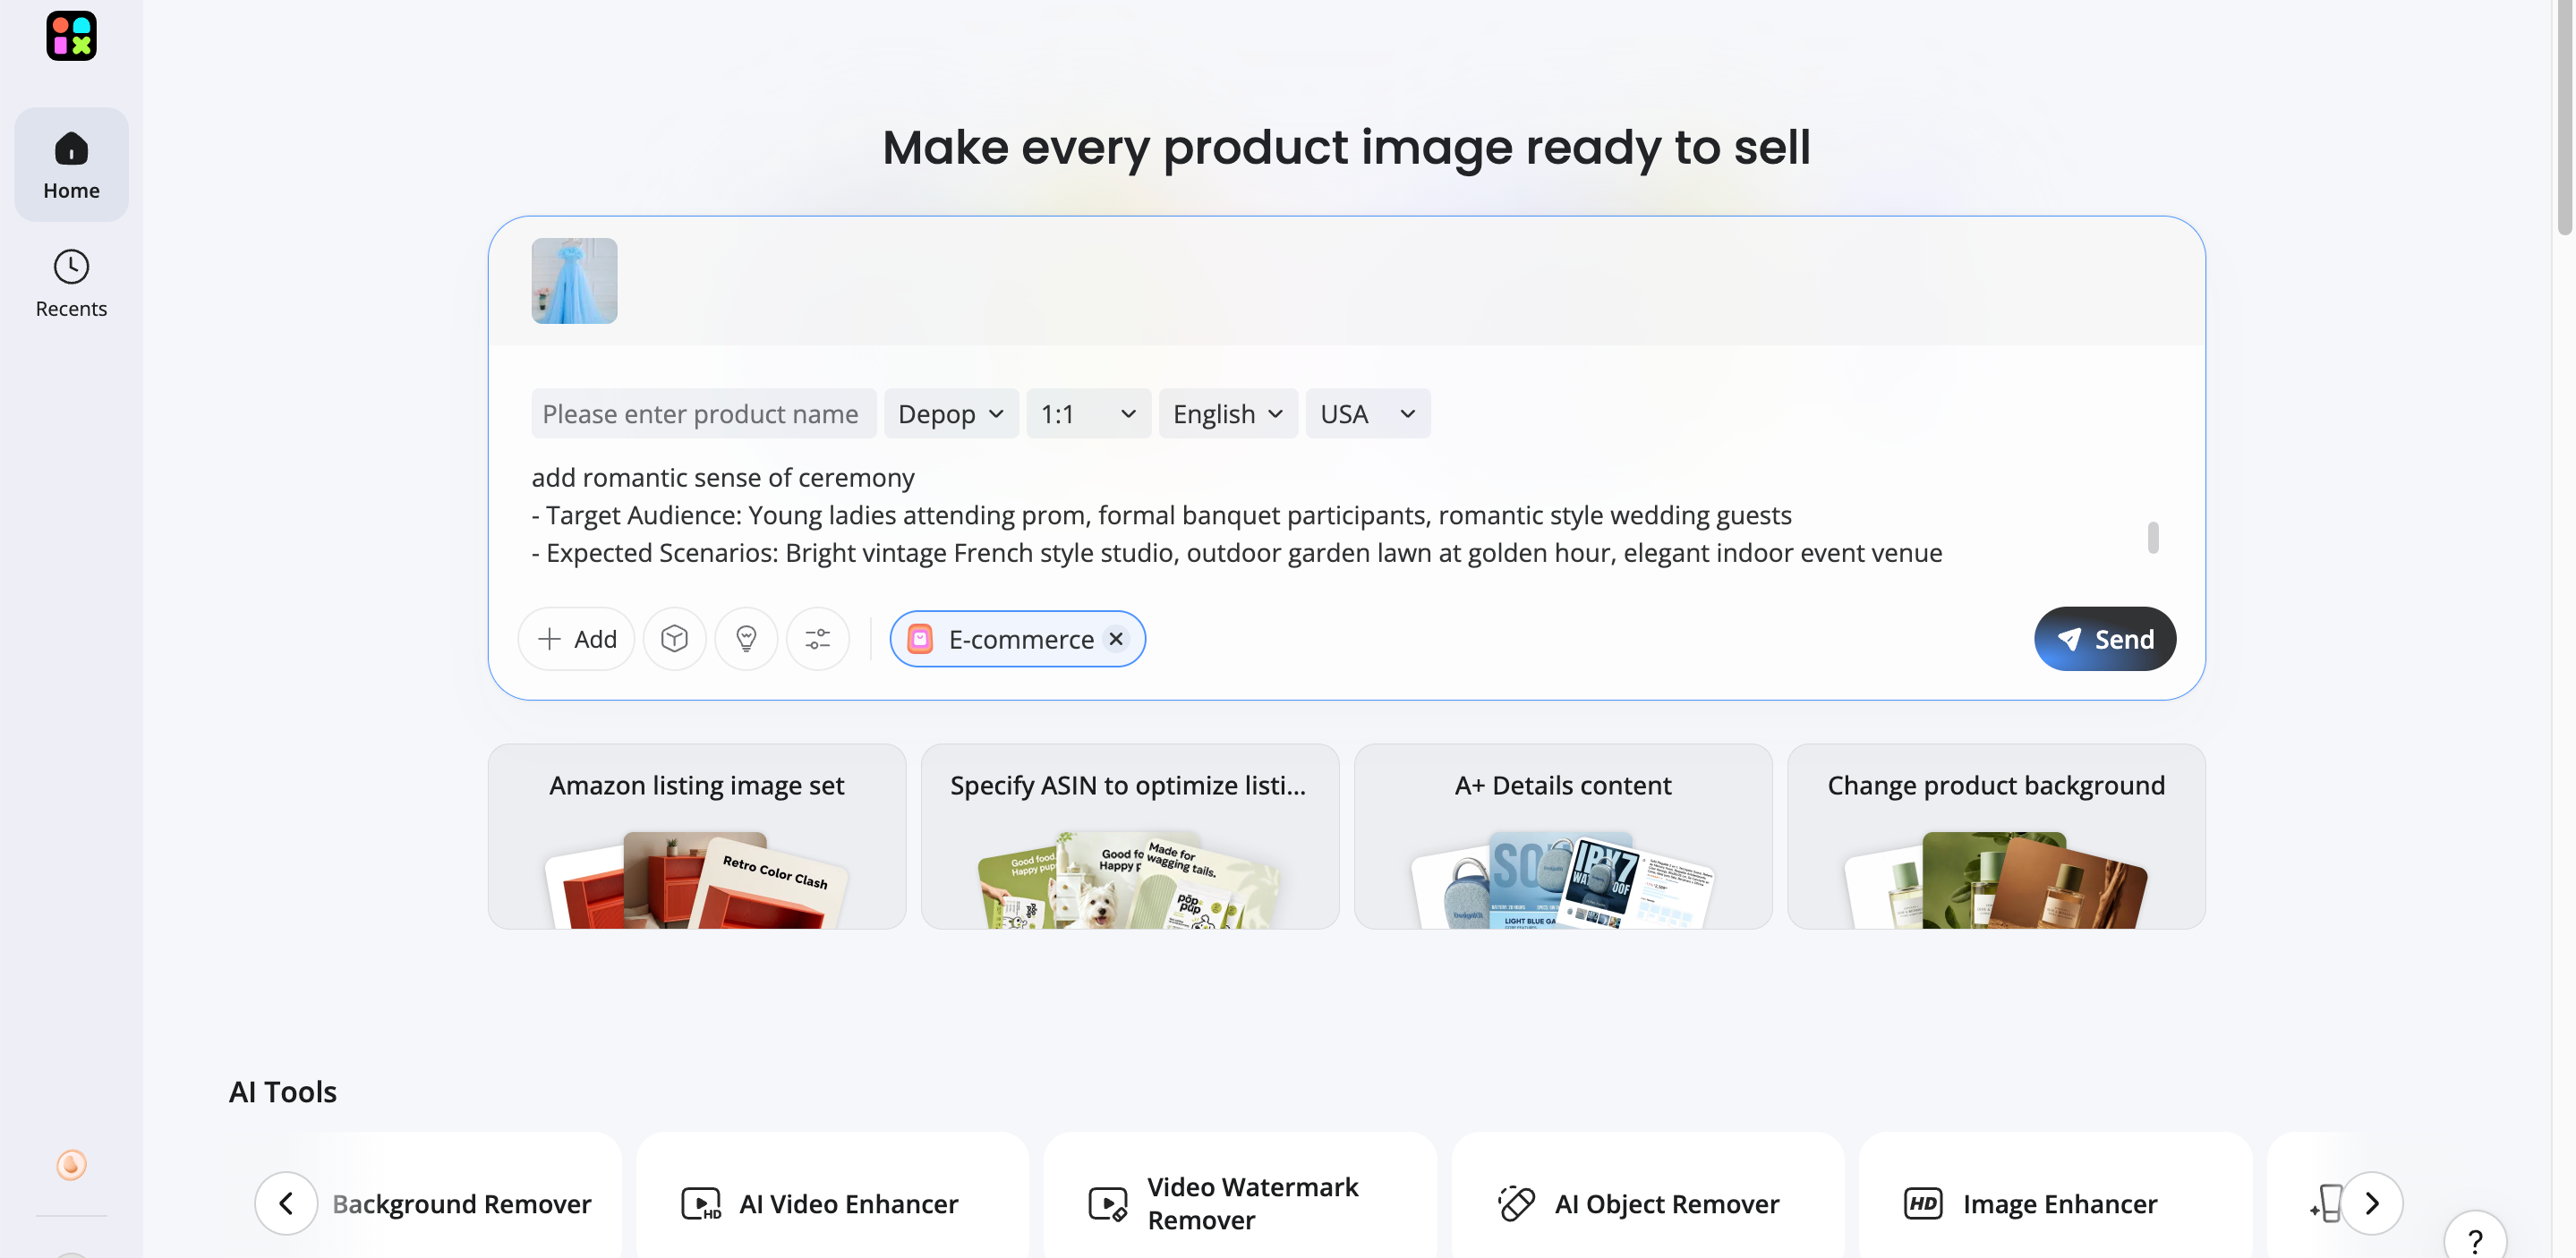
Step 2: Turn Improved Images into Marketing-Ready Assets
Replace or generate backgrounds, retouch product detail, and size for Amazon, Shopify, TikTok, or Instagram.
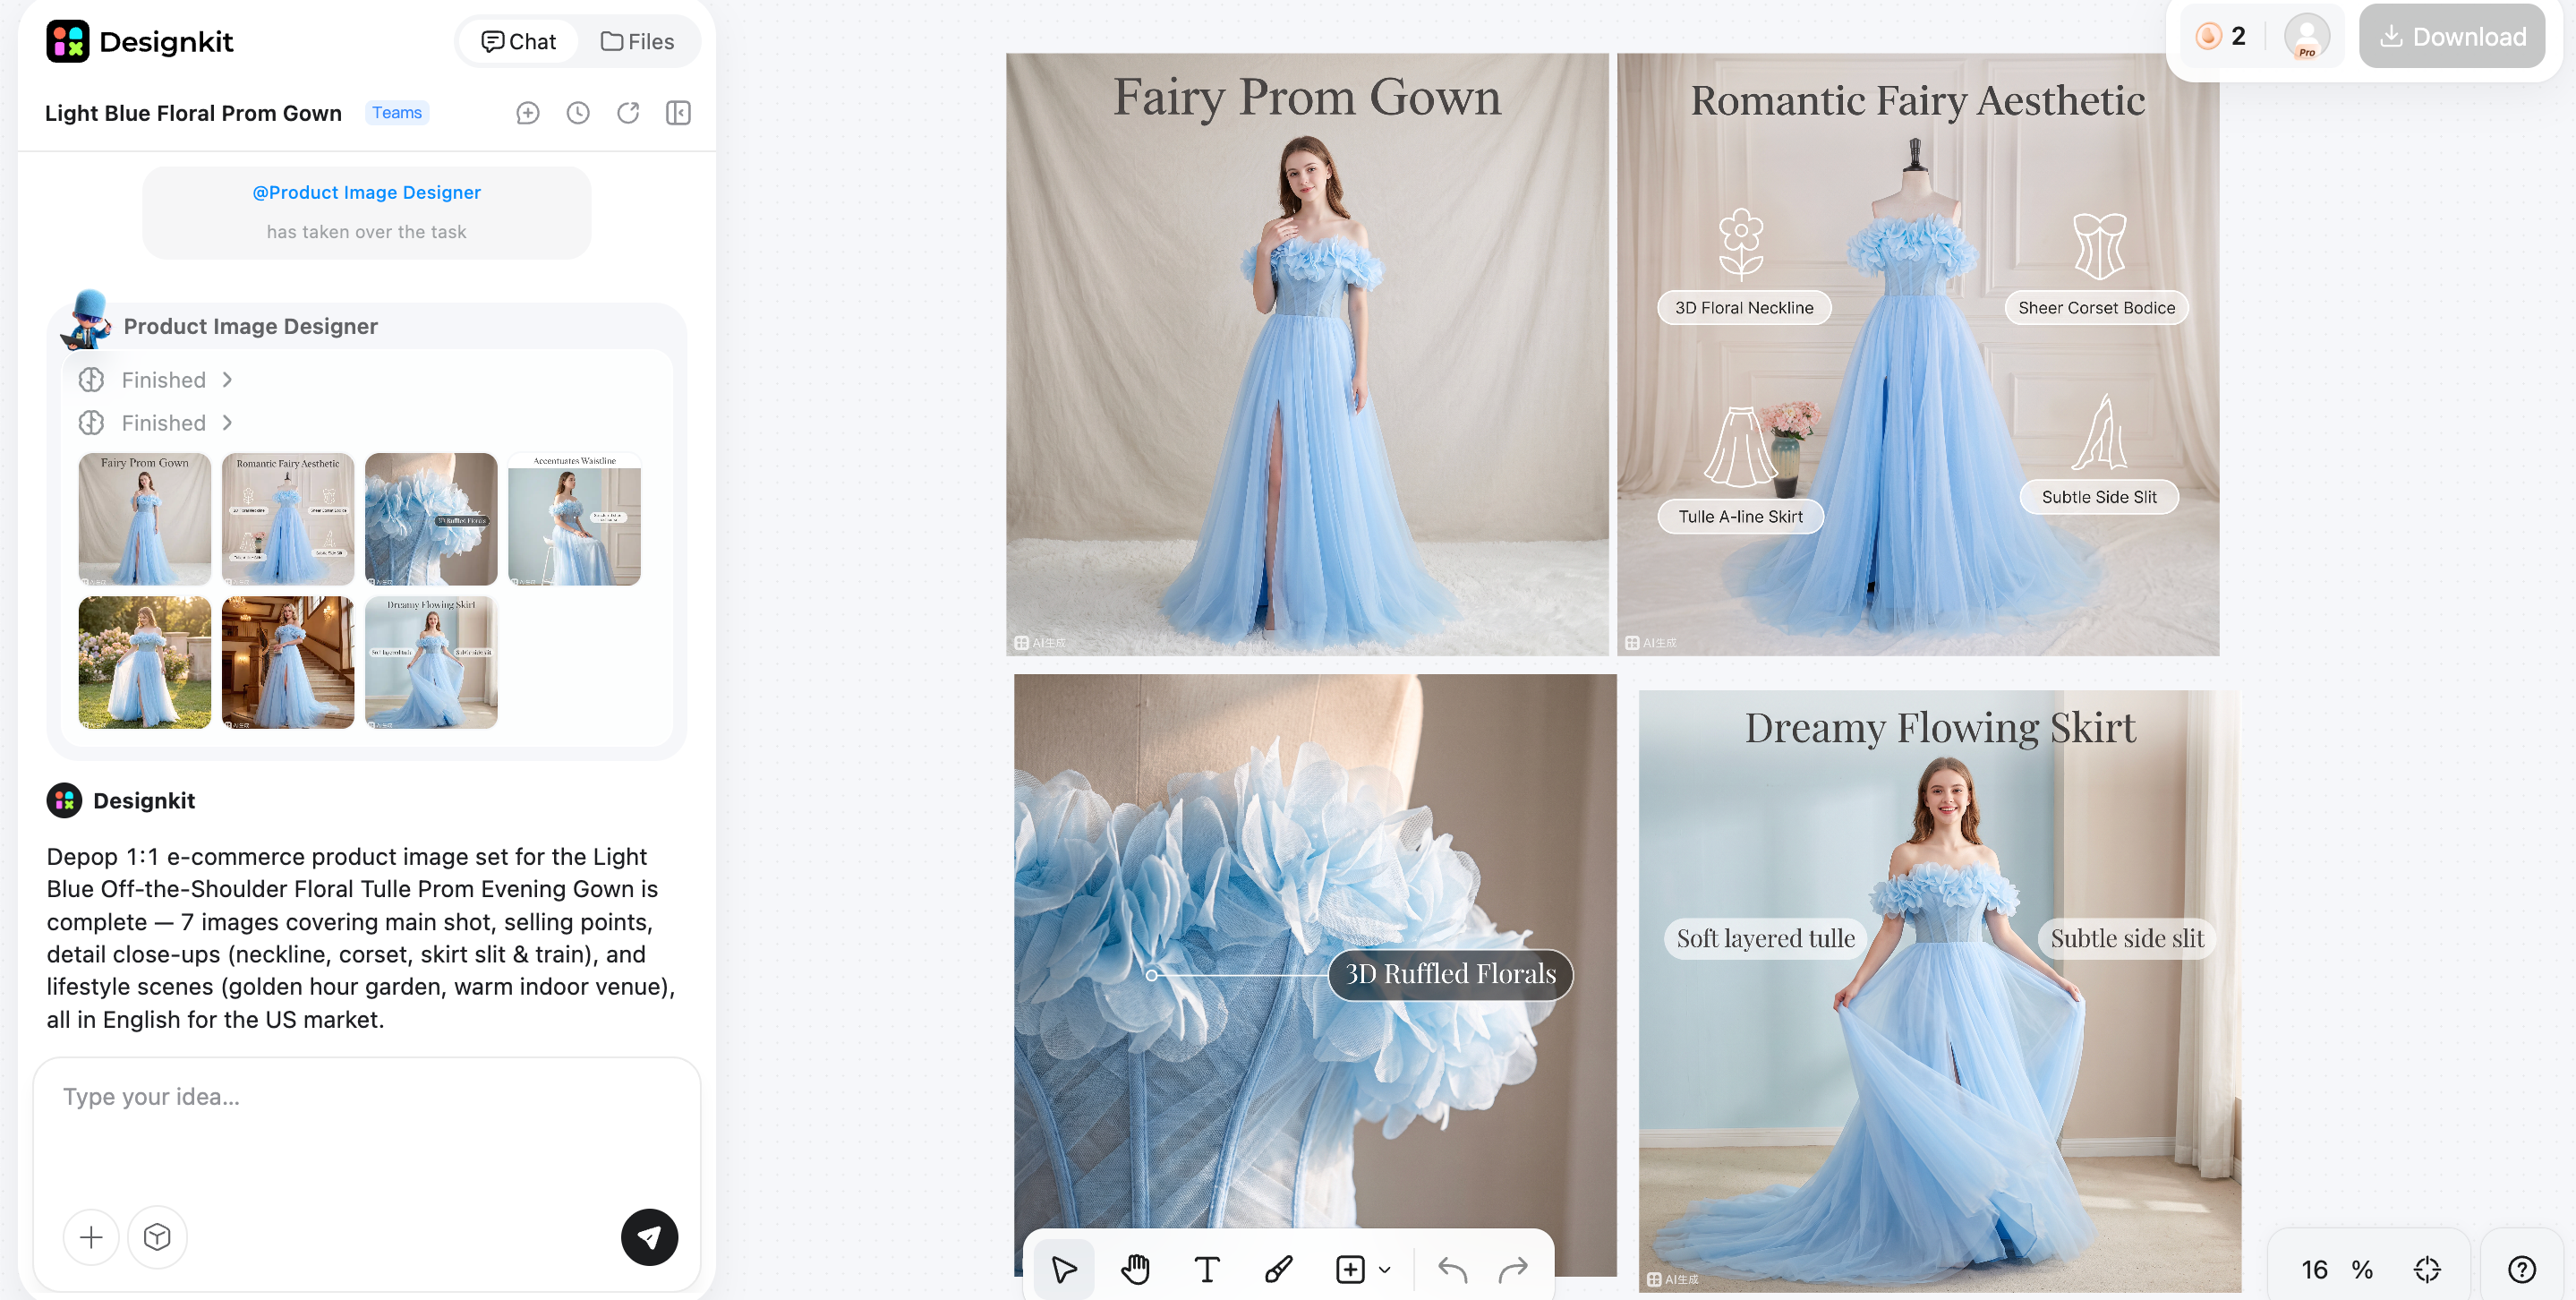
Step 3: Preview, Export, and Publish
Export listing images and social creatives; use batch flow when you have many SKUs.
Turn Clear Photos Into Listing Creatives
Key Features of Designkit to Fix Blurred Images
-
AI Photo Enhancer: Improve clarity and sharpness for product photos before creating marketing assets.
-
AI Retouch: Clean up imperfections and refine fine details for a more polished appearance.
-
AI Image Editor: Fine-tune colors, lighting, cropping, and other adjustments from one workspace.
-
Background Generation & Replacement: Create lifestyle scenes or replace plain backgrounds with AI-generated environments.
-
Batch Processing: Enhance and edit multiple product images simultaneously for faster ecommerce workflows.
Conclusion
The best way to fix a blurry image starts with identifying the type of blur you're dealing with. Motion blur, focus issues, low resolution, and compression each require a different solution. In this guide, we covered five effective methods: AI unblur tools, AI image upscaling, Photoshop sharpening, Lightroom adjustments, and free browser-based tools. While these methods can significantly improve many images, no tool can fully restore details that were never captured. Once your photo is clear enough to use, Designkit helps transform it into marketplace-ready creatives with enhanced backgrounds, lifestyle scenes, and multi-channel exports, making it ideal for post-fix ecommerce production.
Frequently Asked Questions
Can a blurry image actually be made clear?
What's the difference between sharpening and unblurring?
Sharpening increases edge contrast to make an image appear crisper, while unblurring attempts to reverse softness caused by motion, focus errors, or low resolution using AI or specialized algorithms. After improving image quality, Designkit helps prepare the final visuals with new backgrounds, lifestyle scenes, and exports for ecommerce and social platforms.
How do I unblur a photo for free?
Many free online tools and desktop applications offer basic AI enhancement or sharpening for mild blur. They work well for quick edits but may struggle with severe motion blur or heavy compression. If the restored image is intended for online selling, Designkit can quickly transform it into polished marketplace and promotional creatives.
Why does my photo still look blurry after sharpening?
Sharpening only enhances existing edges. It can't recreate details that were never captured. If the image suffers from severe camera shake, missed focus, or heavy compression, sharpening may even emphasize flaws. Once you've achieved the best possible result, Designkit helps maximize its value by creating professional ecommerce-ready visuals.
How do I fix multiple blurry images at once?
If you're working with a large photo library, use software that supports batch AI enhancement or synchronized editing to save time and maintain consistent quality. After improving multiple images, Designkit makes it easy to batch-generate product backgrounds, lifestyle scenes, and channel-specific assets for ecommerce workflows.
Can AI improve a low-resolution blurry image?
Yes. AI can upscale low-resolution images, reconstruct textures, and improve perceived sharpness, especially when the blur is caused by limited image size rather than focus issues. After enhancement, Designkit helps convert those improved images into marketplace-ready listings, advertisements, and social media creatives from one workflow.
What is the best AI unblur tool?
There isn't one best AI unblur tool for every situation. Some are better at restoring photographs, while others focus on creative enhancement or low-resolution images. Choose the tool that matches your blur type first, then use Designkit when you're ready to build polished ecommerce assets from your corrected photos.
How can I make blurry product photos clearer?
Start by identifying whether the blur comes from camera movement, poor focus, or low resolution, then choose the appropriate AI or editing method. Avoid excessive sharpening, which can create unnatural results. Once the product photo is clear enough, Designkit helps generate clean backgrounds, lifestyle scenes, and marketplace-ready images for publishing.
You May Also Like

7 Best Remove.bg Alternatives in 2026: Free & Paid Tools

Instagram Carousel: What It Is, How to Post & Create One

Nano Banana Prompts: 20+ Examples for Better AI Images

Ideogram AI Review 2026: Features, Pricing & Alternatives

Free Mac Photo Editor: 5 Tools Compared for Mac Users

How to Crop a Photo Into a Circle Online (Keep Quality)

How to Make an Image Transparent Online (AI Guide)

Pixlr Background Remover Review 2026: Features, Pricing & Alternatives

How to Fix Overexposed Photos: Recover Highlights Fast

OpenArt AI Review 2026: Features, Pricing & Alternatives

Best AI Headshot Generator: 9 Tools Compared for 2026

Best Stencil Maker Tools 2026: Turn Photos Into Stencils

Pixelbin Watermark Remover Review: Image & Video Results Tested

How to Make a Sticker on iPhone: Easy Step by Step Guide

Best AI Logo Generator in 2026: 10 Tools Compared

How to Turn a Photo Into a Cartoon: A Beginner-Friendly Guide

Landscape vs Portrait: Key Differences & Best Uses in 2026

How to Remove Watermark From Photo: AI, Photoshop & More

How to Fix Pixelated Photos: Photoshop, AI Tools & Tips

Bing Image Creator: How It Works, Features, Uses & Alternatives

How to Remove People from Photos with AI: A Step-by-Step Guide

How to Increase Image Resolution: AI, Photoshop & PPI

How to Add Text to a Photo: 8 Tips for Better Results

How to Fix Grainy Photos: Easy Ways to Clear Images

Creative Profile Picture Ideas for Every Style and Platform

Evoto AI Review 2026: Features, Pricing, Pros & Cons

Pixlr Photo Editor Review: Features, Pricing & Alternatives

Best AI Image Extender Tools in 2026: Expand Photos with AI

How to Make a Collage on iPhone: Easy Guide for 2026

How to Sharpen an Image in Photoshop (Smart Sharpen and Unsharp Mask)

Best Image Background Remover Tools in 2026: AI Tools Compared

How to Make Transparent Background in Paint: Step-by-Step Guide

How to Resize an Image: Best Methods, Tools & Quality Tips

Best AI Image Generator Tools in 2026: Top AI Platforms Compared

Remove.bg Review 2026: Features, Pricing & Is It Worth It?

Luminar Neo Photo Editor Review 2026: AI Features, Price & Pros

How to Post Multiple Photos on Instagram (2026 Guide)

25 Facebook Cover Photo Ideas for Personal & Business Pages

What Is a PFP? Meaning, Examples & How to Create One

Can You Edit an Instagram Post After Posting?

11 Best Canva Alternatives in 2026 for AI Design & Marketing

8 Best Midjourney Alternatives in 2026: Features, Pricing & Comparison

How to Restore Old Photos: AI Tools, Tips & Best Methods

Pixelcut AI Review 2026: Features, Pricing, Pros, Cons & Alternatives

How to Apply Watermark to Photos: Methods, Tips & AI Tools

How to Remove a Background in Illustrator: 4 Easy Methods

How to Change Background Color on Instagram Story (Easy Guide)

8 Best AI Poster Generators in 2026: Create Posters Faster with AI

10 Best AI Image Enhancers in 2026: Tested & Compared

10 Best AI Image Editors in 2026: Features, Pricing & Comparison

7 Best AI Background Changer in 2026: Remove & Replace Photo Backgrounds

Luminar Neo vs Lightroom: Features, Pricing & Comparison 2026

Kittl Review 2026: Is It Worth It? Features & Pricing

How to Make a Blurry Image Clear: 5 AI & Manual Ways

How to Remove Background on iPhone: 5 Easy Methods (2026)

Photoroom Background Remover Review 2026: Features & Alternatives

How to Remove Background in Canva: A Step-by-Step Guide

How to Remove Background in GIMP: Beginner-Friendly Guide

Funny Dog Memes to Try: Doge Meaning and 10 Original Ideas

Back to School Checklist 2026: Supplies, Timeline, and Planning

Recraft AI Review 2026: Features, Pricing, Pros, Cons & Alternatives

How to Make an Image Transparent in Google Slides: Opacity & Background Removal

VanceAI Photo Enhancer Review: Features, Pricing & Alternatives in 2026

What Does Emojify Mean? Text, Photos, & Emoji Art Explained

Top 8 Online Background Removers for Ecommerce Photos (2026)

How to Remove Background in Photoshop: 7 Easy Methods

6 Best AI Image Upscalers 2026: Tools Tested & Compared

Project Indigo Review: Is It Better Than iPhone Camera?

How Big Is an 8x10 Photo? Size, Pixels & Frame Guide

How Big Is a 4x6 Photo? Dimensions, Pixels & Printing Tips

Picsart AI Review: Features, Pricing, Pros, Cons & Alternatives

Lovart AI Review: AI Design Agent Features, Pricing & Alternatives

Fotor AI Image Generator Review: Features, Pricing & Alternatives

How to Add Emoji to Photo Online for Free

Emoji Wallpaper Ideas & How to Make One Online (2026)

Minimalist Poster Design: How to Make a Clean Poster (2026)

How to Make a Custom Poster That Is Ready to Print

Instagram Image Size Guide 2026: Post, Reel, Story & Carousel Specs

LinkedIn Image Size Guide: Profile, Post & Banner Dimensions

YouTube Profile Image Size: Best Dimensions & Safe Area 2026

How to Edit Amazon Product Photos That Boost Sales Fast
Turn Clear Photos Into Finished Creative, Faster
Fix the blur, then build listing-ready layouts and multi-channel creatives around the improved photo with Designkit.
