
How to Post Multiple Photos on Instagram: Carousel and Story Guide
Post multiple photos on Instagram as a carousel or Story. Avoid crop mistakes, keep slides consistent, and export a set ready to upload.

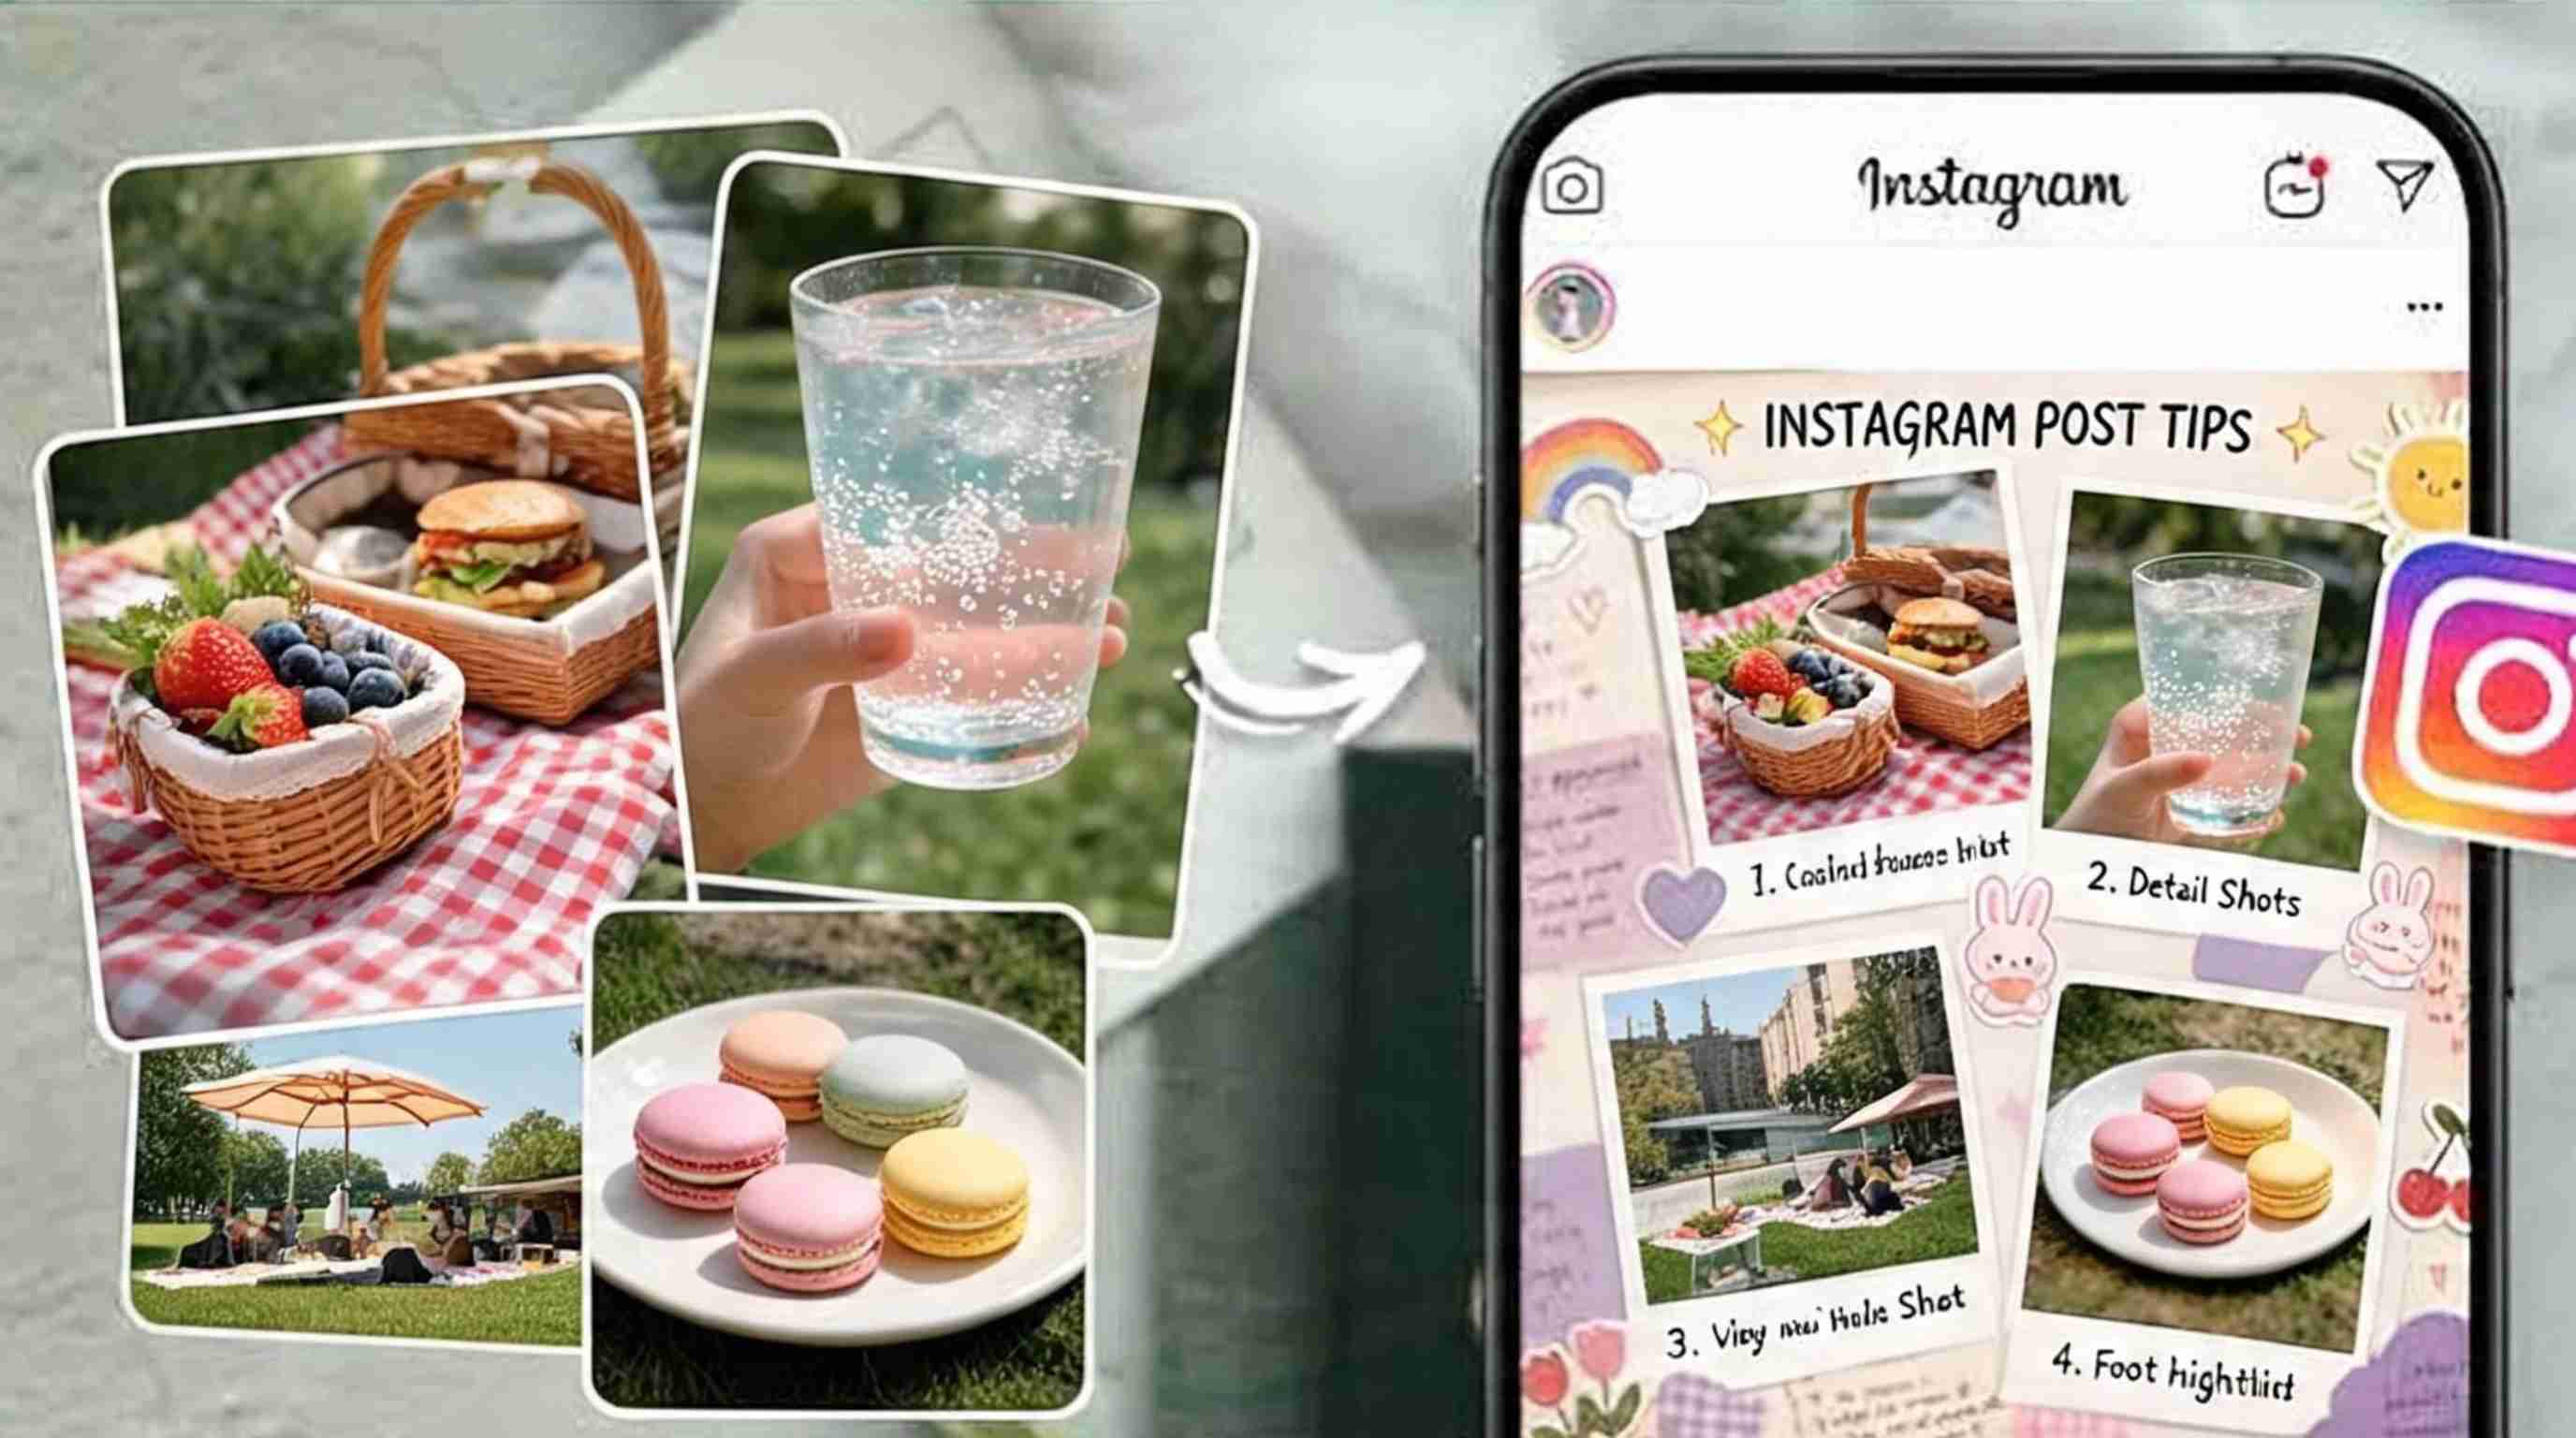
Posting multiple photos on Instagram is simple, but creating a carousel that looks polished is a different challenge. Images can appear cropped, inconsistent, or poorly ordered if you don't prepare them correctly before uploading. Instagram carousels allow you to combine multiple photos into one swipeable post, making them useful for storytelling, tutorials, product showcases, and brand content.
This guide explains how to post multiple photos on Instagram, add multiple images to Stories, choose the right sizes, and create multi-photo posts that look professional.
Why Post Multiple Photos Instead of One
A carousel lets you tell a complete story instead of relying on a single image. Whether you're showing a product from different angles, sharing a step-by-step tutorial, highlighting a transformation, or recapping an event, multiple slides keep viewers engaged for longer. When each image adds value and follows a consistent visual style, carousels often encourage more swipes, saves, and interactions than standalone posts.
How to Post a Multi-Photo Carousel on Instagram (Step by Step)
Step 1: Open Instagram and Create a New Post
Launch Instagram and tap the + button at the bottom or top of the screen. Choose Post instead of Story or Reel to start creating a carousel. If you're learning how to post more pictures on Instagram, this is where the process begins.
Step 2: Select Multiple Photos
Tap the Select Multiple (stacked squares) icon in the photo picker, then choose the images or videos you want to include. Instagram lets you combine both photos and videos in a single carousel, making it easy to add multiple pictures on Instagram for product showcases, tutorials, or travel highlights.
Step 3: Arrange Your Photos in the Right Order
After selecting your files, press and hold any thumbnail to drag it into a new position. Put your strongest image first to grab attention, then organize the remaining slides in a logical sequence that guides viewers through your story.
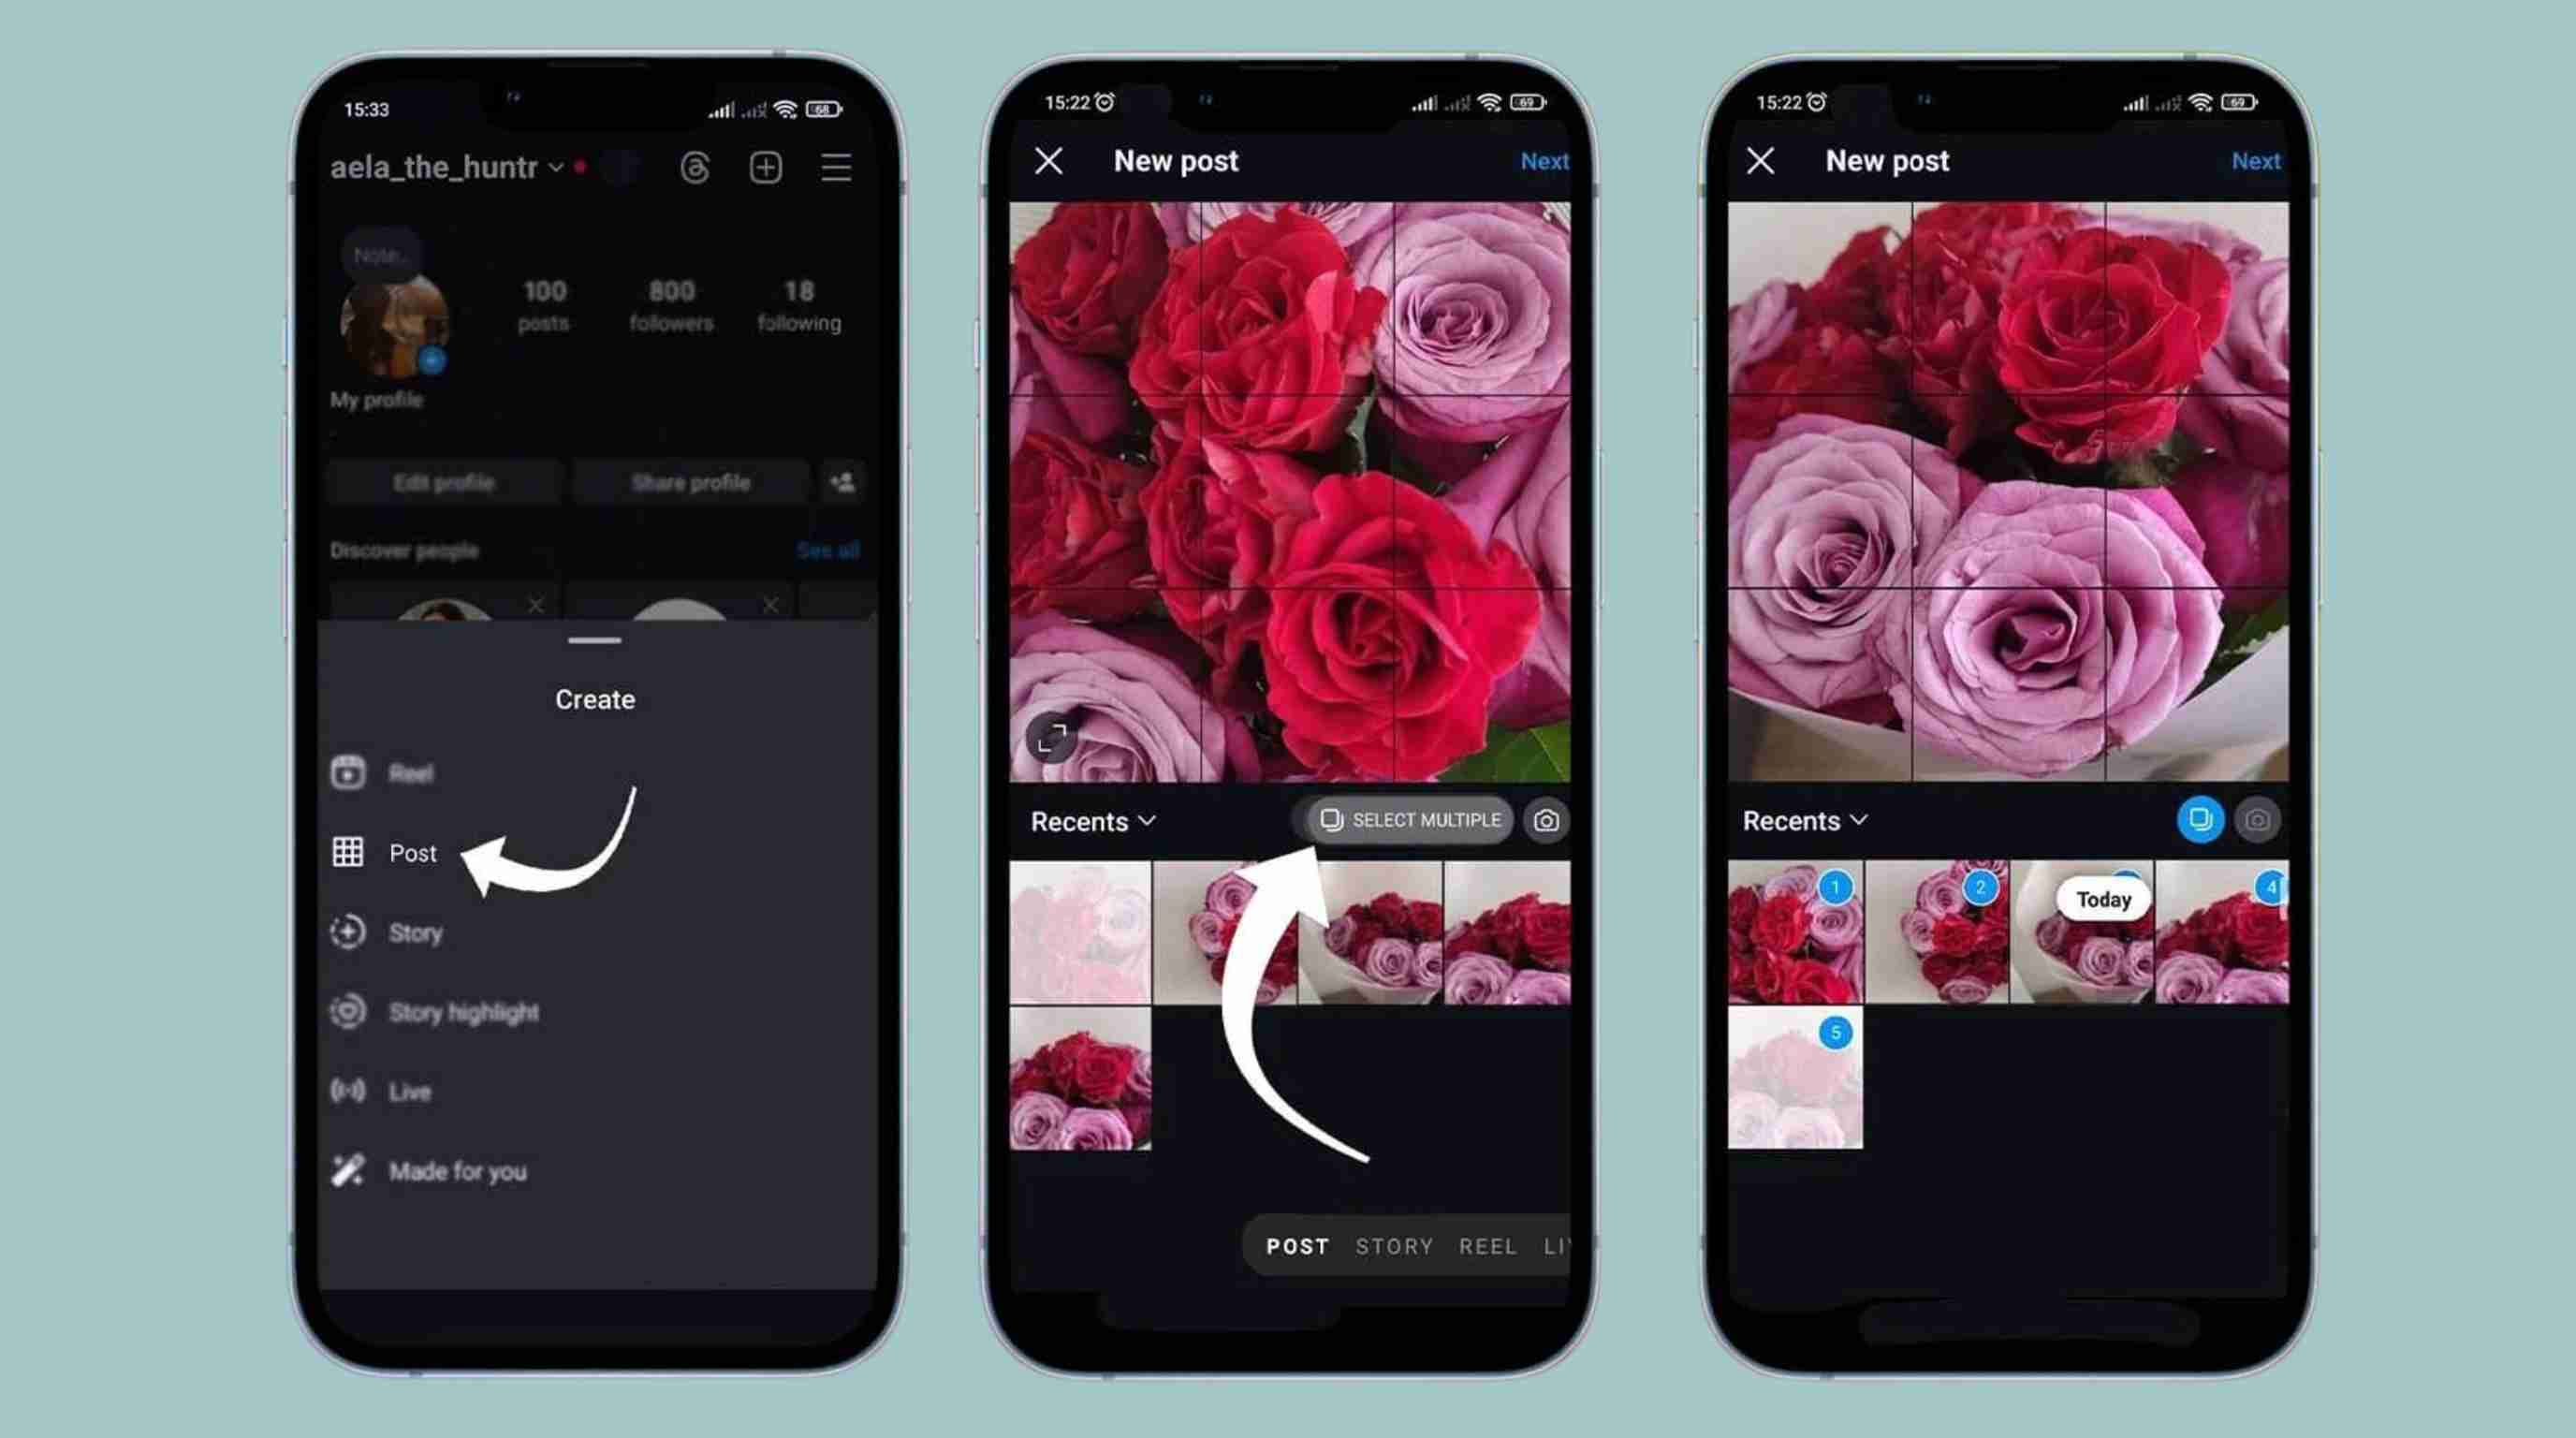
Step 4: Adjust Crops and Edit Your Images
Crop every slide to the same aspect ratio, so the carousel looks consistent while users swipe. Apply similar filters, colors, and lighting across all images to create a polished Instagram multi picture post. For businesses, Designkit helps generate matching visuals and resizes them for a cohesive carousel in just a few clicks.
Step 5: Add Captions and Publish Your Carousel
Write a caption that introduces your carousel, tag relevant people or products, add a location if needed, and include alt text where available to improve accessibility. Review the slide order one last time, then tap Share to publish.
Bonus: Post a Carousel from Instagram on the Web
If you're using a desktop, sign in to Instagram.com and click Create. Upload multiple images, arrange them in the desired order, add your captions and other details, then publish them directly from your browser. This is a convenient option when working with edited images prepared in Designkit on your computer.
The Aspect-Ratio Mistake That Ruins Most Carousels
One of the biggest reasons a carousel looks unprofessional is inconsistent sizing. The first slide often determines how the rest of the carousel is displayed, so if your images use different aspect ratios, later slides may be cropped unexpectedly or padded with empty space. While Instagram allows you to mix photos and videos, keeping every slide at the same dimensions creates a smoother viewing experience. Before you post multiple photos on Instagram, resize and align all visuals to a single aspect ratio. Designkit makes this easy by generating matching, platform-ready images that stay consistent from the first slide to the last.
Best Instagram Carousel Photo Sizes
Use the recommended Instagram dimensions below to keep every slide sharp and consistently cropped. Choosing the right aspect ratio helps your carousel look professional across the entire swipe experience.
|
Format |
Aspect ratio |
Recommended pixels |
Best for |
|---|---|---|---|
|
Portrait |
4:05 |
1080 × 1350 |
Most feed carousels |
|
Square |
1:01 |
1080 × 1080 |
Simple photo sets |
|
Landscape |
1.91:1 |
1080 × 566 |
Wide scenes only |
How Many Photos Can You Post in One Carousel?
Most Instagram accounts can now include up to 20 photos and/or videos in a single carousel, giving creators and businesses more room to tell a story, showcase products, or share tutorials. If your account still limits you to 10 items, update the Instagram app to access the latest features.
When planning how to post multiple photos on Instagram, remember that quality matters more than quantity. Use only the slides that strengthen your message, keep the visual style consistent, and arrange them in an order that encourages viewers to keep swiping. A well-organized Instagram post with multiple photos is more likely to hold attention than a carousel filled with repetitive or mismatched images.
How to Add Multiple Photos to an Instagram Story
Instagram Stories offer several ways to share more than one photo, depending on how you want your content to appear. You can post each image as its own Story, combine several photos on one screen, or use Instagram's built-in layout tools for a quick collage.
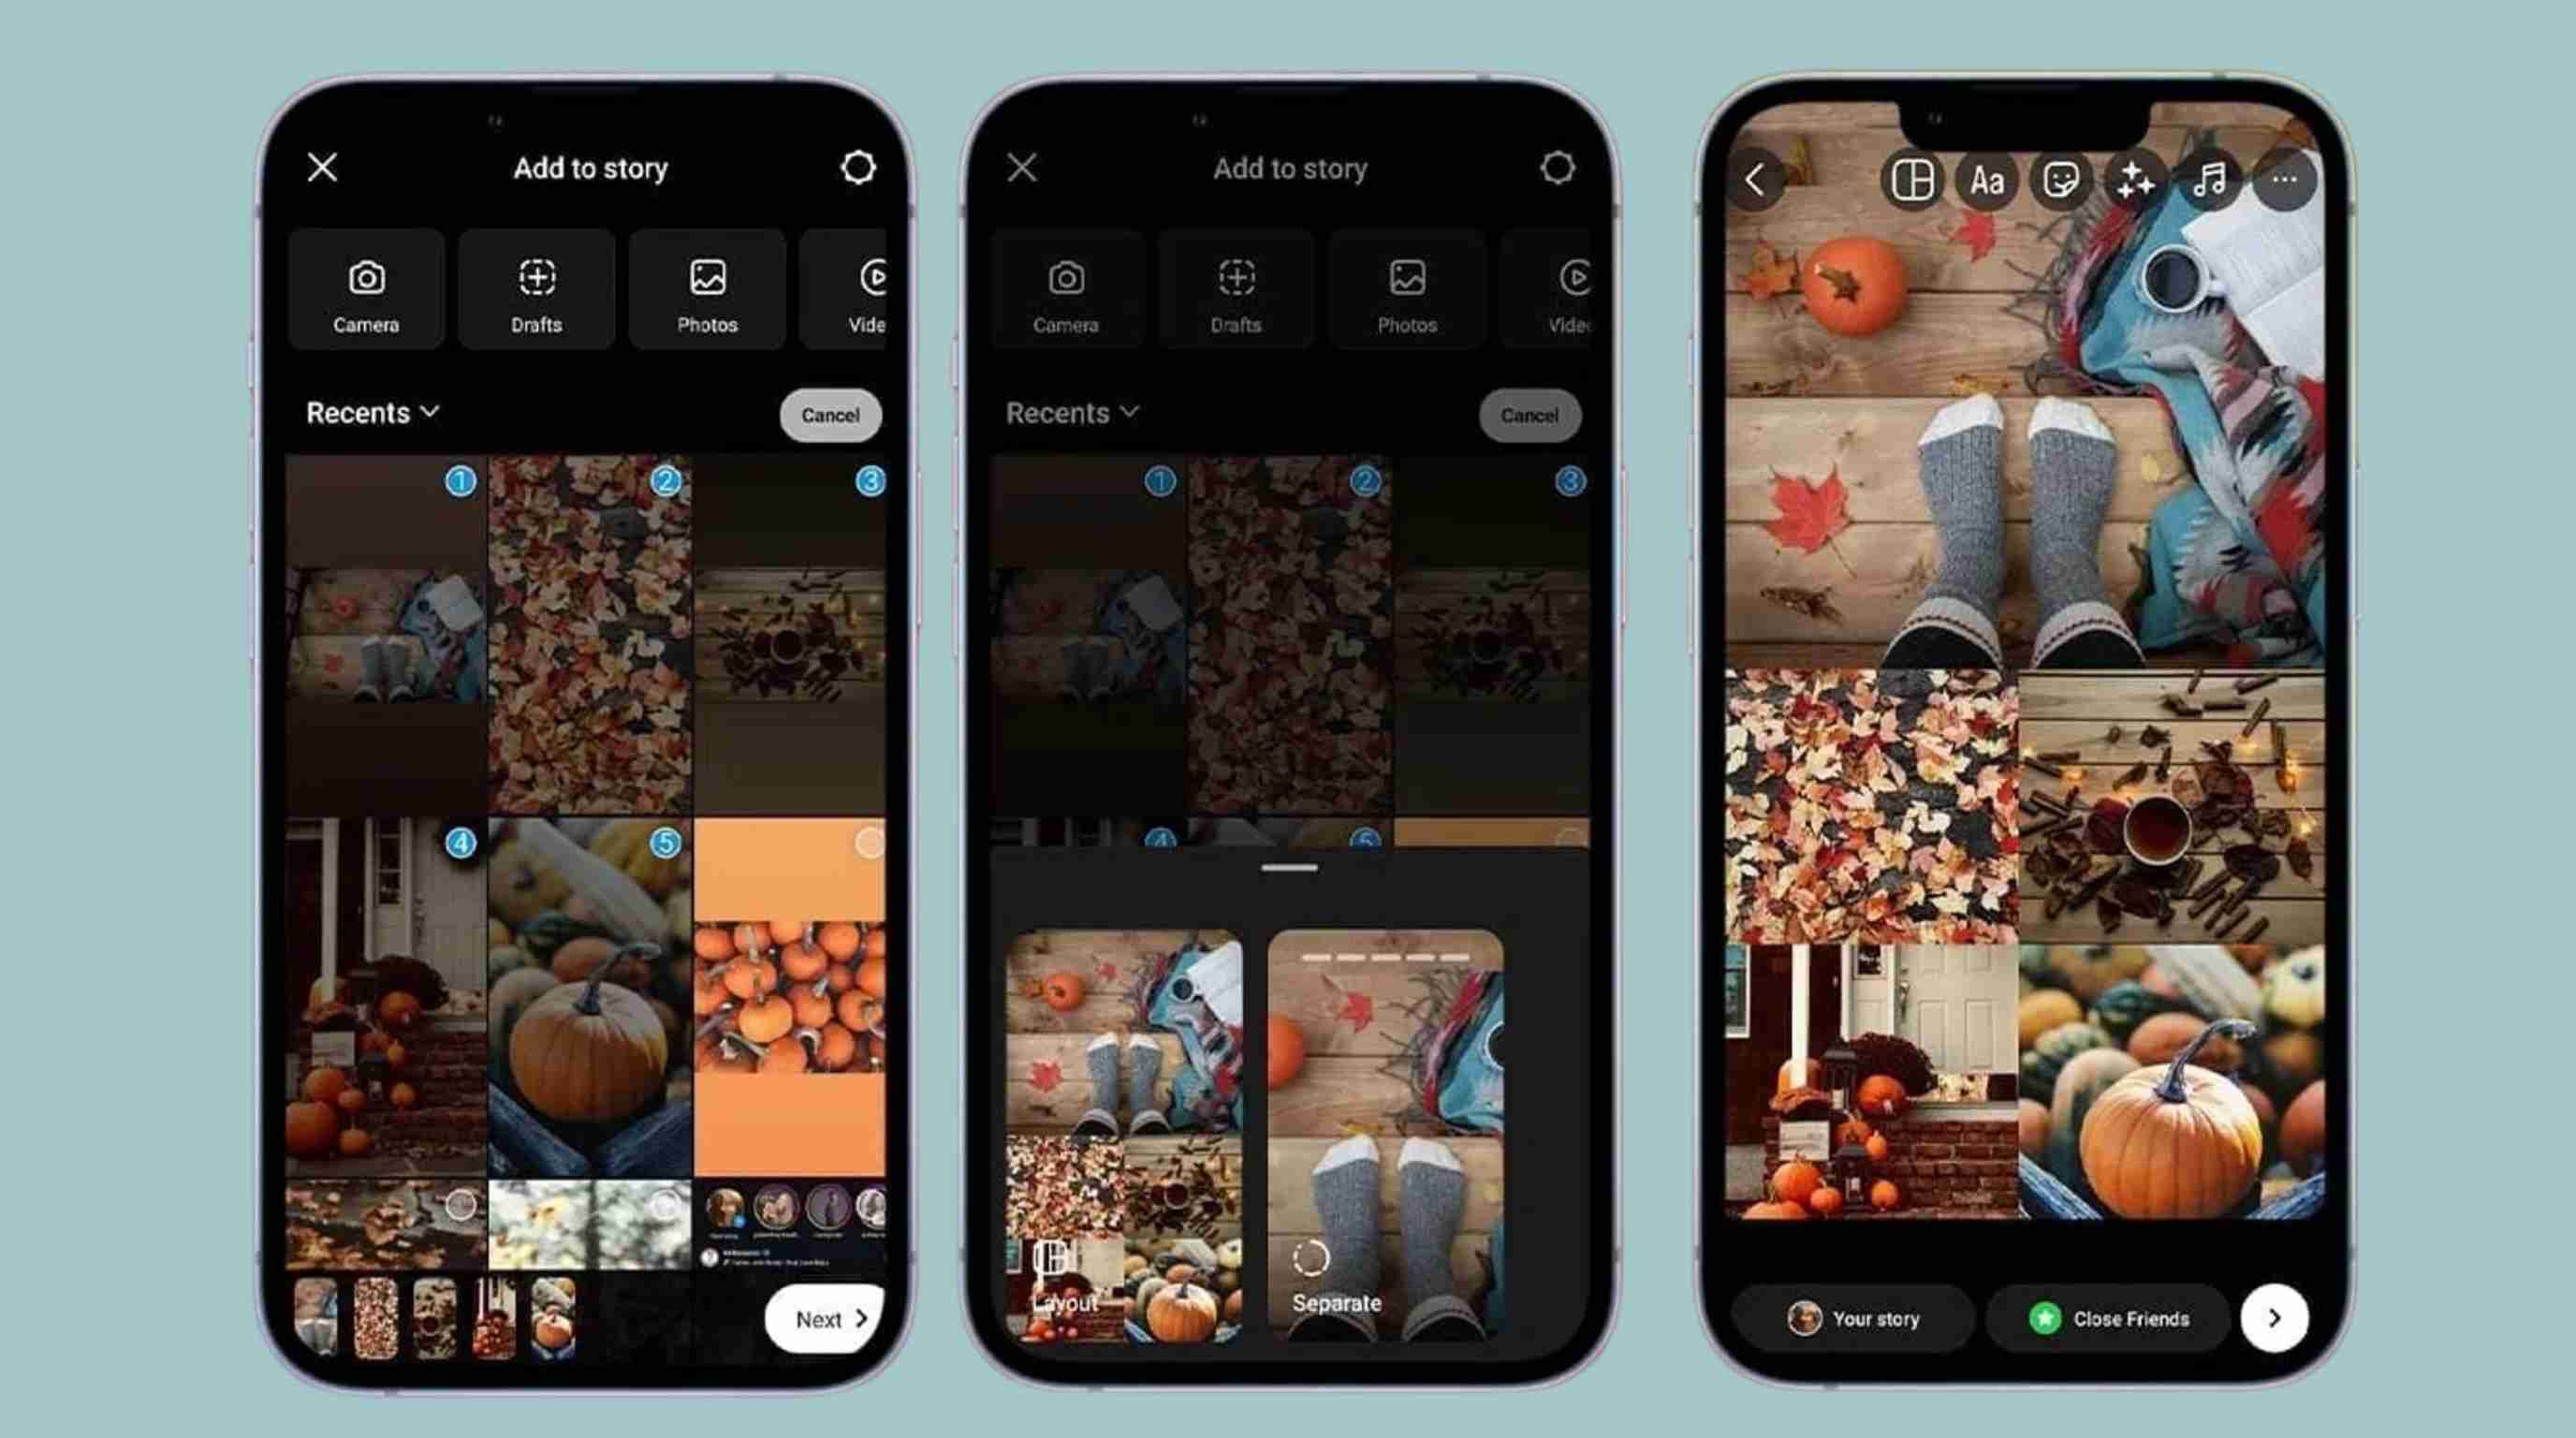
Method 1: Add Multiple Photos as Separate Slides
Open Instagram and swipe to the Story camera. Capture or upload your first image, then publish it or continue adding more photos one at a time. Each image becomes a separate Story slide that viewers tap through in sequence. This is a simple option if you're wondering how to post more pictures on Instagram without creating a feed carousel.
Method 2: Layer Photos onto One Slide with the Sticker Tool
Create a new Story, choose your background photo, then tap the Sticker icon and select the Photo sticker. Add additional images, resize them, and position them anywhere on the screen. This approach works well for mood boards, product highlights, or creative Instagram multi picture post designs within Stories.
Method 3: Use the Built-In Layout Grid for a Quick Collage
Select Layout from the Story camera tools to choose a grid arrangement. Add photos to each section of the grid, then customize your Story with text, stickers, or GIFs before sharing. It's the fastest way to display several images in a single story without using a separate editing app.
Carousel, Story, or Collage: Which Should You Use?
Each format serves a different purpose. Choosing the right one helps your content look more organized and keeps viewers engaged.
Use a Carousel for a Feed Post People Will Swipe Through
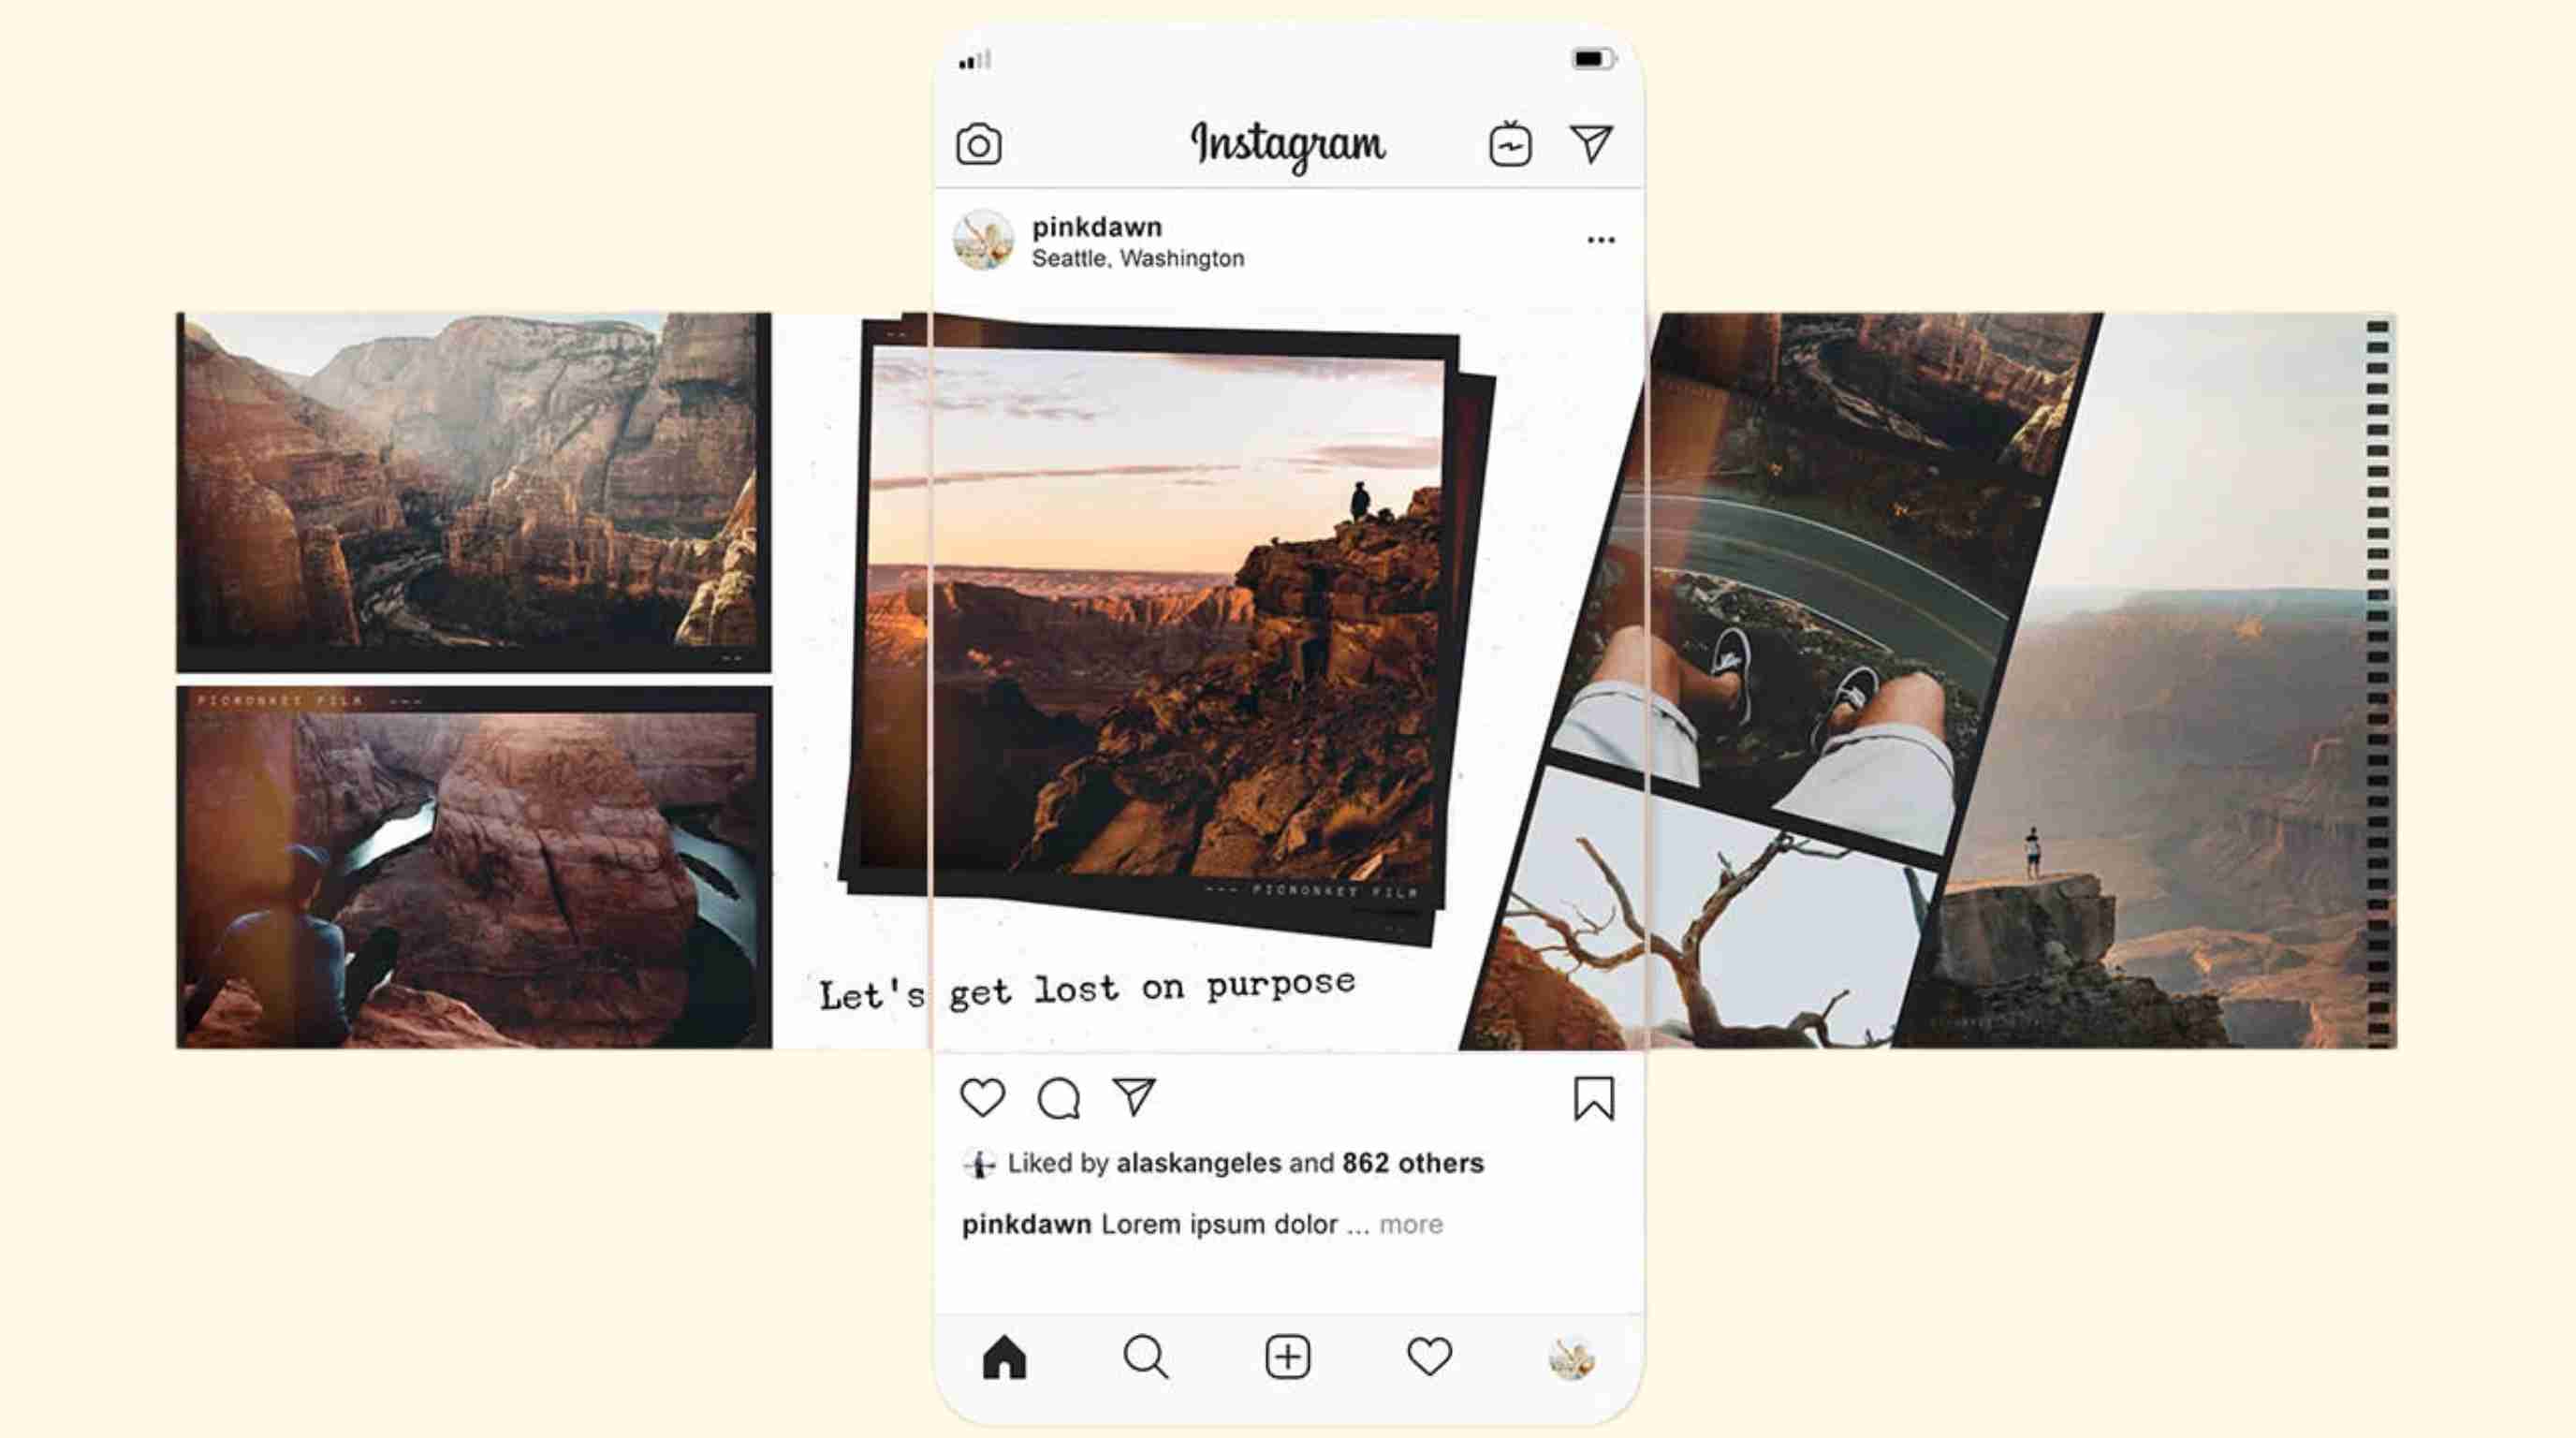
A carousel is ideal when you want to tell a story, share a tutorial, or showcase products from different angles. It lets you include multiple photos in one Instagram post while keeping everything together in your feed.
Use Stories for Casual, In-the-Moment Sharing
Stories are perfect for daily updates, behind-the-scenes moments, limited-time offers, or event coverage. They disappear after 24 hours unless you save them to Highlights, making them a more informal sharing format.
Use a Collage When You Want Several Photos in One Single Image
A collage combines multiple images into one graphic instead of creating swipeable slides. If you want a quick visual summary or promotional design, prepare the collage in Designkit and upload multiple pictures on Instagram as one polished image.
Tips for a multi-photo post that actually gets swipes
A successful carousel does more than display multiple images—it guides viewers from the first slide to the last. These best practices can help improve engagement and encourage people to keep swiping.
Start with Your Strongest Photo
Your first slide determines whether someone stops scrolling. Choose a high-quality image with a clear subject, bold colors, or an eye-catching product angle. A strong opening creates curiosity and increases the chances that viewers will continue through the rest of your carousel.
Keep Editing Consistent
Use the same color style, brightness, contrast, and overall editing across every slide. Consistent visuals make your carousel feel polished and professional, while mismatched filters or lighting can distract viewers and reduce the impact of your content.
Build a Logical Sequence
Arrange your images so they tell a story. Start with an attention-grabbing cover, follow with supporting details, and finish with your key message or result. A clear flow keeps viewers engaged and makes your carousel easier to understand from beginning to end.
End Captions with a Clear Call to Action
Give viewers a reason to interact after they finish swiping. Invite them to comment, save the post, share it with others, visit your profile, or check a product link. A simple, relevant call to action can increase engagement without sounding overly promotional.
Add Alt Text to Every Slide
Alt text improves accessibility by describing what's shown in each image for people using screen readers. It also helps organize your content more clearly and ensures every slide provides context, even when images cannot be viewed directly.
Common Mistakes to Avoid
Avoiding a few common errors can make your carousel look more professional and improve the viewing experience.
Mixing Aspect Ratios
Using portrait, square, and landscape images on the same carousel often leads to awkward crops or empty padding. Resize every image to the same dimensions before uploading, so the entire carousel maintains a clean and consistent appearance.
Uploading Low-Resolution Images
Blurry or pixelated images reduce the quality of your carousel and can make your content appear unprofessional. Export high-resolution files and avoid repeatedly downloading or compressing images before posting to preserve image clarity.
Using Inconsistent Editing
Applying different filters, colors, or lighting styles across slides creates a disconnected look. Keep your edits consistent throughout the carousel so viewers focus on the content instead of noticing visual differences between images.
Adding Too Much Text
Large blocks of text can overwhelm viewers and distract you from your visuals. Keep on-image text brief and easy to read, using captions to provide additional details instead of overcrowding each slide.
Forgetting the First and Last Slide
The first slide should capture attention immediately, while the last slide should leave viewers with a clear takeaway or call to action. A weak opening reduces swipes, and a weak ending misses the opportunity to encourage engagement or conversions.
How Designkit Helps You Build a Full Set of Photos Worth Posting
Knowing the Instagram taps is only half the job. Brands often lack enough consistent, correctly sized images to fill a carousel.
Designkit helps turn a handful of source photos into a complete, cohesive carousel. It generates matching visuals with consistent colors, framing, and styling, making every slide feel like part of the same collection before you upload anything to Instagram.

How to Build a Consistent Photo Set with Designkit in 3 Steps
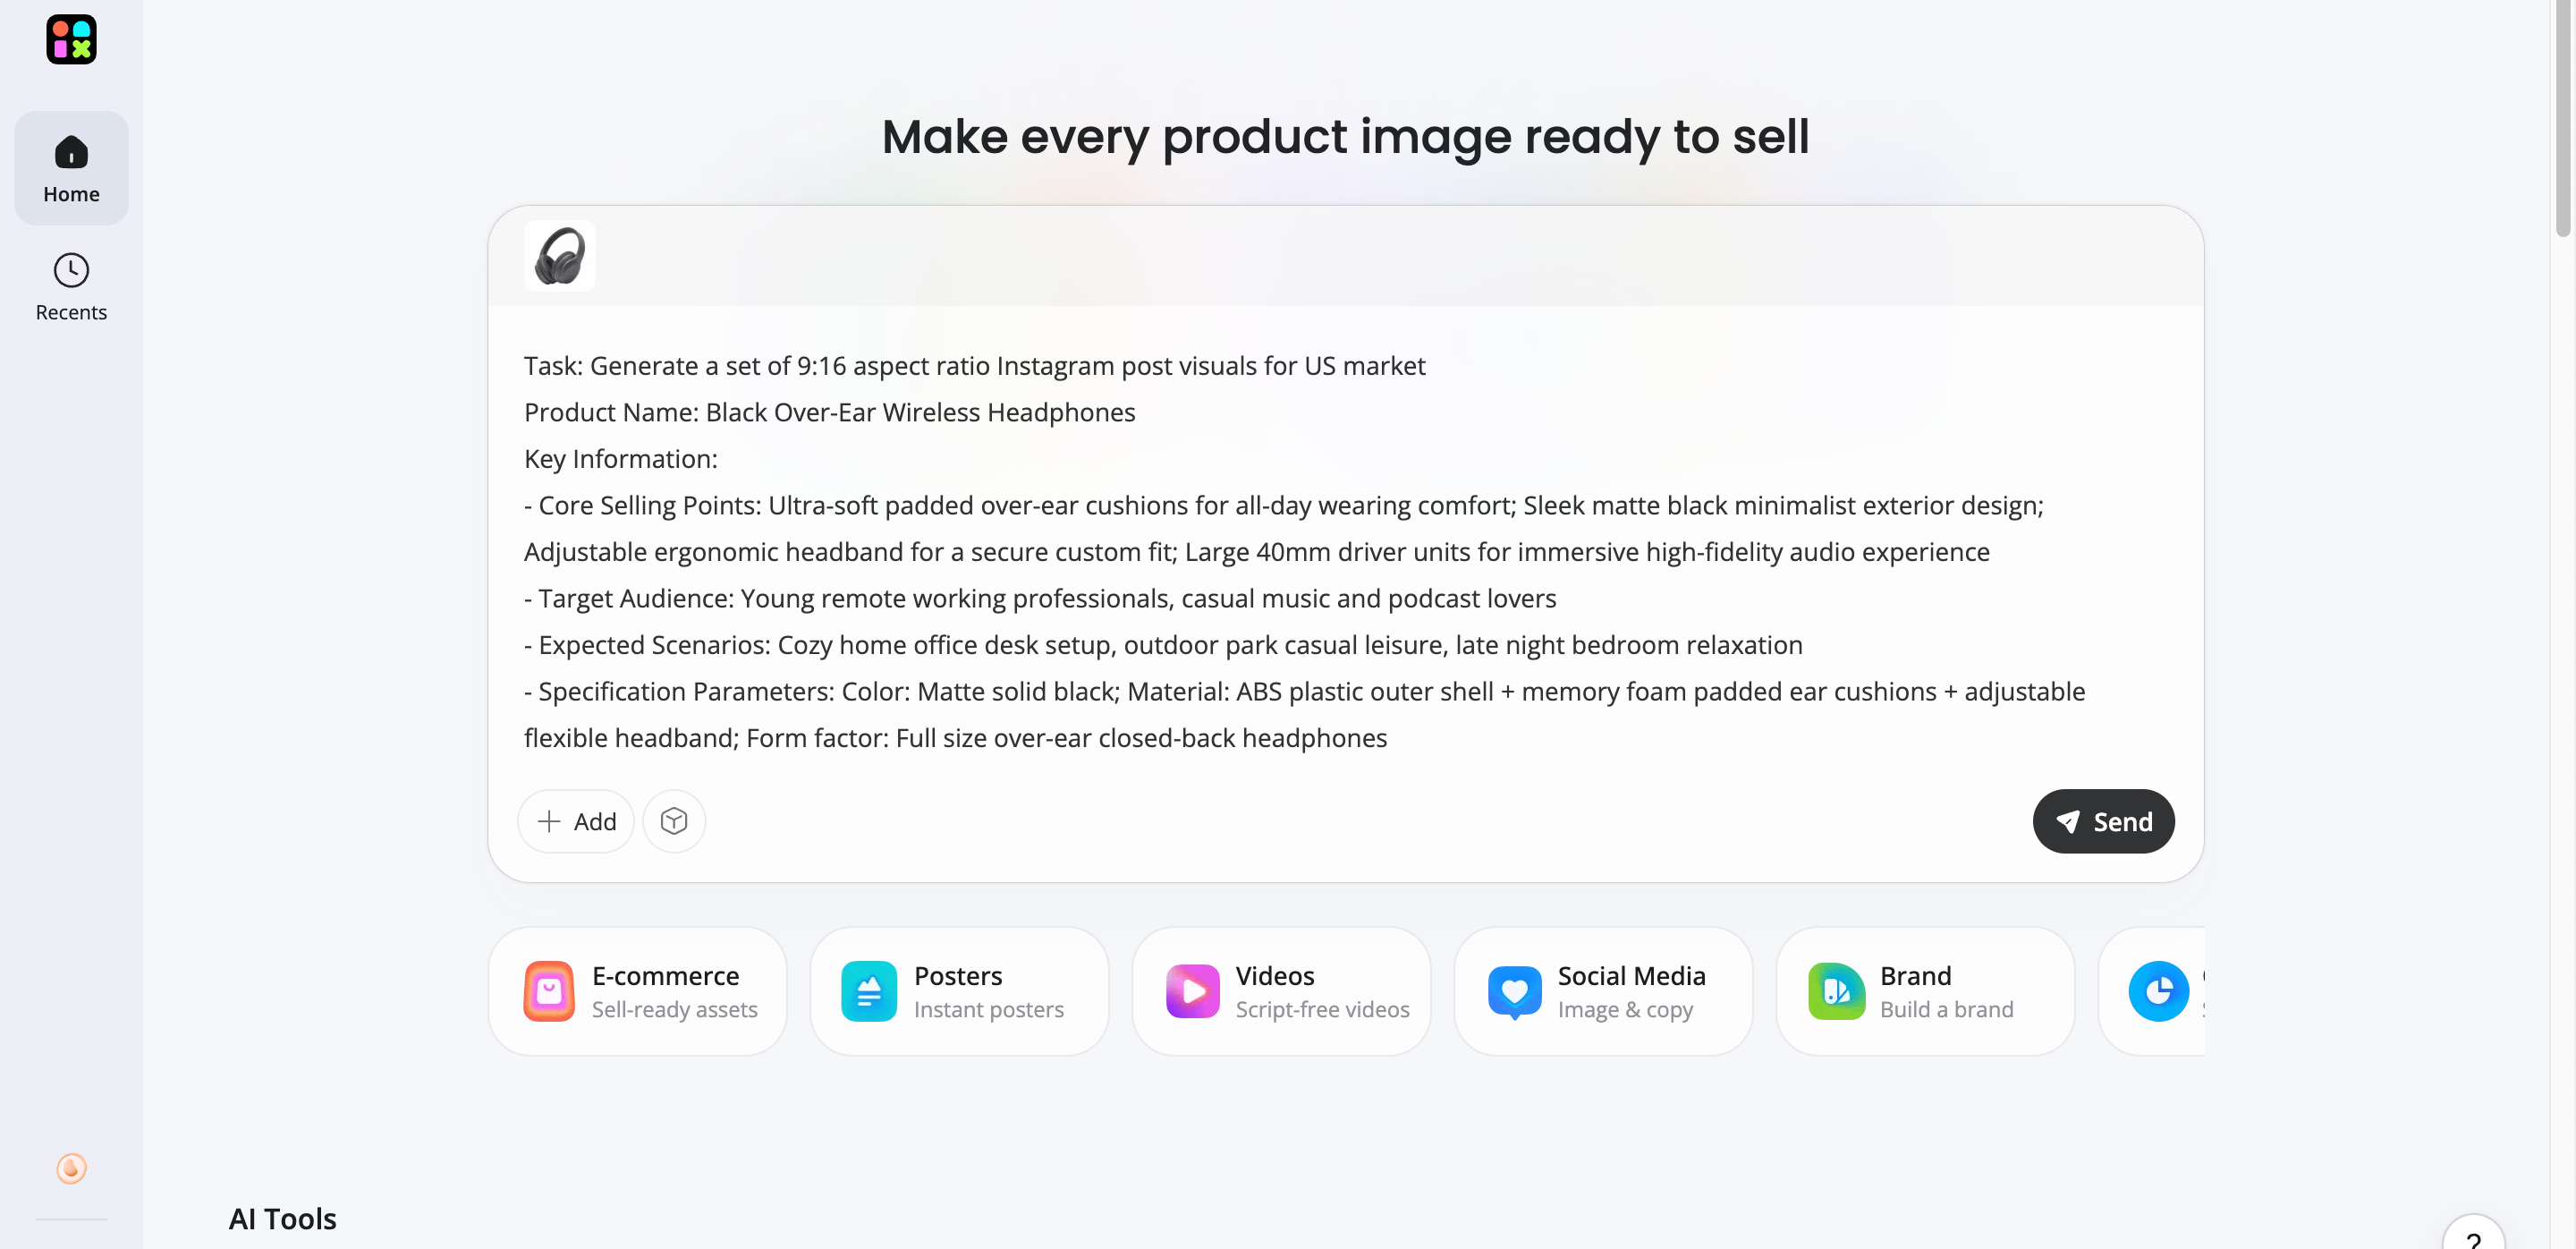
Step 1: Upload Your Source Photos
Upload the images you already have, whether it's a complete collection or just a few product or lifestyle shots.
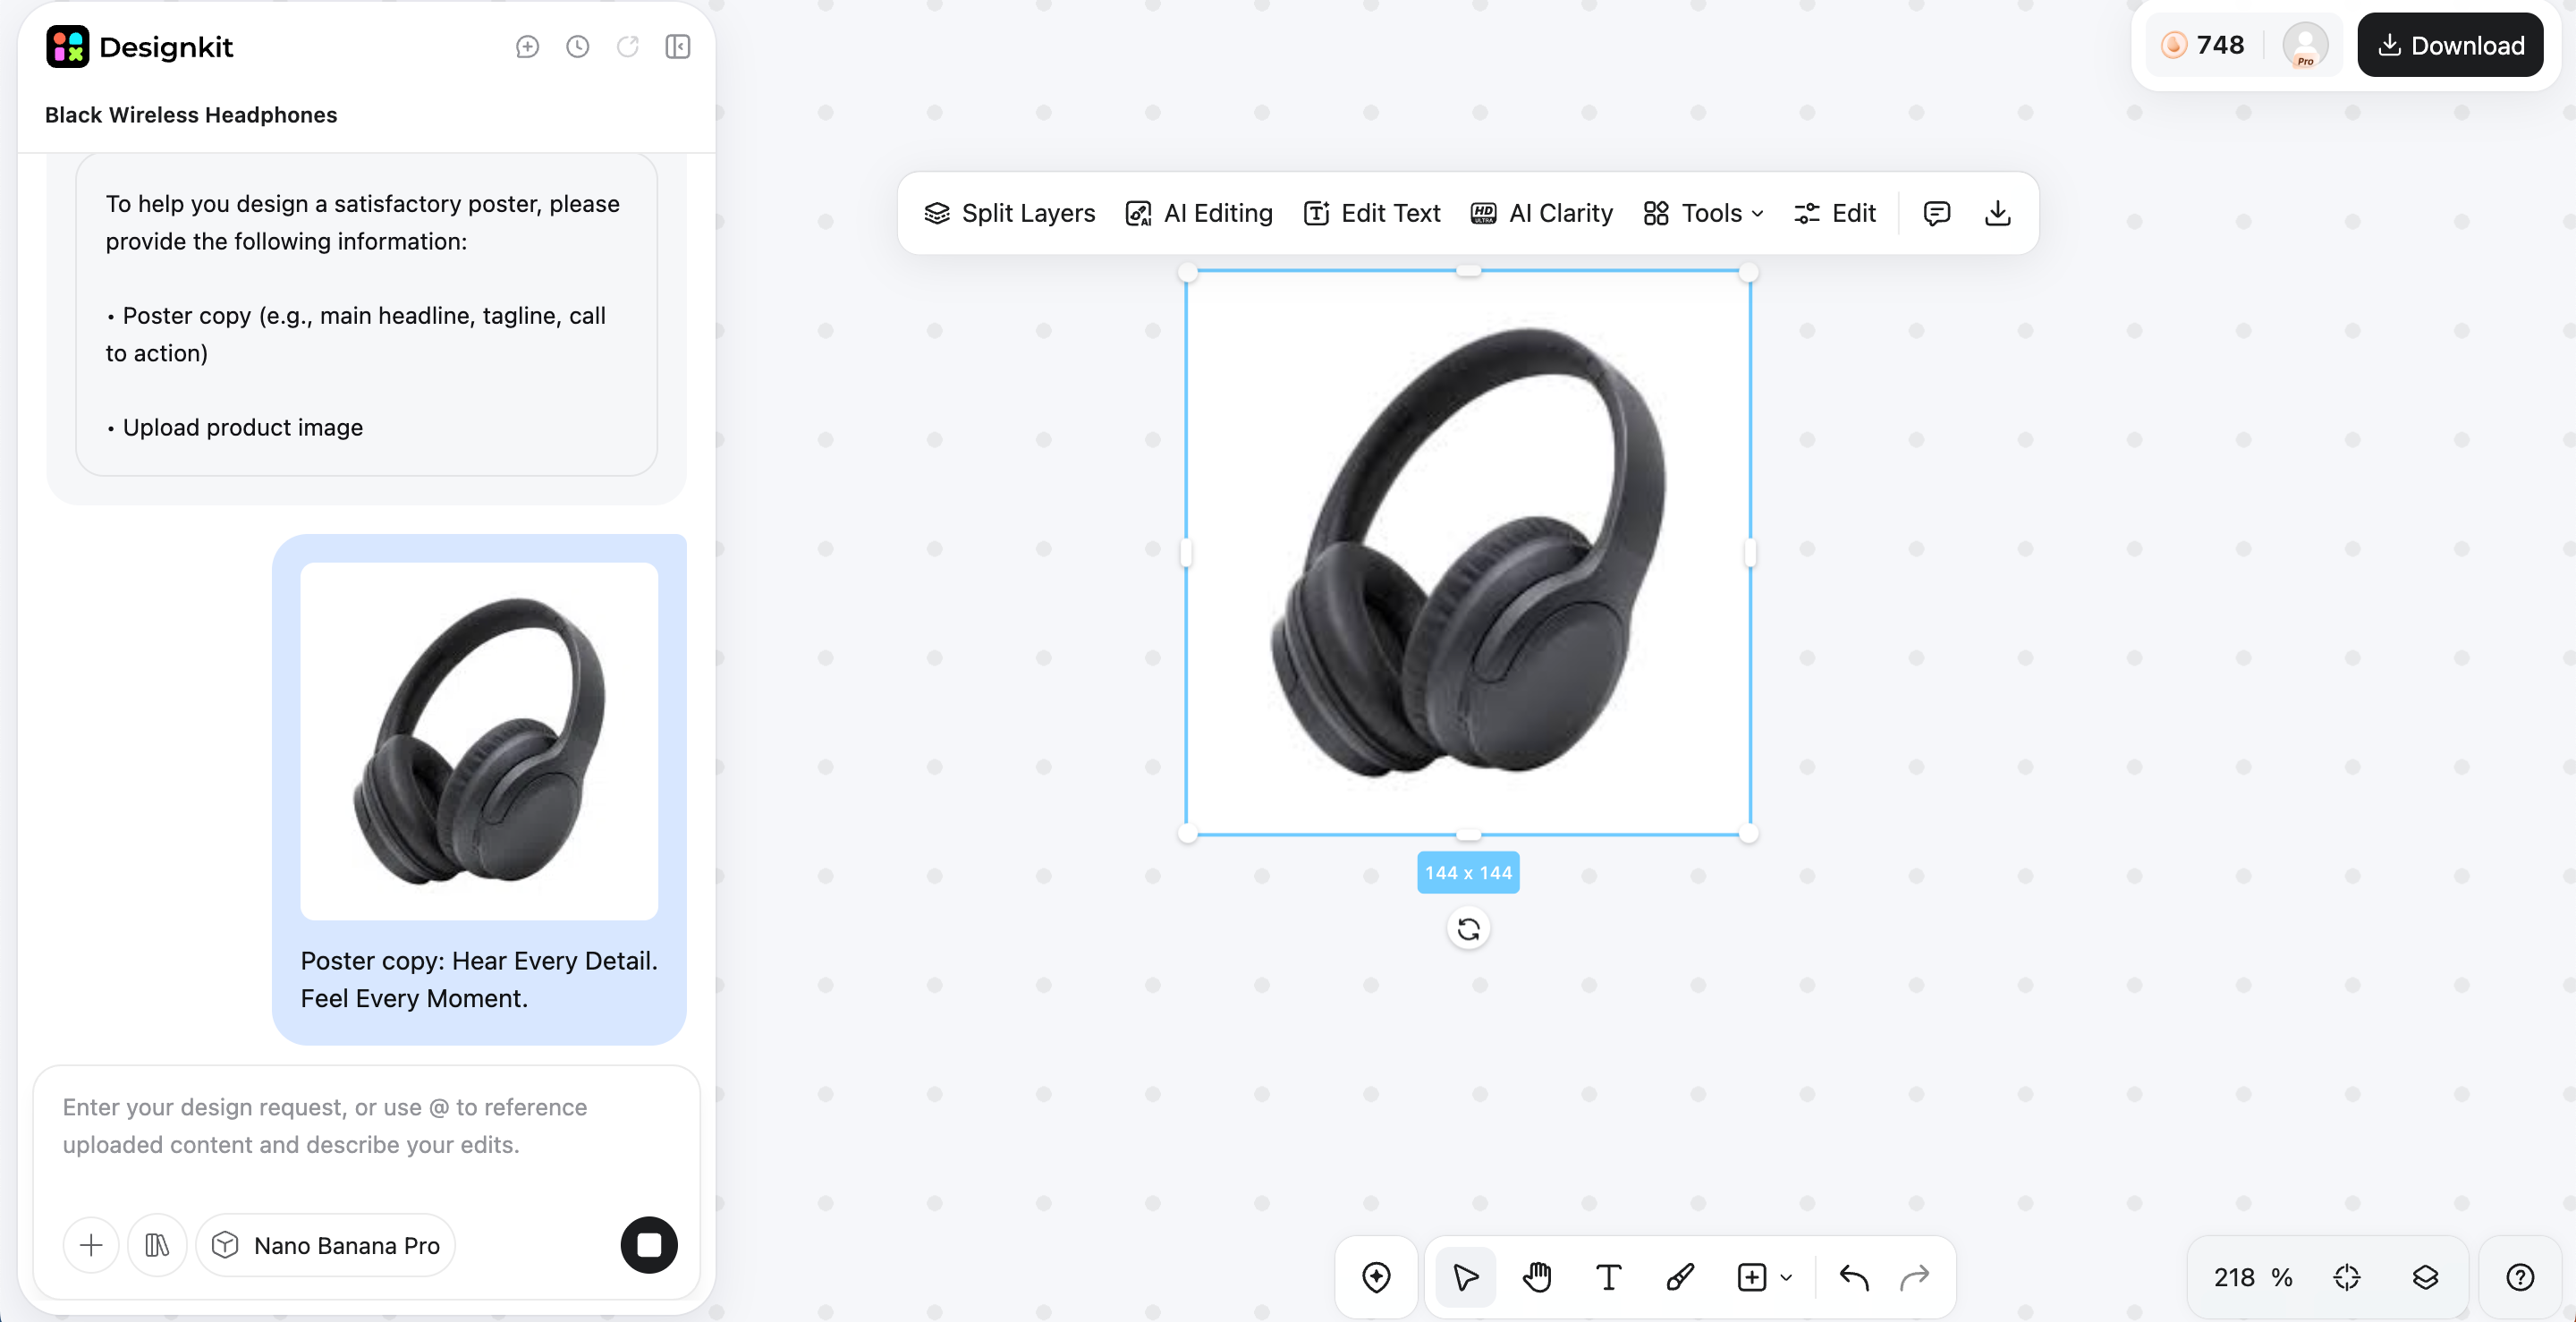
Step 2: Generate a Consistent Set
Designkit matches the style, colors, composition, and aspect ratio across every generated image for a cohesive carousel.
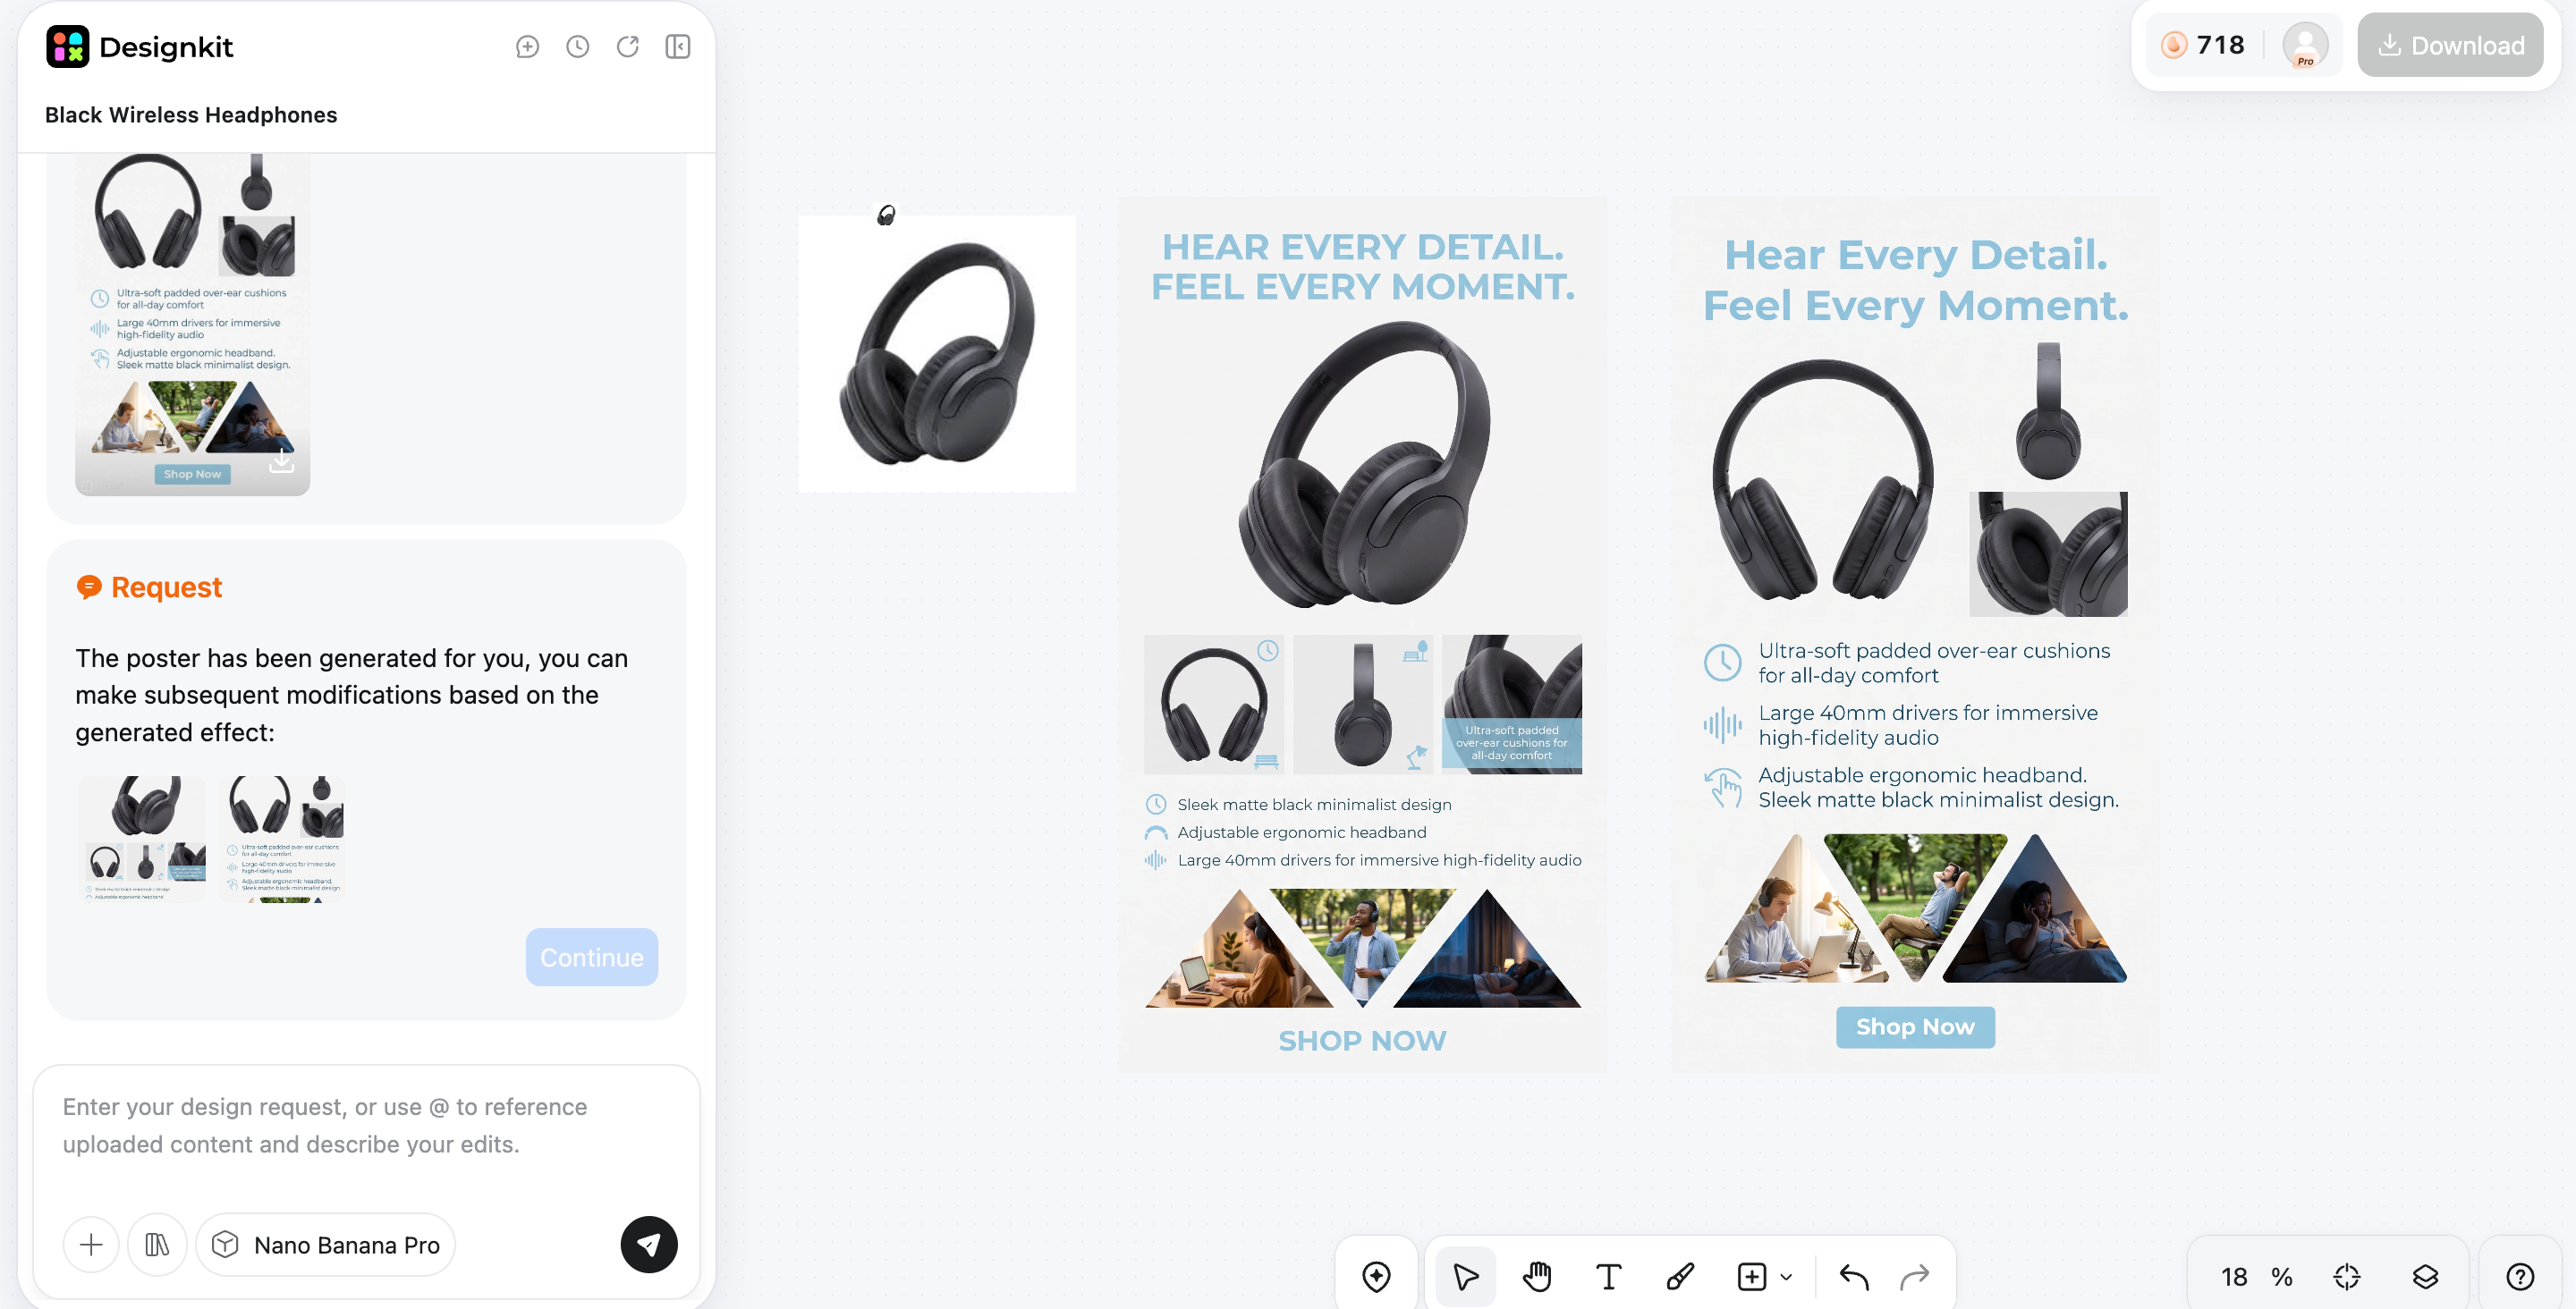
Step 3: Preview, Export, and Post
Review your complete carousel, export the finished images, and upload them directly to Instagram with confidence.
Key features of Designkit
Consistent Styling from a Few Source Photos
Upload a small set of product or brand images, and Designkit generates visuals with matching colors, lighting, backgrounds, and composition. This helps every carousel slide maintain a cohesive look, making your Instagram content appear more professional and recognizable.
Carousel-Oriented Layouts
Designkit creates layouts optimized for swipeable Instagram carousels. Whether you're showcasing products, tutorials, before-and-after comparisons, or brand stories, each slide is designed to flow naturally into the next while maintaining visual consistency.
Bulk Variations for Testing Slide Order
Generate multiple versions of the same carousel without redesigning each slide manually. Experiment with different cover images, product sequences, or promotional messages to compare layouts and identify the order that delivers the best engagement.
Resize to a Single Carousel Aspect Ratio
Resize every image to the same Instagram-friendly dimensions in one step. Designkit helps prevent inconsistent cropping, unwanted padding, and mismatched layouts, ensuring your entire carousel displays smoothly from the first slide to the last.
Conclusion
Creating an engaging Instagram carousel is simple when you follow the right workflow. Select multiple photos, keep every slide in the same aspect ratio, lead with your strongest image, and choose between a Story or carousel based on how you want people to experience your content. Preparing your visuals before uploading helps avoid cropping issues and creates a more polished result. With Designkit, you can generate consistent, Instagram-ready images, resize every asset for a unified carousel, and streamline your content creation from start to finish.
Frequently Asked Questions
How many photos can I post on one Instagram carousel?
Why did Instagram crop my carousel photos strangely?
Instagram often crops carousel images when the selected photos use different aspect ratios. The first slide can determine how the rest of the carousel is displayed, causing inconsistent crops or padding. Designkit helps avoid this by resizing every image to the same Instagram-friendly dimensions before you publish.
Can I mix photos and videos in the same carousel?
Yes. Instagram allows you to combine photos and videos within a single carousel, making it useful for product showcases, tutorials, and storytelling. For the best viewing experience, keep every slide in the same aspect ratio. Designkit prepares both image assets and supporting creatives for a consistent carousel.
Can I edit or reorder a carousel after I've posted it?
You can edit your captions, tags, alt text, and location after publishing, but Instagram doesn't let you reorder carousel slides. If the sequence matters, review everything carefully before posting. Designkit makes this easier by generating variations, so you can finalize the best slide order in advance.
How do I add multiple photos to my Instagram Story at once?
You can add multiple Story slides, layer several photos onto one Story using the Photo sticker, or use Instagram's Layout feature to build a collage. For a more polished result, Designkit helps create matching visuals with consistent colors, backgrounds, and sizing before you upload them.
What's the best photo size for an Instagram carousel?
For most feed carousels, the recommended size is 1080 × 1350 pixels with a 4:5 aspect ratio. Square images at 1080 × 1080 pixels also work well, while landscape is better reserved for wide scenes. Designkit exports your images in Instagram-ready dimensions, helping maintain a consistent look.
Do carousels really get more engagement than single photos?
Carousels often generate higher engagement because people spend more time swiping through multiple slides, especially when the content tells a story or teaches something useful. Success still depends on strong visuals and slide order. Designkit helps create cohesive carousel assets that encourage viewers to keep swiping.
Can I post a carousel from Instagram on the desktop?
Yes. You can create and publish carousels directly from Instagram.com by selecting multiple images, arranging them, adding your captions, and sharing the post. If you prepare your content on a computer, Designkit fits naturally into the workflow by exporting carousel-ready images optimized for Instagram.
You May Also Like

7 Best Remove.bg Alternatives in 2026: Free & Paid Tools

Instagram Carousel: What It Is, How to Post & Create One

Nano Banana Prompts: 20+ Examples for Better AI Images

Ideogram AI Review 2026: Features, Pricing & Alternatives

Free Mac Photo Editor: 5 Tools Compared for Mac Users

How to Crop a Photo Into a Circle Online (Keep Quality)

How to Make an Image Transparent Online (AI Guide)

Pixlr Background Remover Review 2026: Features, Pricing & Alternatives

How to Fix Overexposed Photos: Recover Highlights Fast

OpenArt AI Review 2026: Features, Pricing & Alternatives

Best AI Headshot Generator: 9 Tools Compared for 2026

Best Stencil Maker Tools 2026: Turn Photos Into Stencils

Pixelbin Watermark Remover Review: Image & Video Results Tested

How to Make a Sticker on iPhone: Easy Step by Step Guide

Best AI Logo Generator in 2026: 10 Tools Compared

How to Turn a Photo Into a Cartoon: A Beginner-Friendly Guide

Landscape vs Portrait: Key Differences & Best Uses in 2026

How to Remove Watermark From Photo: AI, Photoshop & More

How to Fix Pixelated Photos: Photoshop, AI Tools & Tips

Bing Image Creator: How It Works, Features, Uses & Alternatives

How to Remove People from Photos with AI: A Step-by-Step Guide

How to Increase Image Resolution: AI, Photoshop & PPI

How to Add Text to a Photo: 8 Tips for Better Results

How to Fix Grainy Photos: Easy Ways to Clear Images

Creative Profile Picture Ideas for Every Style and Platform

Evoto AI Review 2026: Features, Pricing, Pros & Cons

Pixlr Photo Editor Review: Features, Pricing & Alternatives

Best AI Image Extender Tools in 2026: Expand Photos with AI

How to Make a Collage on iPhone: Easy Guide for 2026

How to Sharpen an Image in Photoshop (Smart Sharpen and Unsharp Mask)

Best Image Background Remover Tools in 2026: AI Tools Compared

How to Make Transparent Background in Paint: Step-by-Step Guide

How to Resize an Image: Best Methods, Tools & Quality Tips

Best AI Image Generator Tools in 2026: Top AI Platforms Compared

Remove.bg Review 2026: Features, Pricing & Is It Worth It?

Luminar Neo Photo Editor Review 2026: AI Features, Price & Pros

How to Post Multiple Photos on Instagram (2026 Guide)

25 Facebook Cover Photo Ideas for Personal & Business Pages

What Is a PFP? Meaning, Examples & How to Create One

Can You Edit an Instagram Post After Posting?

11 Best Canva Alternatives in 2026 for AI Design & Marketing

8 Best Midjourney Alternatives in 2026: Features, Pricing & Comparison

How to Restore Old Photos: AI Tools, Tips & Best Methods

Pixelcut AI Review 2026: Features, Pricing, Pros, Cons & Alternatives

How to Apply Watermark to Photos: Methods, Tips & AI Tools

How to Remove a Background in Illustrator: 4 Easy Methods

How to Change Background Color on Instagram Story (Easy Guide)

8 Best AI Poster Generators in 2026: Create Posters Faster with AI

10 Best AI Image Enhancers in 2026: Tested & Compared

10 Best AI Image Editors in 2026: Features, Pricing & Comparison

7 Best AI Background Changer in 2026: Remove & Replace Photo Backgrounds

Luminar Neo vs Lightroom: Features, Pricing & Comparison 2026

Kittl Review 2026: Is It Worth It? Features & Pricing

How to Make a Blurry Image Clear: 5 AI & Manual Ways

How to Remove Background on iPhone: 5 Easy Methods (2026)

Photoroom Background Remover Review 2026: Features & Alternatives

How to Remove Background in Canva: A Step-by-Step Guide

How to Remove Background in GIMP: Beginner-Friendly Guide

Funny Dog Memes to Try: Doge Meaning and 10 Original Ideas

Back to School Checklist 2026: Supplies, Timeline, and Planning

Recraft AI Review 2026: Features, Pricing, Pros, Cons & Alternatives

How to Make an Image Transparent in Google Slides: Opacity & Background Removal

VanceAI Photo Enhancer Review: Features, Pricing & Alternatives in 2026

What Does Emojify Mean? Text, Photos, & Emoji Art Explained

Top 8 Online Background Removers for Ecommerce Photos (2026)

How to Remove Background in Photoshop: 7 Easy Methods

6 Best AI Image Upscalers 2026: Tools Tested & Compared

Project Indigo Review: Is It Better Than iPhone Camera?

How Big Is an 8x10 Photo? Size, Pixels & Frame Guide

How Big Is a 4x6 Photo? Dimensions, Pixels & Printing Tips

Picsart AI Review: Features, Pricing, Pros, Cons & Alternatives

Lovart AI Review: AI Design Agent Features, Pricing & Alternatives

Fotor AI Image Generator Review: Features, Pricing & Alternatives

How to Add Emoji to Photo Online for Free

Emoji Wallpaper Ideas & How to Make One Online (2026)

Minimalist Poster Design: How to Make a Clean Poster (2026)

How to Make a Custom Poster That Is Ready to Print

Instagram Image Size Guide 2026: Post, Reel, Story & Carousel Specs

LinkedIn Image Size Guide: Profile, Post & Banner Dimensions

YouTube Profile Image Size: Best Dimensions & Safe Area 2026

How to Edit Amazon Product Photos That Boost Sales Fast
One Set of Photos, Ready to Swipe Through
Build a consistent, properly sized image set for your next Instagram carousel, then upload it with Select Multiple.
