
How to Remove Background in PowerPoint: Top Methods
Removing a background in PowerPoint works for quick edits, but the best method depends on the image and the finish you need. Learn the steps, avoid rough edges, and see when a dedicated AI workflow saves time.

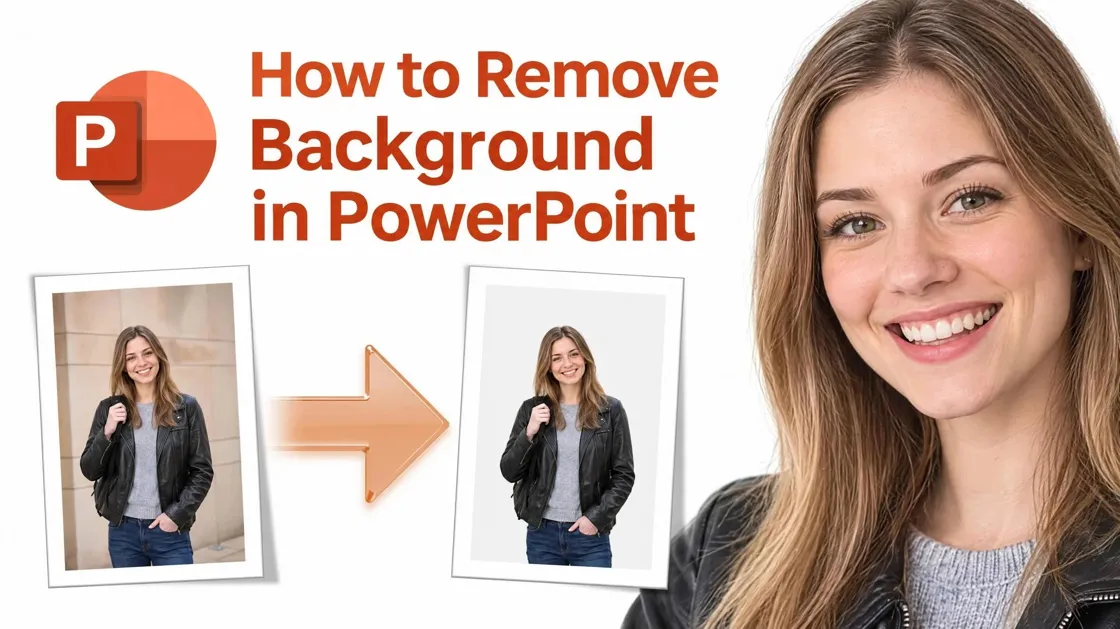
TL;DR:
- Use Remove Background to separate a subject from a more complex photo background.
- Choose Set Transparent Color for simple, uniform backgrounds.
- Use Mark Areas to Keep and Mark Areas to Remove to refine the selection.
- Save the edited image as a PNG to preserve transparency.
- Try an external background-removal tool if PowerPoint struggles with fine details or complex edges.
When removing an image background in PowerPoint, choose the method based on your image, use Remove Background for photos with complex scenes or Set Transparent Color for logos and graphics with a solid-color background. The right tool helps preserve important details while making your subject easier to place on slides. This guide explains how to remove backgrounds, refine edges, fix common selection issues, and save transparent images for reuse in presentations and other designs.
How to Remove Background in PowerPoint
PowerPoint offers two ways to remove an image background, depending on the image and the result you need. Use Remove Background for photographs with detailed or uneven backgrounds, such as portraits and product shots. Choose Set Transparent Color for logos and icons with a uniform background color. The steps below explain where to find each tool, how to check the result, and how to keep the changes so your image is ready for your presentation.
Method 1: Use the Remove Background Tool
Best for portraits, product photos, and images where the background has multiple colors or objects.
The Remove Background tool in PowerPoint identifies the main subject and marks areas it plans to remove. You can refine the selection manually before applying it, which is useful when the automatic result misses part of an object or removes details you want to keep.
-
Insert and select your image. Open your presentation, go to Insert, select Pictures, and add the image. Select the picture to display the Picture Format tab on the ribbon.
-
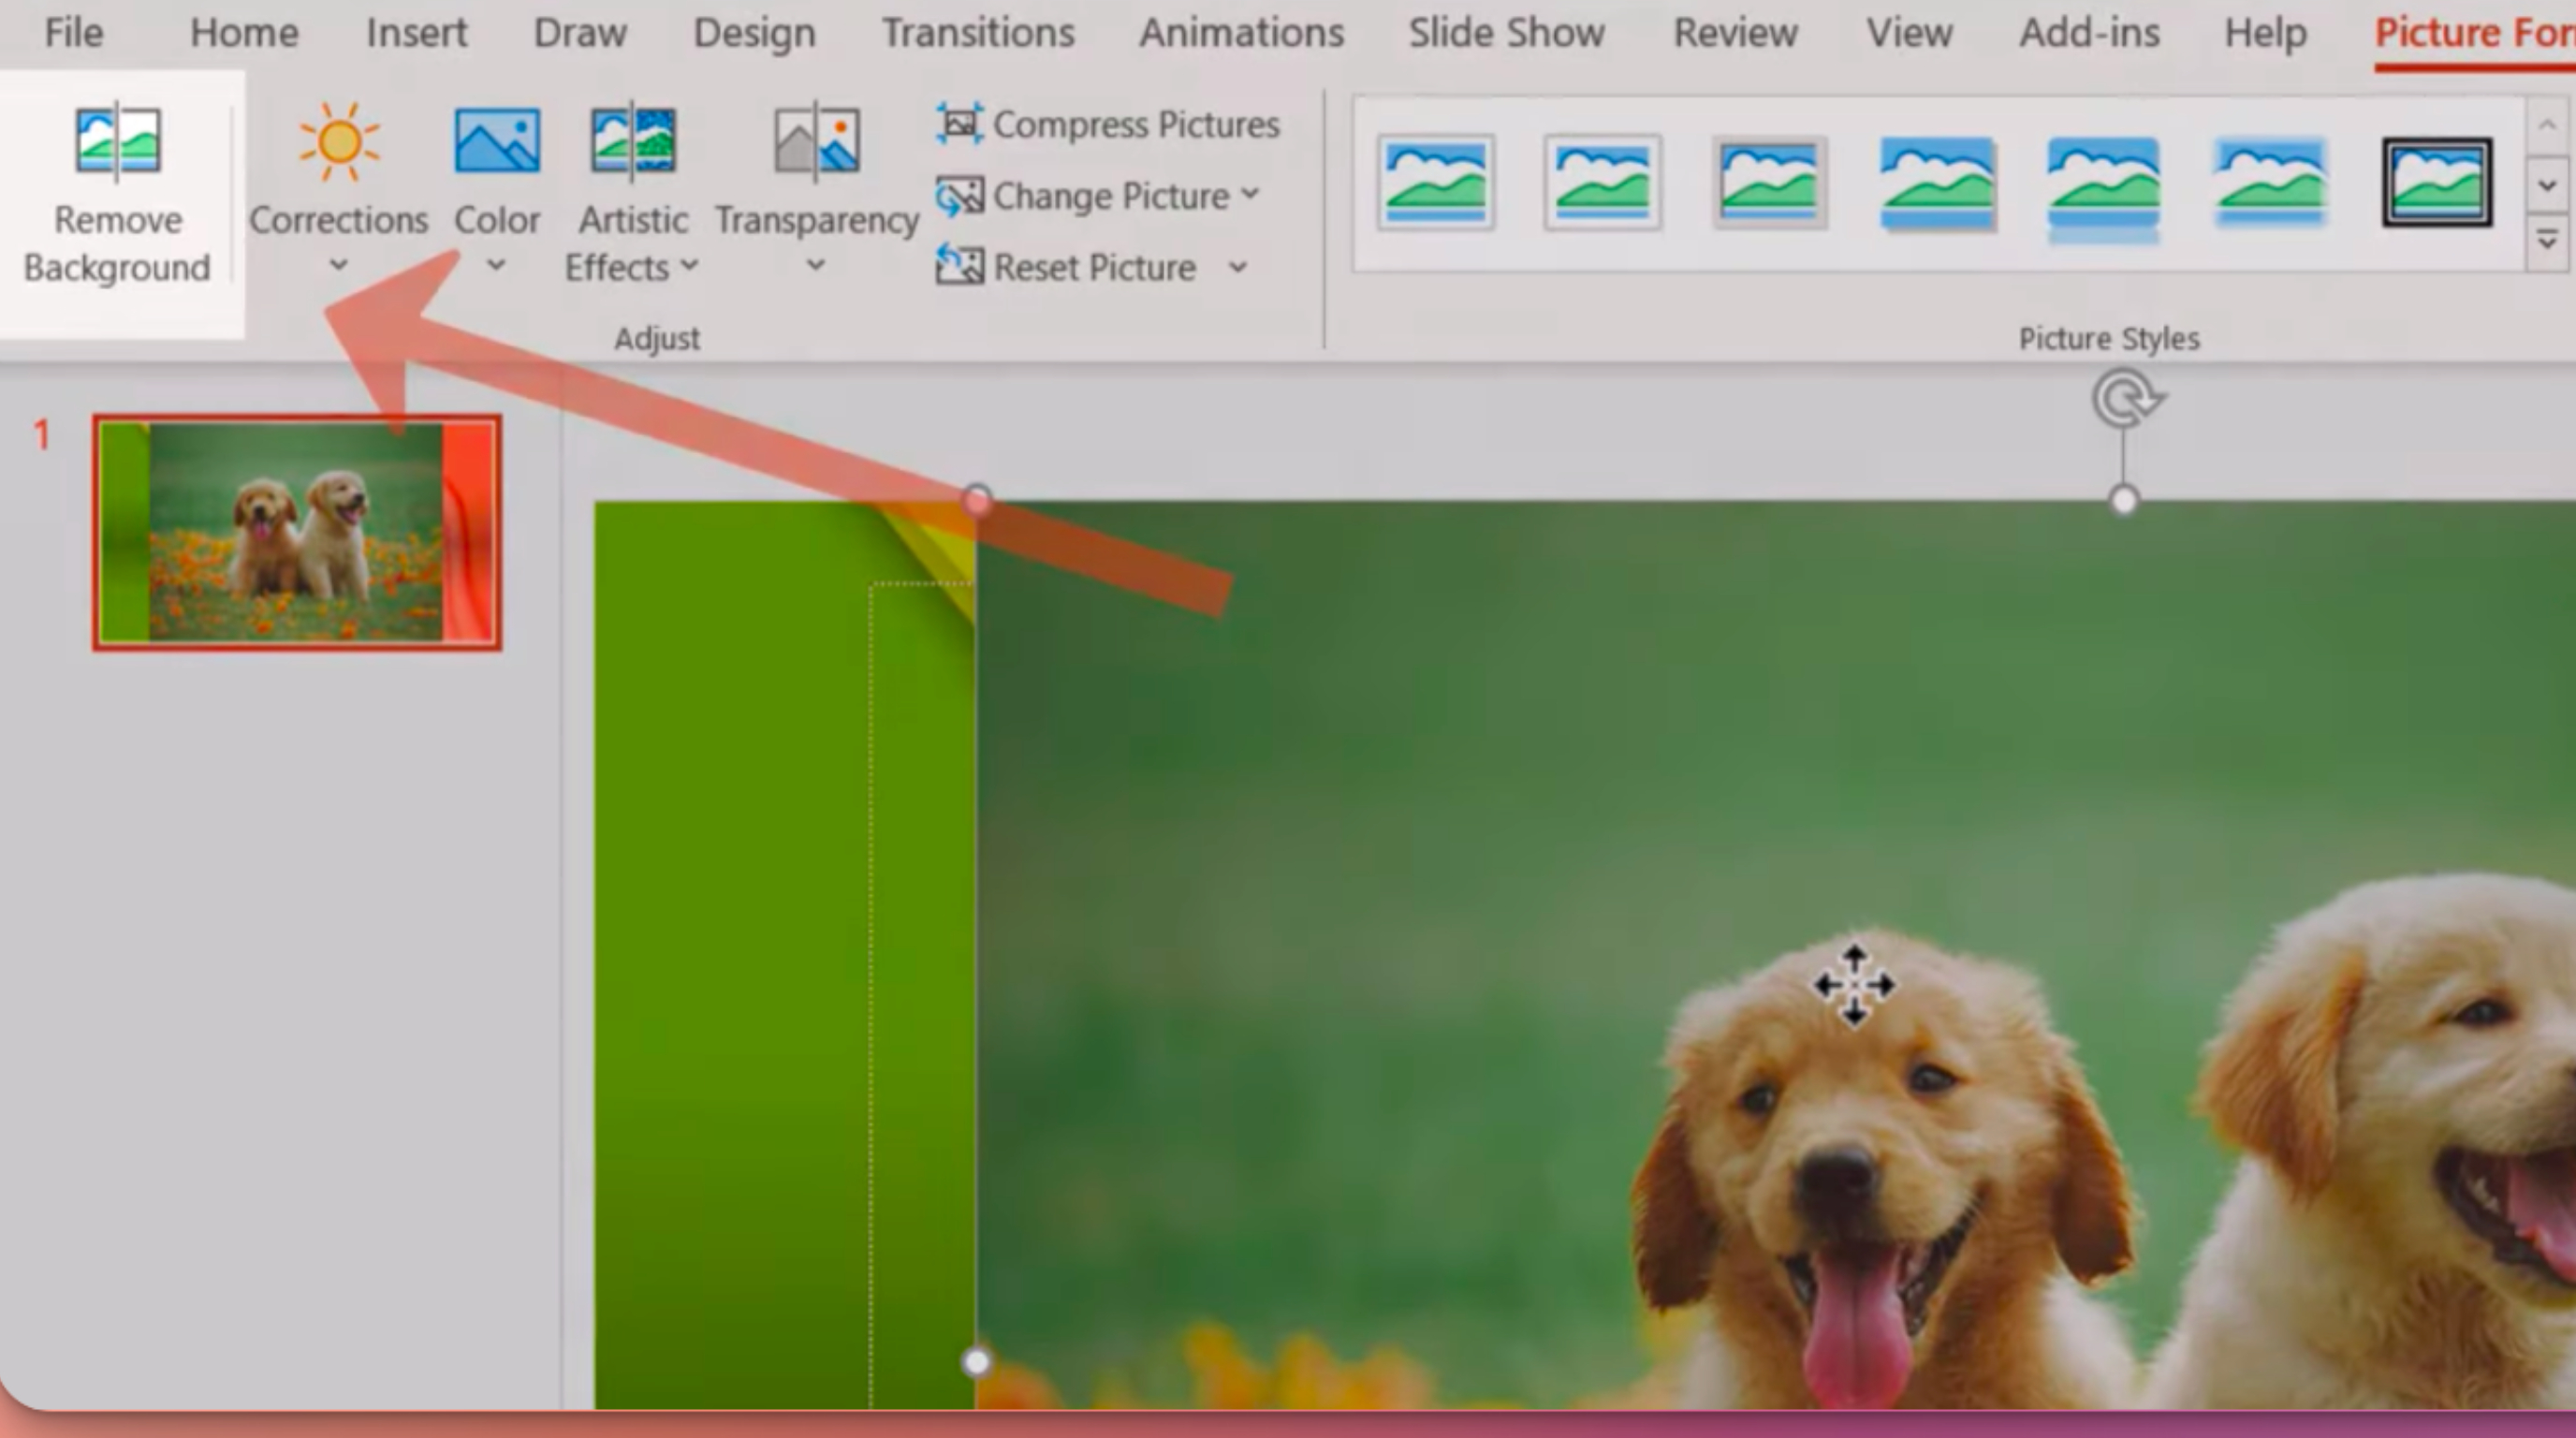
Open the background removal tool. On the Picture Format tab, select Remove Background. PowerPoint analyzes the image and highlights the areas it proposes to remove.
-
Check the magenta areas. The magenta or purple overlay indicates the parts PowerPoint intends to make transparent. Inspect the subject carefully: if magenta covers part of a face, product, clothing, or logo, that detail may be removed when you apply the changes.
-
Mark details to keep or remove. Use Mark Areas to Keep to restore parts of the subject that were selected incorrectly. Use Mark Areas to Remove to select leftover background. Draw short marks over the relevant areas rather than across the entire object, then review the updated selection.
-
Apply the result. Select Keep Changes to remove the marked background. If the result still needs work, undo the change and adjust the selection again before saving or continuing with your slide design.
Tip: For hair, fur, transparent materials, or products with colors similar to the background, zoom in and inspect the edges. PowerPoint may not preserve every fine detail automatically.
Method 2: Use Set Transparent Color
Best for simple logos, icons, and graphics with a single, uniform background color.
If your image has a plain white, black, or other solid-color background, Set Transparent Color can be quicker than manually refining a selection. It makes the selected color transparent wherever that color appears in the image. Unlike Remove Background, it does not identify the subject automatically, so it works best when the background color is clearly different from the colors in the foreground.
-
Insert and select the picture. Go to Insert → Pictures to add your logo, icon, or graphic. Click the image to open the Picture Format tab.
-
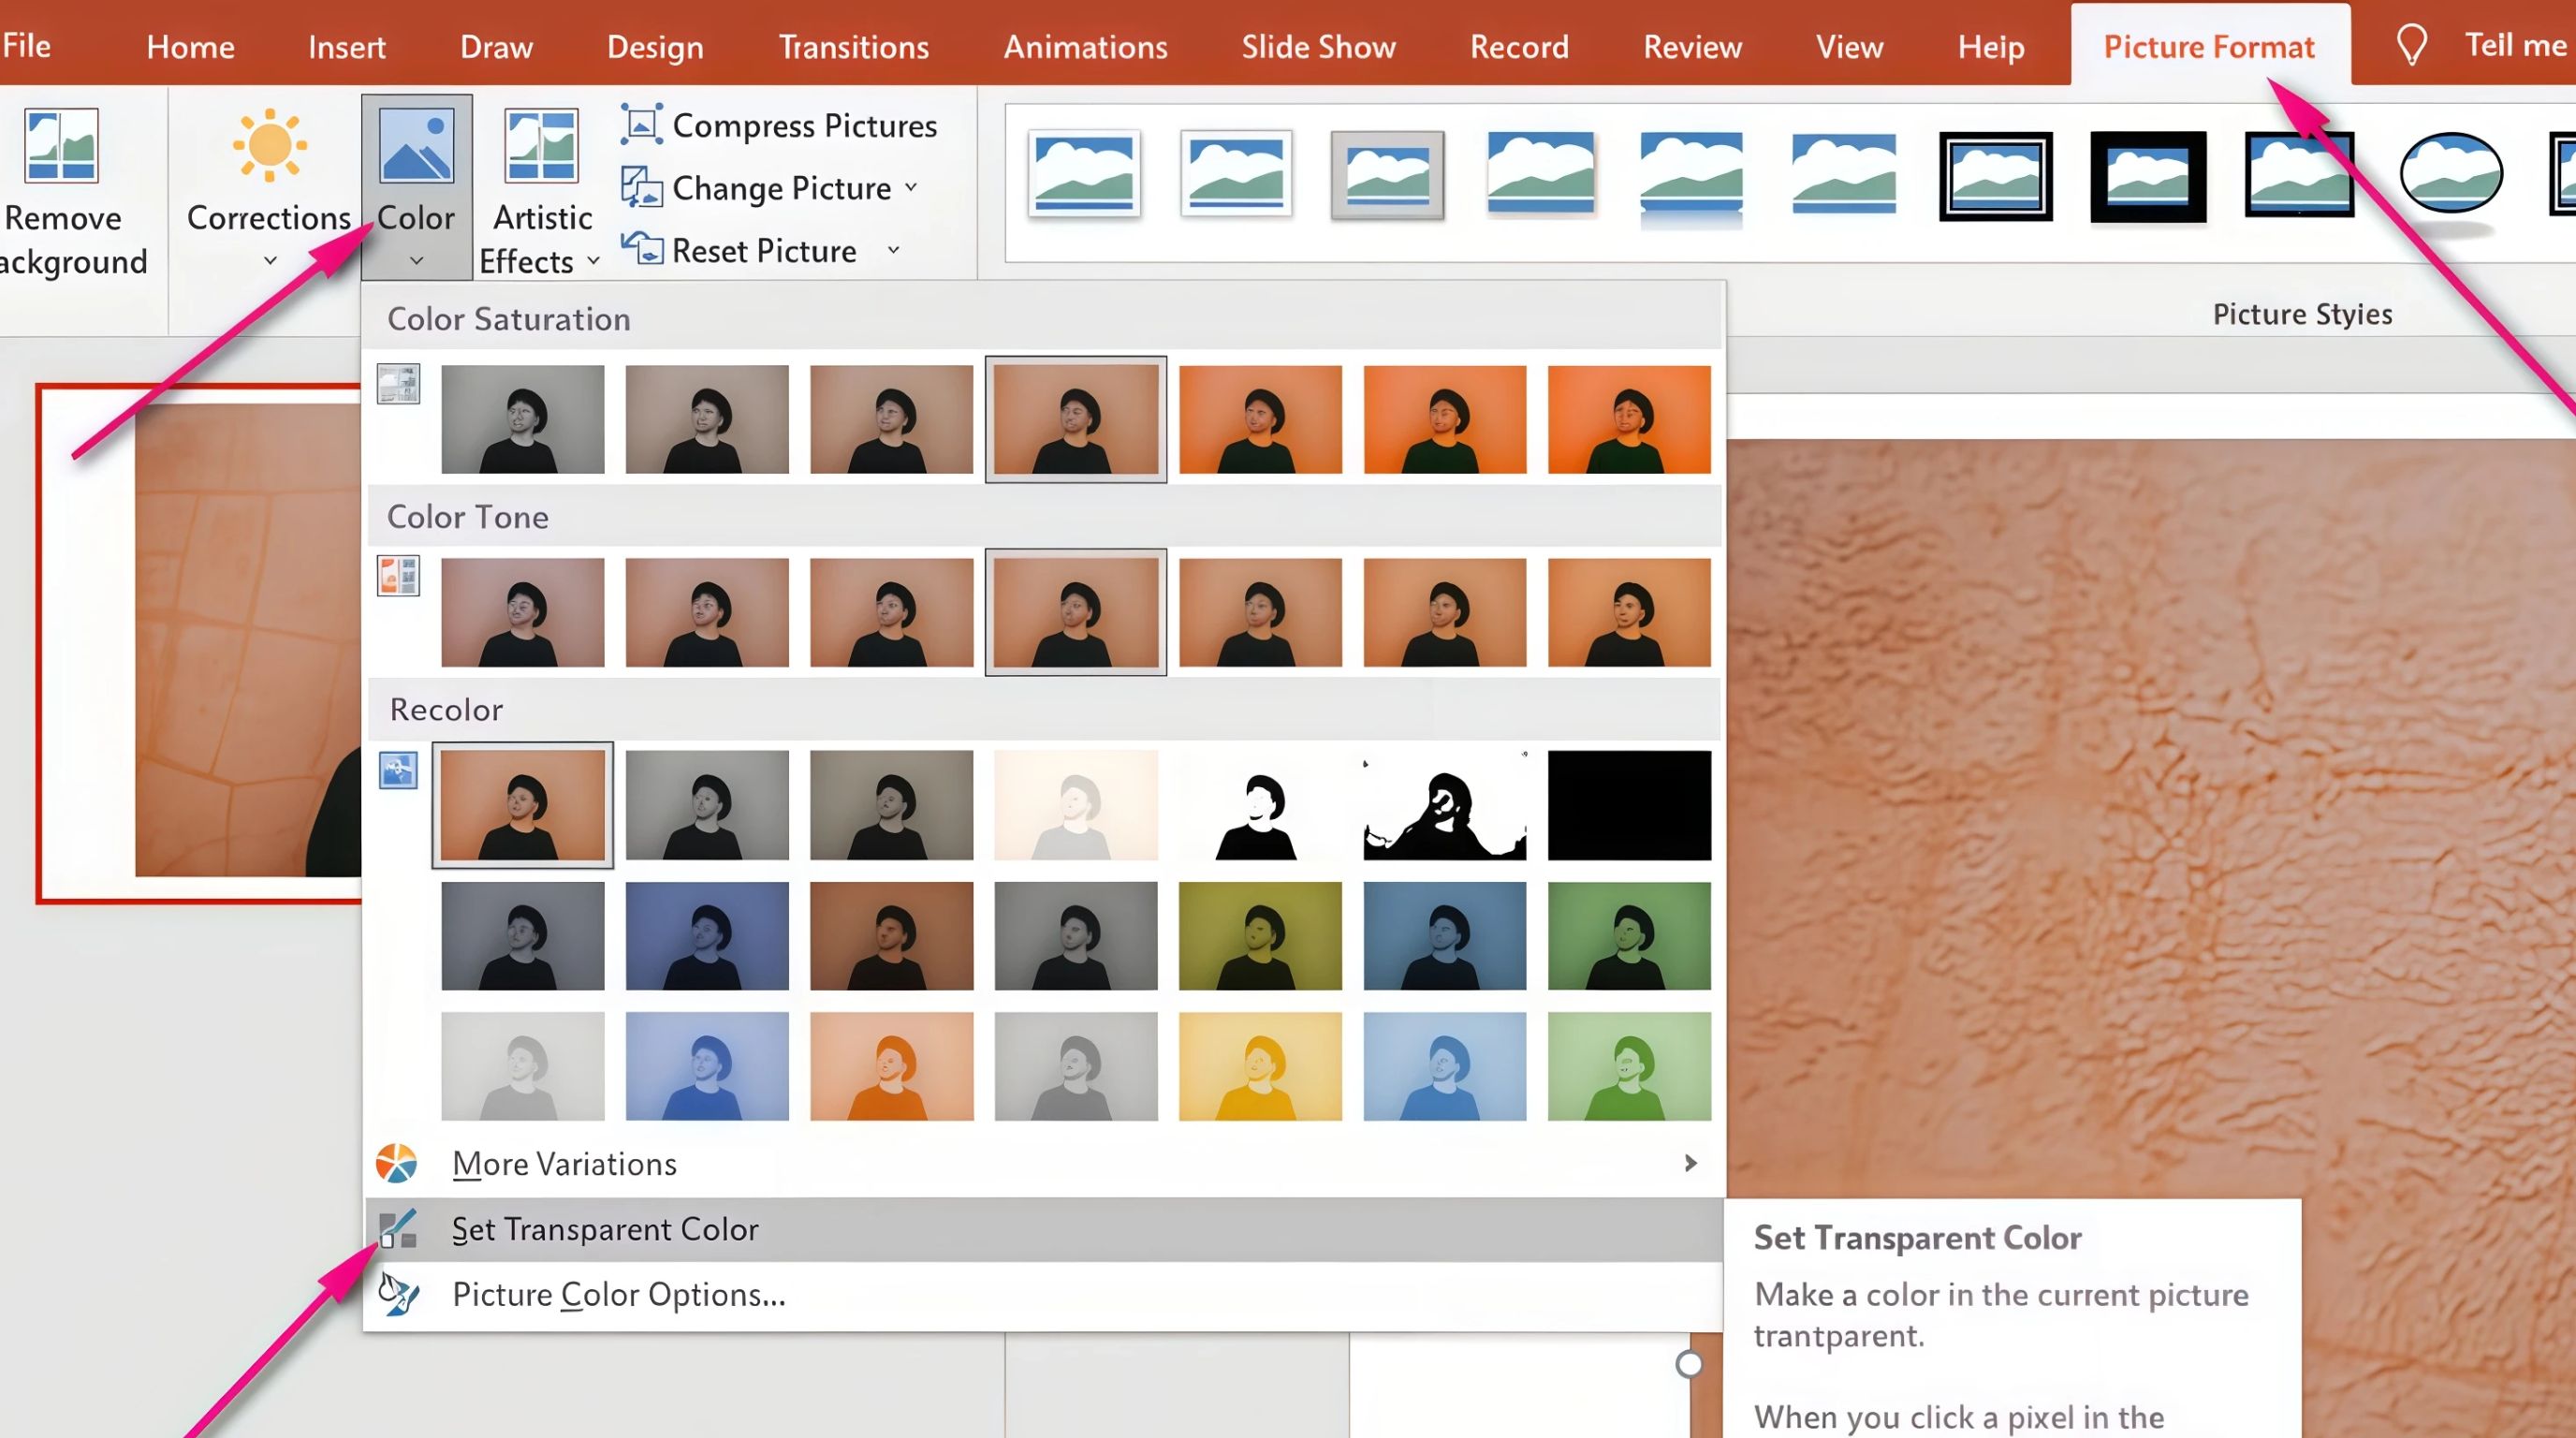
Find Set Transparent Color. On the ribbon, select Color in the Adjust group, then choose Set Transparent Color. In some PowerPoint versions, the available options or their placement may differ slightly.
-
Select the background color. Your pointer changes to a color-selection tool. Click the solid background area you want to remove. PowerPoint makes matching color areas transparent, allowing the slide background to show through.
-
Inspect the image carefully. Check the edges and the details inside the logo or icon. If the same color appears in the subject, those parts may also become transparent. For example, clicking white behind a logo can remove white lettering or highlights within the design.
-
Keep the result and check transparency. Click elsewhere to finish the selection and inspect the image against your slide background. If the result is unsuitable, undo the change and try another method. To reuse the image outside PowerPoint, save it as a PNG and confirm that transparency is preserved.
Important limitation: Set Transparent Color cannot distinguish between a white background and white details in a logo. If both use the same color, it may erase parts of the design along with the background.
Which PowerPoint Background Removal Method Should You Use?
Choose the method based on the image's background, subject details, and how much control the edit requires.
|
Image Type |
Recommended Method |
Why |
|---|---|---|
|
Portrait or person |
Remove Background |
Separates a person from a detailed scene, with manual selection adjustments when needed. |
|
Product photo |
Remove Background |
Lets you correct the selection around product edges and remove surrounding objects. |
|
Logo on a solid background |
Set Transparent Color |
Quickly removes a uniform color when it does not appear in the logo itself. |
|
Icon on a plain background |
Set Transparent Color |
Works well when the background is one distinct color. |
|
Hair, fur, or fine edges |
Remove Background |
Offers selection controls, although intricate details may still need correction. |
|
Subject and background have similar colors |
Test Remove Background first |
Similar colors can cause parts of the subject to be removed accidentally. |
|
White logo on a white background |
Neither method may work reliably |
Set Transparent Color can erase white logo details, while automatic selection may struggle to separate the design. Use a version with a contrasting background or a properly prepared transparent PNG. |
For the cleanest result: Use Remove Background when you need to separate a subject from a scene. Use Set Transparent Color when the background is uniform and distinct from the image itself. After either method, inspect the edges and internal details before using the image in your slides.
How to Remove Backgrounds From Different Types of Images in PowerPoint
The right way to remove a background in PowerPoint depends on the image's colors, edges, and details. Logos may lose lettering, portraits can develop rough edges around hair, and product photos may need careful corrections around their outlines. Choose the appropriate tool for each image and inspect the result before using it in your presentation.
Remove Backgrounds From Logos and Icons
For logos and icons with a solid background, select the image and open Picture Format. Choose Color, then Set Transparent Color, and click the background. Check whether white lettering, symbols, or highlights also disappear. If they do, undo the change and try Remove Background. For logos that need more precise editing, a dedicated logo background remover can help prepare graphics for different designs.

Remove Backgrounds From Portraits and People
When you remove a background from a portrait, select the photo and choose Remove Background under Picture Format. Inspect the magenta overlay around hair, ears, shoulders, and clothing. Use Mark Areas to Keep or Mark Areas to Remove, then select Keep Changes. If nearby objects or uneven edges remain, a dedicated background remover may offer another way to refine the portrait.
Remove Backgrounds From Product Photos
Product photos need careful editing because rough edges can affect packaging, labels, shadows, and product contours. Select the image in PowerPoint and choose Remove Background. Mark any missing product details to keep, remove leftover background areas, and check the result at a closer zoom. If the selection damages fine details or reflective surfaces, try a dedicated PNG background remover before placing the product image in your presentation.
How to Save an Image With a Transparent Background
After you remove a background from an image in PowerPoint, save it in a format that preserves transparency if you plan to reuse it. A transparent image can sit on colored slides, presentation templates, or other designs without displaying its original background. Follow these steps to export the edited picture and check that the transparent areas remain intact.
Save the Edited Image as a PNG
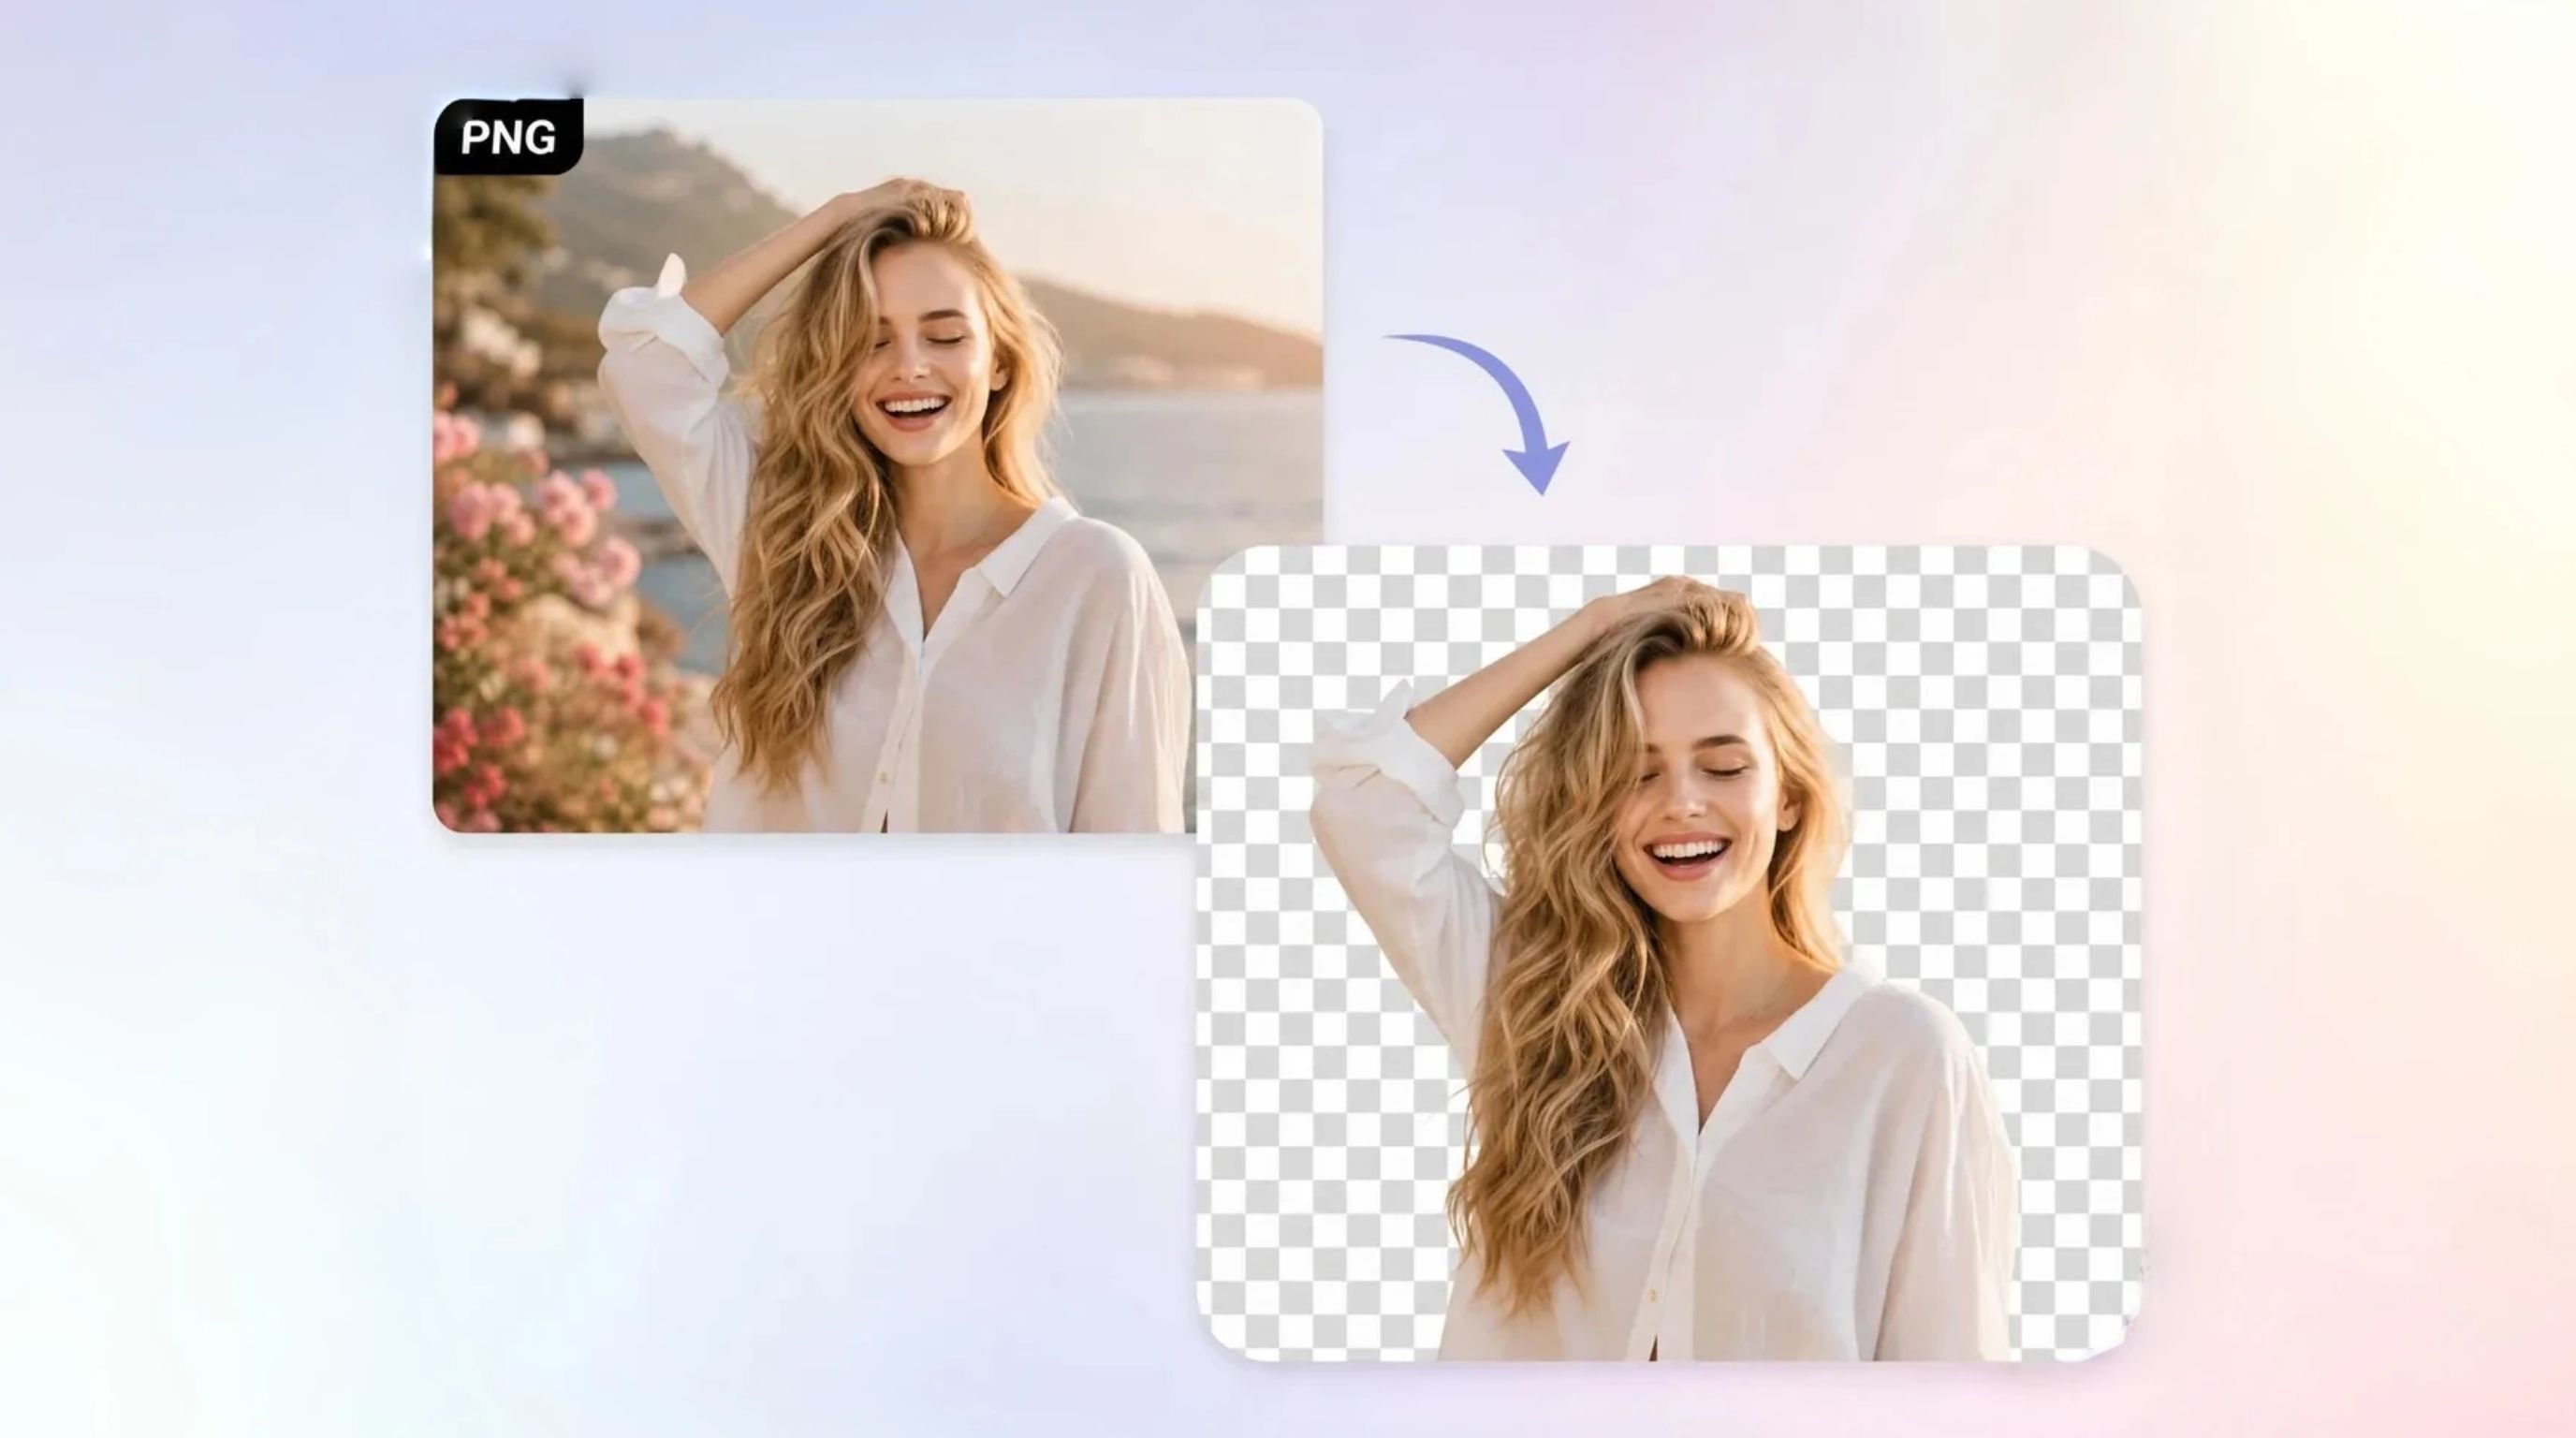
Once you finish editing, select the picture and make sure the background removal changes have been applied. Right-click the image and choose Save as Picture. Select PNG as the file format, choose a location, and save the file. PNG supports transparency, making it suitable for logos, signatures, and product images. If you're learning how to remove the background from images in PowerPoint, remember that choosing PNG helps preserve the result, while JPEG does not support transparent areas.
Keep the Image Transparent When Reusing It
Insert the saved PNG into another PowerPoint slide or a design with a contrasting background. If the original background no longer appears, the transparency has been preserved. If you see a solid white or black rectangle, check that you saved the image in PNG format and removed the background before exporting.
Common PowerPoint Background Removal Problems and Fixes
When you remove a background from an image in PowerPoint, the result may contain missing details, leftover patches, or rough edges. Sometimes, the editing tool is unavailable altogether. These problems can depend on image quality, similar subject and background colors, or the file format. The fixes below explain what to check and how to improve the result when removing an image background in PowerPoint.
PowerPoint Removes Part of the Subject
If PowerPoint removes part of a person's hair, a product label, or a logo detail, it may have mistaken that area for the background. Select the picture, open Picture Format, and choose Remove Background. Use Mark Areas to Keep to restore missing details, then inspect the selection before choosing Keep Changes. Make short, precise marks around the affected areas rather than drawing across the whole subject. If the subject and background share similar colors, accurate selection may require several adjustments.
Parts of the Original Background Remain
Unwanted background patches can remain around hair, between objects, or along product edges. Reopen Remove Background and select Mark Areas to Remove. Mark the leftover areas carefully, checking the preview after each adjustment. Busy backgrounds and fine boundaries may require additional corrections. For a cleaner result, start with an image where the subject stands out clearly from its surroundings. If you're learning how to remove a picture background in PowerPoint, remember that automatic selection may not remove every background detail in one attempt.
Set Transparent Color Removes Too Much
Set Transparent Color makes matching color areas transparent wherever they appear in the image. If you select white behind a logo, white lettering or highlights may disappear too. Undo the change and try Remove Background, which allows you to mark areas to keep and remove. This issue is especially common when the subject and background share the same color. If neither method preserves the important details, use an image with a contrasting background or prepare a cleaner version before editing it in PowerPoint.
Remove Background Is Unavailable or Grayed Out
If Remove Background is grayed out, check these common causes:
-
The picture isn't selected: Click the image to display the Picture Format tab.
-
You've selected a shape or grouped object: Select the actual picture instead of a shape, icon, or group.
-
The file is a vector graphic: Some vector formats, including SVG, may not support the same background-removal controls. Try inserting a PNG or JPG version.
-
The image format isn't supported by the tool: Insert a standard raster image and check whether the option becomes available.
If the tool remains unavailable, try a supported image copy and repeat the process. Converting a vector graphic to PNG or JPG may enable editing, but it can reduce image quality when resized. These checks can help when you need to remove the background of an image in PowerPoint but cannot access the usual controls.
Best PowerPoint Alternative for Removing Image Backgrounds: Designkit
PowerPoint works well for basic background removal, but images with fine details, complex scenes, or demanding visual requirements may need more editing control. Designkit is an alternative for users who want to remove image backgrounds and continue refining the visuals in one creative workflow. Whether you're preparing presentation graphics, product photos, or marketing assets, you can use it to adjust backgrounds and adapt images for different purposes.

Why Use Designkit for PowerPoint Background Removal?
PowerPoint may remove parts of your subject, leave unwanted background patches, or struggle with images that have similar foreground and background colors. If repeated adjustments still produce a rough cutout, Designkit offers another way to edit the image before using it in your presentation.
-
Prepare Cleaner Images for Slides: Refine images with leftover background areas or uneven edges so they fit more naturally into your presentation layout.
-
Adjust the Background to Match Your Design: Replace a distracting scene with a more suitable background instead of settling for a cutout that clashes with your slide.
-
Fix Other Visual Distractions: If unwanted objects remain after the background is removed, an object remover can help clean up the image before you use it.
-
Get Free Full-Resolution Exports: Create up to 100 free full-resolution images per day, with 100 full-resolution exports available daily.
-
Process Multiple Images at Once: Remove backgrounds from multiple images at once, up to 15 per batch.
-
Reuse Images Beyond Presentations: Once your visual is ready, adapt it for product listings or social media content without treating those channels as the main reason to edit the image.
Designkit is worth considering when PowerPoint's built-in tools cannot produce the result you need. You can continue refining the image rather than relying on a basic cutout alone.
How to Remove an Image Background With Designkit
Step 1: Upload Your Photo
Open Designkit's Image Background Remover and upload the photo you want to edit. Choose a product image, portrait, or other visual where you need to separate the subject from its original background.

Step 2: Remove the Background Automatically
Let Designkit detect the main subject and remove the surrounding background. This helps isolate products, people, or other objects without manually tracing their outlines.
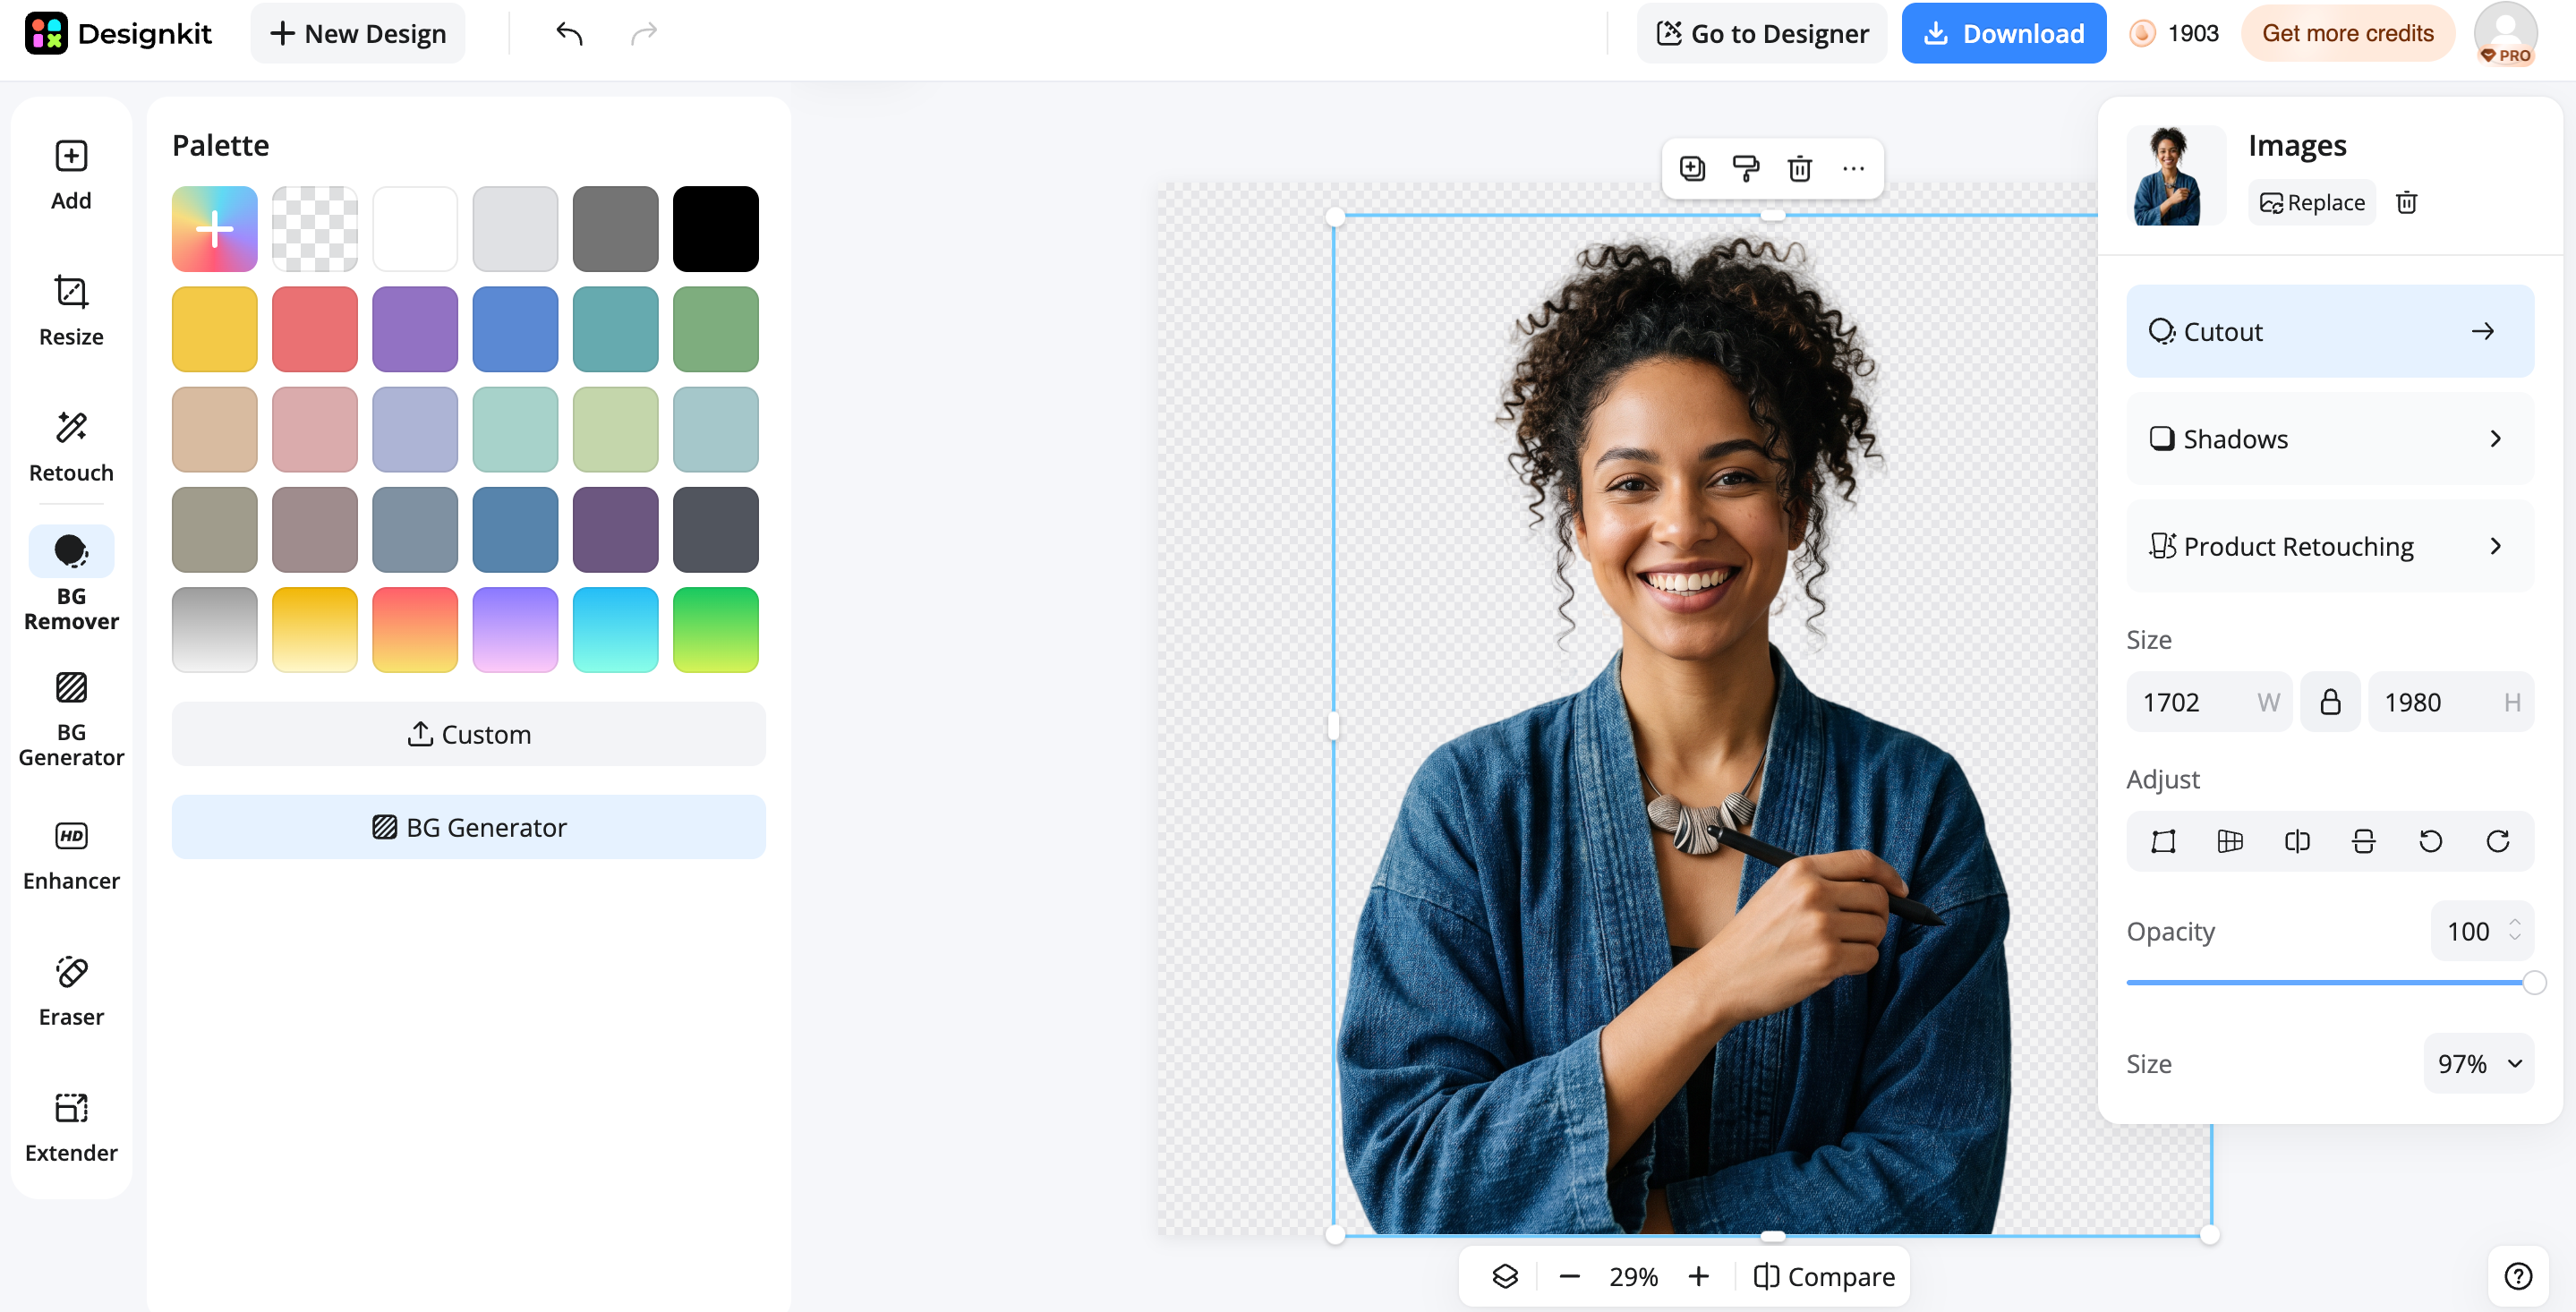
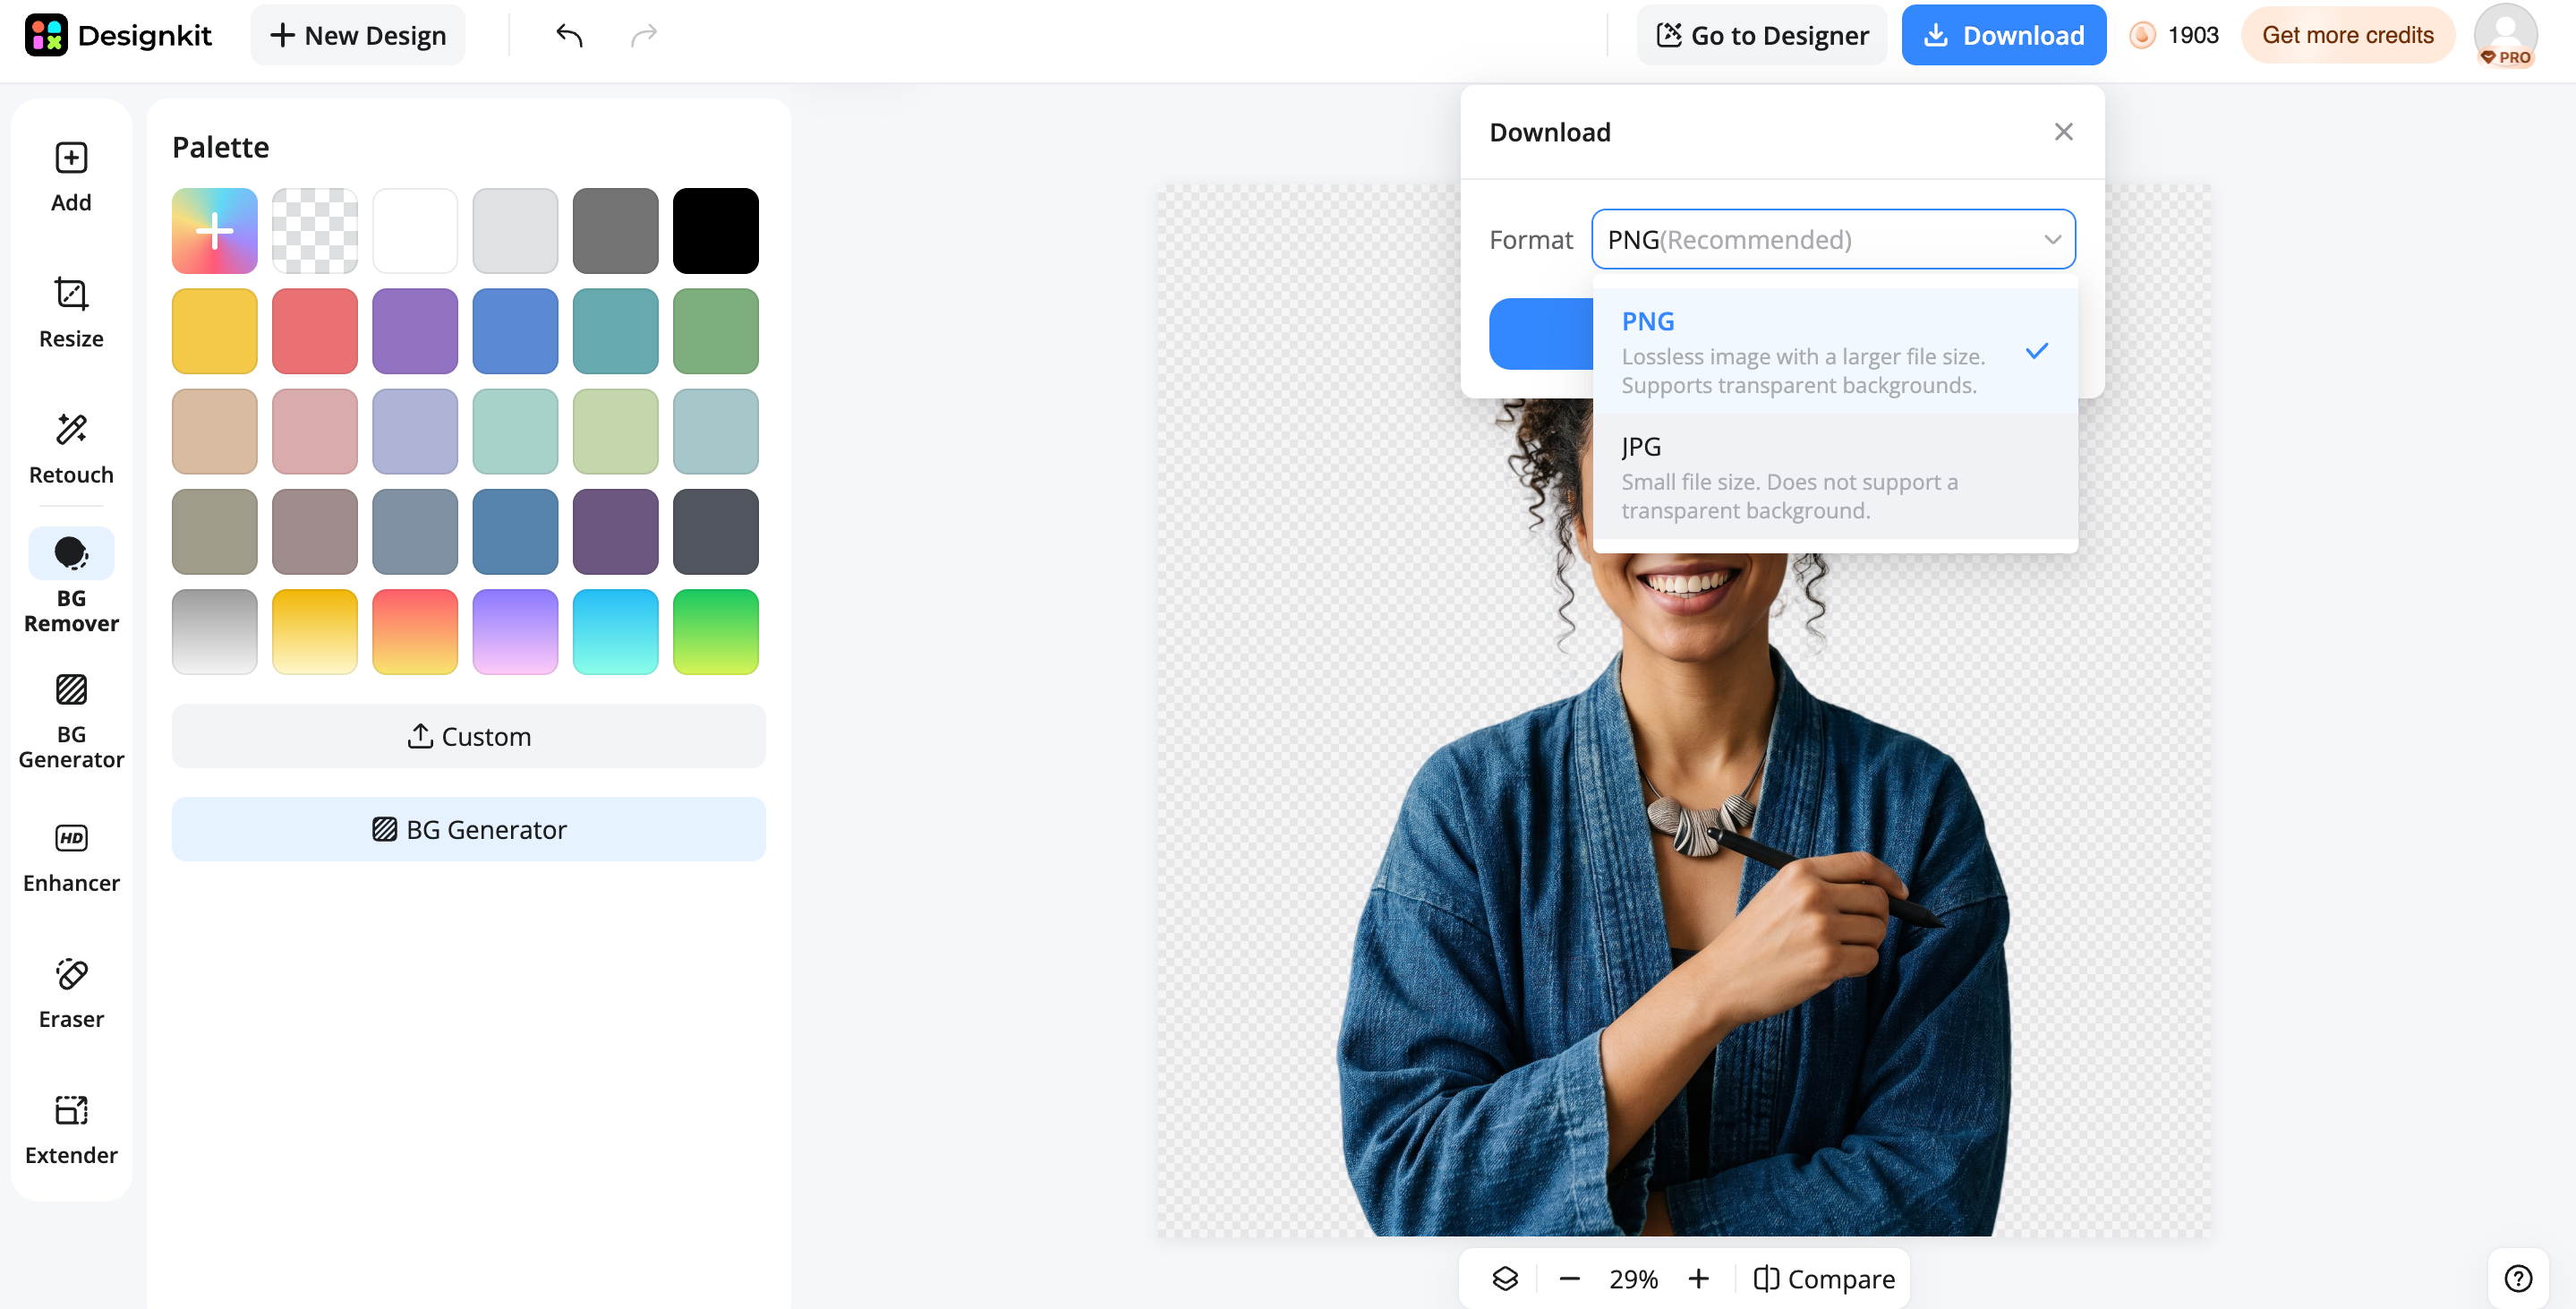
Step 3: Check the Result and Download
Inspect the edges around your subject for leftover background areas or missing details. Once the cutout looks right, download the image and use it in your product listings, marketing materials, or other designs.
When Should You Choose Designkit Over PowerPoint?
PowerPoint works well when you need to remove a background and place the image directly into a slide. Its built-in tools are convenient for simple edits, but complex edges or images that need further adjustments may require additional editing. Choose Designkit when you need to replace backgrounds, refine product photos, or prepare consistent visuals for presentations, online stores, and marketing campaigns. Instead of stopping at background removal, you can continue editing the image for different placements. Before publishing, check that fine details remain intact and the final image fits the intended layout.
Conclusion
Removing an image background in PowerPoint depends on the image you are editing. Use Remove Background for complex photos and Set Transparent Color for logos or graphics with solid backgrounds. Refine the selection to preserve fine details, check edges for unwanted remnants, and save the image as a PNG when you need transparency. Before using it, confirm that the subject looks natural, important details remain intact, and the image fits your slide layout.
If you need to replace backgrounds or refine product photos for presentations and marketing, Designkit offers additional editing options.
Frequently Asked Questions
Can I remove an image background in PowerPoint without another tool?
How do I remove a white background from an image in PowerPoint?
Select the image and go to Picture Format, Color, Set Transparent Color. Click the white background to make it transparent. This works best when the white area is a consistent color. If the image also contains white text, icons, or highlights, those details may disappear too. In that case, try Remove Background for more control when you remove background from image powerpoint.
How do I remove the background from a picture in PowerPoint and keep the image transparent?
Select the picture, choose Picture Format, Remove Background, refine the selection, and click Keep Changes. To preserve transparency outside PowerPoint, right-click the edited image, choose Save as Picture, and select PNG. PNG supports transparent areas, unlike JPEG. Open the saved file on a contrasting background to check that the original background is gone.
Why does PowerPoint remove part of my image?
PowerPoint may mistake part of the subject for the background when colors overlap or details are thin, such as hair, product edges, or transparent-looking areas. Select the picture, reopen Remove Background, and use Mark Areas to Keep to restore missing parts. Zoom in and make small corrections before applying the changes. If the selection remains unreliable, Designkit offers AI image-editing tools for further refinement.
Can I remove a background in PowerPoint Online?
Open the picture and check the Picture Format options to see whether Remove Background is available in your version of PowerPoint for the web. If the option is missing, use the desktop app if available or remove the background with another image editor before inserting the result. Designkit can provide an alternative workflow when you need to prepare a clean image online.
How do I erase a background in PowerPoint without affecting the subject?
Select the picture and choose Picture Format, Remove Background. Use Mark Areas to Keep to protect the subject and Mark Areas to Remove to clear leftover background patches. Inspect fine details around hair, clothing, and product edges before clicking Keep Changes. If PowerPoint keeps erasing important parts, Designkit can help you edit the image separately before adding it to your slide.
Can I replace the background after removing it?
Yes. After removing the original background, place the subject on a colored slide, a new background image, or another visual. You can also save the cutout as a PNG to reuse it in other projects. If you want more options than PowerPoint provides, Designkit lets you continue editing an image and change its background to better match your presentation.
What should I do if PowerPoint's background removal looks messy?
Reopen Remove Background and correct the selection with Mark Areas to Keep and Mark Areas to Remove. Pay particular attention to hair, shadows, narrow gaps, and product outlines. If several attempts still leave rough edges, try a clearer source image or another editing tool. Designkit offers AI-powered image editing as an alternative for refining cutouts and preparing cleaner visuals for presentations.
You May Also Like

How to Remove Background in PowerPoint: Easy Guide

Fotor Watermark Remover Review: Quality & Alternatives

Fotor Background Remover Review: Features, Pricing & Alternatives

How to Make a TikTok Slideshow: Photo Posts & Video Slideshows

How to Add a Shadow in Photoshop | Realistic Product Photo Guide

Remix an Image With AI: Steps, Prompts & Tips

Remove.bg Shutting Down Dec 1, 2026: What Users Are Saying

7 Best Remove.bg Alternatives in 2026: Free & Paid Tools

Instagram Carousel: What It Is, How to Post & Create One
Nano Banana Prompts: 20+ Examples for Better AI Images

Ideogram AI Review 2026: Features, Pricing & Alternatives
Free Mac Photo Editor: 5 Tools Compared for Mac Users
How to Crop a Photo Into a Circle Online (Keep Quality)

How to Make an Image Transparent Online (AI Guide)

Pixlr Background Remover Review 2026: Features, Pricing & Alternatives

How to Fix Overexposed Photos: Recover Highlights Fast

OpenArt AI Review 2026: Features, Pricing & Alternatives

Best AI Headshot Generator: 9 Tools Compared for 2026
Best Stencil Maker Tools 2026: Turn Photos Into Stencils

Pixelbin Watermark Remover Review: Image & Video Results Tested

How to Make a Sticker on iPhone: Easy Step by Step Guide

Best AI Logo Generator in 2026: 10 Tools Compared

How to Turn a Photo Into a Cartoon: A Beginner-Friendly Guide
Landscape vs Portrait: Key Differences & Best Uses in 2026
How to Remove Watermark From Photo: AI, Photoshop & More
How to Fix Pixelated Photos: Photoshop, AI Tools & Tips

Bing Image Creator: How It Works, Features, Uses & Alternatives
How to Remove People from Photos with AI: A Step-by-Step Guide

How to Increase Image Resolution: AI, Photoshop & PPI

How to Add Text to a Photo: 8 Tips for Better Results
How to Fix Grainy Photos: Easy Ways to Clear Images

Creative Profile Picture Ideas for Every Style and Platform
Evoto AI Review 2026: Features, Pricing, Pros & Cons

Pixlr Photo Editor Review: Features, Pricing & Alternatives
Best AI Image Extender Tools in 2026: Expand Photos with AI

How to Make a Collage on iPhone: Easy Guide for 2026
How to Sharpen an Image in Photoshop (Smart Sharpen and Unsharp Mask)
Best Image Background Remover Tools in 2026: AI Tools Compared
How to Make Transparent Background in Paint: Step-by-Step Guide
How to Resize an Image: Best Methods, Tools & Quality Tips

Best AI Image Generator Tools in 2026: Top AI Platforms Compared

Remove.bg Review 2026: Features, Pricing & Is It Worth It?

Luminar Neo Photo Editor Review 2026: AI Features, Price & Pros

How to Post Multiple Photos on Instagram (2026 Guide)

25 Facebook Cover Photo Ideas for Personal & Business Pages

What Is a PFP? Meaning, Examples & How to Create One

Can You Edit an Instagram Post After Posting?

11 Best Canva Alternatives in 2026 for AI Design & Marketing

8 Best Midjourney Alternatives in 2026: Features, Pricing & Comparison
How to Restore Old Photos: AI Tools, Tips & Best Methods

Pixelcut AI Review 2026: Features, Pricing, Pros, Cons & Alternatives
How to Apply Watermark to Photos: Methods, Tips & AI Tools
How to Remove a Background in Illustrator: 4 Easy Methods

How to Change Background Color on Instagram Story (Easy Guide)

8 Best AI Poster Generators in 2026: Create Posters Faster with AI

10 Best AI Image Enhancers in 2026: Tested & Compared

10 Best AI Image Editors in 2026: Features, Pricing & Comparison
7 Best AI Background Changer in 2026: Remove & Replace Photo Backgrounds
Luminar Neo vs Lightroom: Features, Pricing & Comparison 2026

Kittl Review 2026: Is It Worth It? Features & Pricing
How to Make a Blurry Image Clear: 5 AI & Manual Ways

How to Remove Background on iPhone: 5 Easy Methods (2026)

Photoroom Background Remover Review 2026: Features & Alternatives
How to Remove Background in Canva: A Step-by-Step Guide
How to Remove Background in GIMP: Beginner-Friendly Guide

Funny Dog Memes to Try: Doge Meaning and 10 Original Ideas

Back to School Checklist 2026: Supplies, Timeline, and Planning

Recraft AI Review 2026: Features, Pricing, Pros, Cons & Alternatives

How to Make an Image Transparent in Google Slides: Opacity & Background Removal

VanceAI Photo Enhancer Review: Features, Pricing & Alternatives in 2026

What Does Emojify Mean? Text, Photos, & Emoji Art Explained
Top 8 Online Background Removers for Ecommerce Photos (2026)
How to Remove Background in Photoshop: 7 Easy Methods
6 Best AI Image Upscalers 2026: Tools Tested & Compared

Project Indigo Review: Is It Better Than iPhone Camera?
How Big Is an 8x10 Photo? Size, Pixels & Frame Guide
How Big Is a 4x6 Photo? Dimensions, Pixels & Printing Tips

Picsart AI Review: Features, Pricing, Pros, Cons & Alternatives

Lovart AI Review: AI Design Agent Features, Pricing & Alternatives

Fotor AI Image Generator Review: Features, Pricing & Alternatives

How to Add Emoji to Photo Online for Free

Emoji Wallpaper Ideas & How to Make One Online (2026)
Minimalist Poster Design: How to Make a Clean Poster (2026)

How to Make a Custom Poster That Is Ready to Print
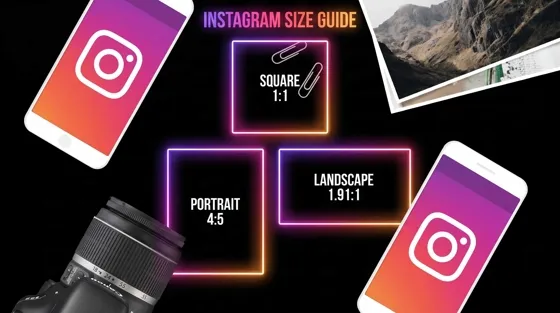
Instagram Image Size Guide 2026: Post, Reel, Story & Carousel Specs
LinkedIn Image Size Guide: Profile, Post & Banner Dimensions

YouTube Profile Image Size: Best Dimensions & Safe Area 2026

How to Edit Amazon Product Photos That Boost Sales Fast
Create Cleaner Images with Designkit
Remove backgrounds, refine the result, and create polished visuals for your next project in Designkit. Start free today.