
How to Remove Background in Photoshop: 7 Methods for Any Image Type
Learn how to remove background in Photoshop using beginner-friendly and advanced methods. Compare tools, fix common mistakes, and turn clean cutouts into ready-to-use creative assets with AI.

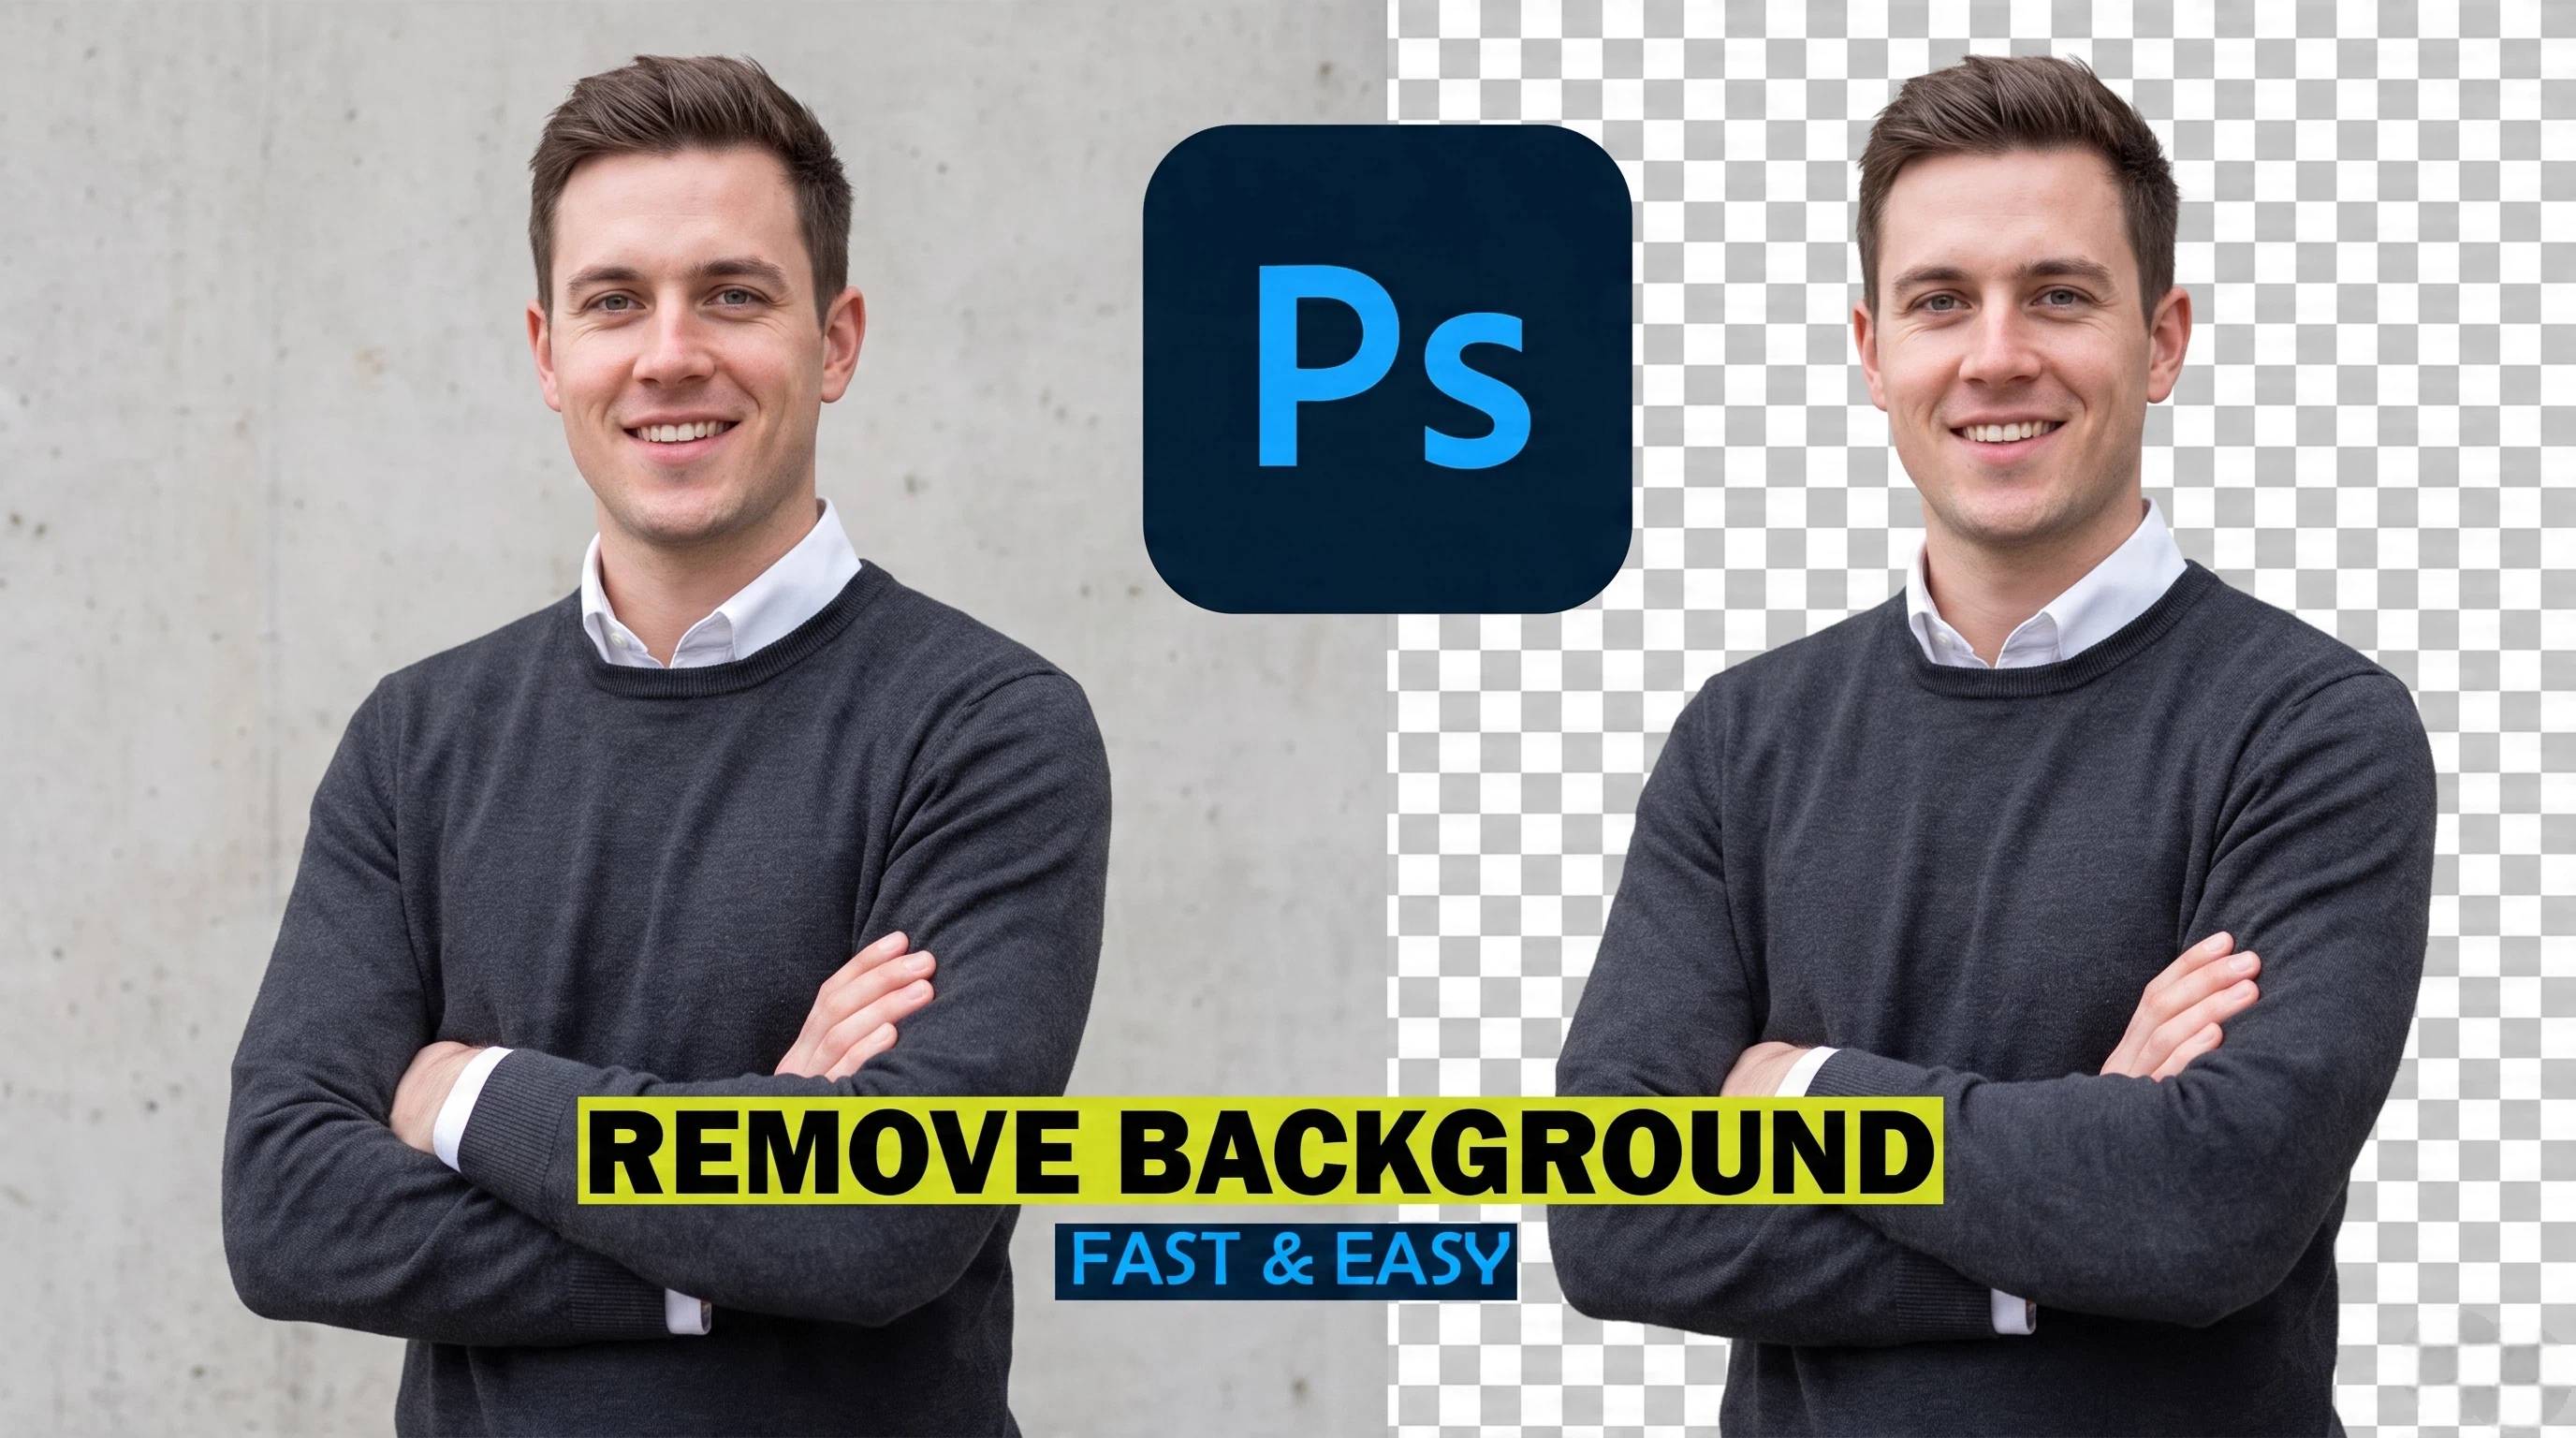
Most background removal problems come from using the wrong method, not from Photoshop itself. A one click tool can remove a simple background in seconds, while images with hair, transparent objects, or complex edges often require more precise editing. Choosing the right technique for each image saves time and produces cleaner results.
Photoshop includes everything from automatic background removal to detailed Pen Tool selections. This guide explains all seven methods, when each one works best, and how to refine your cutout for a clean, professional finish that is ready for product photos, marketing materials, or creative projects.
How to Remove Background in Photoshop: 7 Methods
Photoshop offers several ways to remove a background, ranging from one-click AI tools to precise manual selections. Start with the fastest method that suits your image, then move to more advanced tools when you need cleaner edges or greater control.
Before You Start: Unlock the Background Layer
Before editing, double-click the locked Background layer to convert it into a standard layer. Then use a Layer Mask instead of permanently deleting the background, so you can easily refine edges or restore hidden areas later without damaging the original image.
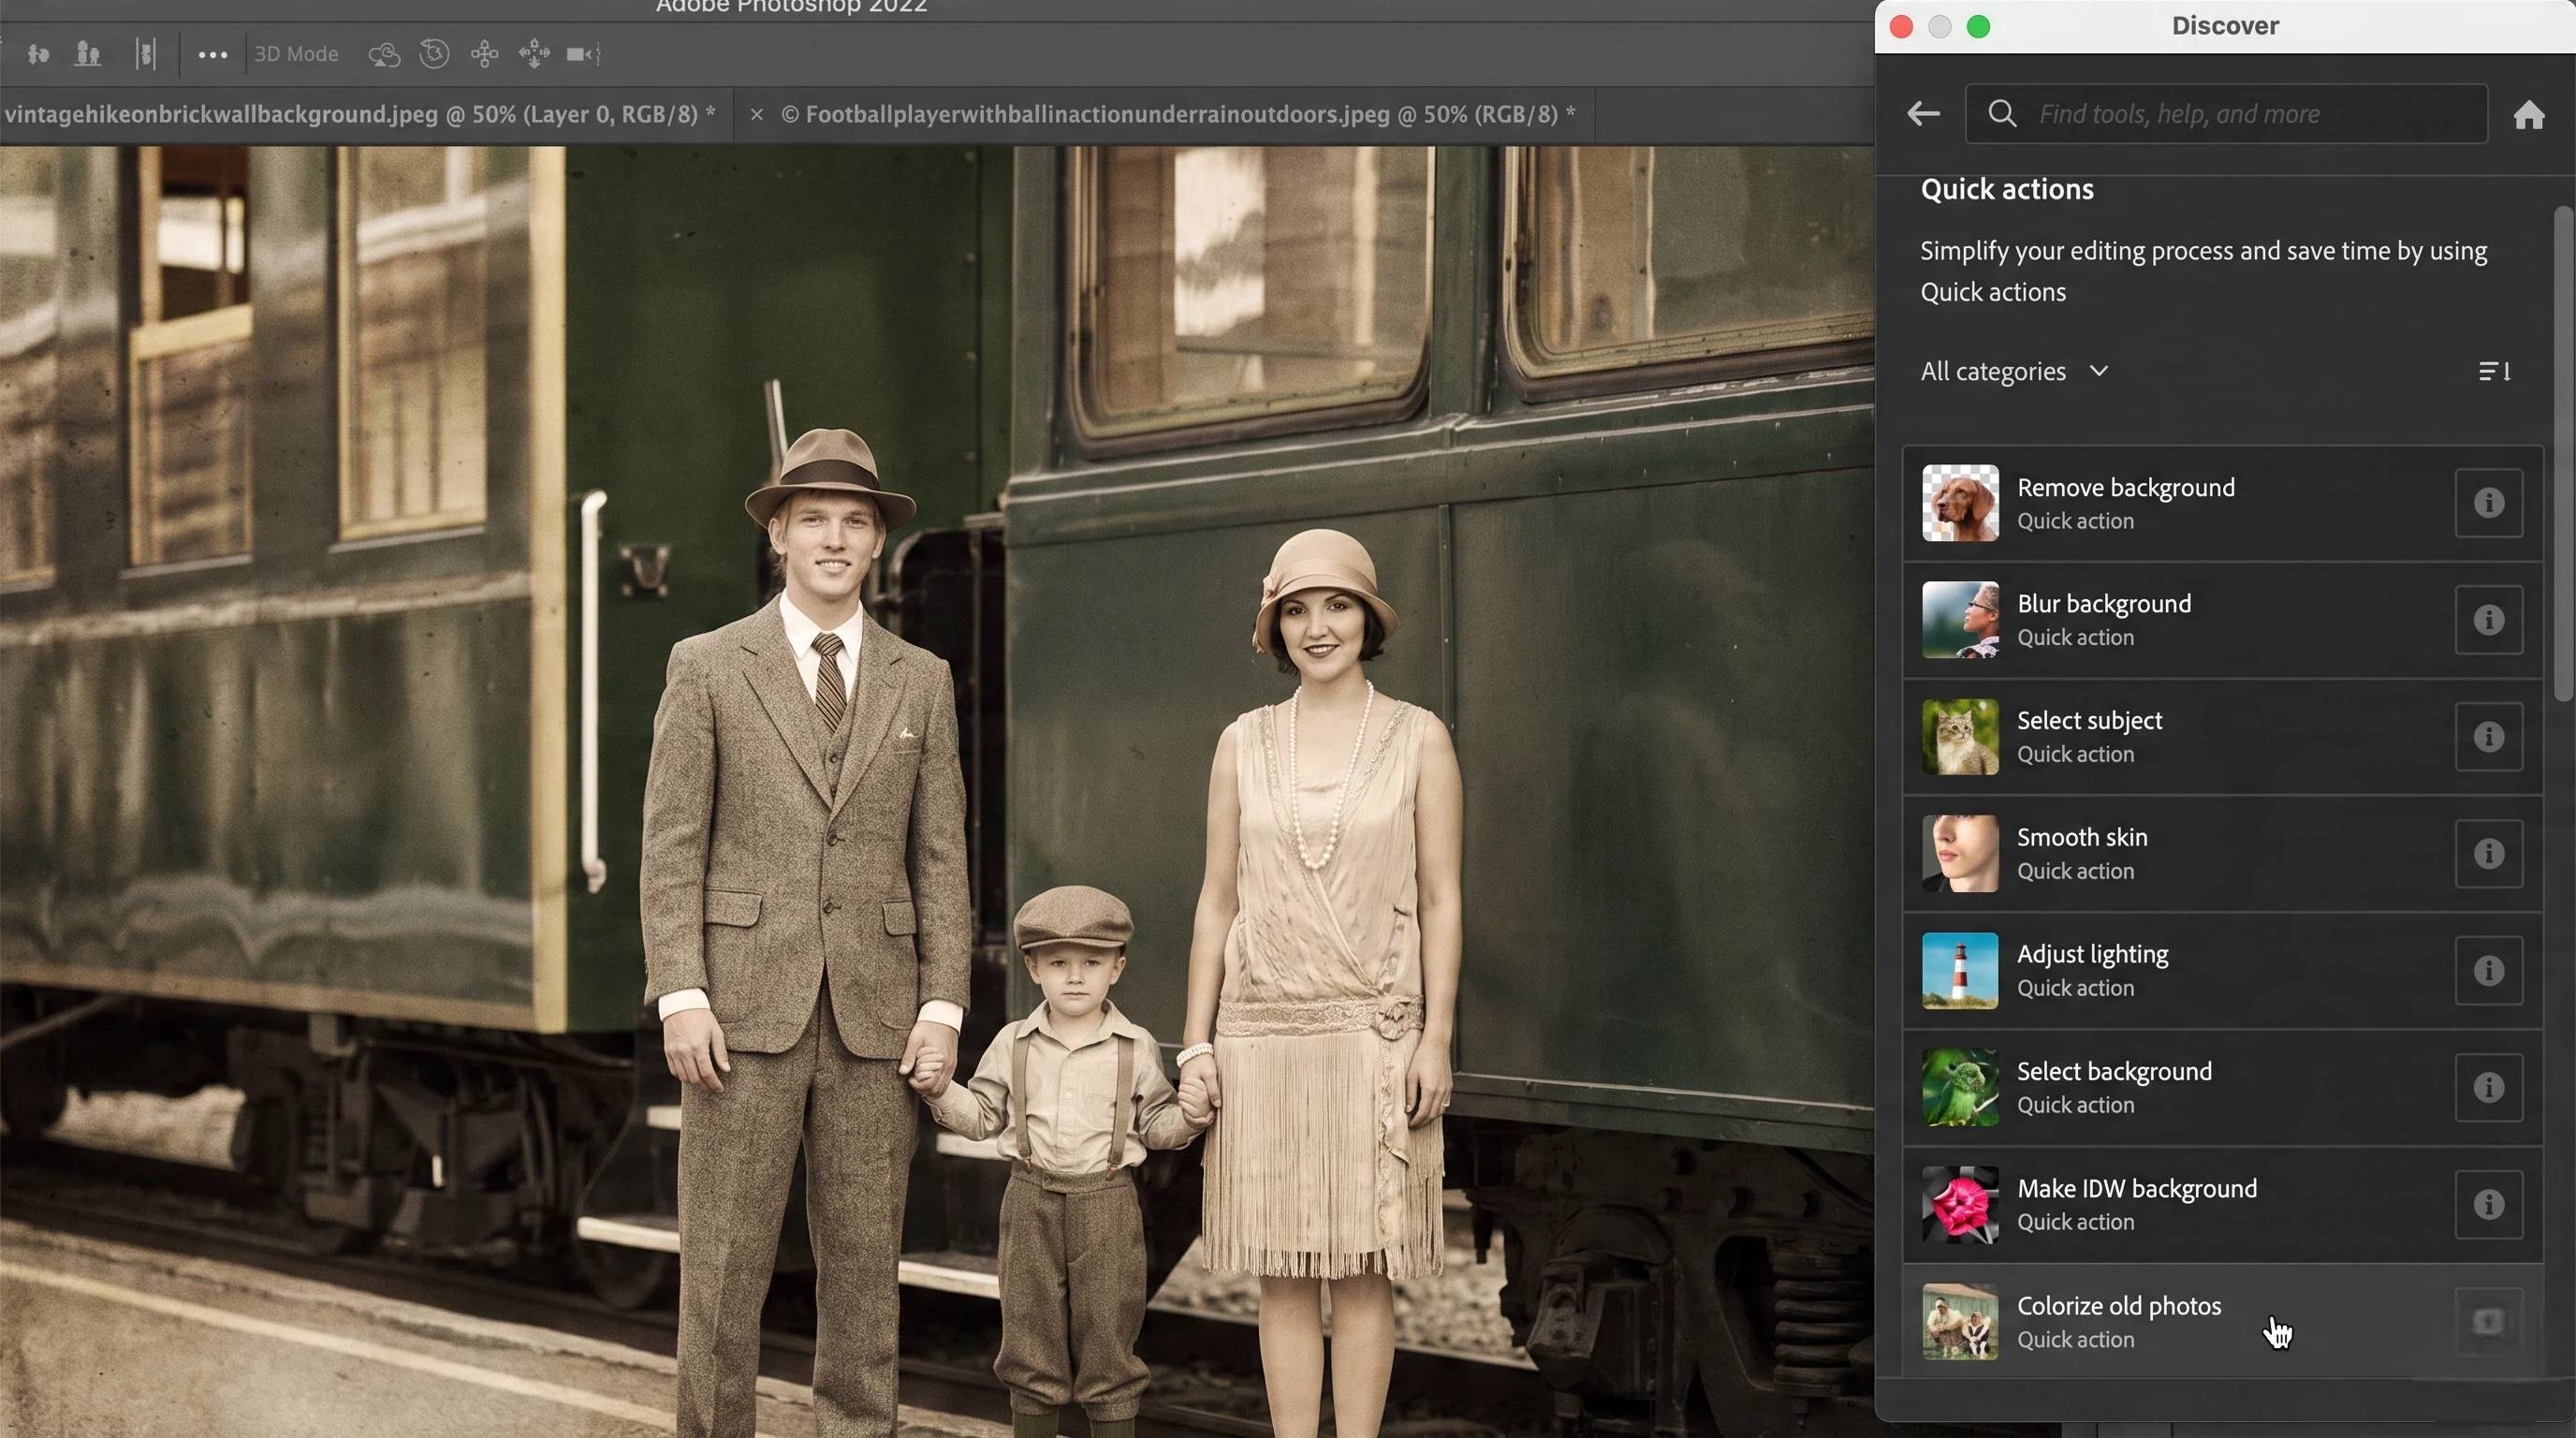
Method 1: Remove Background Quick Action — Best for Beginners
Go to Window > Properties > Quick Actions > Remove Background. Photoshop automatically detects the main subject and creates a layer mask in one click. This method works best on high-contrast images and is the fastest Photoshop background remover for beginners.
Method 2: Object Selection Tool — Best Automatic Detection
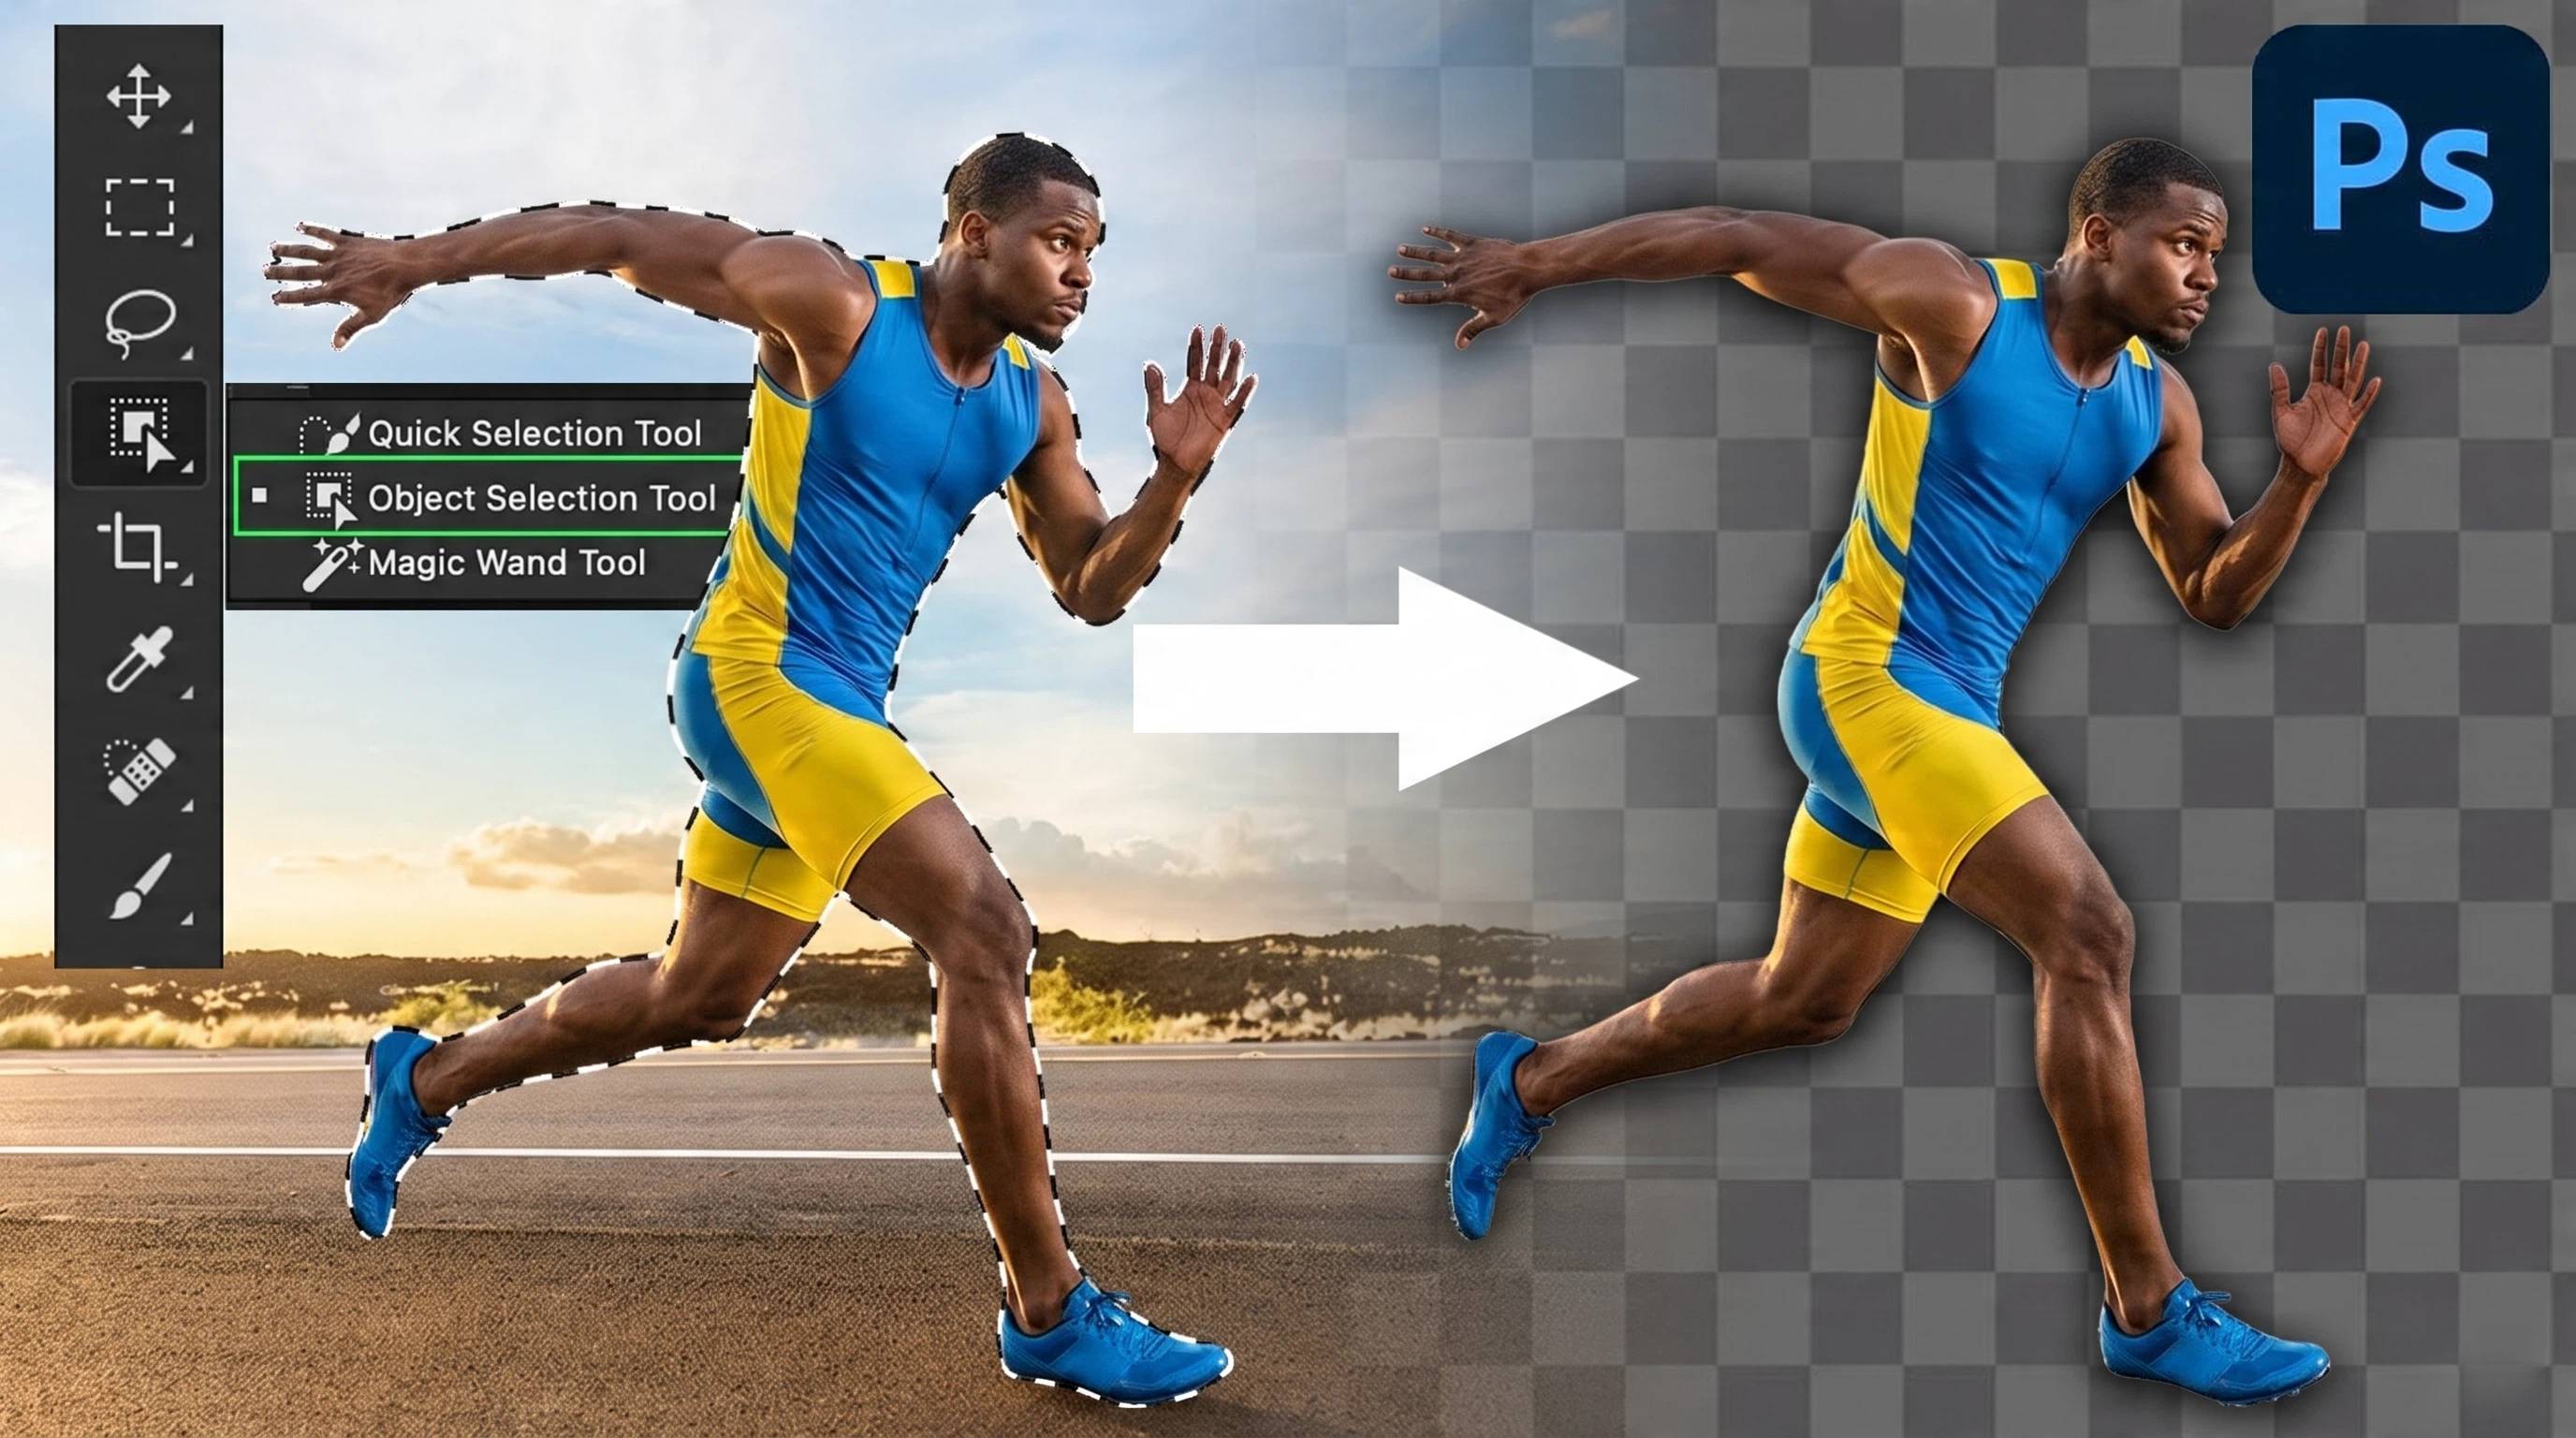
Press W to activate the Object Selection Tool, enable Object Finder, then click your subject. Add a Layer Mask to hide the background. This method performs well on people, pets, products, and objects with clearly defined edges.
Method 3: Quick Selection Tool — Best Balance of Speed and Control
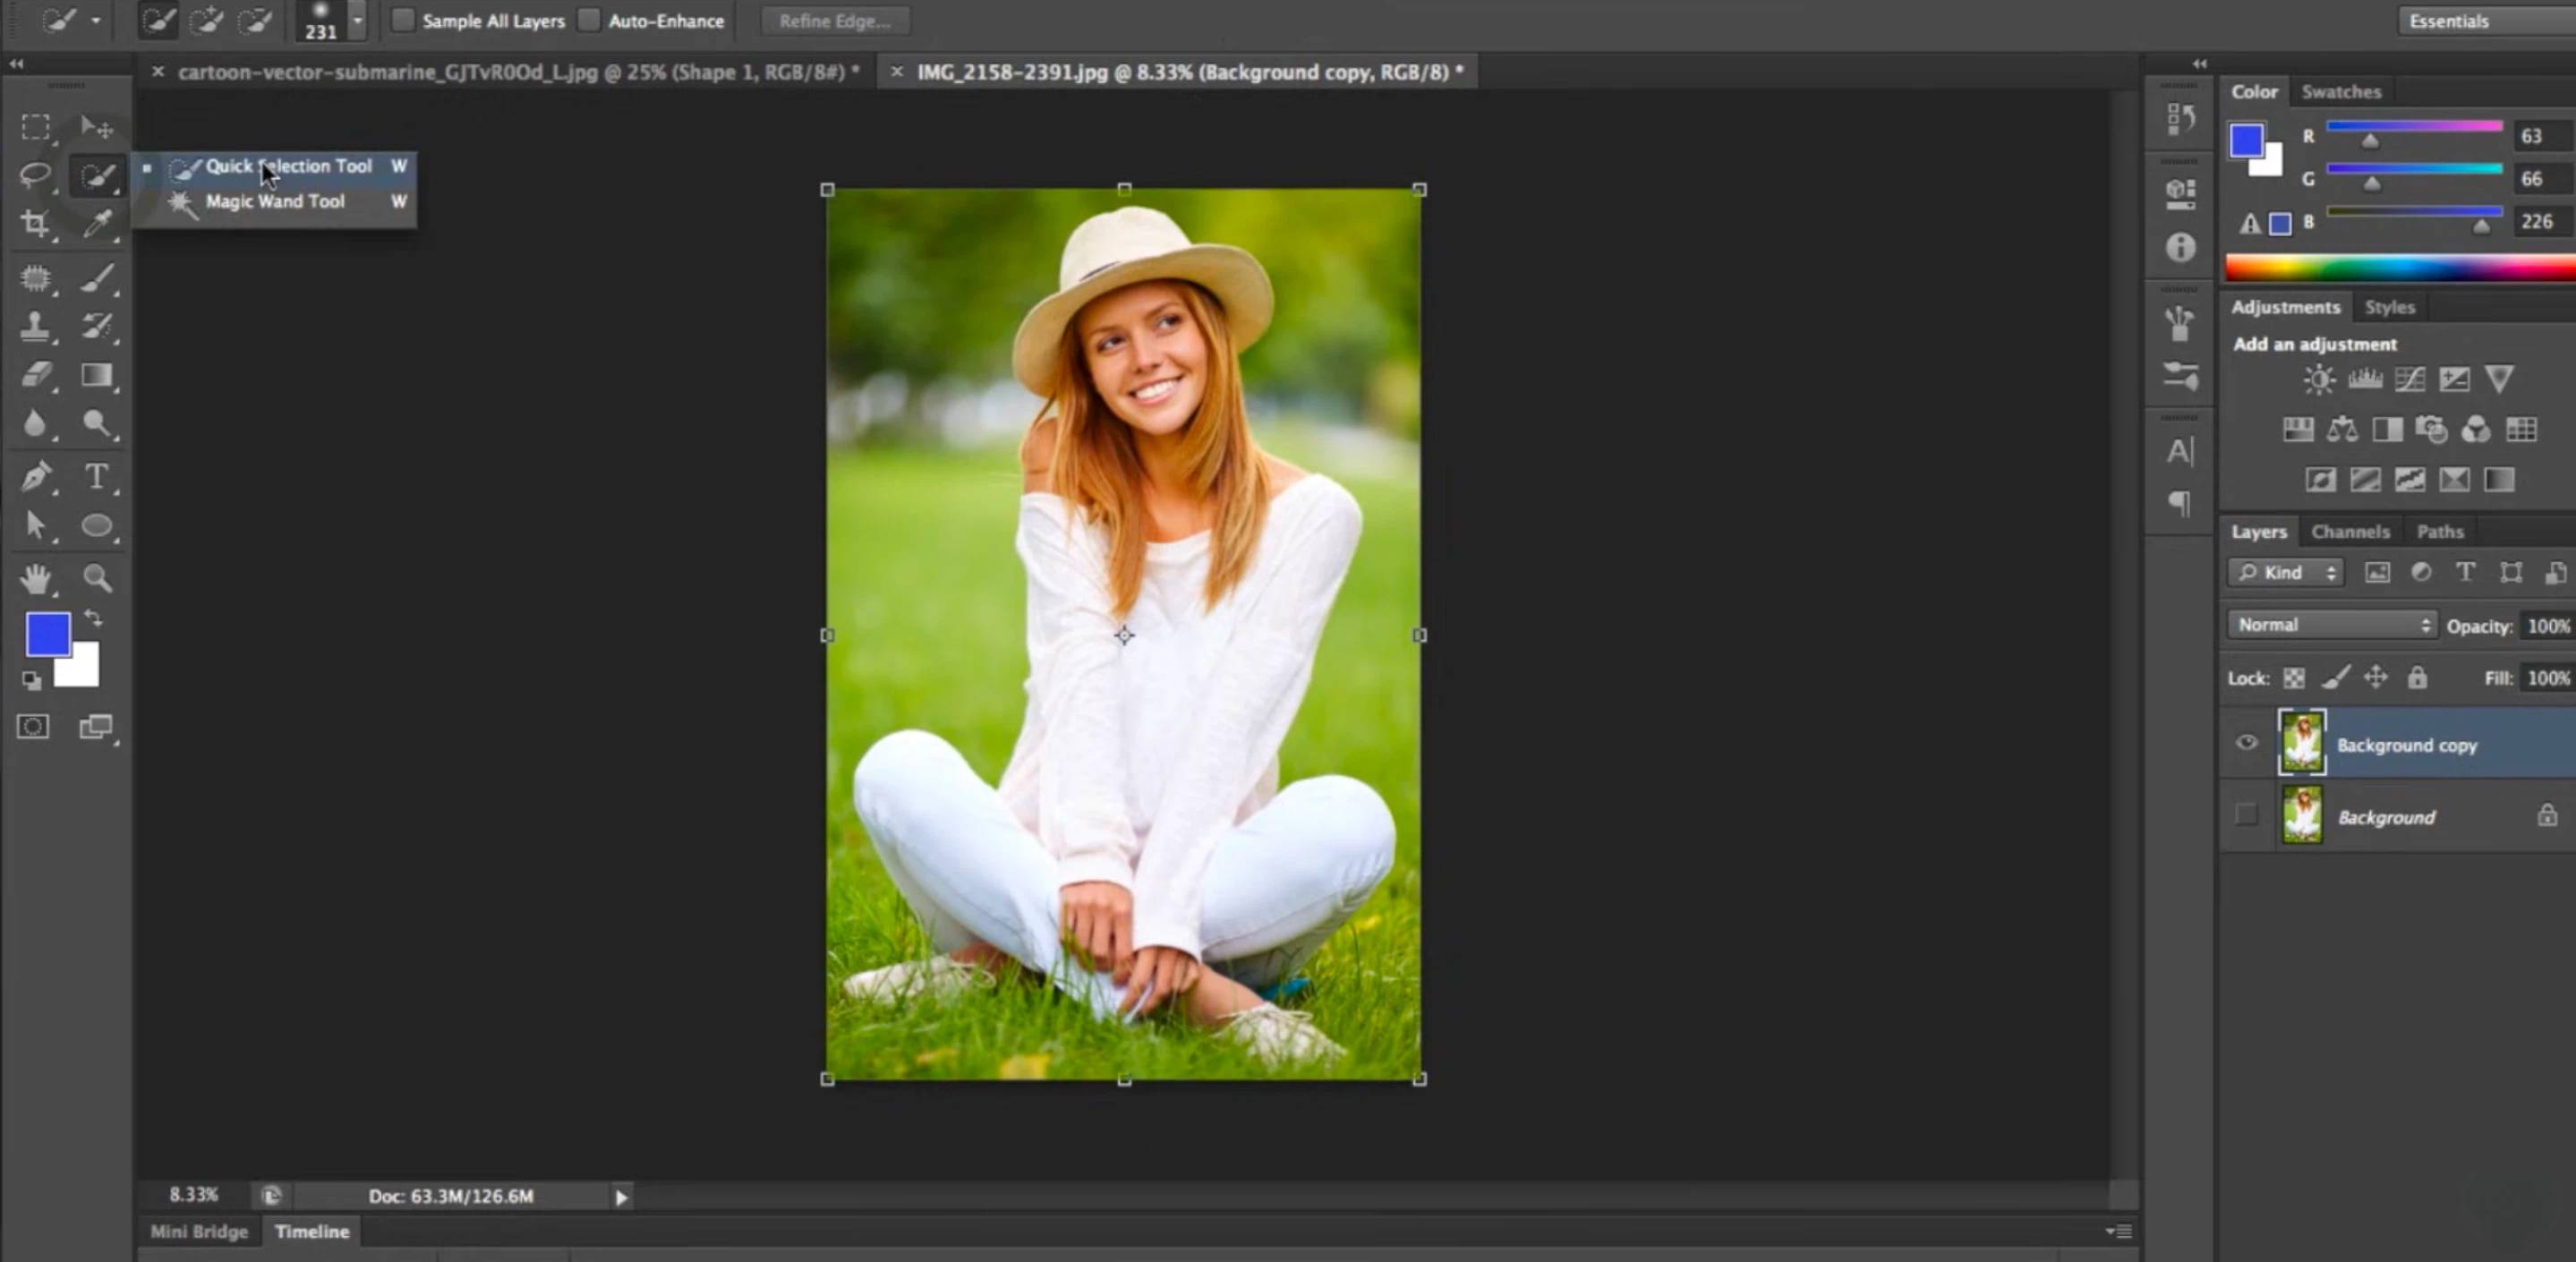
Press W and paint over the subject until it's selected. Open Select and Mask to refine the edges, invert the selection if needed, and apply a Layer Mask. This workflow is ideal when you need to erase a background in Photoshop with more control.
Method 4: Select Subject + Layer Mask — Best Non-Destructive Workflow
Choose Select > Subject to let Photoshop identify the main object automatically. Click Add Layer Mask, then refine the mask using the Brush Tool or Select and Mask for smoother, more natural-looking edges.
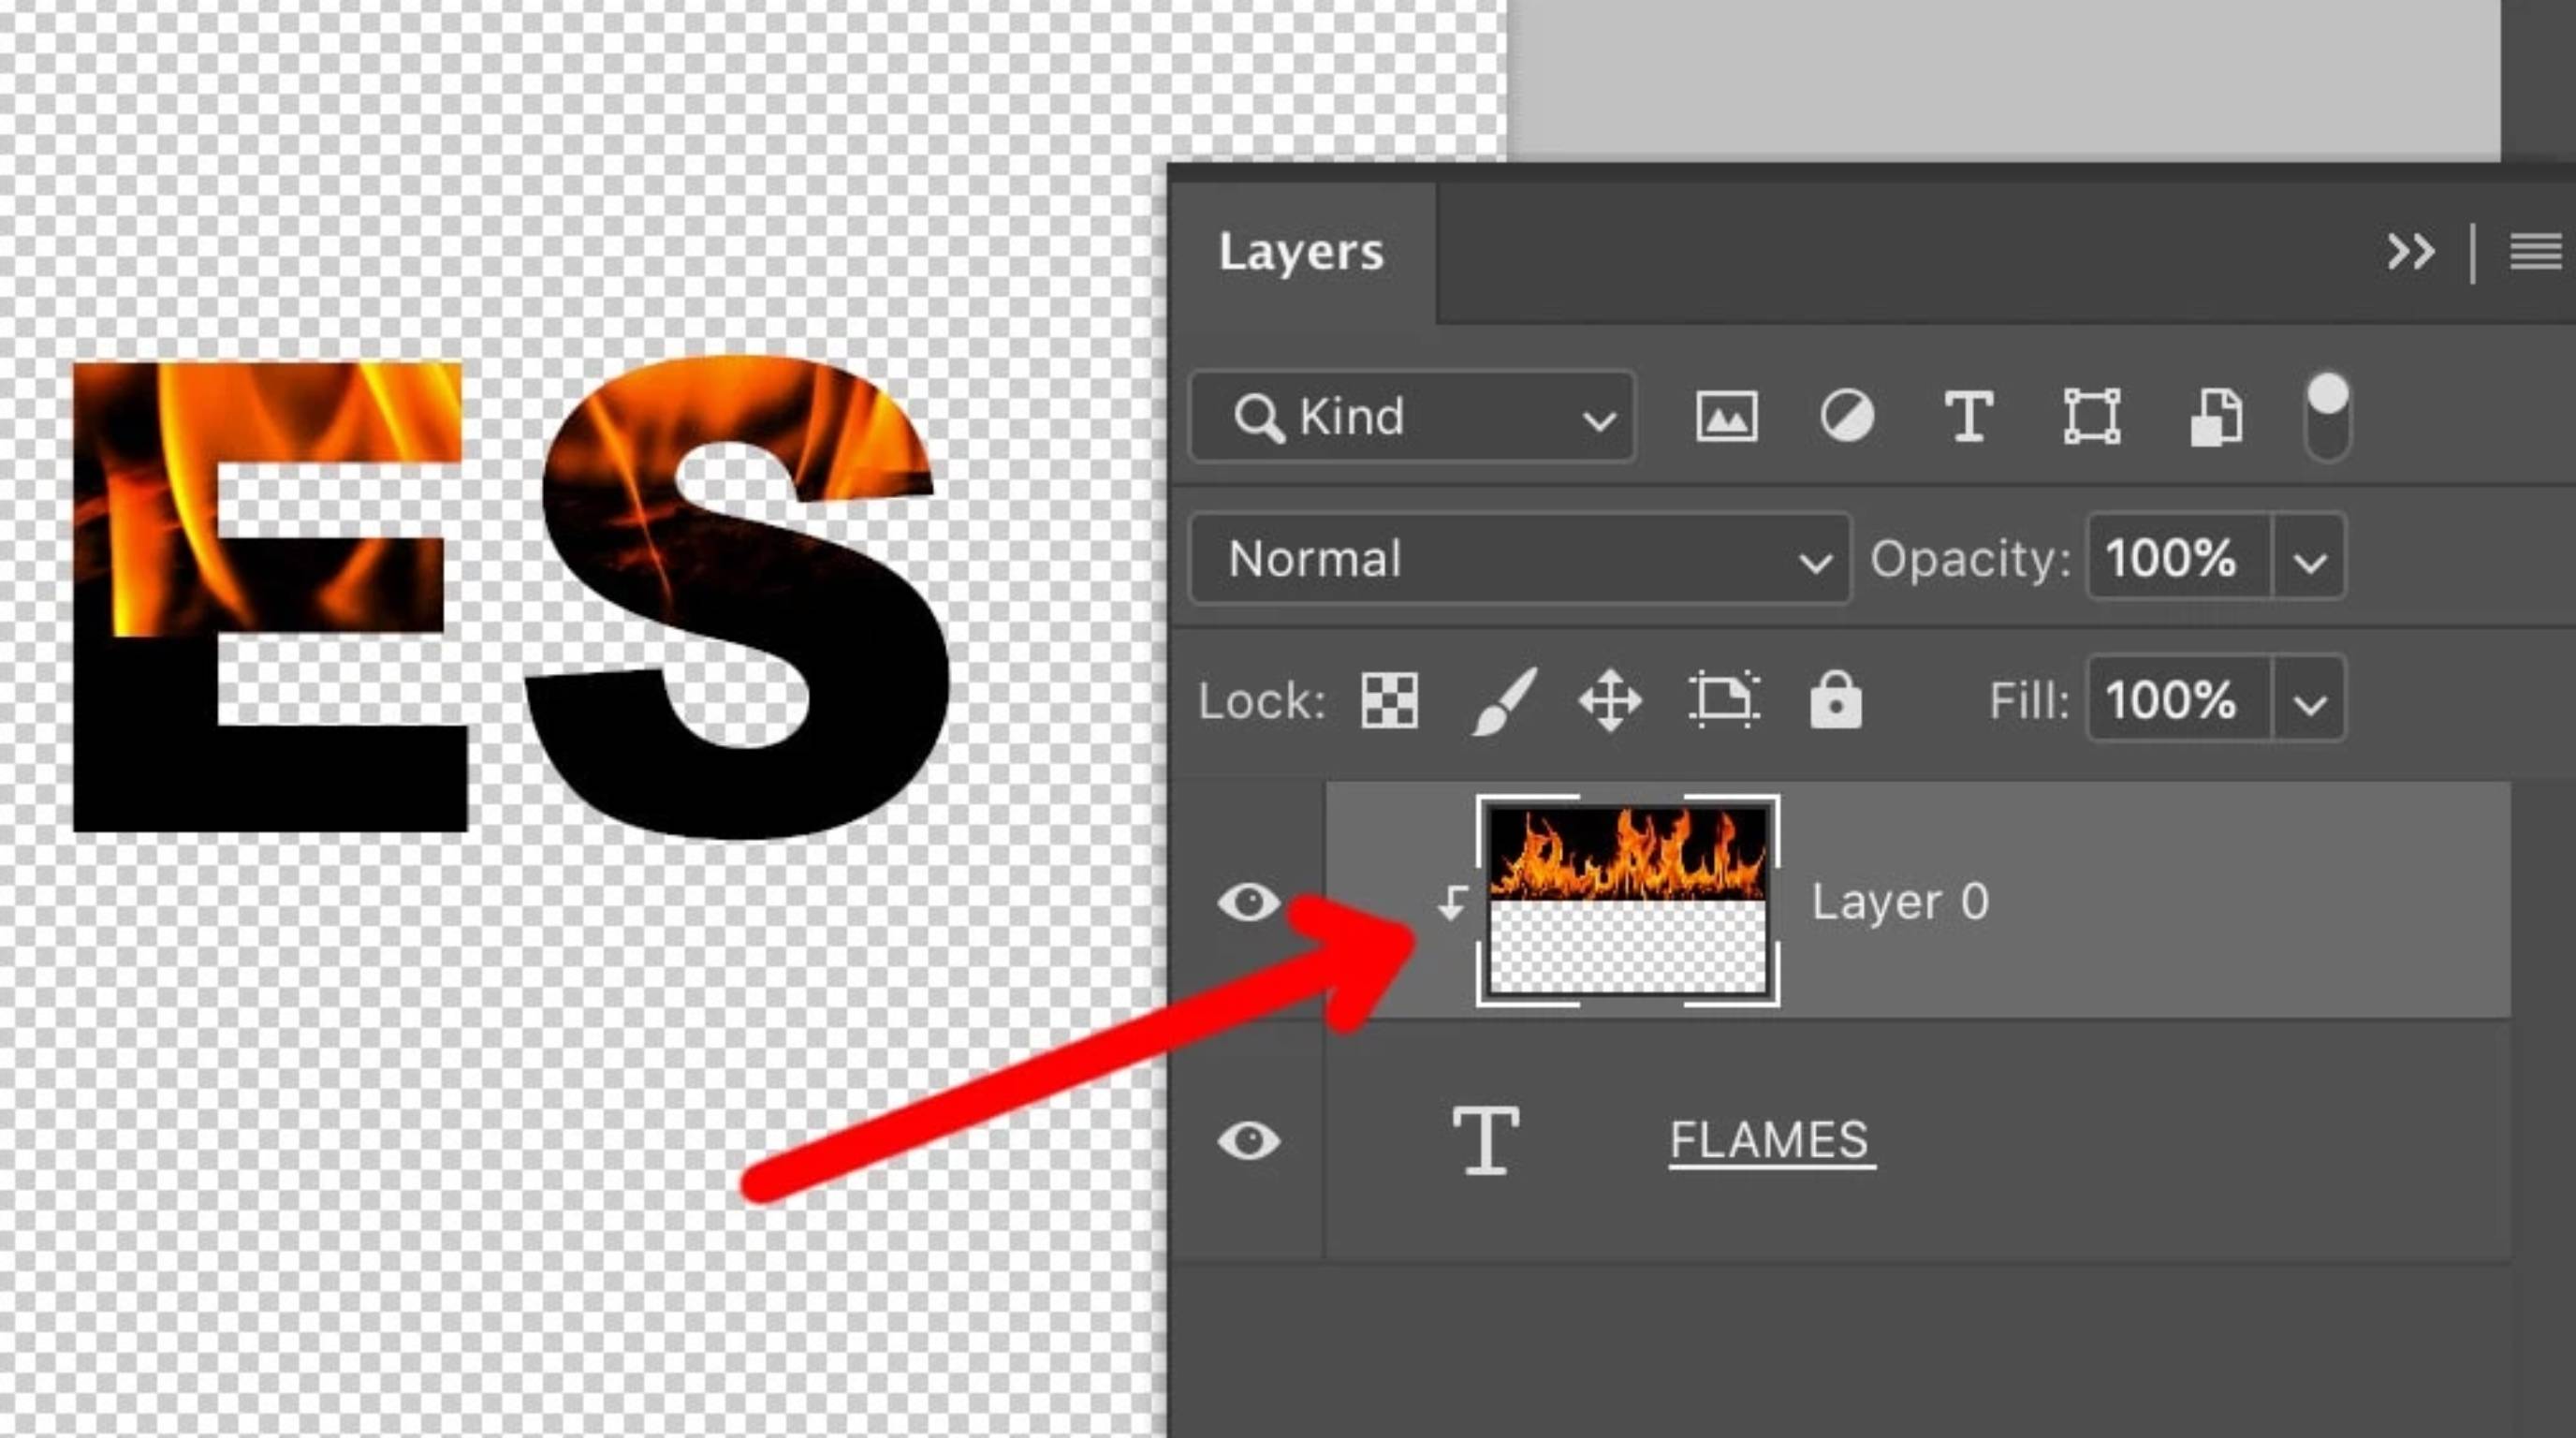
Method 5: Pen Tool — Best for Precise Product Edges
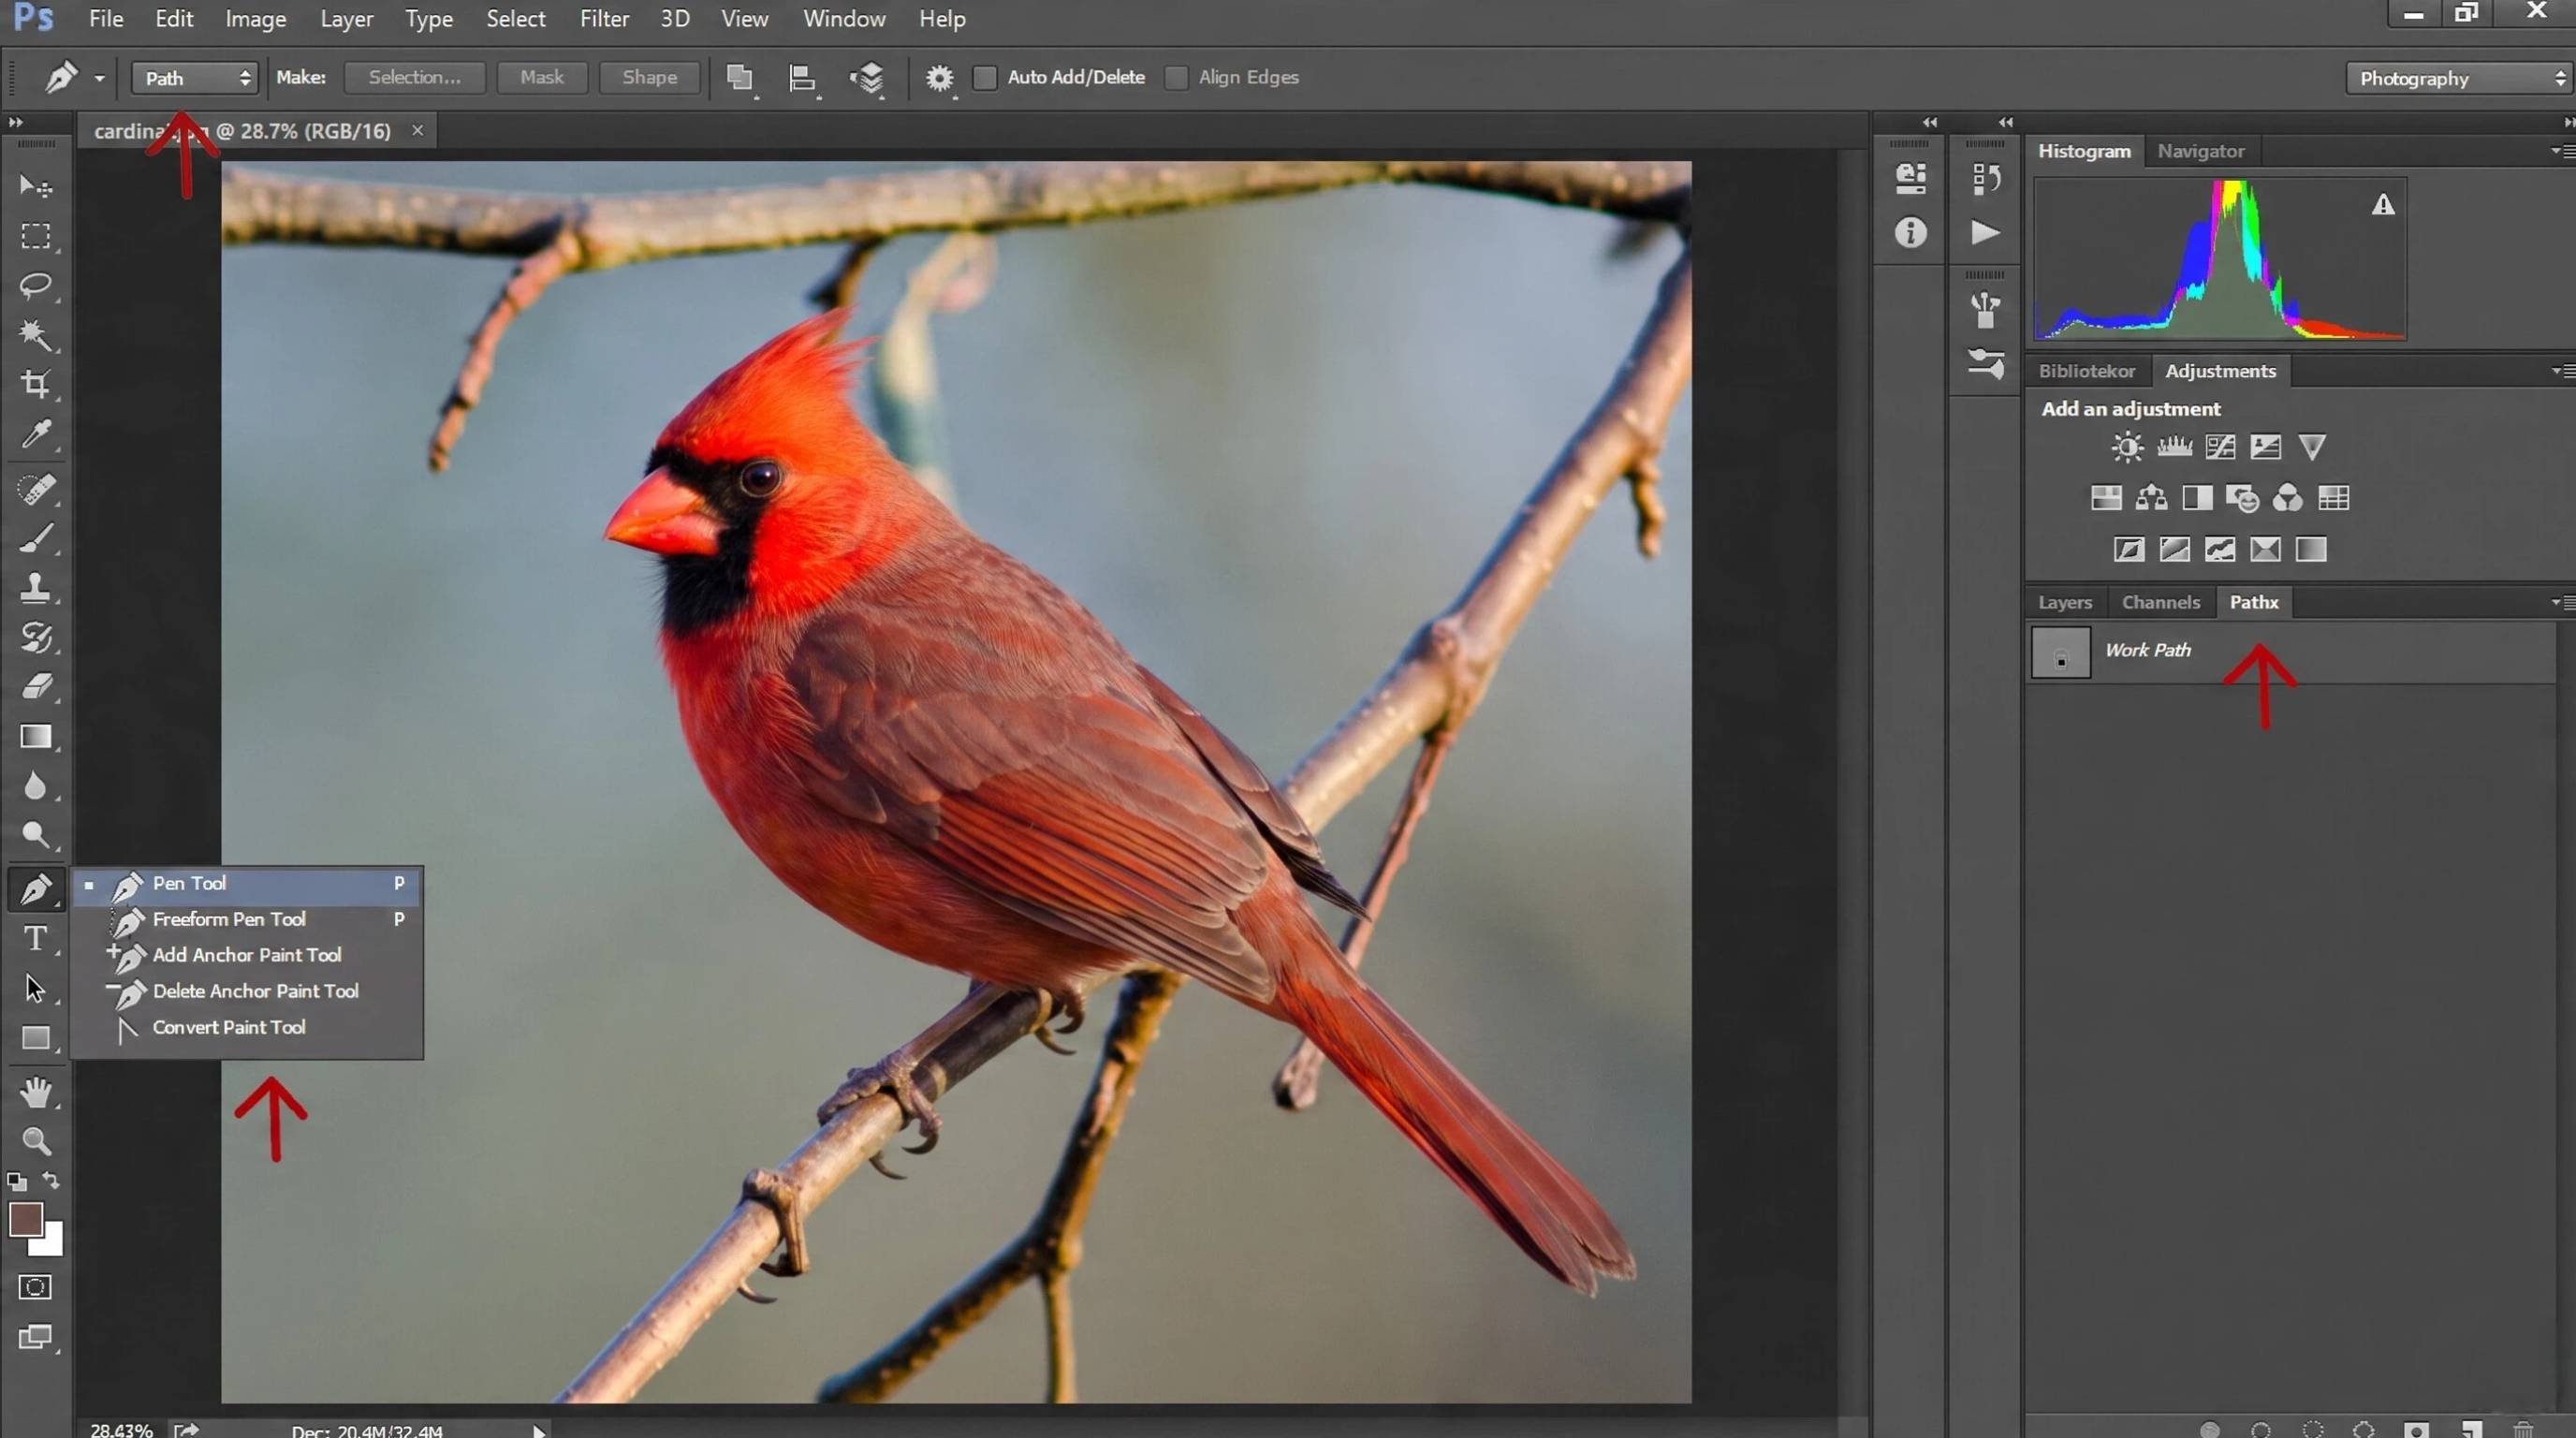
Press P to select the Pen Tool and draw a path around hard edges. Convert the path into a selection and apply a Layer Mask. This method delivers the cleanest results for ecommerce products, packaging, and other objects with sharp outlines.
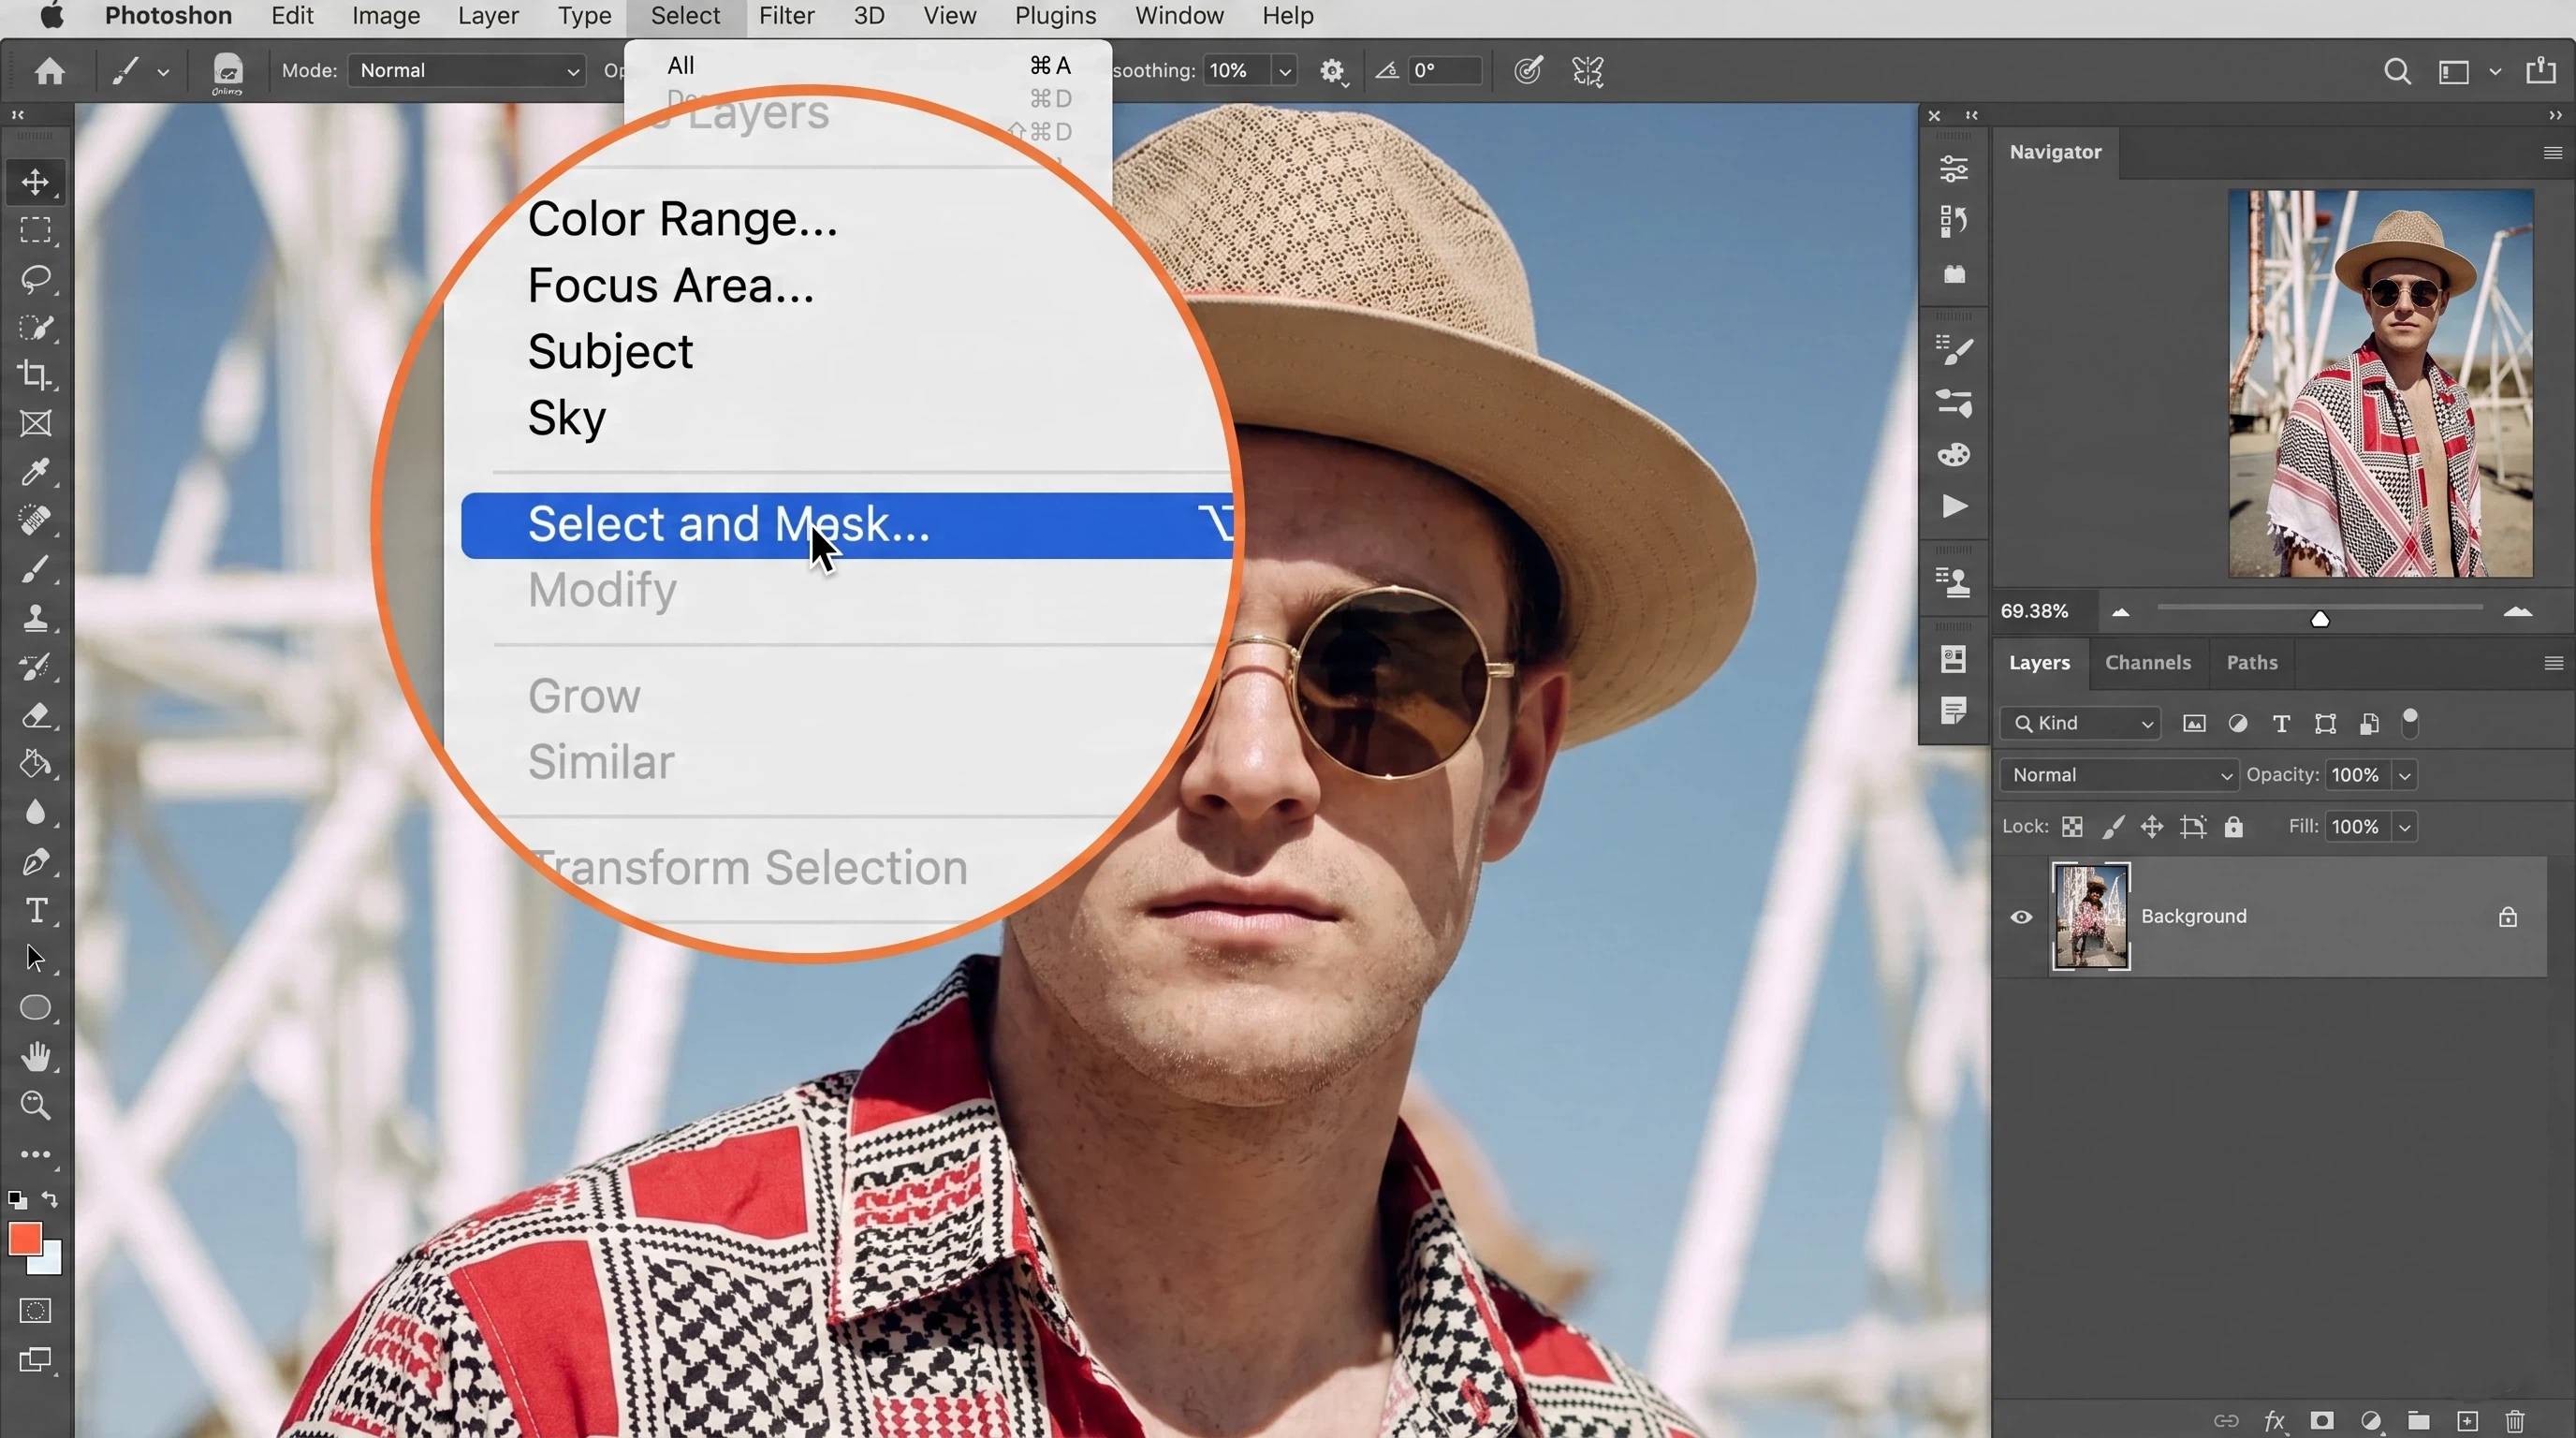
Method 6: Select and Mask Workspace — Best for Hair, Fur, and Fine Edges
From any active selection, open Select > Select and Mask. Use the Refine Edge Brush, adjust Smooth, Shift Edge, and Decontaminate Colors, then output the result as a New Layer with a Layer Mask. It's also an effective way to remove a white background in Photoshop when edge details need careful refinement.
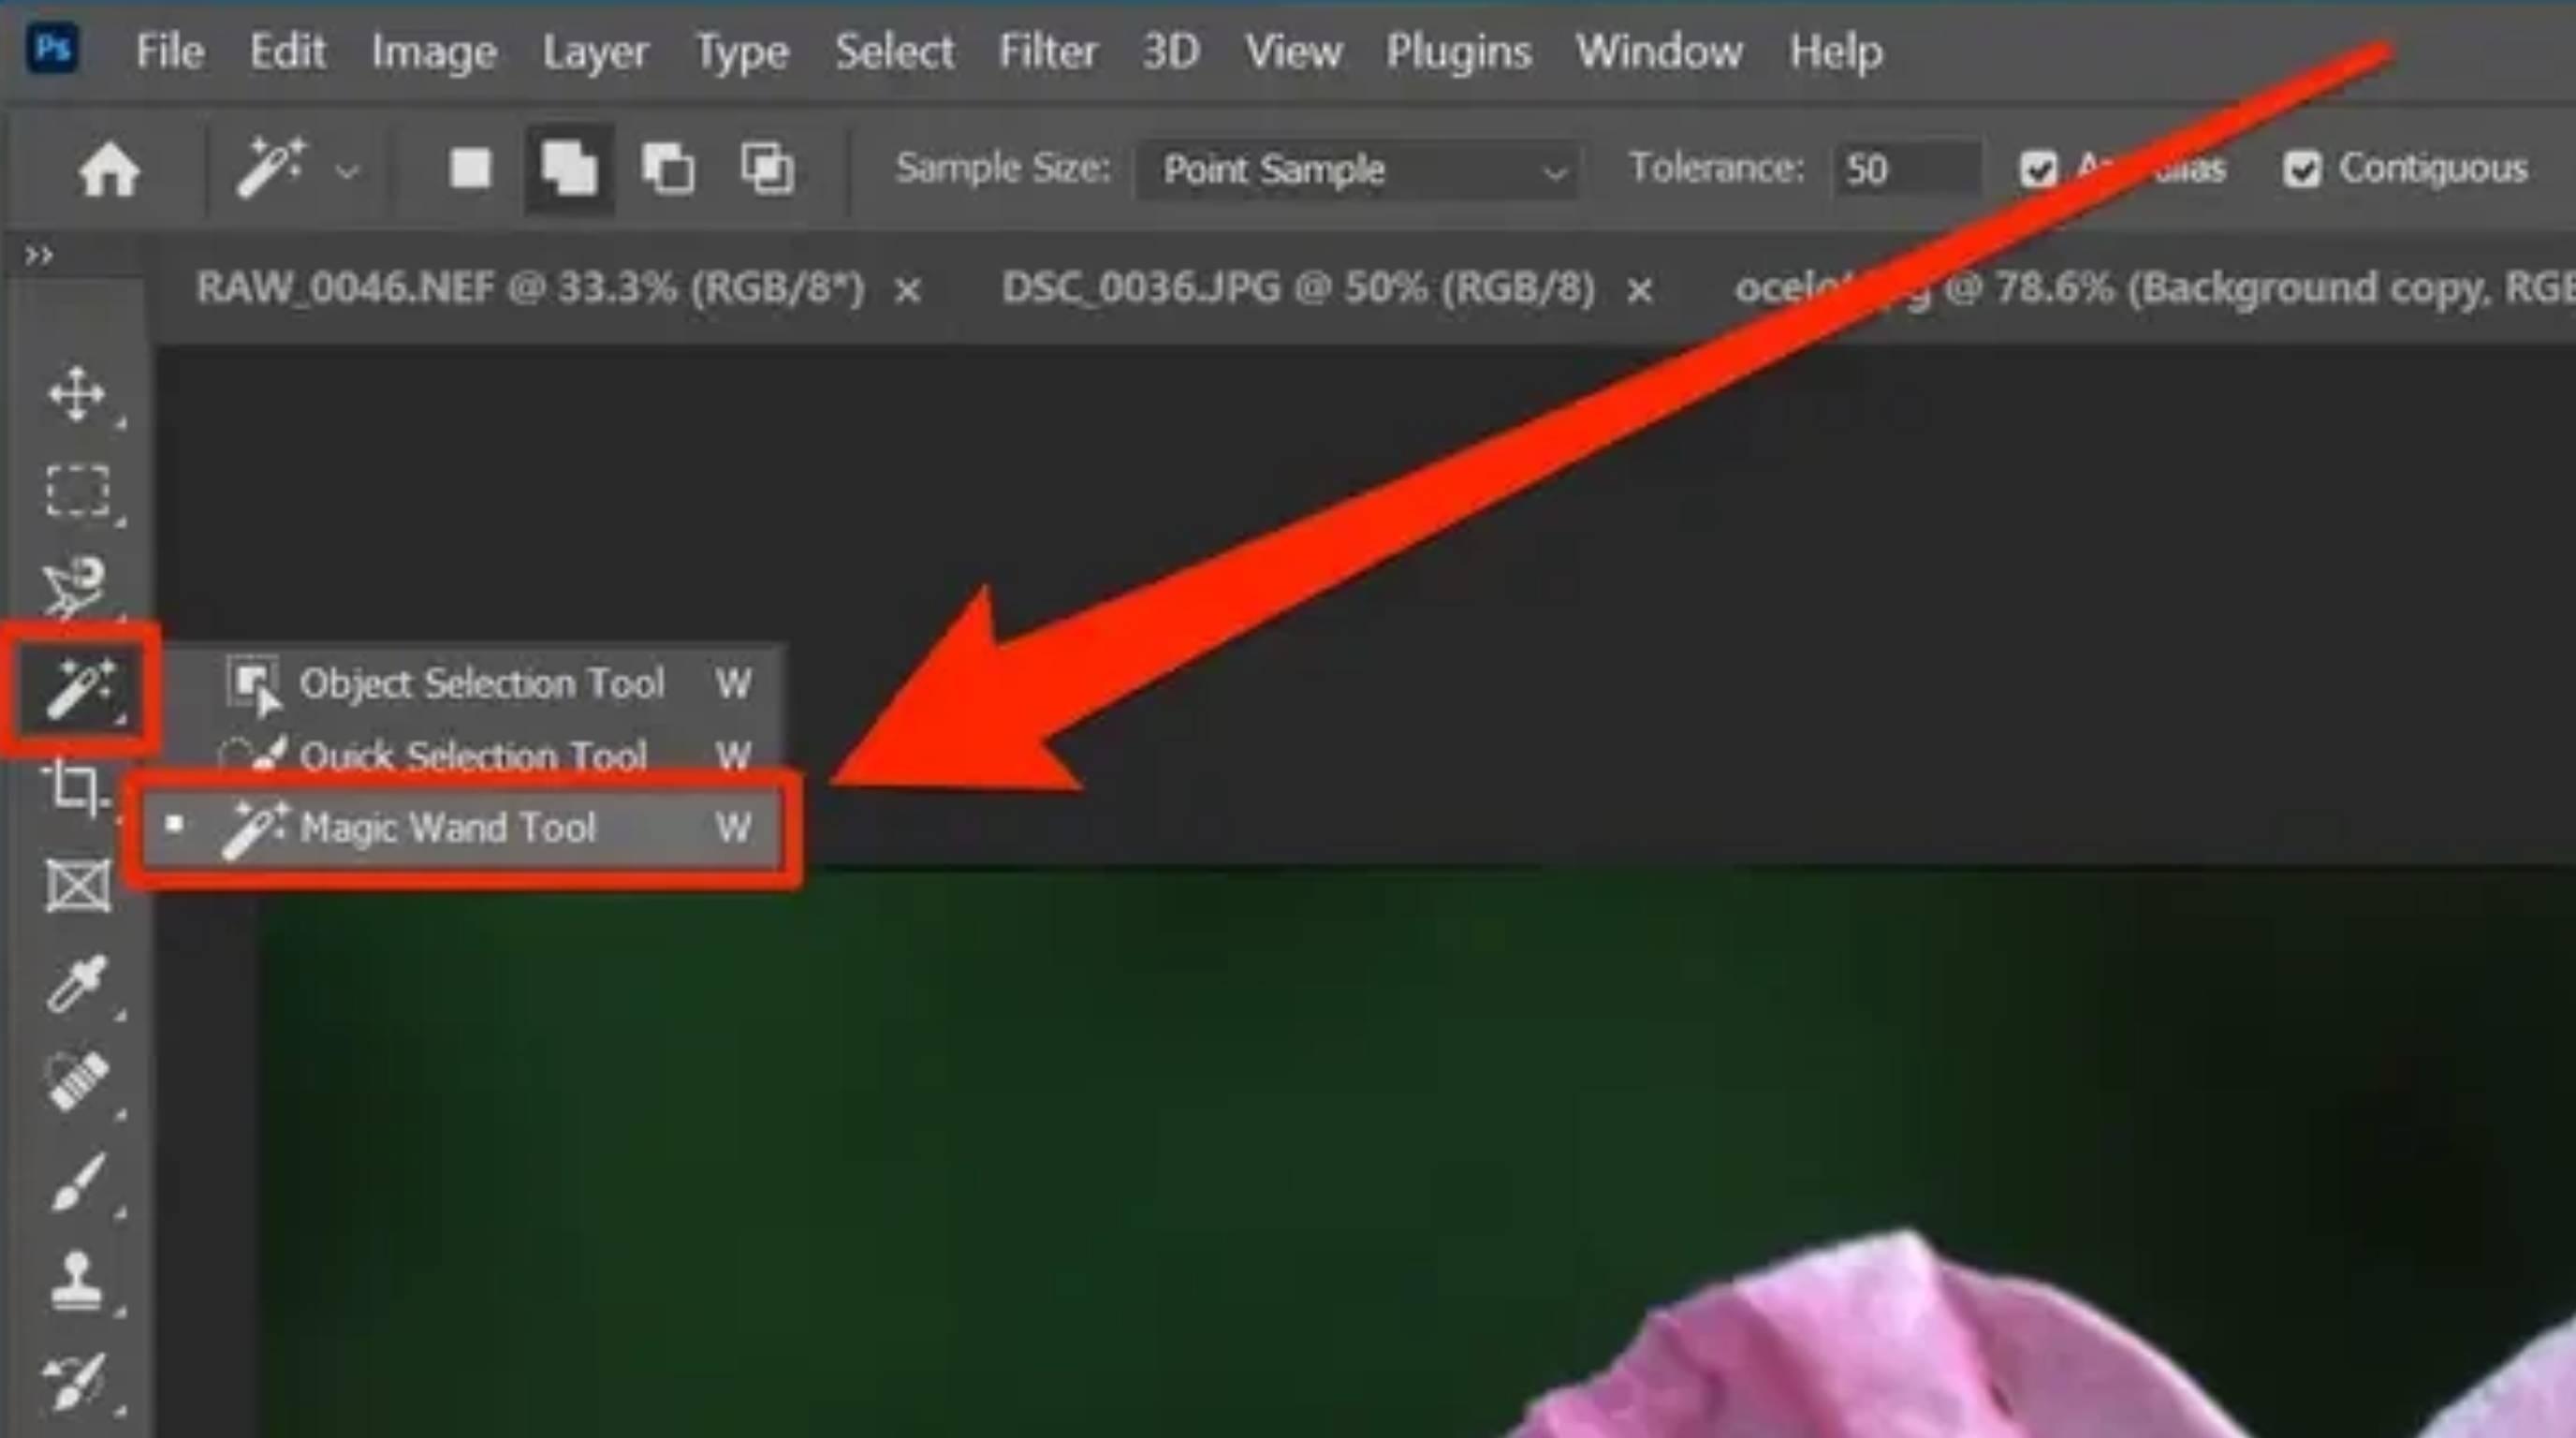
Method 7: Magic Wand Tool — Best for Solid Backgrounds
Press W and choose the Magic Wand Tool. Click the background, adjust the tolerance setting, invert the selection if necessary, and apply a mask or delete the background. The Photoshop Background Eraser Tool or Magic Wand works best on flat white or single-color backgrounds with clear subject separation.
How to Remove Background in Photoshop Step by Step (Quick Selection Method)
The Quick Selection Tool offers one of the best combinations of speed and control, making it ideal for most products, portraits, and everyday images.
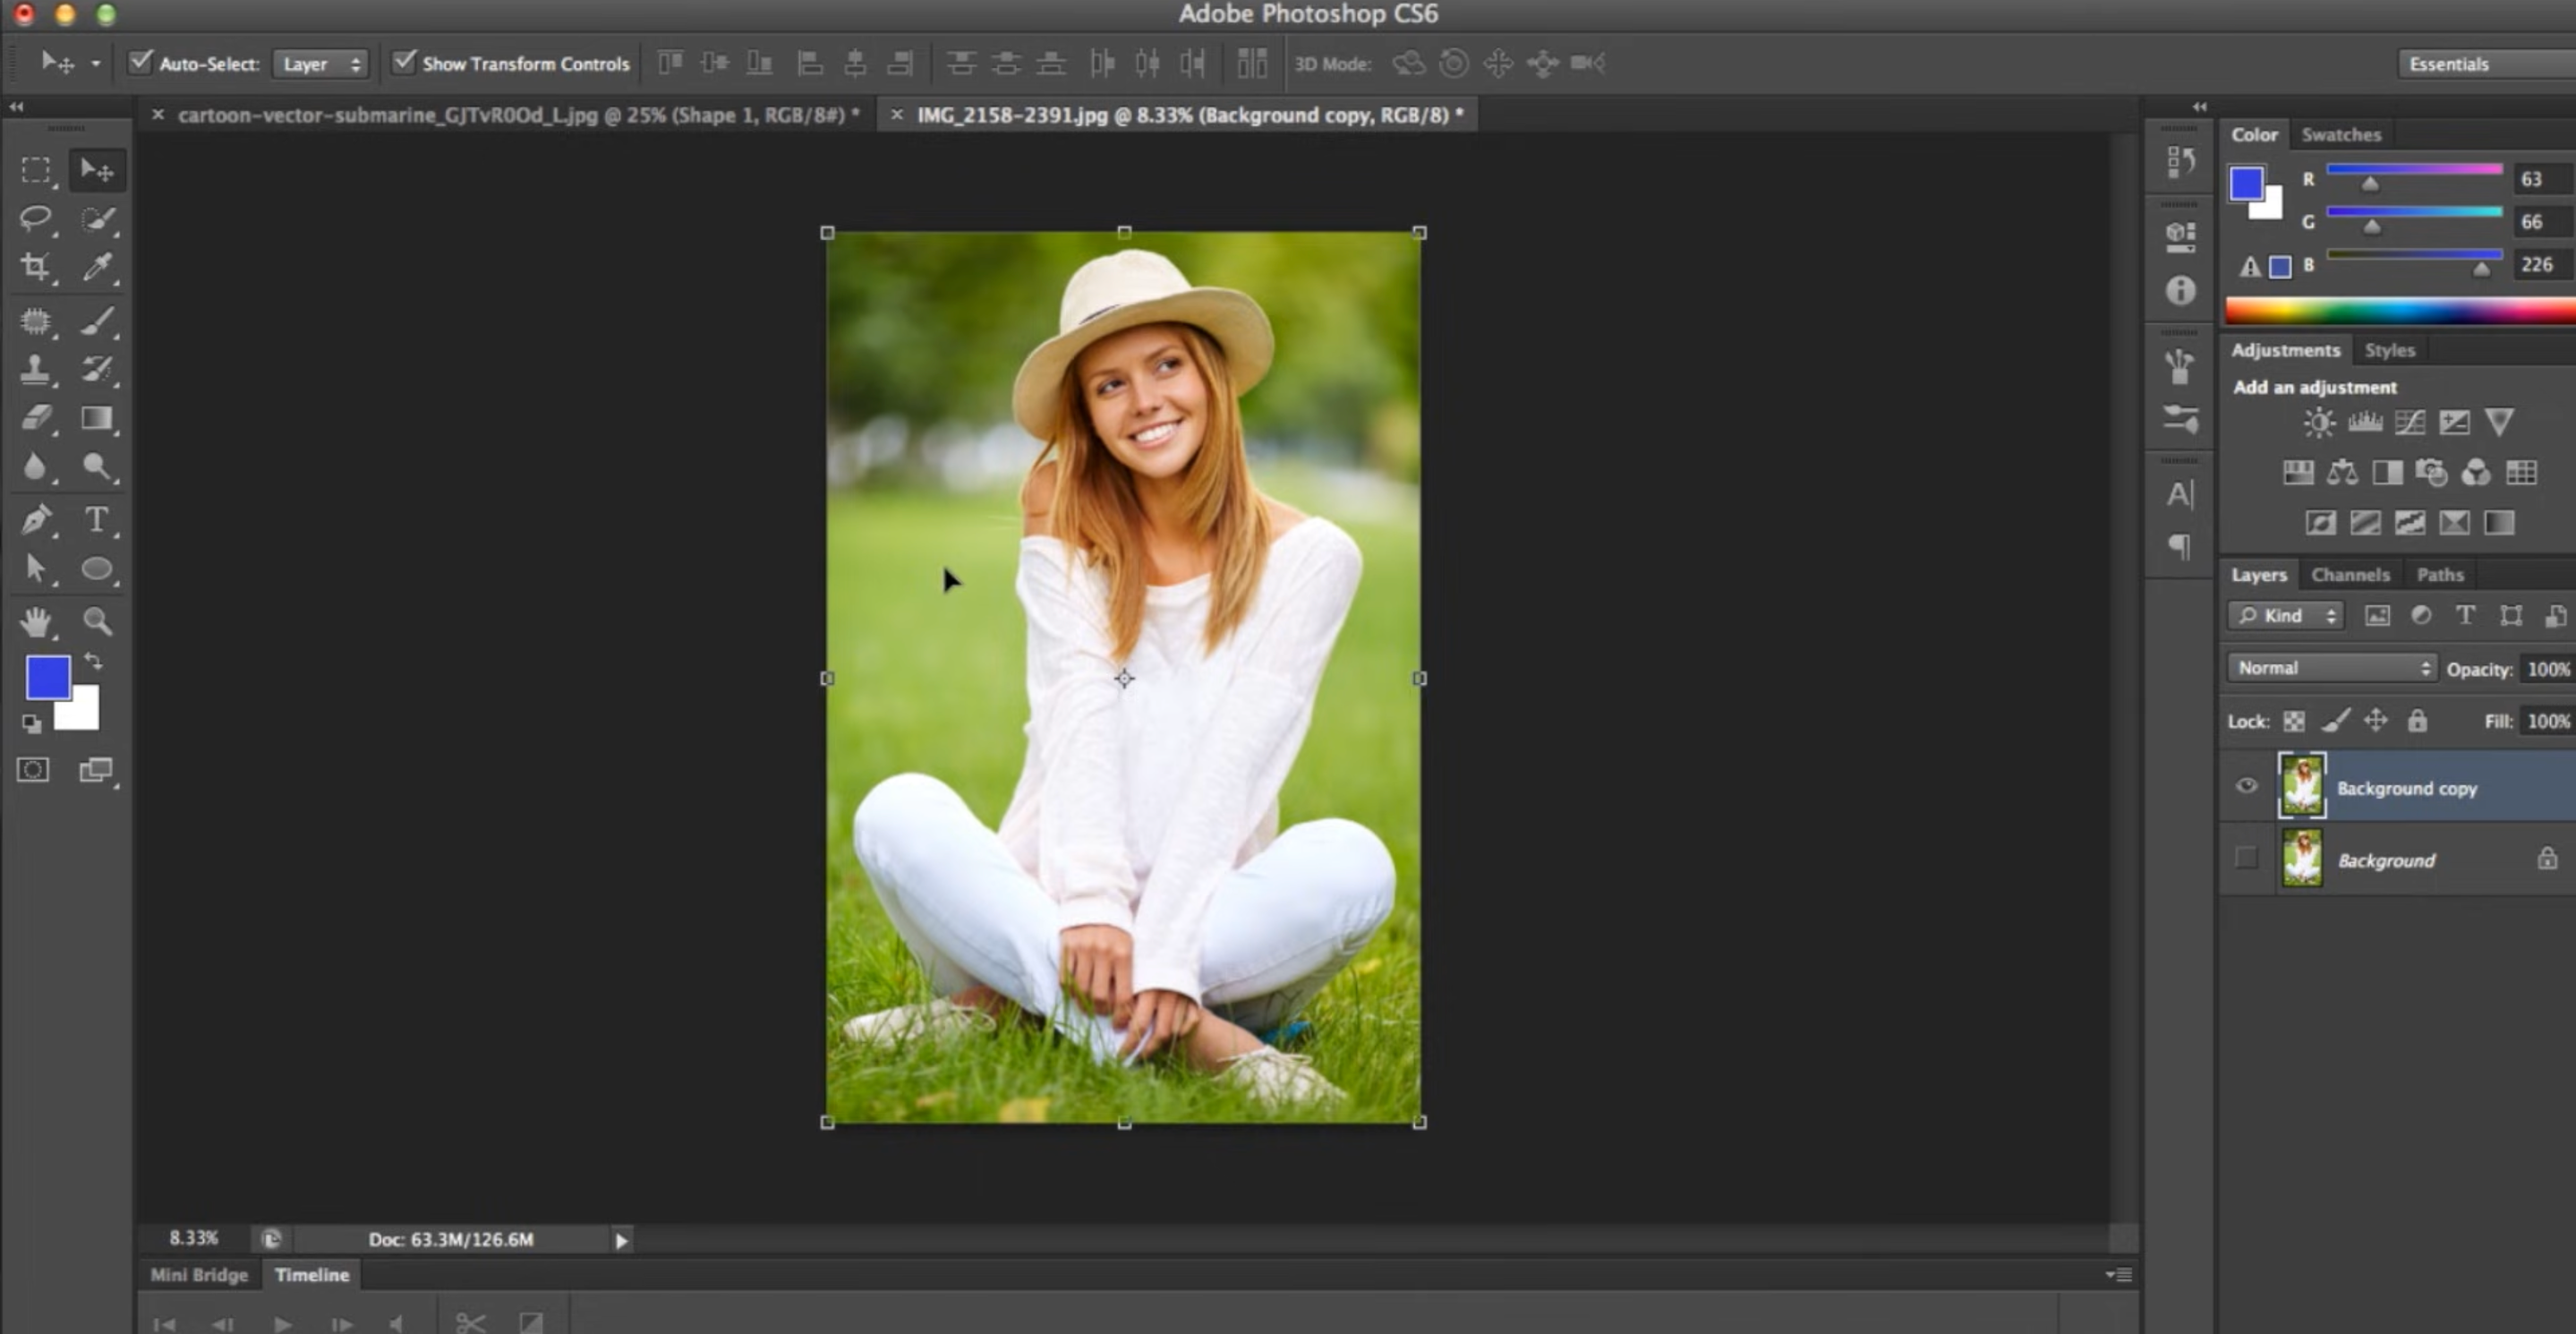
Step 1: Open Your Image
Open your image in Photoshop and unlock the Background layer by double-clicking it. This lets you edit non-destructively and apply a Layer Mask later.
Step 2: Select the Subject
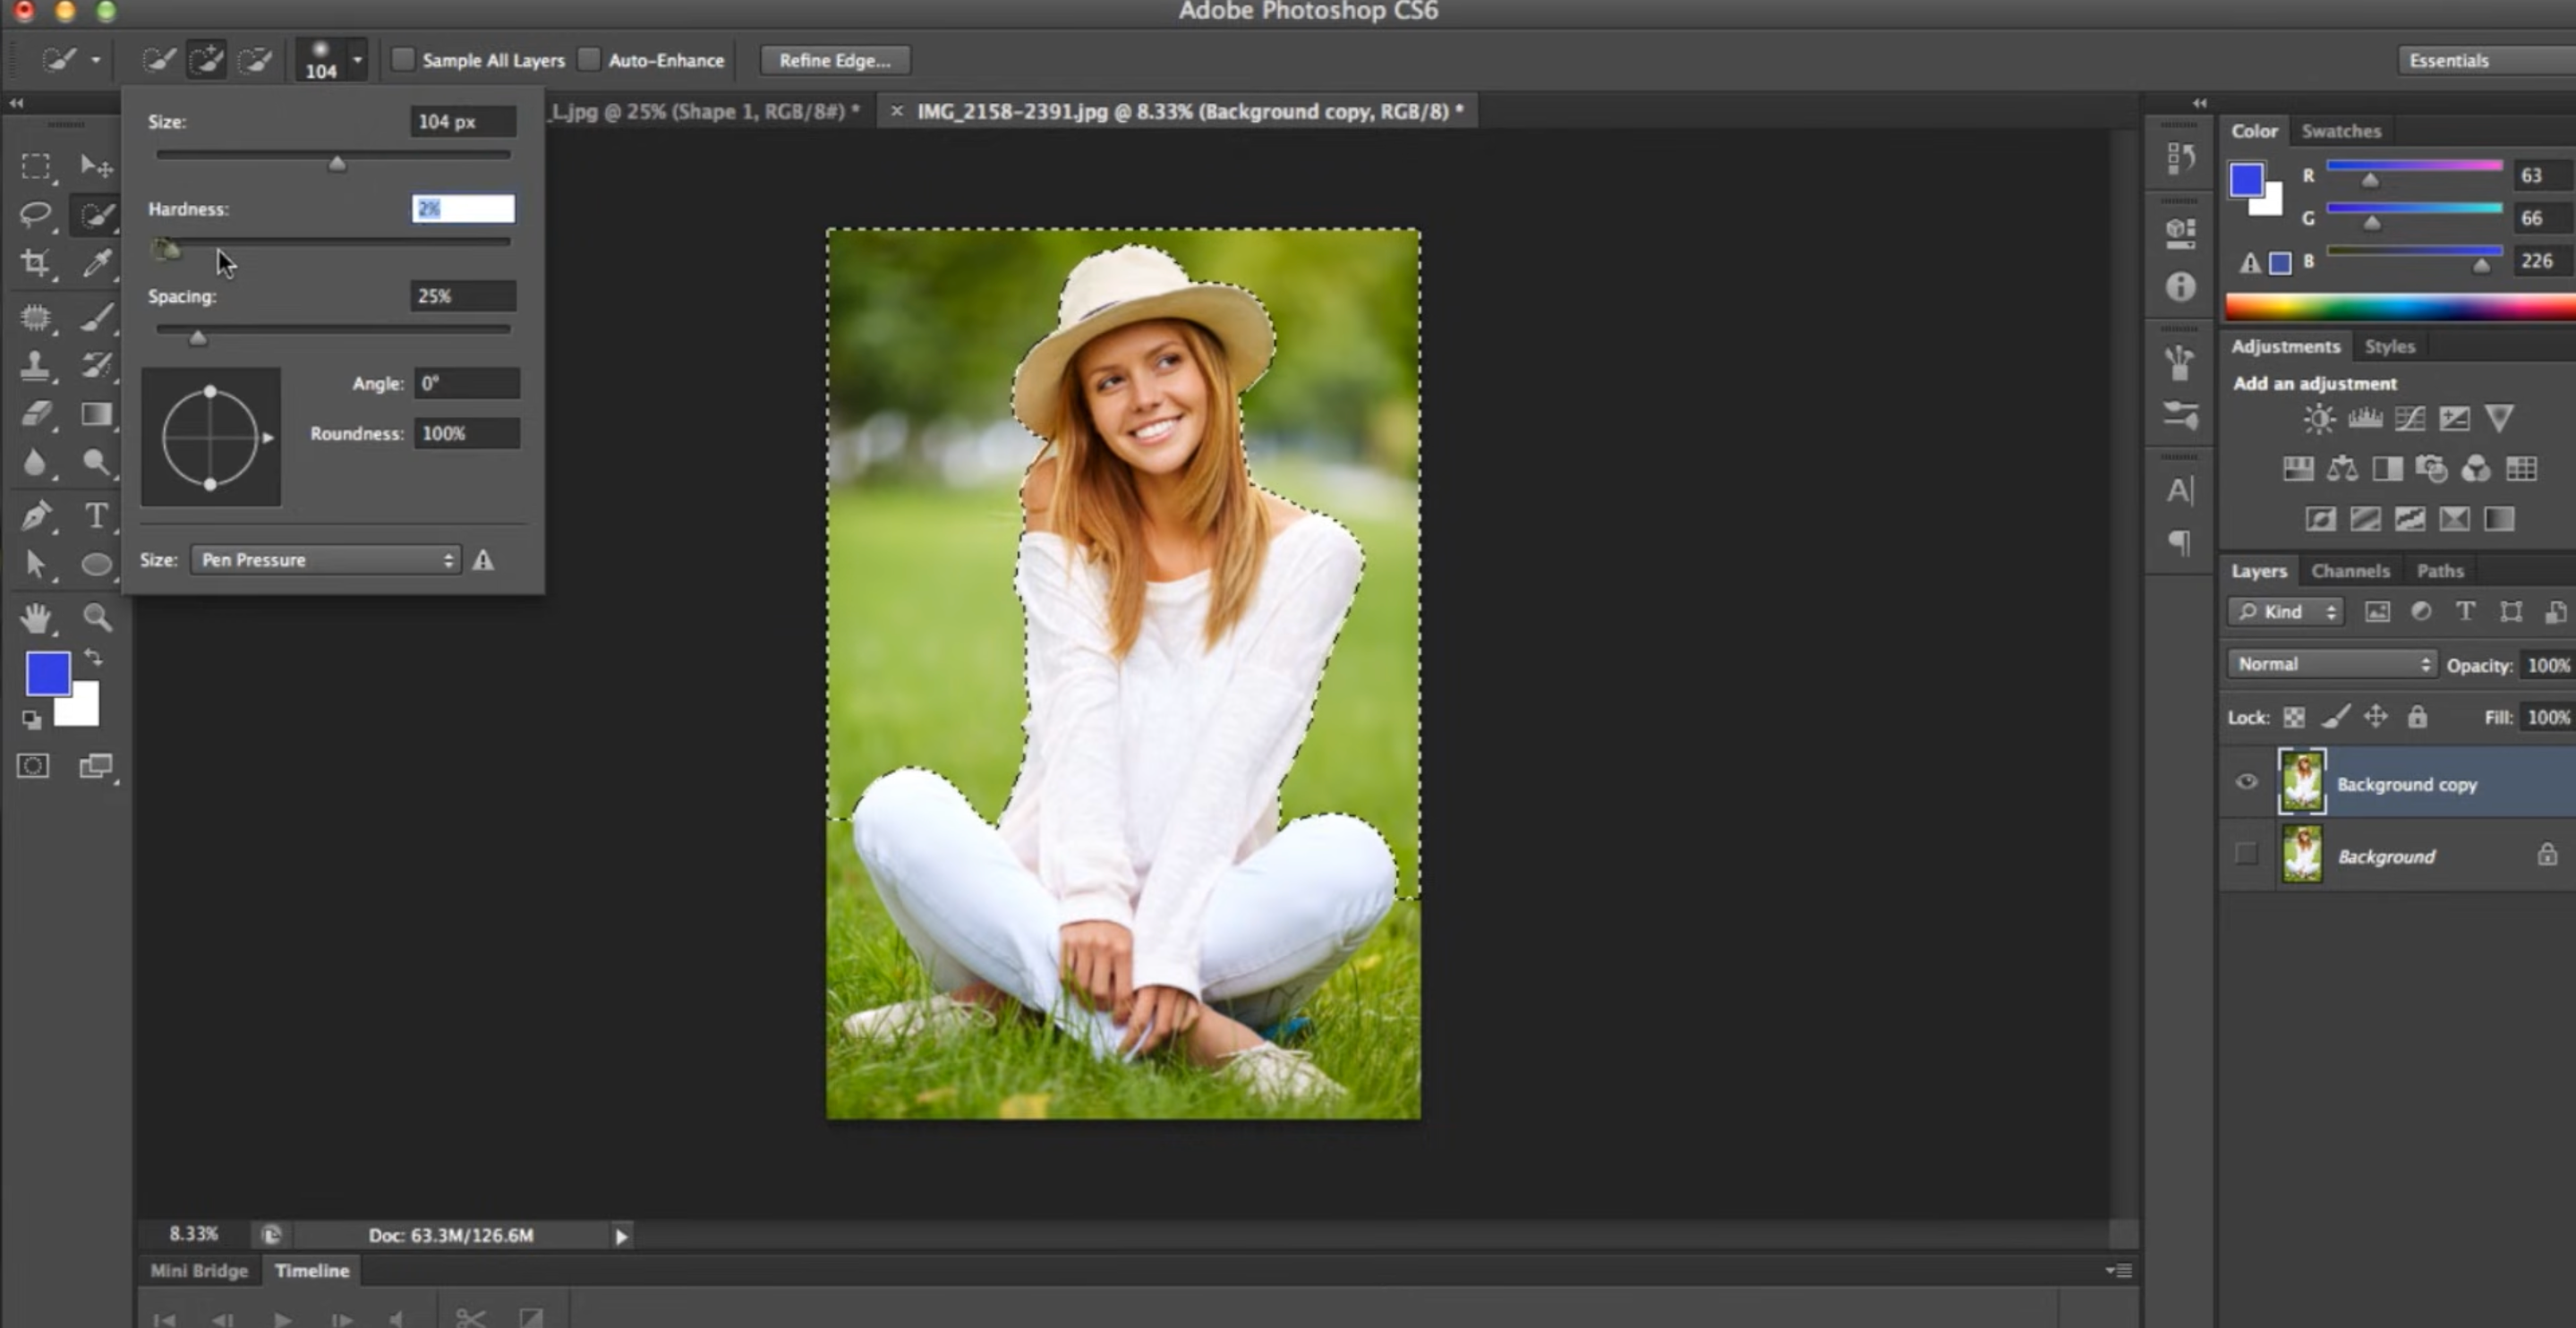
Press W to activate the Quick Selection Tool, then click and drag over the subject. Photoshop automatically expands the selection as you paint.
Step 3: Refine the Edges
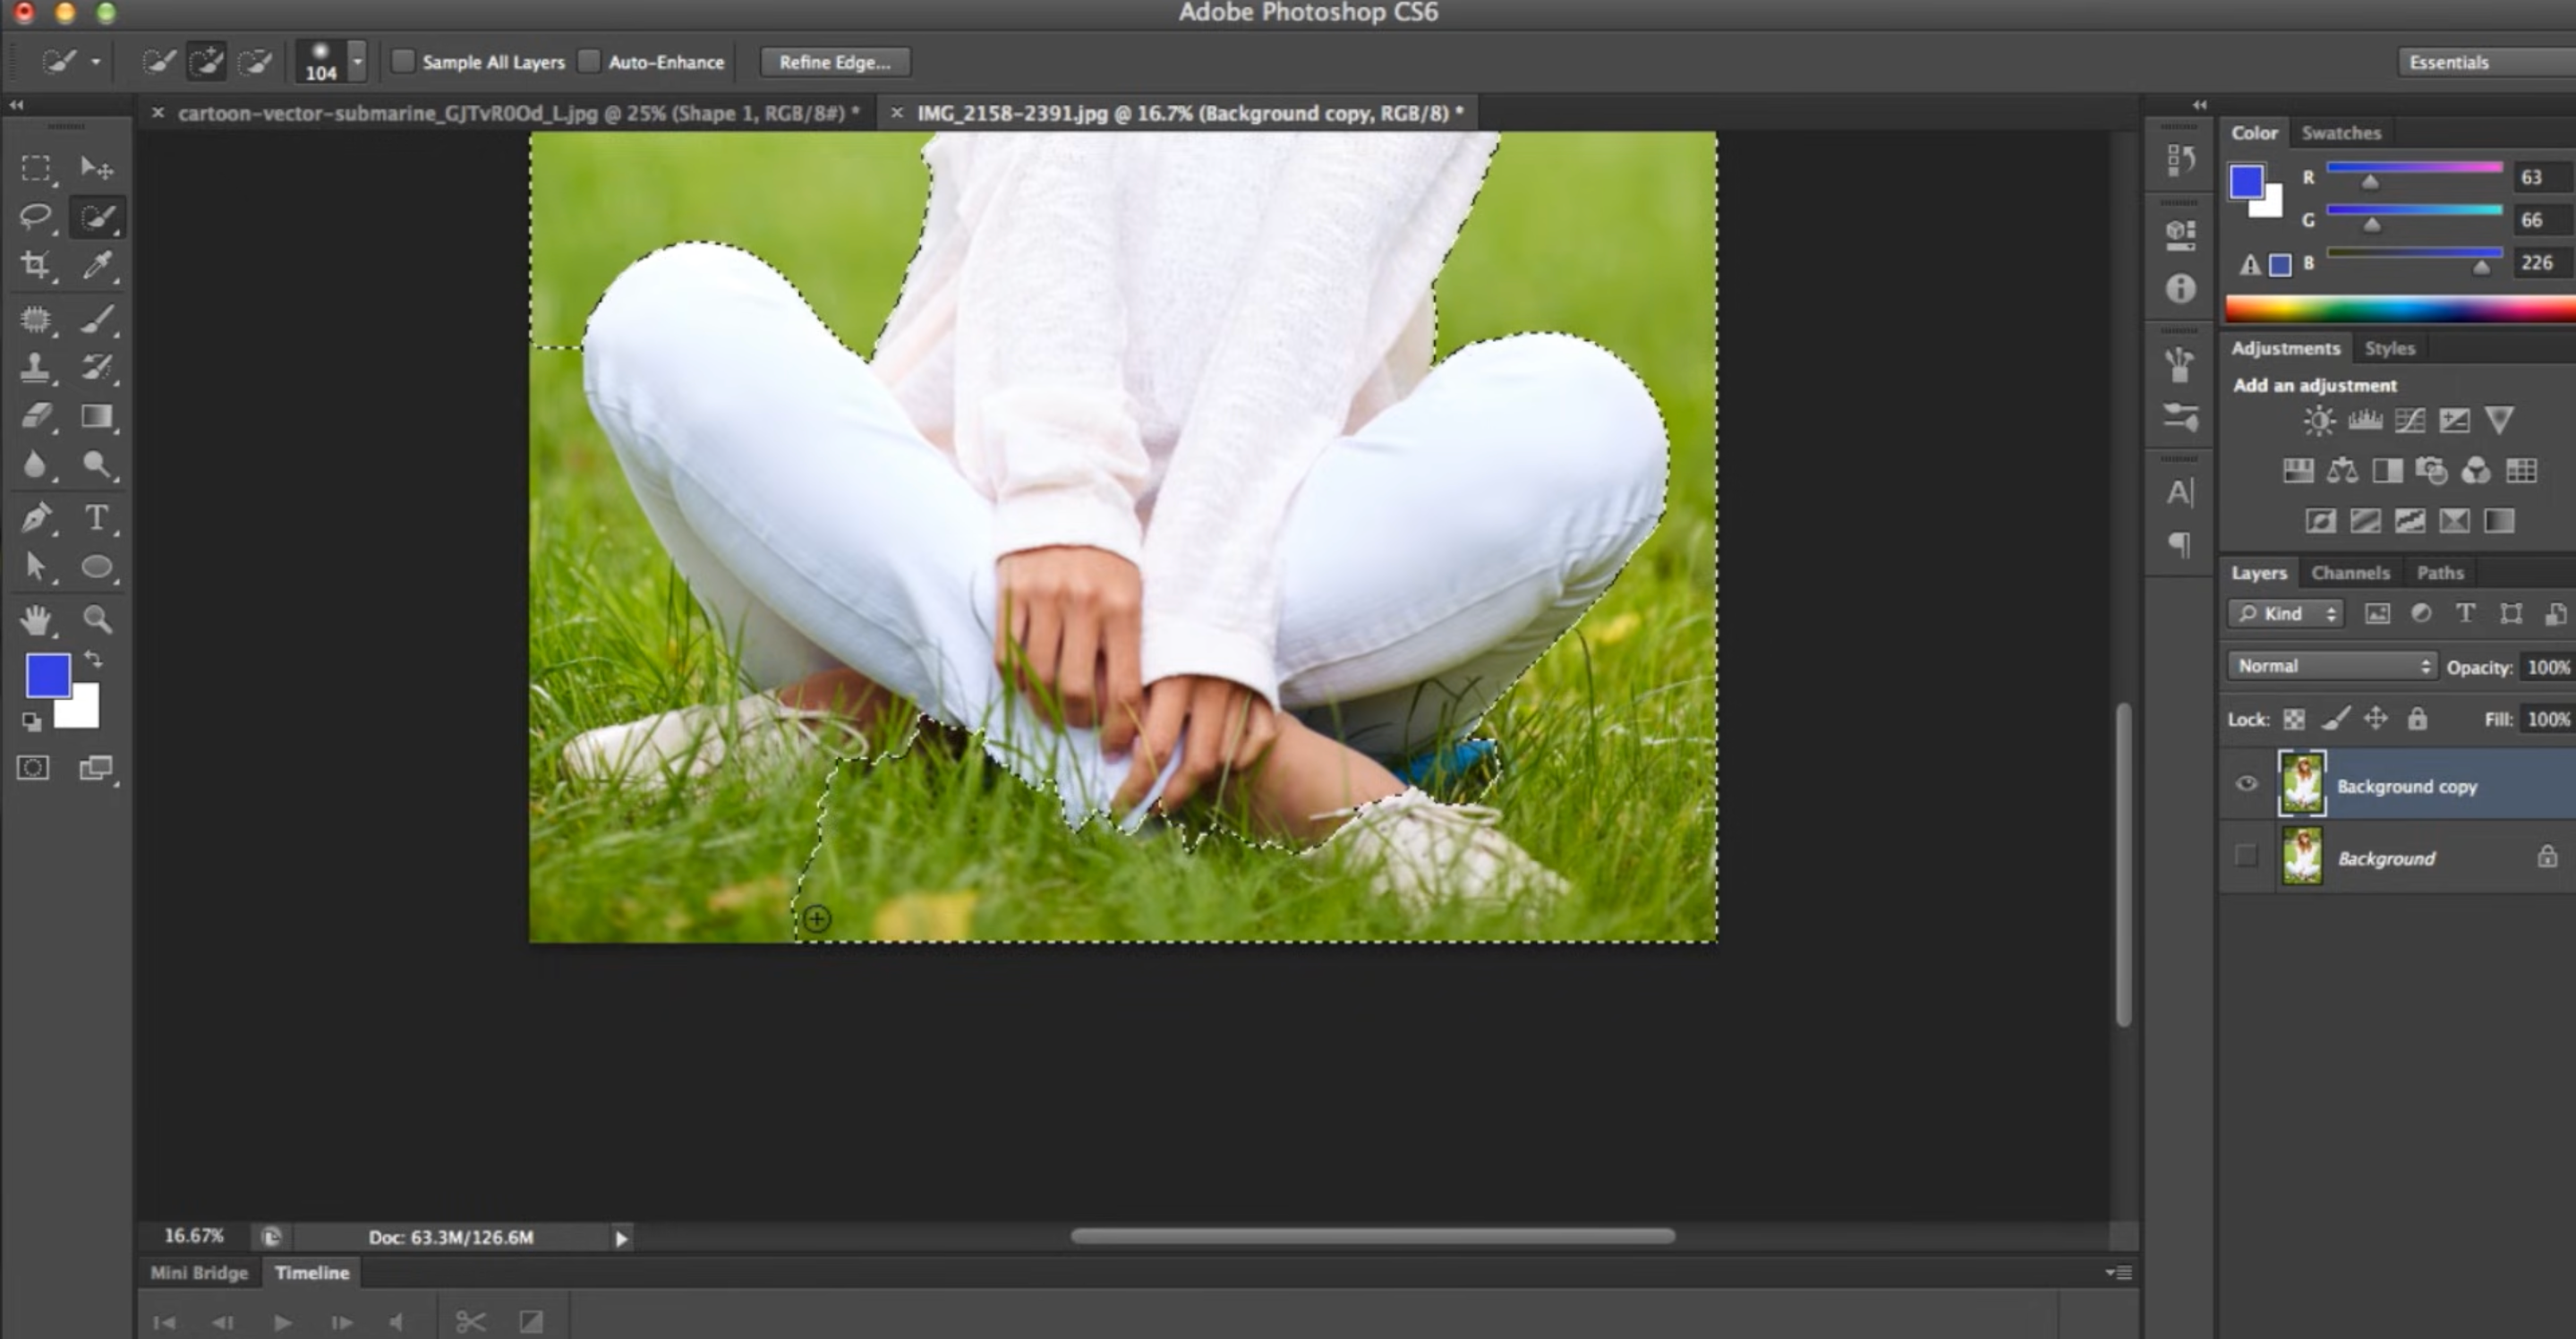
Choose Select > Select and Mask to clean up the selection. Adjust Smooth, Feather, and Shift Edge, then output the result as a Layer Mask for easy future edits.
Step 4: Export as Transparent PNG
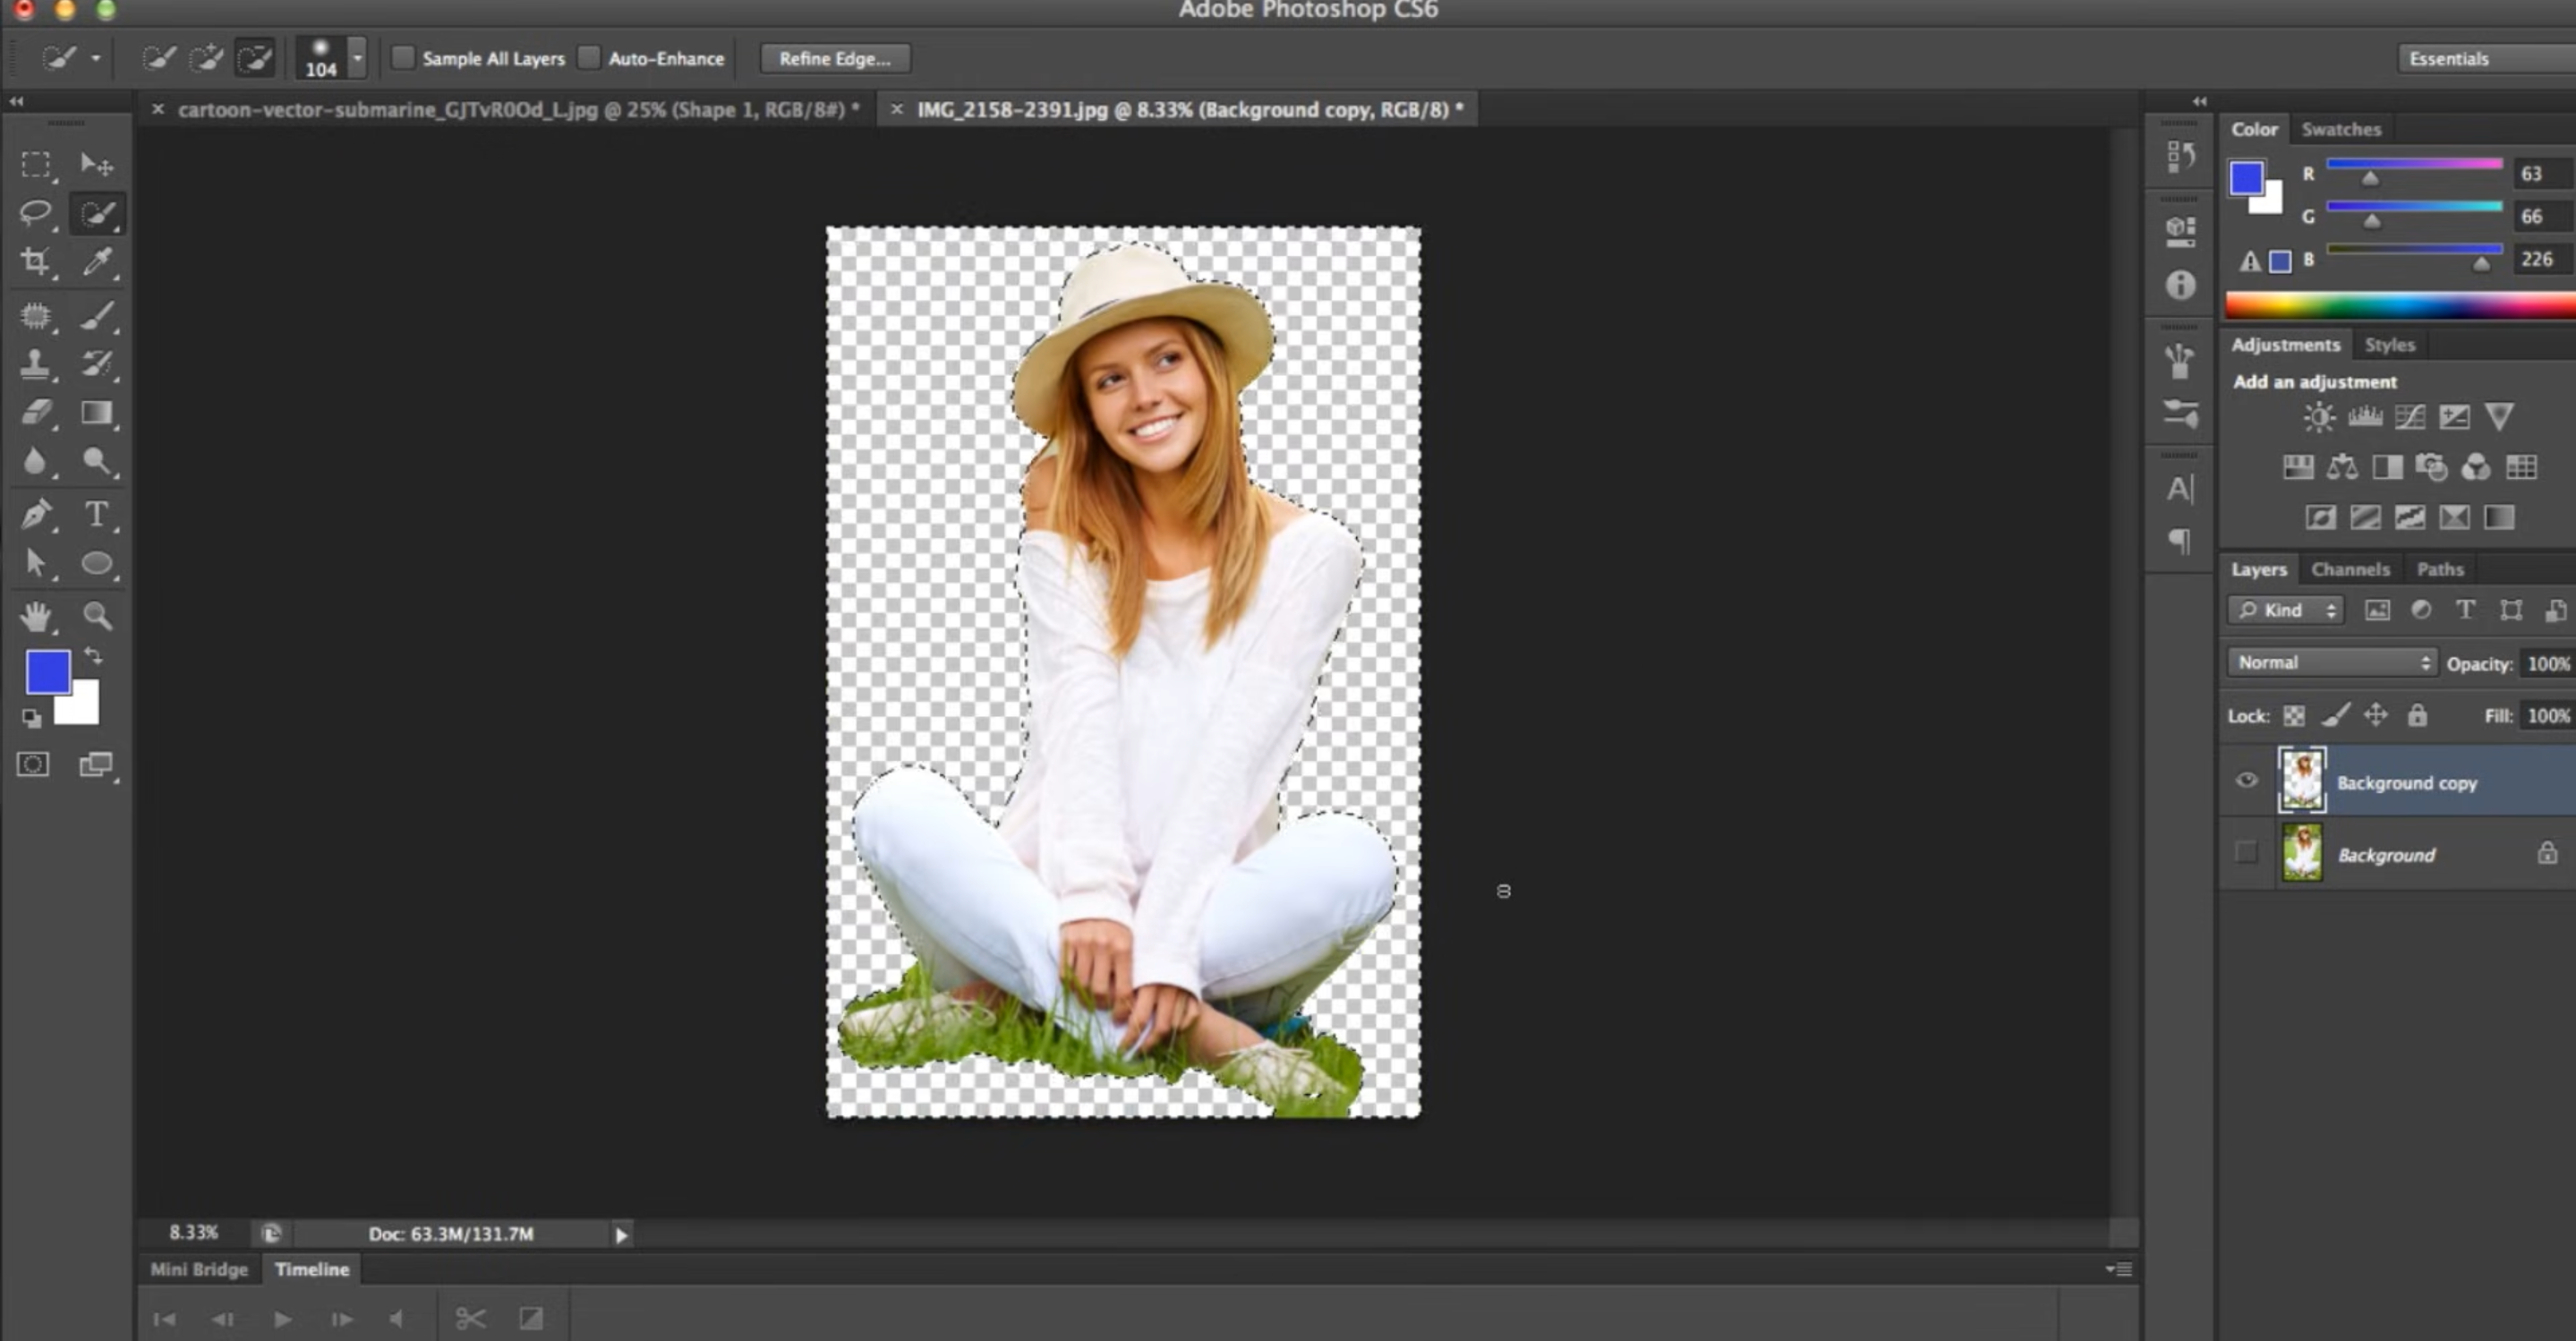
Go to File > Export > Export As, choose PNG, and ensure transparency is enabled. Save the file to preserve the transparent background for web or ecommerce use.
How to Remove a White Background in Photoshop
White backgrounds are usually the easiest to remove because they contrast well with the subject. Depending on the image, you can use automatic selection tools or refine the edges manually for a cleaner cutout when removing a background in Photoshop.
Magic Wand on White Studio Backgrounds
Press W and select the Magic Wand Tool. Set a low tolerance, enable Contiguous, then click the white background. Invert the selection and apply a Layer Mask to keep the subject while hiding the background.
Color Range for Pure White Studio Backgrounds
Go to Select > Color Range, use the eyedropper to sample the white background, then adjust Fuzziness until only the background is selected. Apply the selection as a mask and refine it if necessary. This is an effective approach if you're wondering how to remove the background in Photoshop for clean studio images.
Remove White Fringing After the Cutout
If a white outline remains around the subject, open Select and Mask and enable Decontaminate Colors. You can also move Shift Edge slightly inward to remove visible halos. For small problem areas, the Photoshop Background Eraser Tool can be used to manually clean up stubborn edges.
Why Does Your Background Removal Still Look Rough?
Even after removing the background, the cutout may look unnatural if the wrong selection method or mask settings were used. These common issues are usually easy to fix with the right Photoshop tools.
Wrong Tool for the Image's Contrast Level
The Magic Wand Tool works best on high-contrast, solid backgrounds. For images with similar foreground and background colors, start with Object Selection or Select Subject to create a more accurate initial selection before refining it.
White Halo Around the Edges
A visible white outline usually appears when part of the original background remains in the mask. Open Select and Mask, enable Decontaminate Colors, or contract the mask by about 1 pixel. Avoid adding too many feathers, as it can make edges appear soft and unnatural.
Hair, Fur, or Mesh Looks Jagged
Fine details require extra refinement. Reopen Select and Mask, use the Refine Edge Brush on flyaway hair or fur, and avoid applying a high global Smooth value, which can remove natural strands and make edges look artificial.
How to Choose the Right Photoshop Background Removal Method
The best background removal method depends on your image. Use the table below to match your subject with the tool that offers the best balance of speed, accuracy, and editing control.
|
Image Type |
Recommended Method |
Why |
|---|---|---|
|
Simple product on plain background |
Remove Background / Object Selection |
Fast AI detection |
|
Product with sharp edges |
Pen Tool |
Pixel-level control |
|
Portrait with hair or fur |
Select Subject + Select and Mask |
Preserves fine detail |
|
Solid white or single-color background |
Magic Wand / Color Range |
Removes uniform color quickly |
|
Many cutouts needing new backgrounds and channel sizes |
Designkit (after cutout) |
Batch creative production, not manual masking |
What to Do After You Remove the Background
Removing the background is only part of the workflow. Exporting, replacing the background, and optimizing the file ensures it's ready for websites, print, or ecommerce listings.
Export as a Transparent PNG
Go to File > Export > Export As, choose PNG, and make sure Transparency is enabled. This preserves the transparent background for use on websites, marketplaces, or graphic design projects.
Replace or Generate a New Background
Add a new layer beneath the subject and place your replacement background. Use Transform (Ctrl/Cmd + T) to resize and position it. In newer Photoshop versions, you can also use Generative Fill or Replace Background to create a new scene automatically.
Prep the File for Web, Print, or Marketplace Listings
Resize the image for its final destination, sharpen edges if necessary, and export a web-optimized PNG. Keep a PSD version with the Layer Mask intact so you can make future edits without repeating the background removal process.
Bonus: Turn Clean Cutouts Into Listing and Social Creatives
Once Photoshop gives you a clean cutout, the next step is preparing it for marketing. Designkit helps ecommerce teams replace backgrounds, generate lifestyle scenes, and export channel-ready assets faster. It complements Photoshop rather than replacing it for manual selections and edge refinement.
Remove Backgrounds Faster and Create New Visuals with Designkit
Step 1: Upload and Remove Image Backgrounds
Upload product photos for AI background removal, or import a transparent PNG created in Photoshop to continue your workflow.
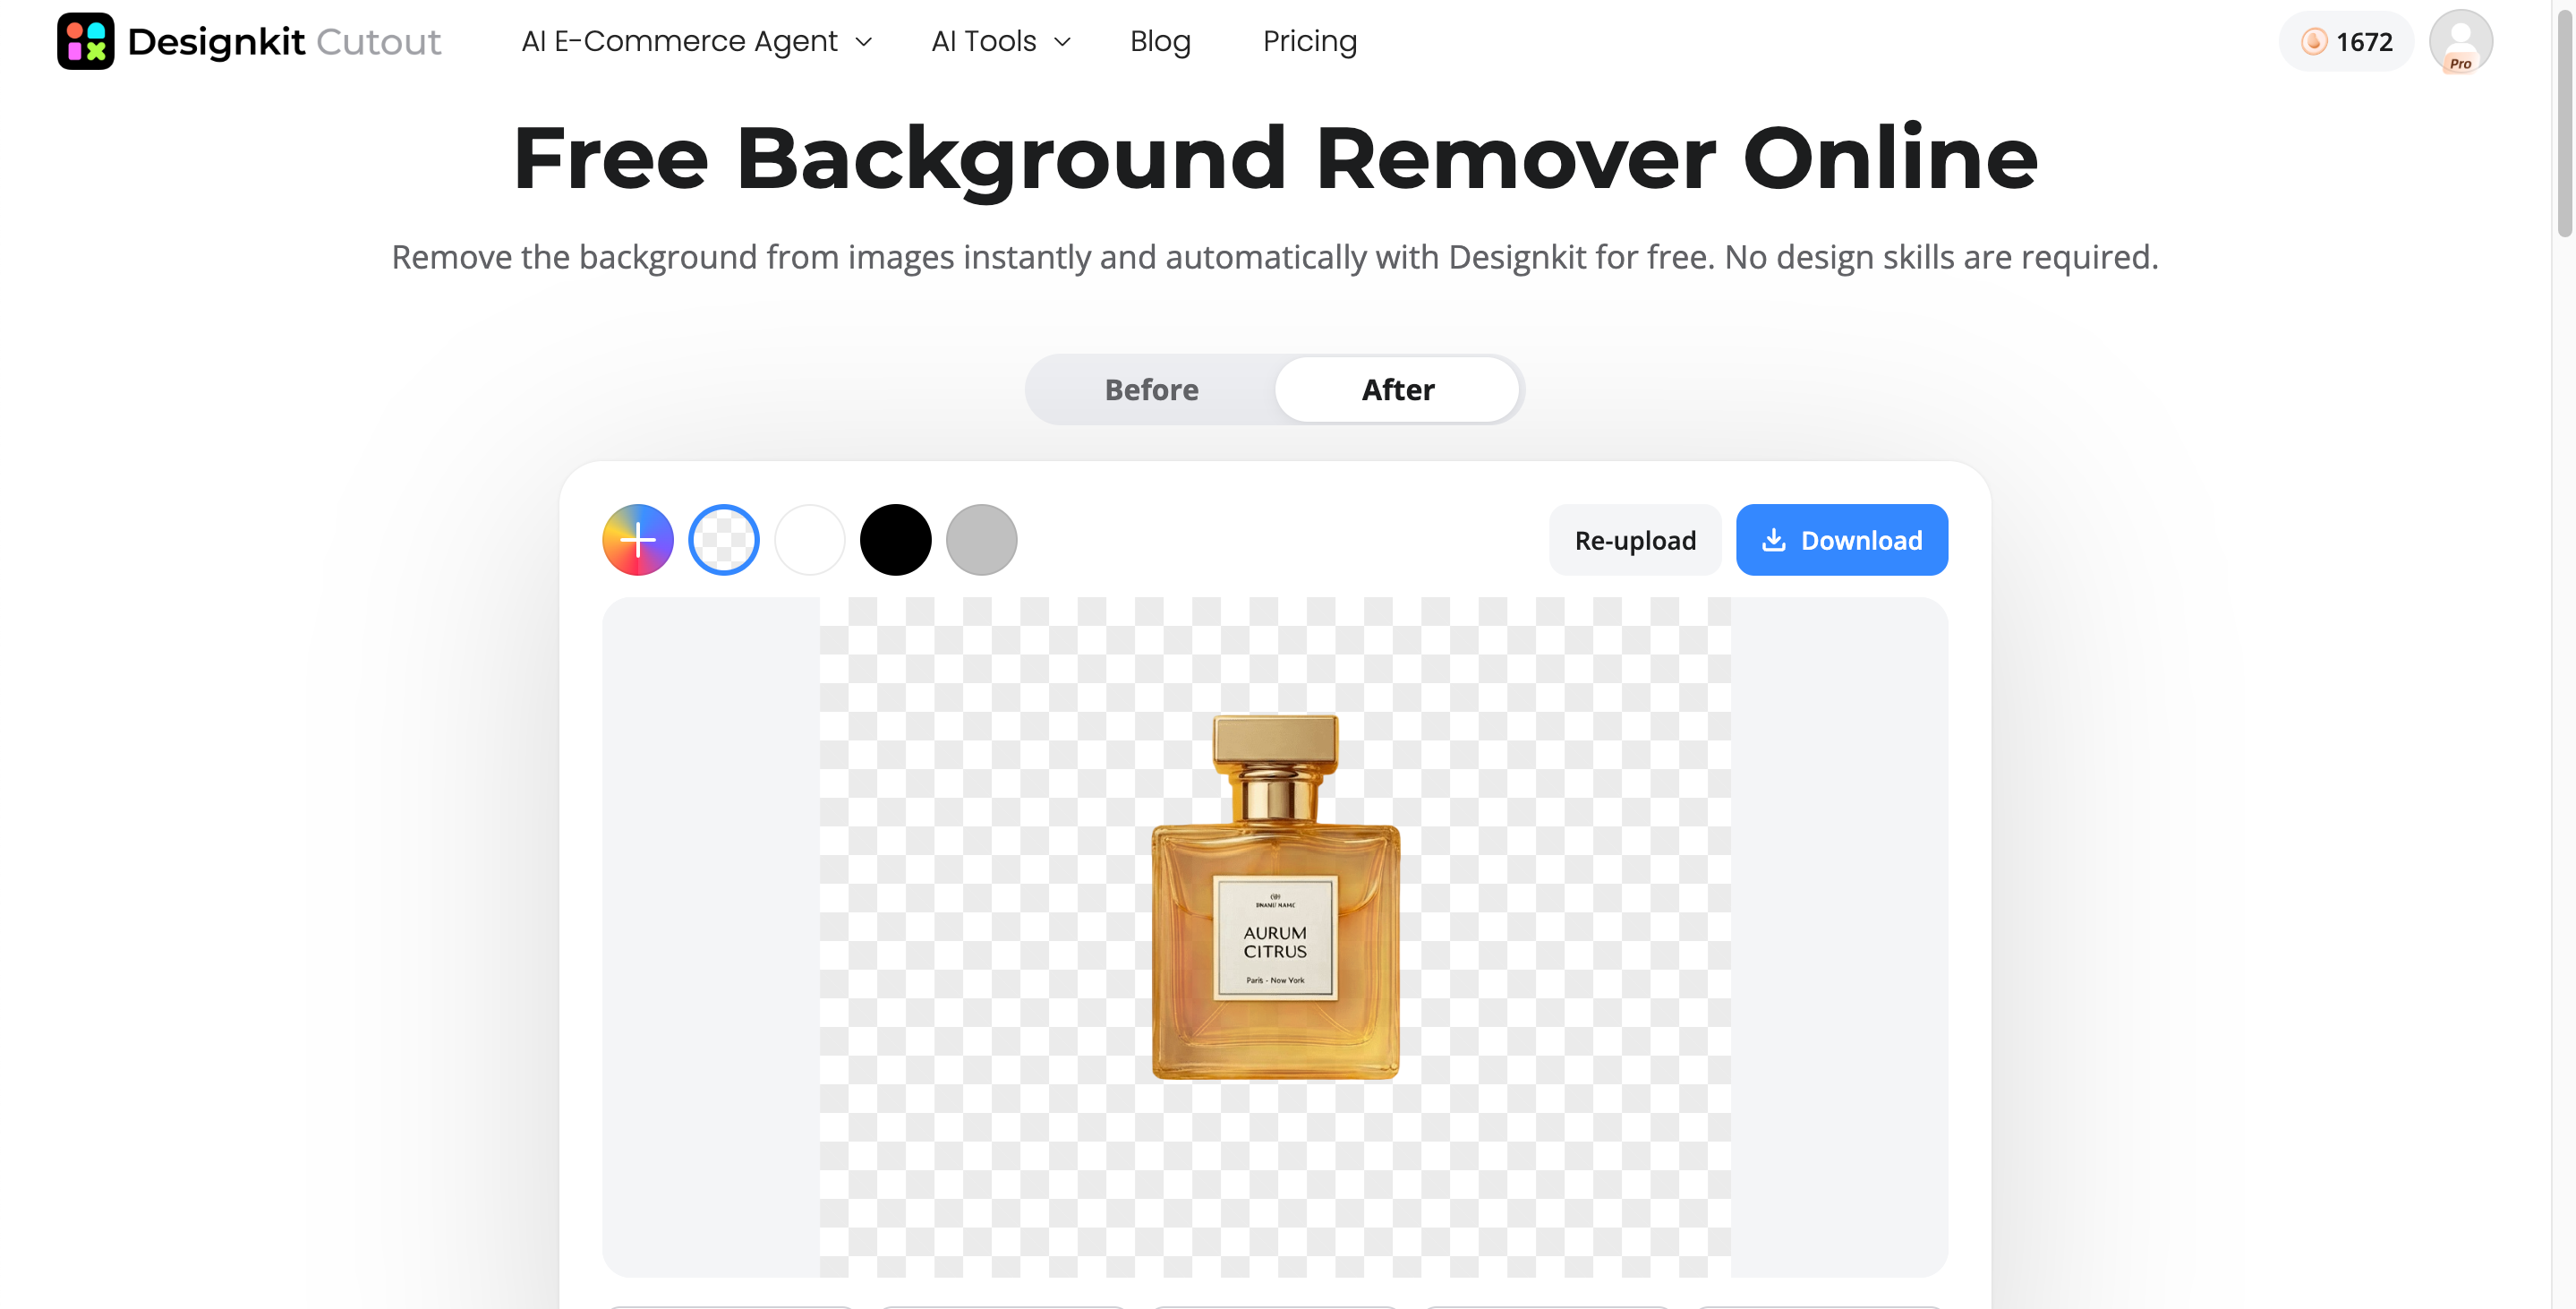
Remove Image Background Online
Step 2: Generate Marketing-Ready Visuals
Replace backgrounds, create lifestyle scenes, enhance product photos, and resize images for Amazon, Shopify, TikTok Shop, or Instagram.
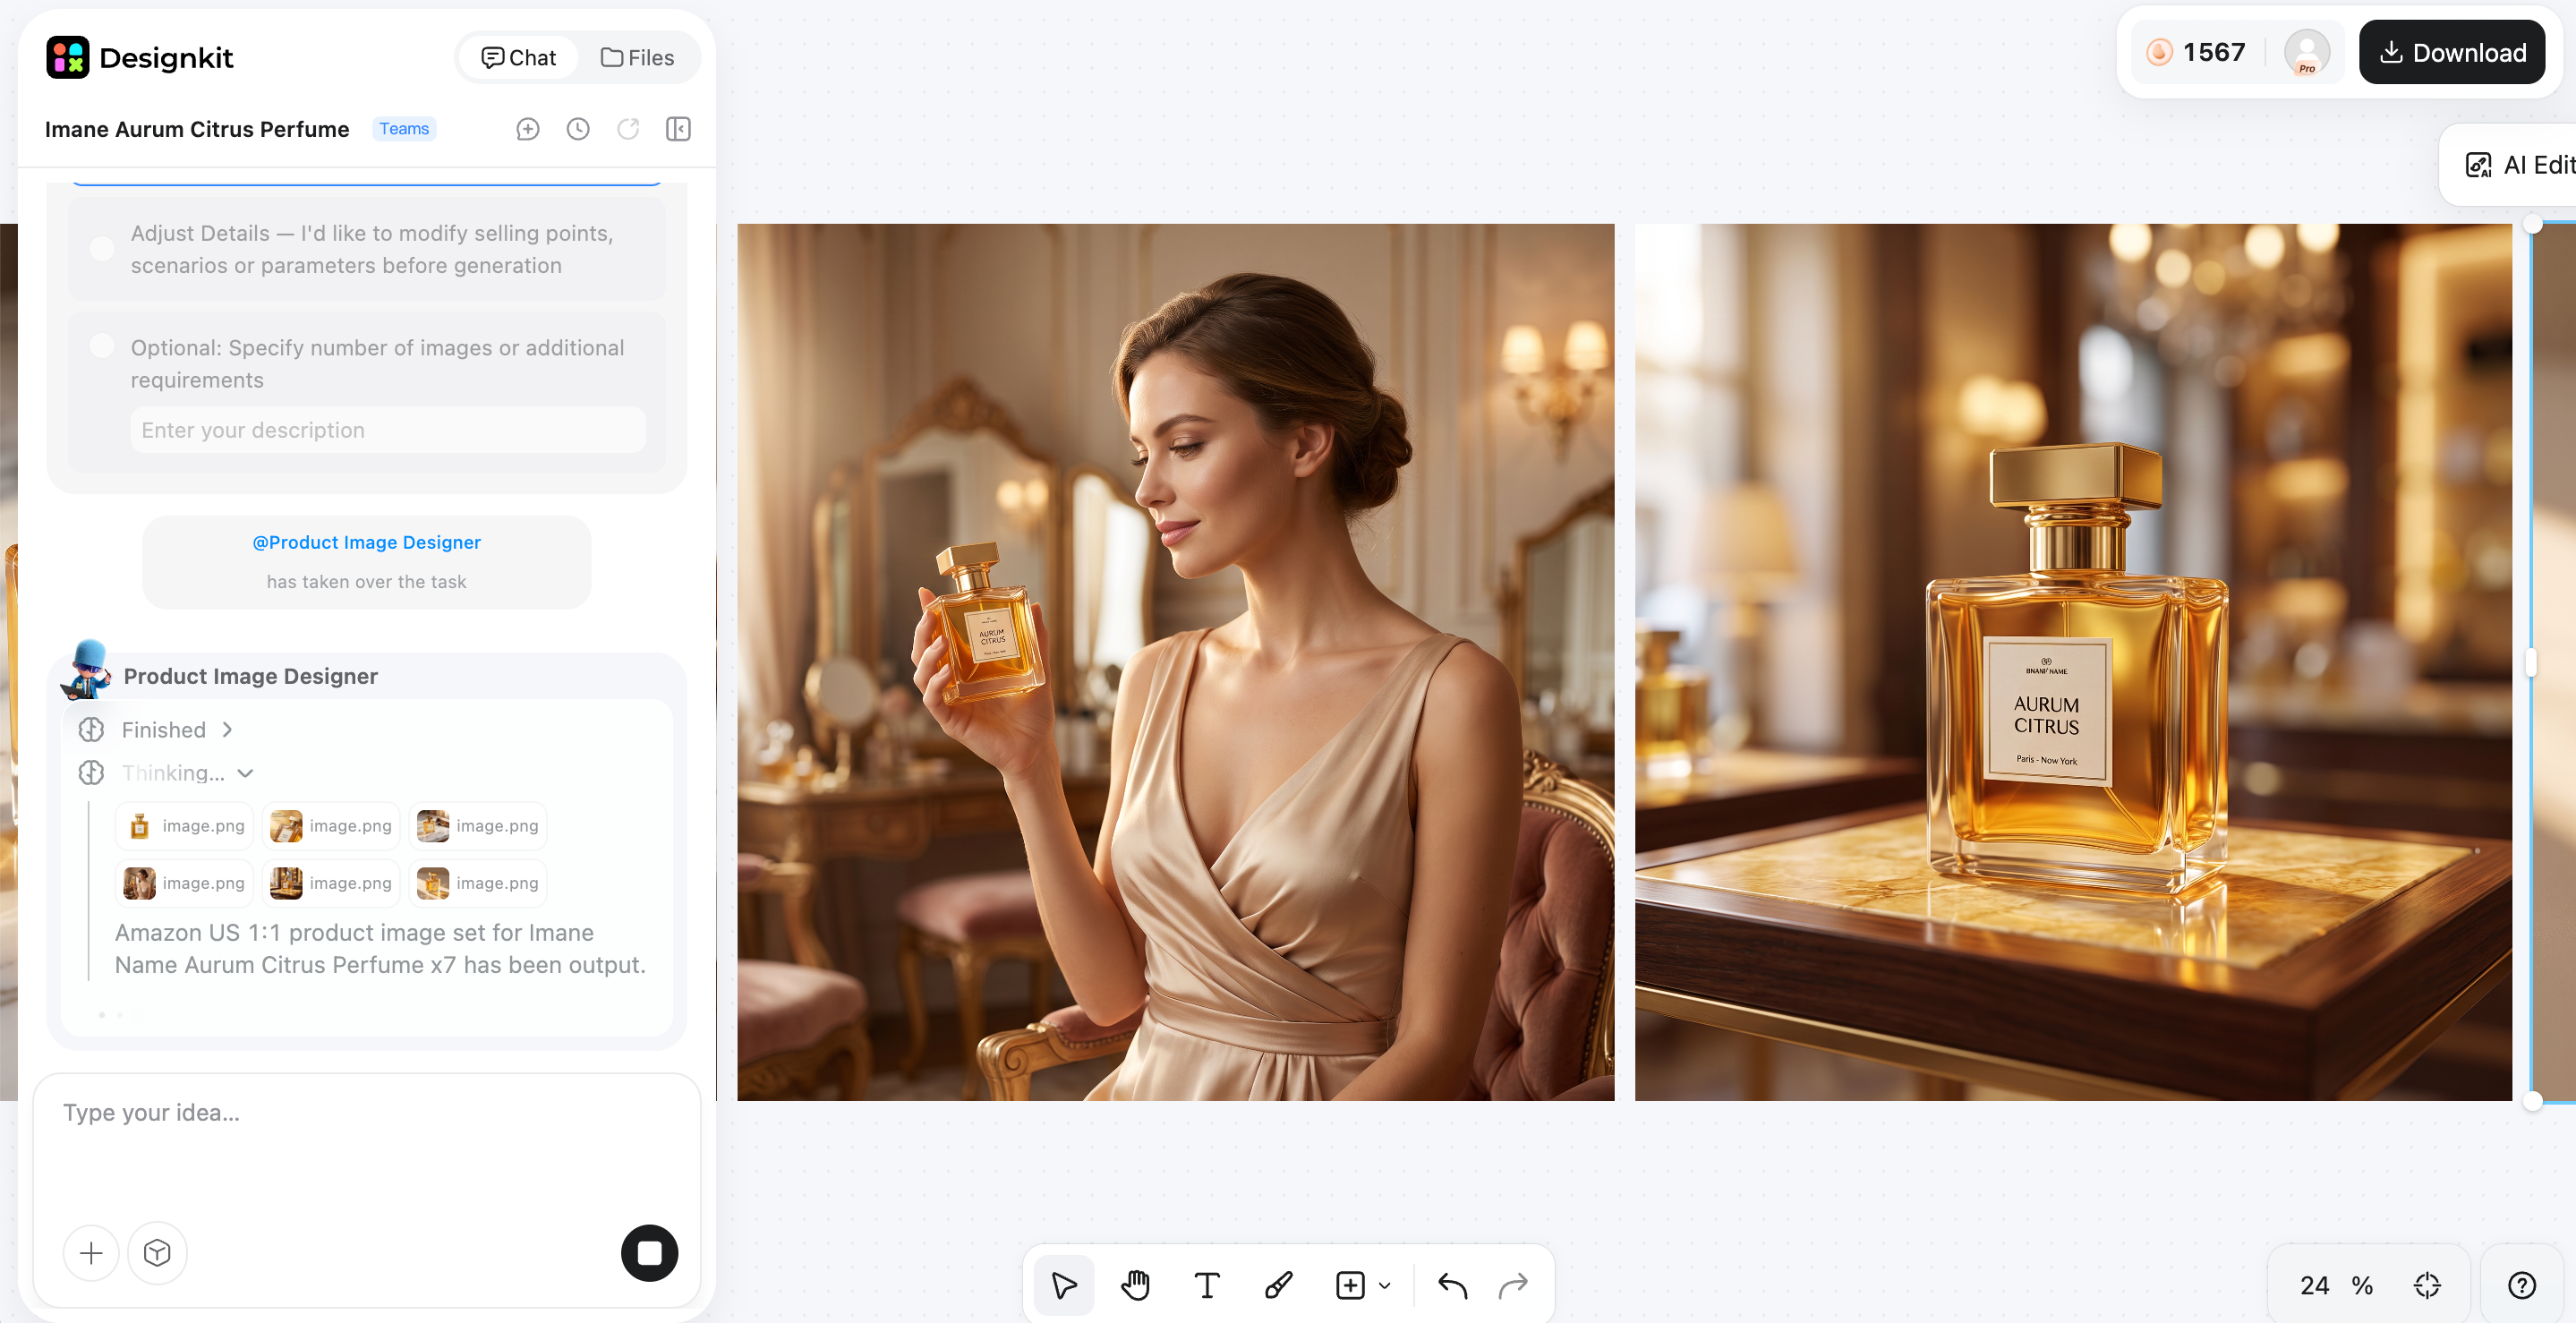
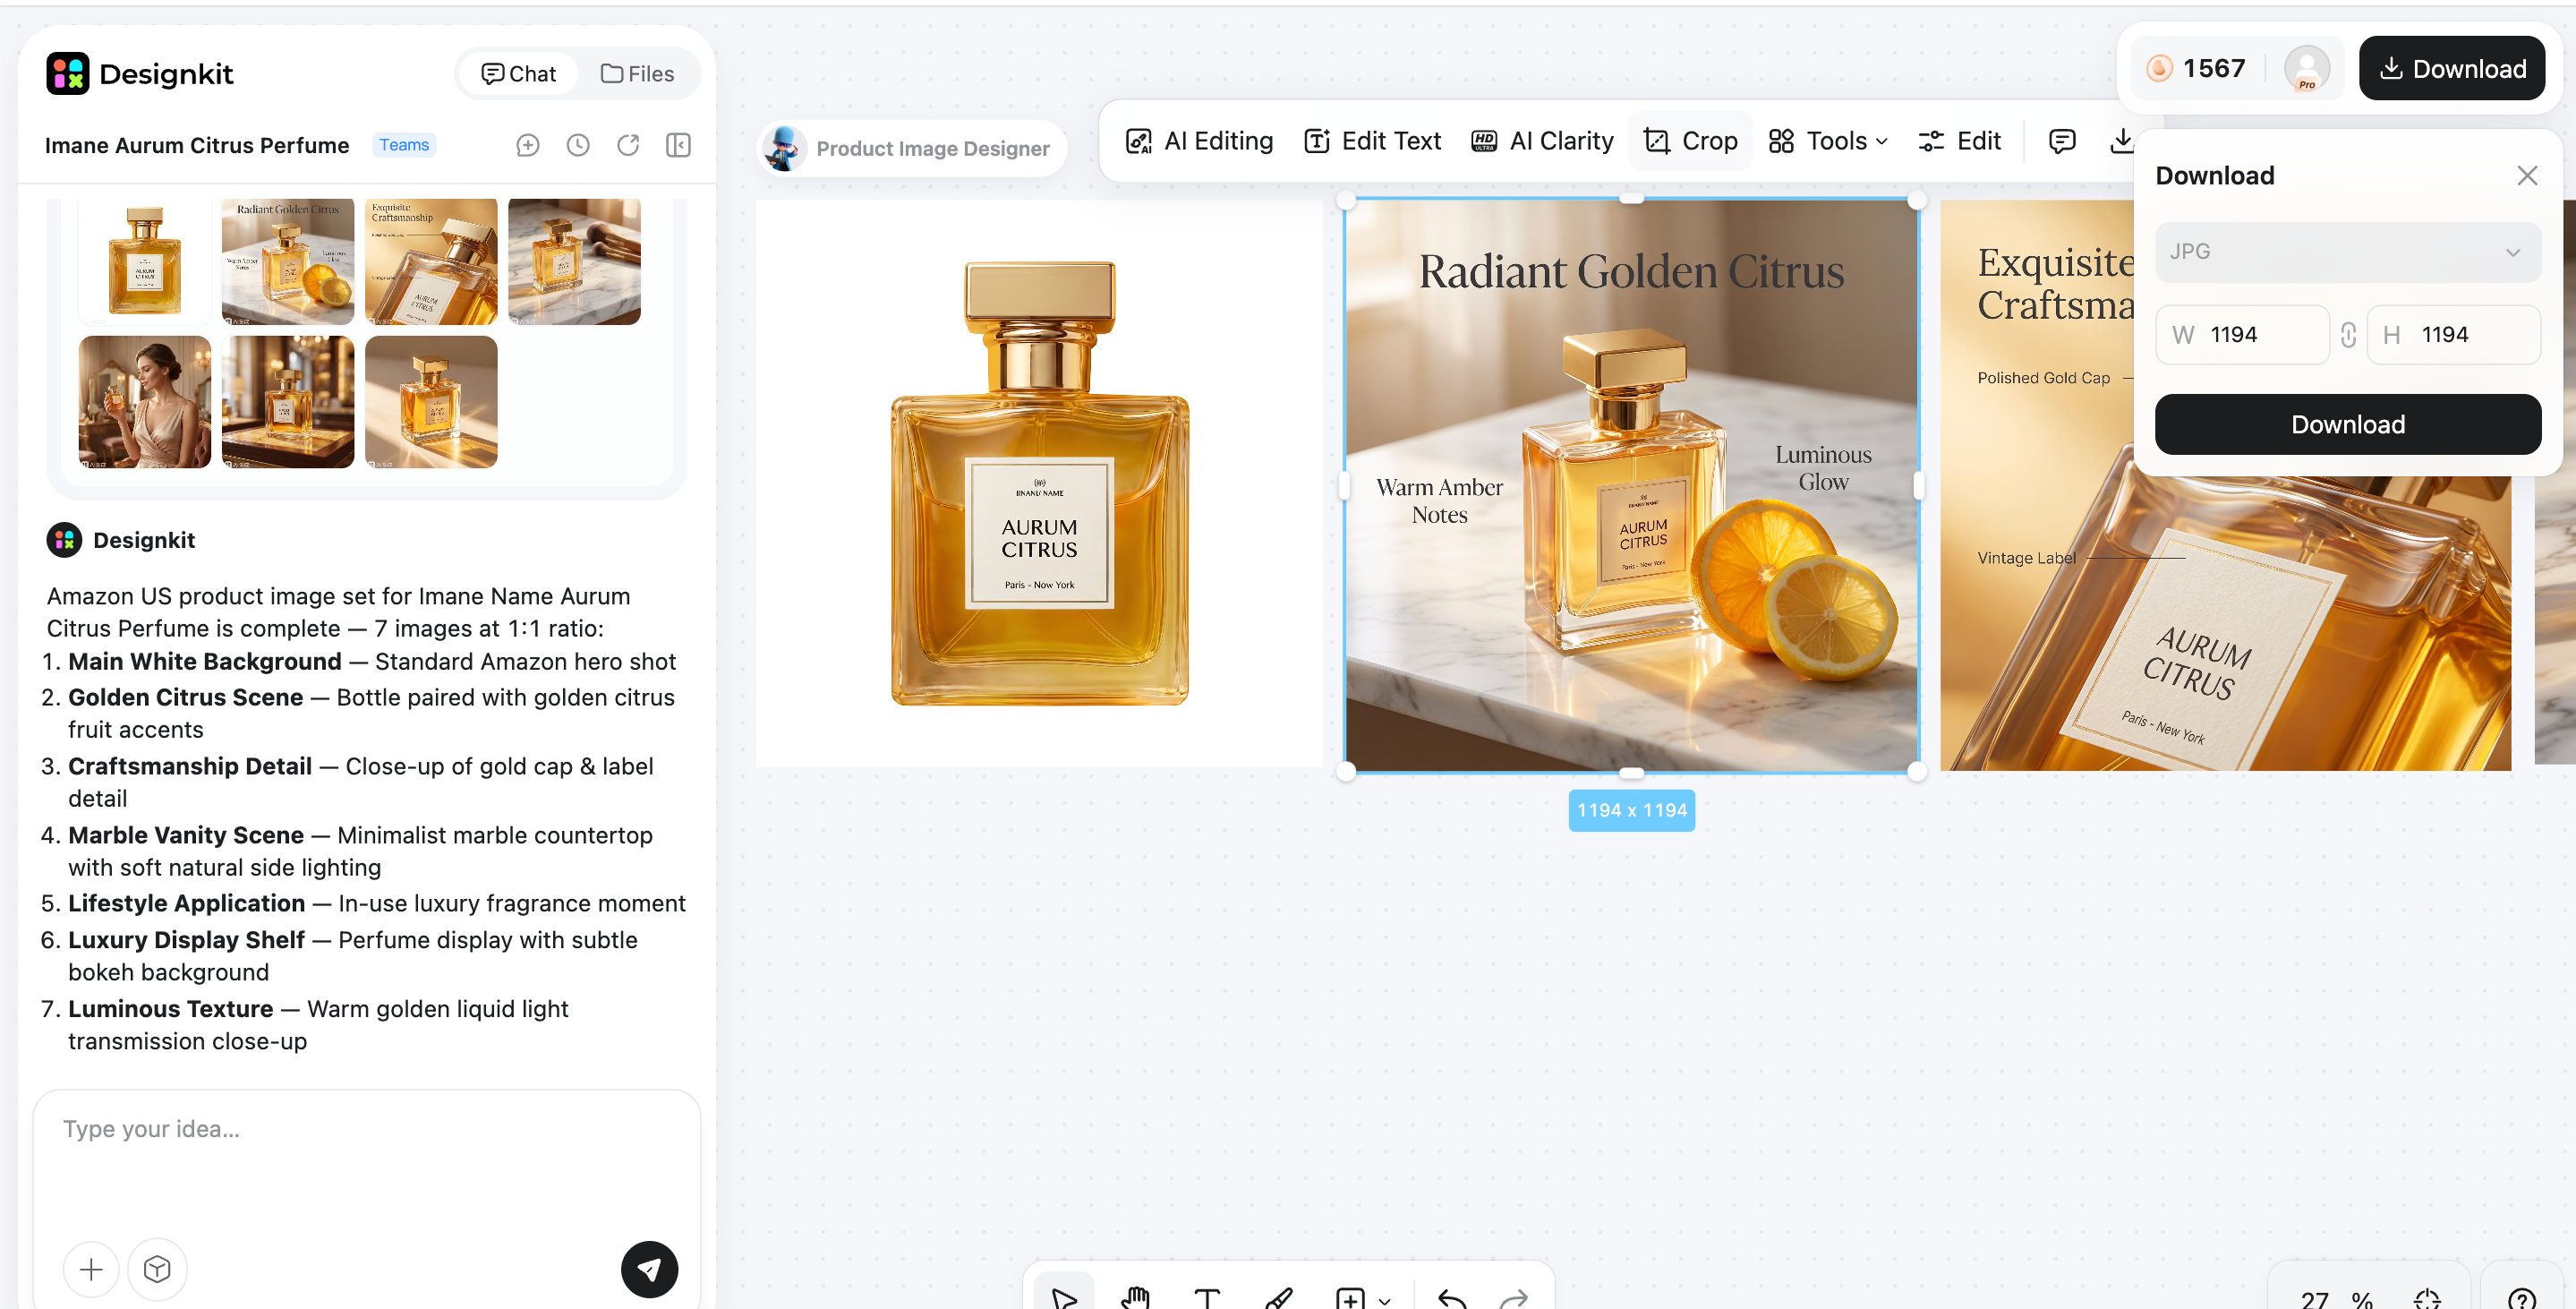
Step 3: Preview, Export, and Publish
Preview your designs, then export listing images, advertising creatives, and social media assets individually or in bulk.
Features of Designkit
AI Background Remover
Remove distracting backgrounds from product photos with a single click. Designkit creates clean, accurate cutouts that help your products stand out and gives you a professional starting point for Instagram posts, stories, carousels, and marketplace listings.
AI Background Generator
Replace plain or cluttered backgrounds with AI-generated scenes that match your brand or campaign. Create lifestyle settings, seasonal themes, or studio-style backdrops to make your Instagram content more engaging without a photo shoot.
AI Photo Enhancement
Improve image quality automatically by sharpening details, correcting lighting, enhancing colors, and increasing clarity. Designkit helps transform everyday product photos into polished visuals that look ready for social media and e-commerce.
Multi-Channel Asset Export
Export your finished designs in optimized sizes for Instagram, Facebook, Shopify, Amazon, and other platforms. Designkit helps you maintain consistent branding while reducing the time spent resizing and preparing assets for different channels.
When to Use Photoshop vs Designkit
Both Photoshop and Designkit can help remove backgrounds, but they are built for different workflows. Photoshop offers precise manual control for complex edits, while Designkit focuses on fast, AI-powered creation for scalable content production.
|
Feature |
Photoshop |
Designkit |
|---|---|---|
|
Best for |
Manual masking, hair, and complex edges |
Ecommerce creative production after cutout |
|
Control |
Full manual precision |
Simplified AI workflow |
|
Learning curve |
Higher |
Lower |
|
Edge refinement |
Select and Mask, Pen Tool |
Basic AI removal and scene generation |
|
Batch listing creatives |
Manual per file |
Built for scale |
|
Batch creation |
Limited |
Designed for scale |
Conclusion
Photoshop remains the industry standard for removing backgrounds when you need precise control over selections, masks, and complex edges such as hair, fur, or transparent objects. The best method depends on your image, whether that's Quick Actions for speed, the Pen Tool for product photography, or Select and Mask for fine details. Once your cutout is complete, the workflow doesn't end there.
If you're preparing images for ecommerce or marketing, Designkit helps transform transparent PNGs into polished listing images, lifestyle scenes, and channel-ready assets, making it easier to publish consistently across marketplaces and social platforms.
Frequently Asked Questions
How do I remove the background from an image in Photoshop?
What tool removes background in Photoshop?
Photoshop offers several background removal tools, including Remove Background Quick Action, Object Selection, Quick Selection, Magic Wand, Pen Tool, and Select and Mask. The right choice depends on your subject and edge complexity. After creating a clean cutout, Designkit can quickly generate polished ecommerce and marketing assets.
How do I remove a white background in Photoshop?
For white studio backgrounds, use the Magic Wand Tool or Color Range to select the background, then apply a Layer Mask. If a white outline remains, refine the mask using Select and Mask and Decontaminate Colors. Once the cutout is complete, Designkit makes it easy to replace the background with professional lifestyle scenes.
How do I remove the background from a logo in Photoshop?
Use the Magic Wand Tool for simple logos on solid backgrounds or the Pen Tool for sharper, more accurate edges. Save the finished logo as a transparent PNG to preserve the cutout. If you plan to use the logo across product images, banners, or social posts, Designkit helps resize and export assets for multiple channels.
Which Photoshop tool is best for removing background from hair or fur?
The best workflow is Select Subject followed by Select and Mask using the Refine Edge Brush. This combination preserves fine strands while reducing jagged edges and unwanted halos. After achieving a clean cutout, Designkit can place the subject into realistic backgrounds without requiring another manual edit.
Can I remove backgrounds from multiple images in Photoshop at once?
Photoshop supports batch processing through Actions, Batch Processing, and scripts, but setting them up requires some experience and works best with similar images. If your goal is producing many ecommerce visuals after background removal, Designkit offers a faster workflow for creating and exporting multiple assets.
What file format should I export a background-removed image as?
For transparent backgrounds, export as PNG. Keep a layered PSD if you may need to edit the mask later, while JPEG is suitable only if the image has a solid background. After exporting the transparent image, Designkit can generate marketplace-ready versions in different sizes from the same source file.
What is the best Photoshop alternative for removing backgrounds?
Several AI tools can remove backgrounds automatically without Photoshop, making them ideal for beginners or quick edits. The best option depends on whether you prioritize speed, accuracy, or additional editing features. If you also need product backgrounds, lifestyle scenes, and channel-specific exports, Designkit provides an end-to-end workflow beyond simple background removal.
You May Also Like

Project Indigo Review: Is It Better Than iPhone Camera?

6 Best AI Image Upscalers 2026: Tools Tested & Compared

How Big Is an 8x10 Photo? Size, Pixels & Frame Guide

How Big Is a 4x6 Photo? Dimensions, Pixels & Printing Tips

Picsart AI Review: Features, Pricing, Pros, Cons & Alternatives

Lovart AI Review: AI Design Agent Features, Pricing & Alternatives

Fotor AI Image Generator Review: Features, Pricing & Alternatives

How to Add Emoji to Photo Online for Free

Emoji Wallpaper Ideas & How to Make One Online (2026)

Minimalist Poster Design: How to Make a Clean Poster (2026)

How to Make a Custom Poster That Is Ready to Print

Instagram Image Size Guide 2026: Post, Reel, Story & Carousel Specs

LinkedIn Image Size Guide: Profile, Post & Banner Dimensions

YouTube Profile Image Size: Best Dimensions & Safe Area 2026

How to Edit Amazon Product Photos That Boost Sales Fast
Turn Cutouts Into Finished Creative, Faster
Remove the background in Photoshop, then turn transparent product images into listing-ready layouts and channel-specific assets with Designkit.


