
How to Remove People from Photos with Natural Results
Learn how AI rebuilds the area behind an unwanted person, then follow four steps to remove distractions while keeping the background natural.

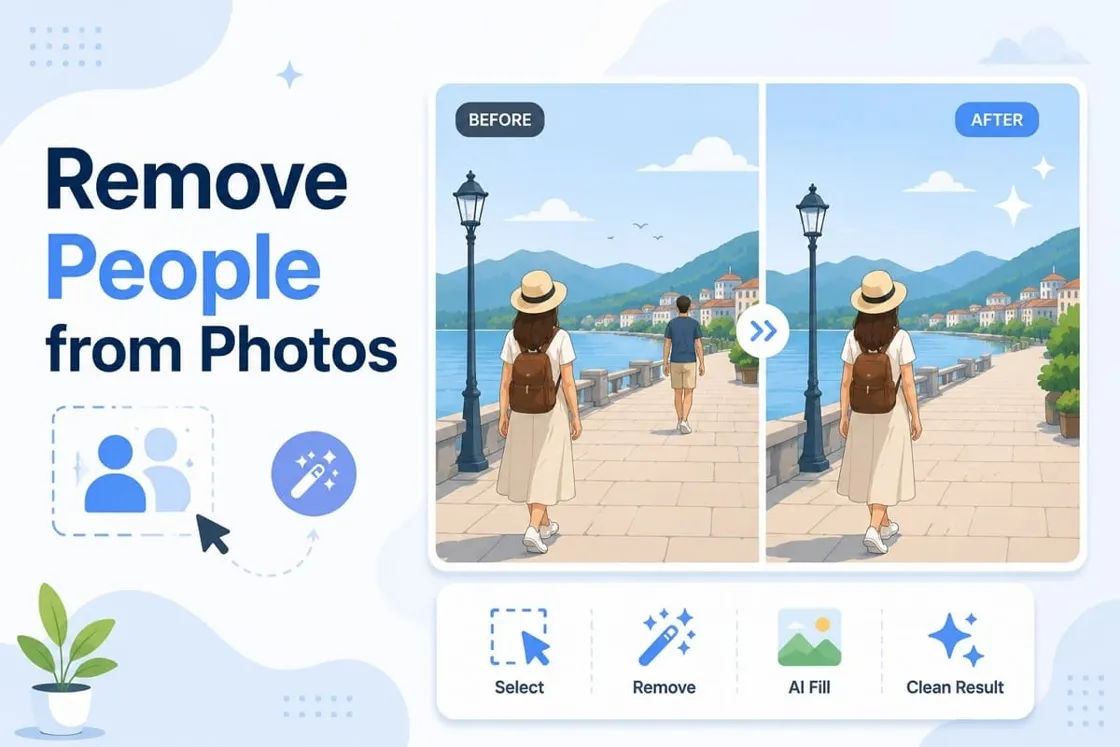
A stranger walks into frame at the wrong moment, or a passerby stands just behind your subject. The photo is otherwise exactly what you wanted, and one figure keeps it from being usable. Taking that figure out is only half the job. Whatever sits behind them has to be replaced with something that matches the rest of the scene, and that replacement is where most edits fail.
How convincing that replacement looks depends more on the photo than on the tool. This guide explains how AI reconstruction works, which scenes are suitable for it, and when removal is a better choice than cropping or manual editing. It then shows how to complete the edit online and correct results that still look unnatural.
How Does AI Remove a Person from a Photo?
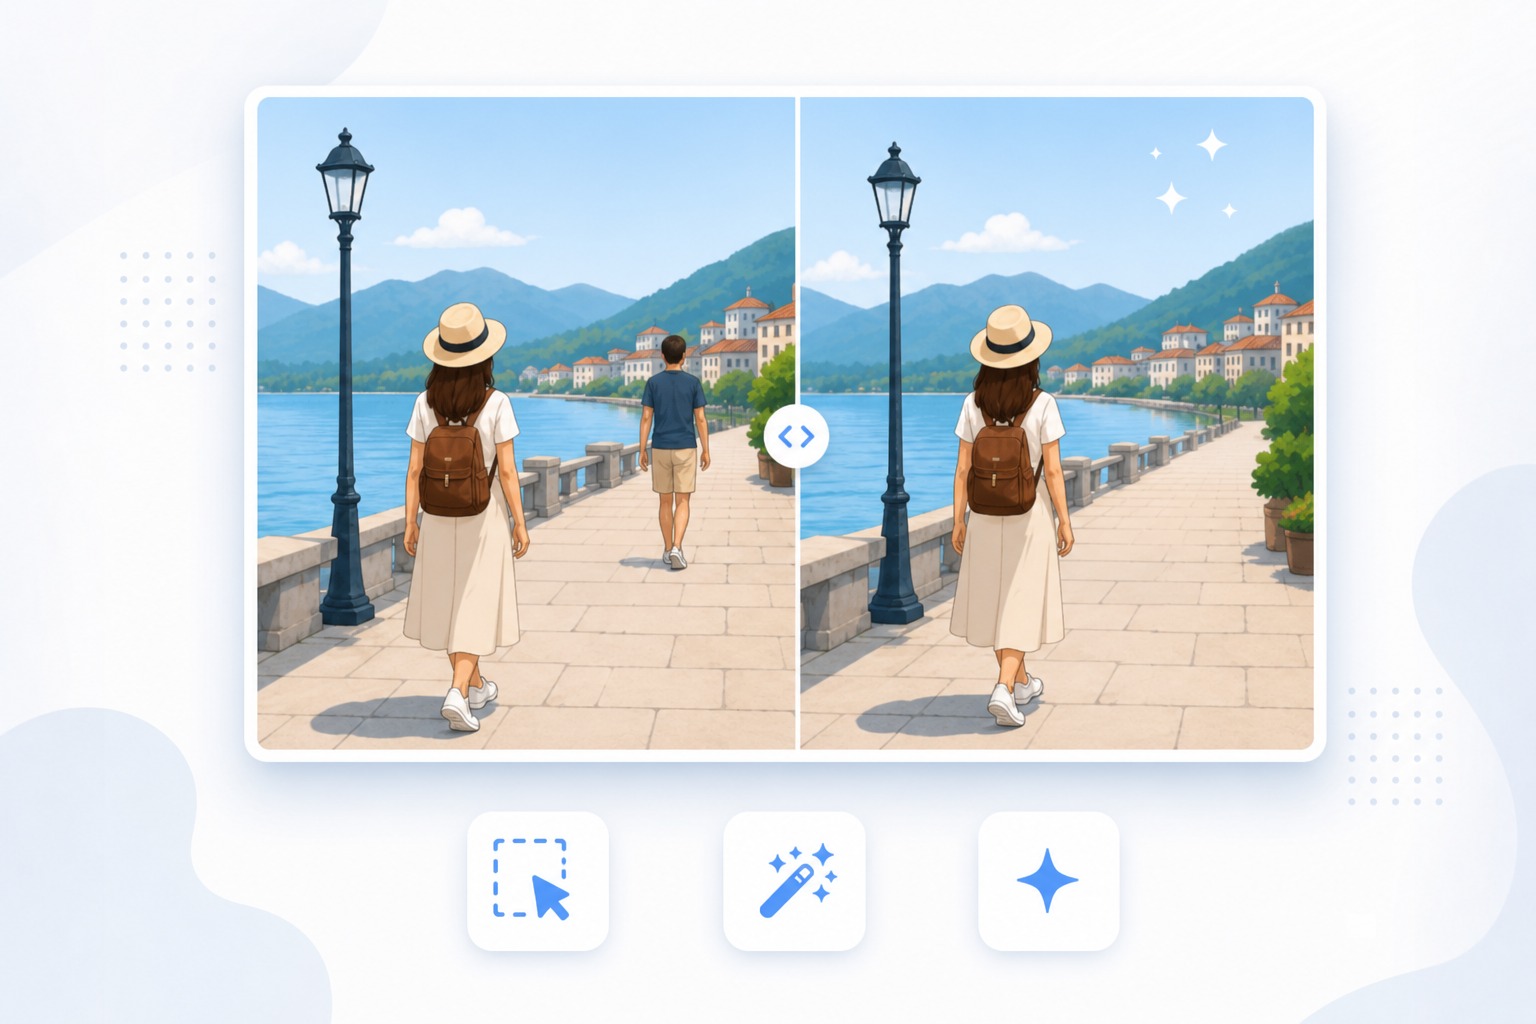
Once you mark a figure, the AI tool treats that area as missing and generates content to fill it. This is how AI remove person from photo tools reconstruct the scene. Adobe describes the process as studying the surrounding content for context clues, then producing a fill that blends with what stays visible.
Nearby colors, textures, lines, and objects steer that fill. A wall supplies the color and grain to continue, and a horizon supplies the line where ground meets sky. The fill is generated rather than copied from elsewhere in the picture.

Google, describing its own tool, says the system predicts what the pixels would look like if the distraction were not there. Any AI people remover produces a plausible reconstruction rather than the scene that was actually hidden. That is why the same tool succeeds on one photo and struggles on another.
- Generally Easier: Sky, grass, water, sand, plain walls, blurred backgrounds, and open pavement.
- Generally Harder: Brickwork, tiling, text and signage, railings, patterned fabric, dense foliage, and anything with strong straight lines running through the selection.
Removing One Person, Several People, or a Crowd
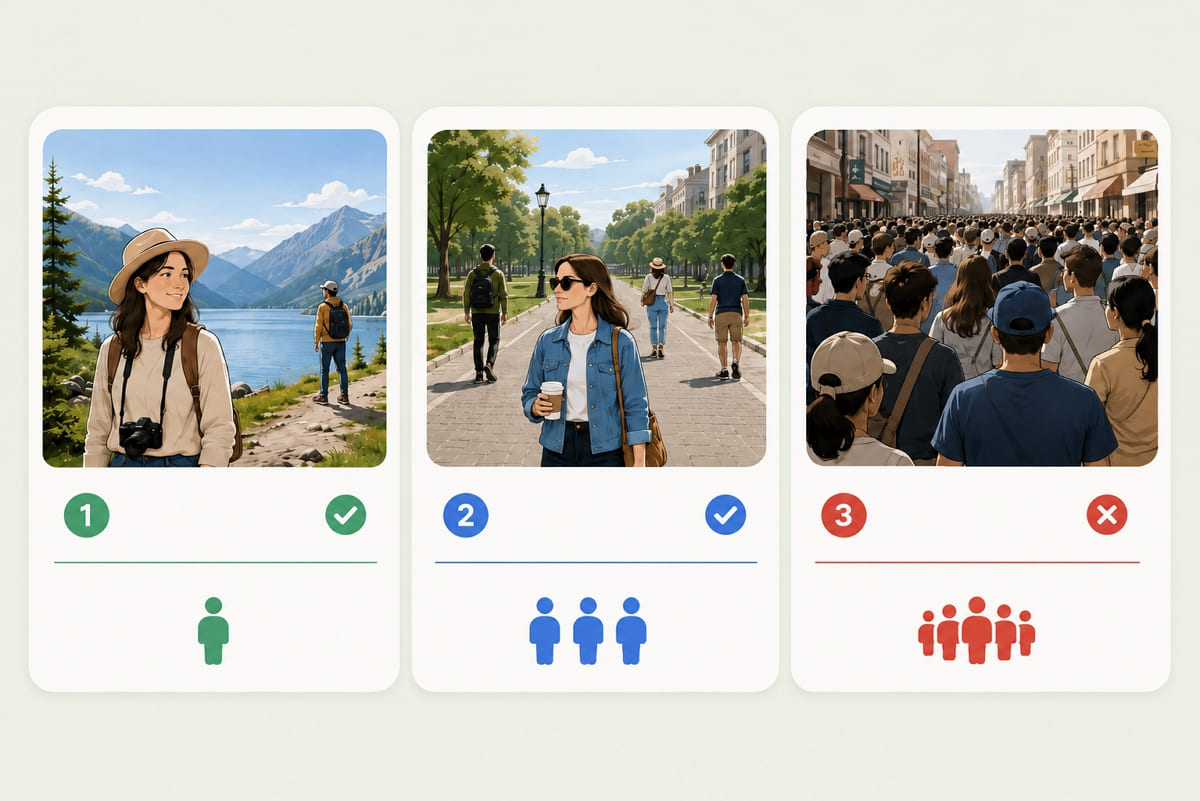
The difficulty of person removal depends on how many people appear in the frame, how much of the scene they cover, and whether they overlap the main subject. The following cases show when AI has enough visible background to rebuild the image and when the edit is more likely to struggle:
1. One Background Person
A single figure standing clear of your subject is the easiest case. Google notes that objects with clear boundaries and distinct edges are more seamless to remove, and that good lighting helps the tool read the scene. One person also leaves most of the background visible, so the model has plenty to work from. Distance helps as well, since a figure further back covers less of the scene and sits against softer detail.
2. Several Separate People
Handle each person separately instead of selecting the entire group at once. Smaller selections preserve more of the visible background and usually produce cleaner results. Removing several people together can erase useful scene details the AI needs for reconstruction. Start with the figures closest to your subject, then work outward so you can stop once the photo looks balanced.
3. Overlapping People or a Crowd
When figures overlap each other or press against your subject, there is no clean boundary to select and little surrounding scene left to rebuild from. In these cases, trying to remove people from photo areas can produce less convincing results. A crowd filling the frame is especially difficult to reconstruct, so reframing the shot often works better than forcing an unnatural edit.
How to Keep the Reconstructed Background Natural
5 habits do most of the work when you edit people out of photos. So, the following 5 points highlight how to edit people out of photos while keeping the natural background:
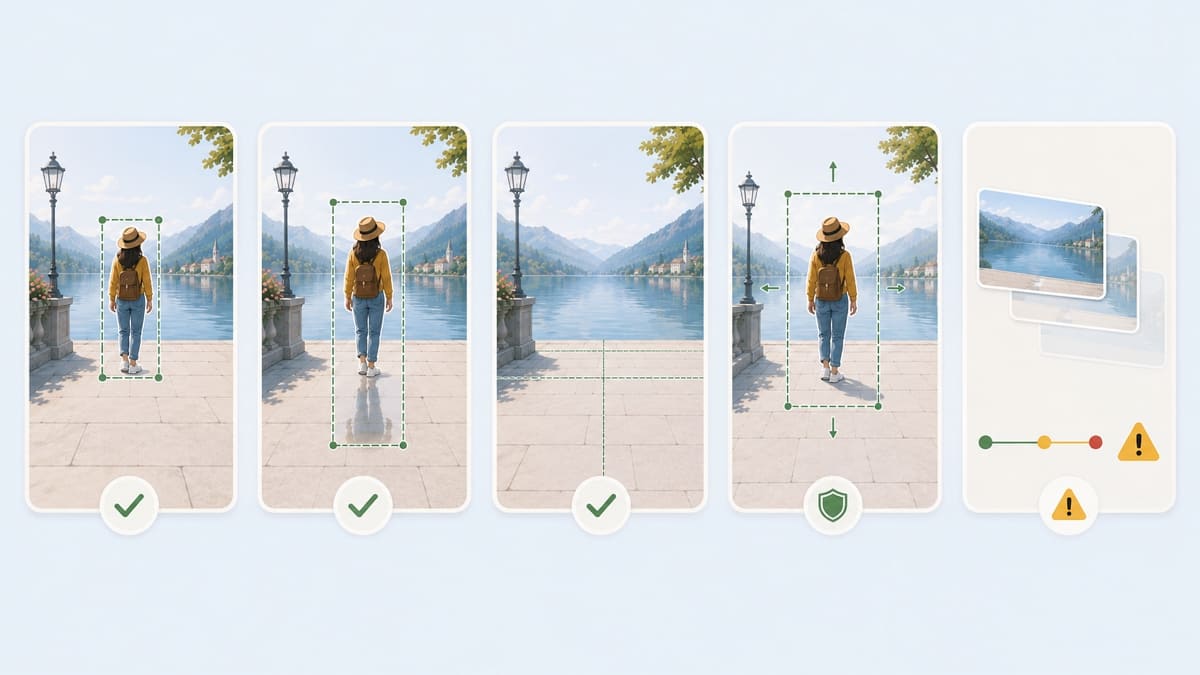
1. Keep Selections Tight to Preserve Context: The model builds from what stays visible, so a tight, accurate selection preserves more reference material than a generous one. Removing extra background alongside the person only makes the reconstruction harder, and it widens the area you then have to inspect.
2. Include Shadows and Reflections: A figure often casts a shadow or appears in glass and water. Those traces sit outside the body outline and survive the removal unless you mark them too, which is the single most common giveaway. Check the ground first, since that is where a shadow usually stretches.
3. Align Patterns, Lines, and Textures: Anything continuous has to resume on the far side of the gap at the same spacing and angle. The eye tracks that rhythm without being asked, so a seam half a degree out of true still registers as wrong.
4. Protect Your Subject and Frame Edges: Keep the selection clear of the person you actually photographed, since an overlap can alter a face or a hand you cannot restore afterward. Stay off the edges of the frame too, where the model has reference on one side only.
5. Know When to Stop Editing: Each pass builds on generated content rather than the original photo. After two or three attempts on the same area, quality usually falls rather than improves.
When keeping the full frame matters and the background provides enough visible context, AI removal is usually the most practical option. The following workflow shows how to apply it online.
Note:The right approach depends on how to edit someone out of a photo without hurting the composition. Cropping works well when the person is near an edge. If they overlap your subject or cover a complex background, check whether enough visible detail remains for a natural AI reconstruction.
How to Remove People from Photos with Designkit
Once you know the photo is suitable for AI removal, the editing process itself is straightforward. Designkit’s Object Remover runs in the browser and uses four steps to select the unwanted person, rebuild the surrounding area, and export the finished image.
Step 1: Upload the Photo
Open the “Object Remover ” tool and select “ Upload Image.” You can choose a file from your device, drag it into the workspace, or use batch upload when several photos need the same treatment.
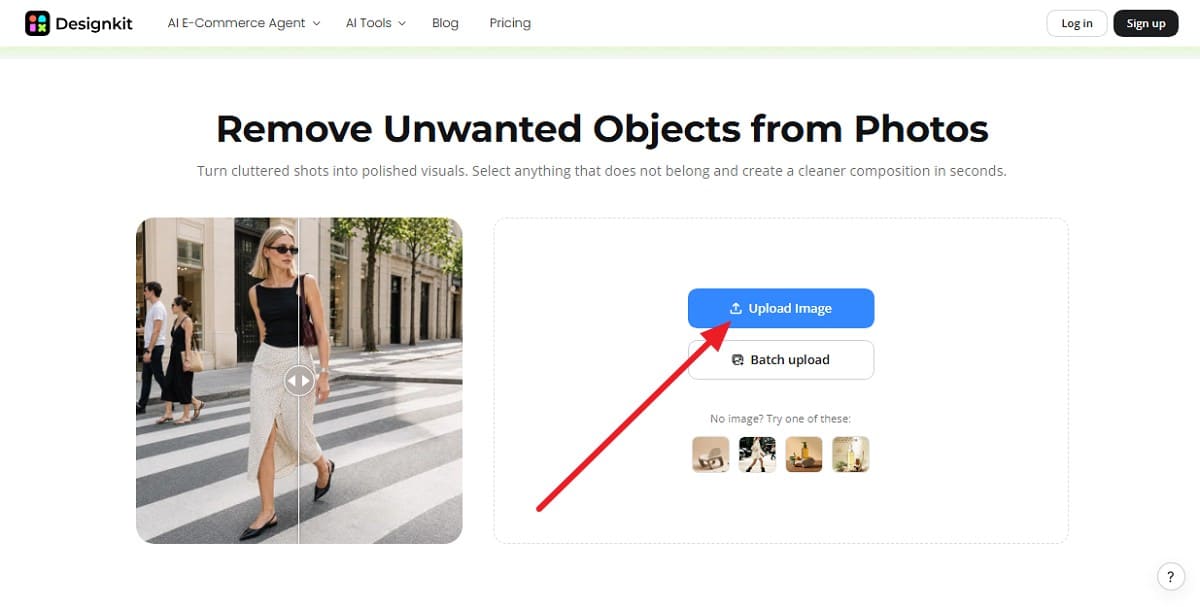
Tip: Start from the largest, least compressed version you have. An erased object tool requires original photo details to succeed, whereas screenshots or re-shared files lack sufficient data.
Step 2: Mark the Person
With the photo loaded, the selection does most of the work. Pick the “Brush, Circle, or Square Selector ” in the “ Advanced ” section and cover the figure completely. Leave a thin margin of roughly 5 to 15 pixels around the outline. That margin gives the model a clean boundary to work against.
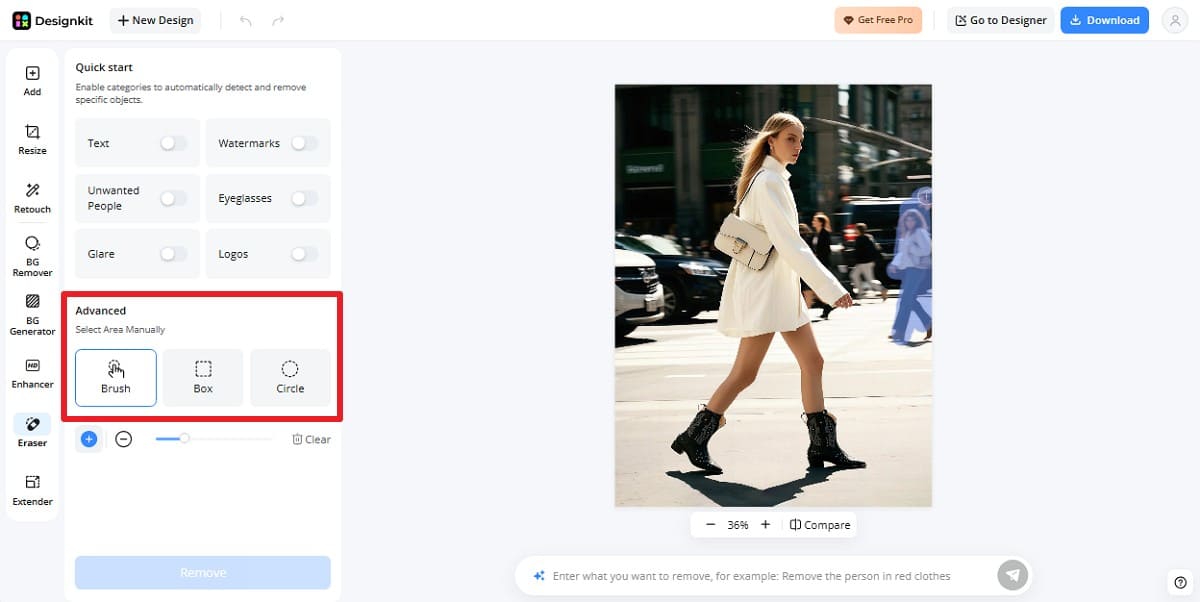
Step 3: Remove the Selected Person
Once highlighted, press the “Remove ” button and wait for the result. Designkit can erase a person from a photo and generate replacement content that blends with the surrounding scene.
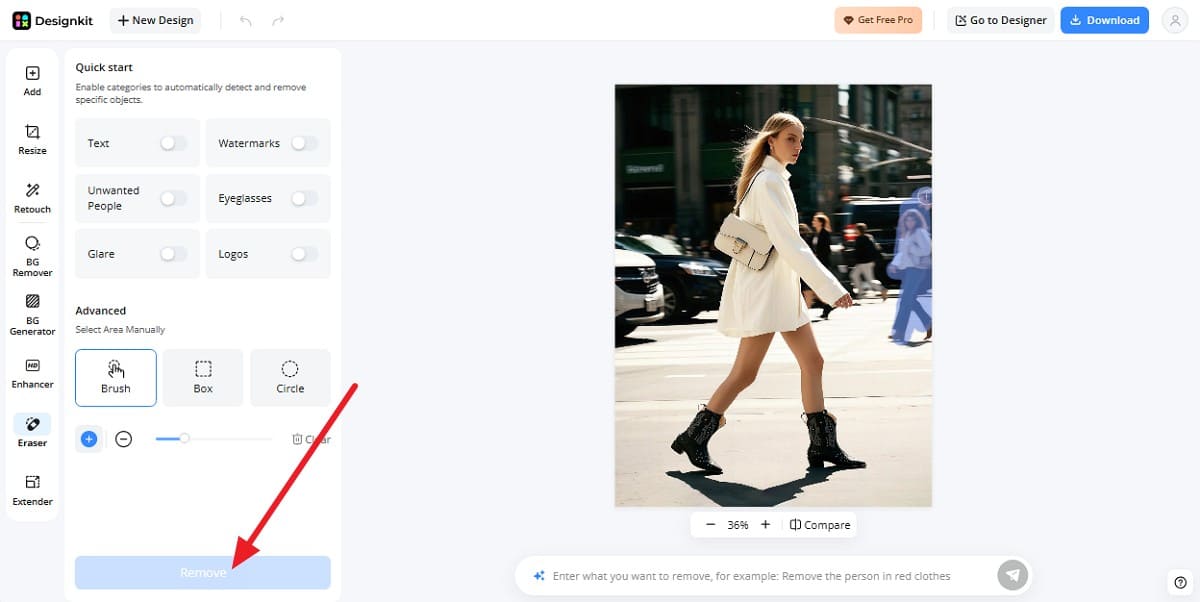
Tip: When you need to delete a person from a photo, remove one figure at a time. Separate selections help preserve the background and make each result easier to check.
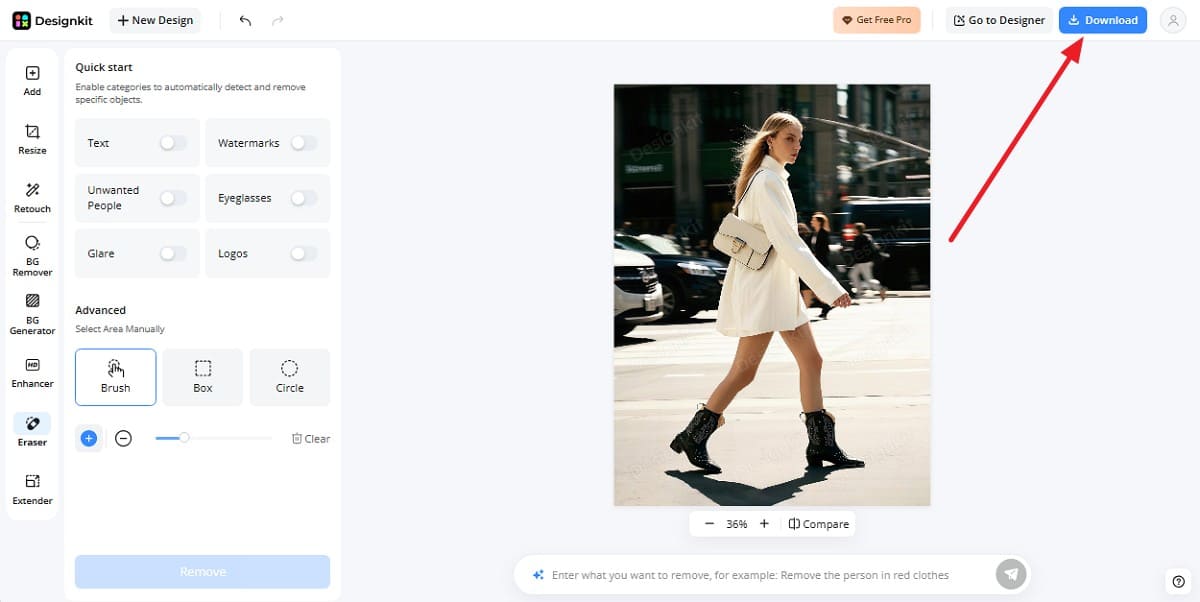
Step 4: Preview and Download
Inspect the edited area before saving the image. Zoom in and check the edges where the person was removed for any blur, distortion, or leftover details. Once the result looks natural, click Download, select your preferred format, and export the image.
Remove Unwanted Object from Your Photo
Tip: Make another pass if a small detail remains, then export the completed picture to your device. A second attempt often starts from a different selection rather than from the version you just saved.
What to Do When Person Removal Looks Unnatural
Even a careful selection produces the occasional bad result. Each failure has a recognizable signature, so review the following table and know how to fix it when you remove someone from a photo:
|
Visible Problem |
Likely Cause |
Recommended Response |
|---|---|---|
|
A Thin Outline, Hand, or Shoe Remains |
Part of the figure was missed |
Select only the leftover area and remove it again |
|
A Shadow or Reflection Remains |
It was outside the original selection |
Select the shadow or reflection separately and rerun the removal |
|
The Filled Area Looks Soft or Smeared |
The AI lacks enough surrounding detail |
Retry with a tighter selection or crop if the result still looks unnatural |
|
A Line or Pattern Does Not Align |
The background structure was rebuilt incorrectly |
Retry the area manually or reframe the image |
|
The Main Subject Has Changed |
The selection overlapped the subject |
Restart from the original and keep the selection clear of the subject |
|
A Background Detail Appears Twice |
The AI duplicated a nearby feature |
Rerun the edit with a slightly different selection area |
Note: Some attempts to erase a person from a photo are better restarted from the original image. Repeated edits can introduce new artifacts, especially when later passes build on generated areas. Starting fresh often gives AI cleaner background details to work with.
AI Removal vs Cropping and Manual Editing
While learning how to edit someone out of a photo, it's important to choose the right approach. 3 methods are available, and they don't compete for the same job.
|
Factor |
AI Person Removal |
Cropping |
Manual Editing |
|---|---|---|---|
|
Best For |
People inside the frame |
People near an edge or corner |
Complex or structured backgrounds |
|
Speed |
Fast |
Fastest |
Slowest |
|
Skill Required |
Low |
Very low |
Medium to high |
|
Background Reconstruction |
AI-generated |
Not required |
Manually controlled |
|
Preserves Original Framing |
Yes |
No |
Yes |
|
Level of Control |
Medium |
High but limited |
Highest |
|
Works on Crowds |
Limited |
Only when the crowd can be cropped out |
Possible but time-consuming |
|
Patterns & Straight Lines |
May struggle |
No reconstruction needed |
Offers the best control |
|
Best Background Type |
Simple or open backgrounds |
Any background if framing allows |
Complex or structured backgrounds |
|
Best Choice When… |
You want to keep the composition and edit quickly |
The unwanted person is close to the edge |
Accuracy matters more than editing speed |
Verdict: Cropping works best when the unwanted person is near the edge, and you can remove them without hurting the composition. If you want to keep the full frame, learning how to remove someone from a photo with AI is often the better option. The right choice depends on the person’s position and how much of the original scene you want to preserve.
Conclusion
Clear results depend on the background, pattern complexity, and the person’s position in the frame. For a quick way to remove people from photos, Designkit’s Object Remover works online and fills the selected area automatically. Keep selections tight, preserve the original image, and crop instead when the background is too complex. A careful final review also helps catch small artifacts before you download the edited photo.
Frequently Asked Questions
Can AI recover the real background hidden behind a person?
Which backgrounds give the best results?
Even low-detail surfaces work best. Structured or repeating backgrounds are harder, because the model has to continue a pattern rather than simply extend a texture.
Why is the person's shadow still in the photo?
Shadows and reflections sit outside the body outline, so a selection drawn around the figure leaves them behind. They also lack a hard edge, so a shadow needs a wider selection than the person did. Glass and water behave the same way.
How do I fix a small leftover patch?
Select only the patch rather than redoing the whole area. A second pass is usually easier than the first, because the completed fill now surrounds the gap and gives the model more to match against.
What about hair, motion blur, and soft edges?
Soft edges are harder to remove because there is no clear boundary to follow. Include the full faded area in your selection, and use manual cleanup when motion blur leaves visible artifacts.
When should I stop editing and try something else?
The clearest signal is a new attempt that fixes one area and breaks another, since the model is now working from generated material. At that point, crop the frame, edit the problem manually, or reshoot.
You May Also Like

Remove.bg Shutting Down Dec 1, 2026: What Users Are Saying

7 Best Remove.bg Alternatives in 2026: Free & Paid Tools

Instagram Carousel: What It Is, How to Post & Create One

Nano Banana Prompts: 20+ Examples for Better AI Images

Ideogram AI Review 2026: Features, Pricing & Alternatives

Free Mac Photo Editor: 5 Tools Compared for Mac Users

How to Crop a Photo Into a Circle Online (Keep Quality)

How to Make an Image Transparent Online (AI Guide)

Pixlr Background Remover Review 2026: Features, Pricing & Alternatives

How to Fix Overexposed Photos: Recover Highlights Fast

OpenArt AI Review 2026: Features, Pricing & Alternatives

Best AI Headshot Generator: 9 Tools Compared for 2026

Best Stencil Maker Tools 2026: Turn Photos Into Stencils

Pixelbin Watermark Remover Review: Image & Video Results Tested

How to Make a Sticker on iPhone: Easy Step by Step Guide

Best AI Logo Generator in 2026: 10 Tools Compared

How to Turn a Photo Into a Cartoon: A Beginner-Friendly Guide

Landscape vs Portrait: Key Differences & Best Uses in 2026

How to Remove Watermark From Photo: AI, Photoshop & More

How to Fix Pixelated Photos: Photoshop, AI Tools & Tips

Bing Image Creator: How It Works, Features, Uses & Alternatives

How to Remove People from Photos with AI: A Step-by-Step Guide

How to Increase Image Resolution: AI, Photoshop & PPI

How to Add Text to a Photo: 8 Tips for Better Results

How to Fix Grainy Photos: Easy Ways to Clear Images

Creative Profile Picture Ideas for Every Style and Platform

Evoto AI Review 2026: Features, Pricing, Pros & Cons

Pixlr Photo Editor Review: Features, Pricing & Alternatives

Best AI Image Extender Tools in 2026: Expand Photos with AI

How to Make a Collage on iPhone: Easy Guide for 2026

How to Sharpen an Image in Photoshop (Smart Sharpen and Unsharp Mask)

Best Image Background Remover Tools in 2026: AI Tools Compared

How to Make Transparent Background in Paint: Step-by-Step Guide

How to Resize an Image: Best Methods, Tools & Quality Tips

Best AI Image Generator Tools in 2026: Top AI Platforms Compared

Remove.bg Review 2026: Features, Pricing & Is It Worth It?

Luminar Neo Photo Editor Review 2026: AI Features, Price & Pros

How to Post Multiple Photos on Instagram (2026 Guide)

25 Facebook Cover Photo Ideas for Personal & Business Pages

What Is a PFP? Meaning, Examples & How to Create One

Can You Edit an Instagram Post After Posting?

11 Best Canva Alternatives in 2026 for AI Design & Marketing

8 Best Midjourney Alternatives in 2026: Features, Pricing & Comparison

How to Restore Old Photos: AI Tools, Tips & Best Methods

Pixelcut AI Review 2026: Features, Pricing, Pros, Cons & Alternatives

How to Apply Watermark to Photos: Methods, Tips & AI Tools

How to Remove a Background in Illustrator: 4 Easy Methods

How to Change Background Color on Instagram Story (Easy Guide)

8 Best AI Poster Generators in 2026: Create Posters Faster with AI

10 Best AI Image Enhancers in 2026: Tested & Compared

10 Best AI Image Editors in 2026: Features, Pricing & Comparison

7 Best AI Background Changer in 2026: Remove & Replace Photo Backgrounds

Luminar Neo vs Lightroom: Features, Pricing & Comparison 2026

Kittl Review 2026: Is It Worth It? Features & Pricing

How to Make a Blurry Image Clear: 5 AI & Manual Ways

How to Remove Background on iPhone: 5 Easy Methods (2026)

Photoroom Background Remover Review 2026: Features & Alternatives

How to Remove Background in Canva: A Step-by-Step Guide

How to Remove Background in GIMP: Beginner-Friendly Guide

Funny Dog Memes to Try: Doge Meaning and 10 Original Ideas

Back to School Checklist 2026: Supplies, Timeline, and Planning

Recraft AI Review 2026: Features, Pricing, Pros, Cons & Alternatives

How to Make an Image Transparent in Google Slides: Opacity & Background Removal

VanceAI Photo Enhancer Review: Features, Pricing & Alternatives in 2026

What Does Emojify Mean? Text, Photos, & Emoji Art Explained

Top 8 Online Background Removers for Ecommerce Photos (2026)

How to Remove Background in Photoshop: 7 Easy Methods

6 Best AI Image Upscalers 2026: Tools Tested & Compared

Project Indigo Review: Is It Better Than iPhone Camera?

How Big Is an 8x10 Photo? Size, Pixels & Frame Guide

How Big Is a 4x6 Photo? Dimensions, Pixels & Printing Tips

Picsart AI Review: Features, Pricing, Pros, Cons & Alternatives

Lovart AI Review: AI Design Agent Features, Pricing & Alternatives

Fotor AI Image Generator Review: Features, Pricing & Alternatives

How to Add Emoji to Photo Online for Free

Emoji Wallpaper Ideas & How to Make One Online (2026)

Minimalist Poster Design: How to Make a Clean Poster (2026)

How to Make a Custom Poster That Is Ready to Print

Instagram Image Size Guide 2026: Post, Reel, Story & Carousel Specs

LinkedIn Image Size Guide: Profile, Post & Banner Dimensions

YouTube Profile Image Size: Best Dimensions & Safe Area 2026

How to Edit Amazon Product Photos That Boost Sales Fast
Remove the Distraction, Keep the Full Frame
Mark the person you want to remove and let Designkit rebuild the surrounding scene. Review the background, adjust the selection if needed, and download.
