
How to Make an Image Transparent in Google Slides: Complete Guide
Make images transparent in Google Slides with opacity controls, transparent PNGs, and a simple prep workflow when you need background removal.


Making an image transparent in Google Slides is one of the easiest ways to create cleaner, more professional presentations. Whether you're designing slides for school, business, client pitches, or marketing campaigns, adjusting image transparency helps improve readability, establish visual hierarchy, and keep your audience focused on the most important content.
While Google Slides includes built-in opacity controls, it has limited image editing capabilities when you need transparent backgrounds or reusable presentation assets.
In this guide, you'll learn how to make an image transparent in Google Slides, when to use transparency instead of background removal, and how to prepare polished visuals for your presentations with a simple workflow.
Why make an image transparent in Google Slides?
Use transparent pictures to organise visual data without cluttering up your slides. A semi-transparent image is a supporting player, adding depth without competing with your headlines, charts, or important graphics, and still keeping your content as the main attraction. This simple tweak is often all it takes to make a busy slide easier to read and more engaging for your audience.
Learning how to make images transparent in Google Slides is useful in many situations, from classroom assignments to business presentations and ecommerce marketing decks. Rather than editing images in complex design software, you can adjust their opacity directly inside Google Slides and achieve a polished result within seconds.
Common use cases
Image transparency works well in many presentation scenarios, including:
-
Text overlays: Fade background images, so titles and paragraphs remain easy to read.
-
Watermark logos: Add subtle branding without distracting from the main content.
-
Presentation covers: Create visually appealing title slides with soft background imagery.
-
Product showcases: Highlight products while using supporting visuals behind them.
-
Sales decks: Make them interesting to look at, without charts or performance data overload.
-
Marketing presentations: Layer graphics to guide viewers' attention naturally.
Transparency vs. background removal: What's the difference?
Although they're often used together, transparency and background removal solve two different design problems. Transparency changes the opacity of an entire image, making every part of it more see-through. Background removal, on the other hand, isolates the subject by deleting everything around it, allowing you to place the object on any background without unwanted edges.
Knowing this difference makes it much easier to choose the right editing method. When you're putting a landscape photo behind a presentation title, usually just lowering the transparency will do. However, if you're inserting a product image or company logo, you'll generally want to remove the background from the image in Google Slides first, so that only the subject appears on the slide.
|
Editing method |
What it does |
Best for |
|---|---|---|
|
Adjust transparency |
Makes the entire image more see-through |
Background images, overlays, watermarks |
|
Remove background |
Deletes unwanted areas around the subject |
Product photos, logos, portraits |
|
Transparent PNG |
Saves an image without a background |
Reusable presentation assets |
How to make an image transparent in Google Slides
If you want to make images transparent in Google Slides, the process only takes a few clicks on the desktop version of Google Slides. Once you know where the transparency controls are located, you can quickly apply the same style across multiple slides and create a more consistent presentation design.
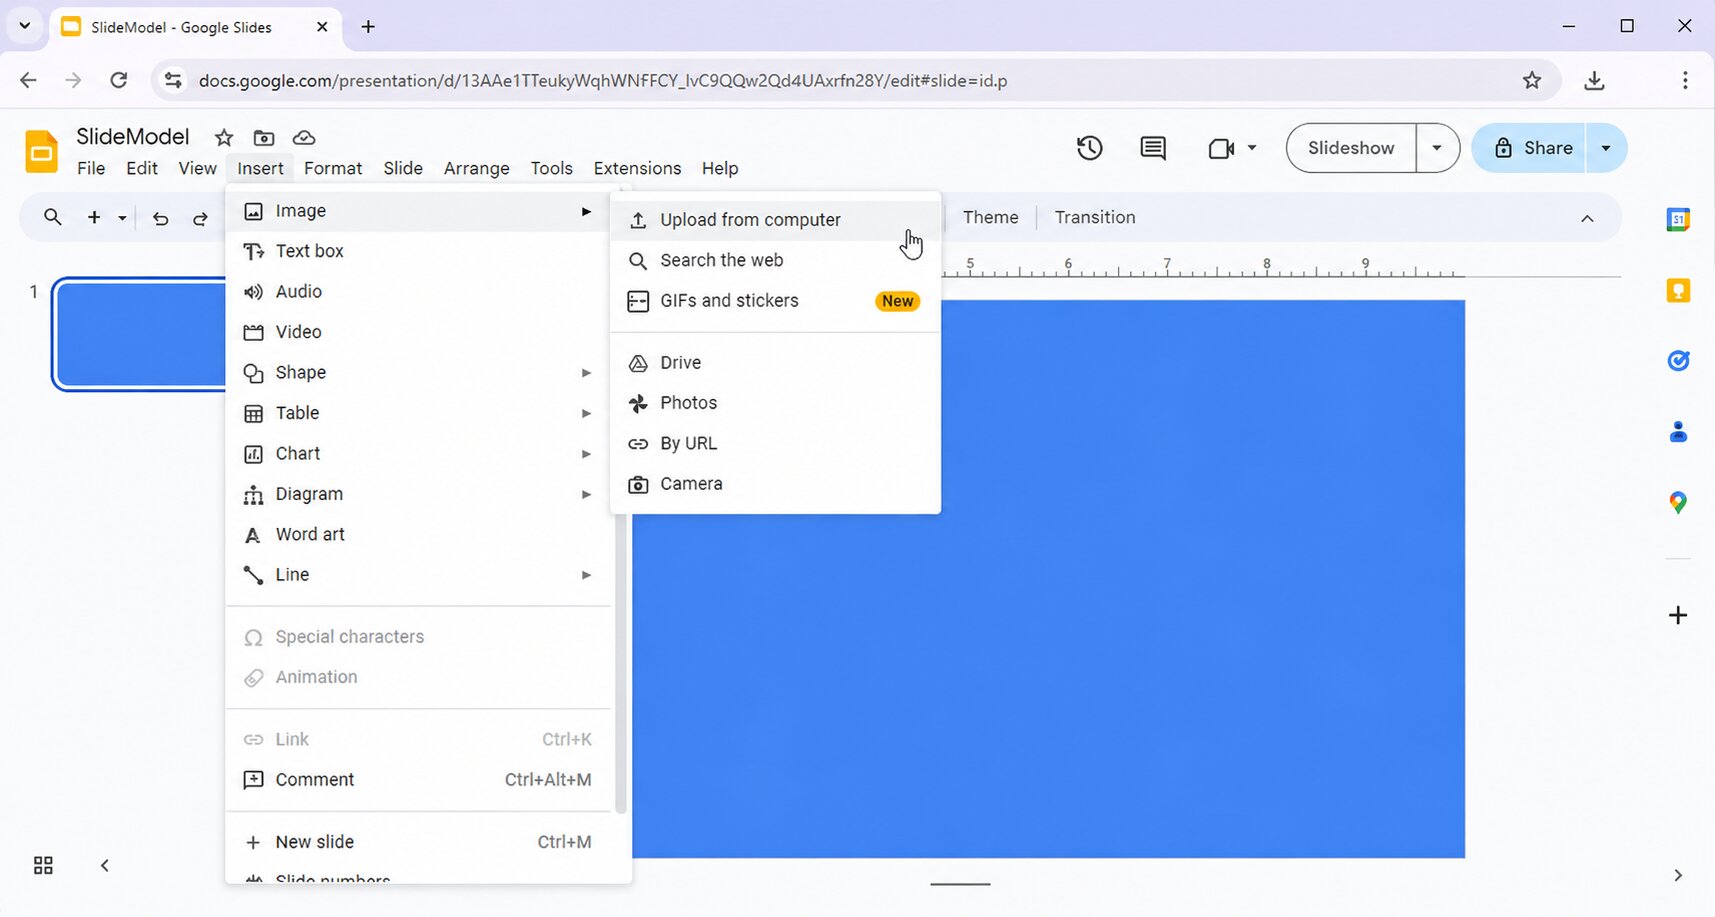
Step 1: Insert your image
Now open your presentation and navigate to the slide where you want to insert an image. Select Insert → Image and upload your picture from your computer, Google Drive, Google Photos or other supported source. Resize and place the image where you want it on your slide layout first, and then change the transparency. If you get the placement right to start with, it's easier to judge how much transparency you really need.
Step 2: Open Format options
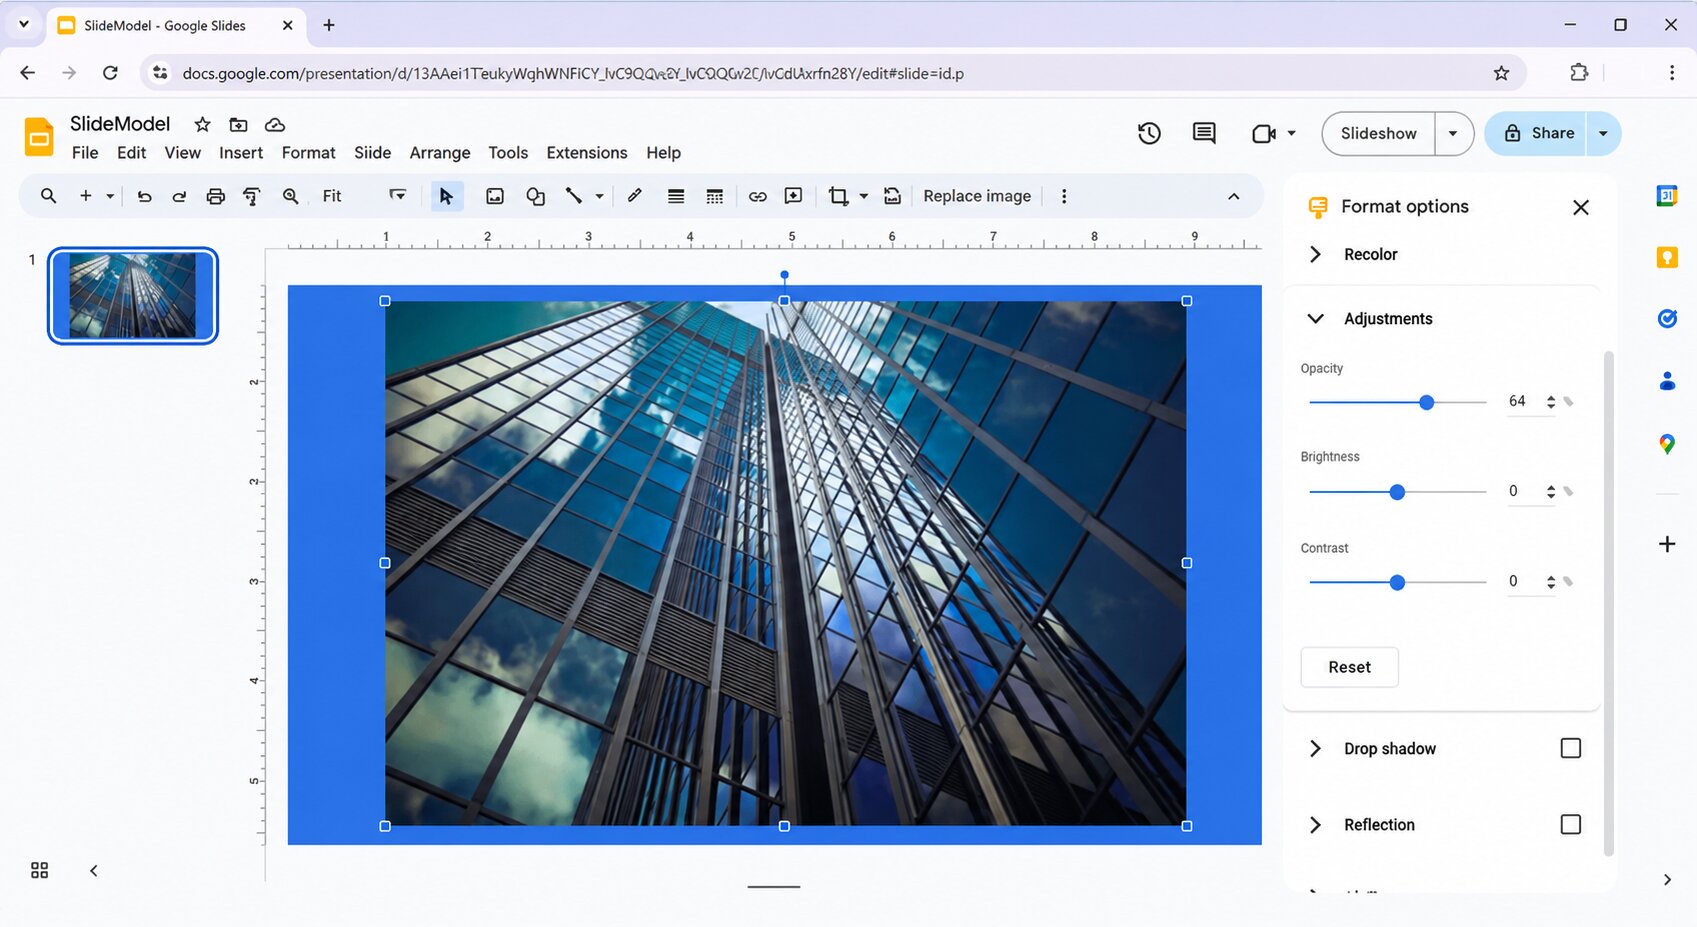
Click the image to select it, and then select Format options from the toolbar or right-click the image. Then you'll notice a settings panel on the right side of the screen. Expand Adjustments to reveal the transparency slider and other controls such as Brightness and Contrast. These settings allow you to change how the image interacts with the rest of your slide.
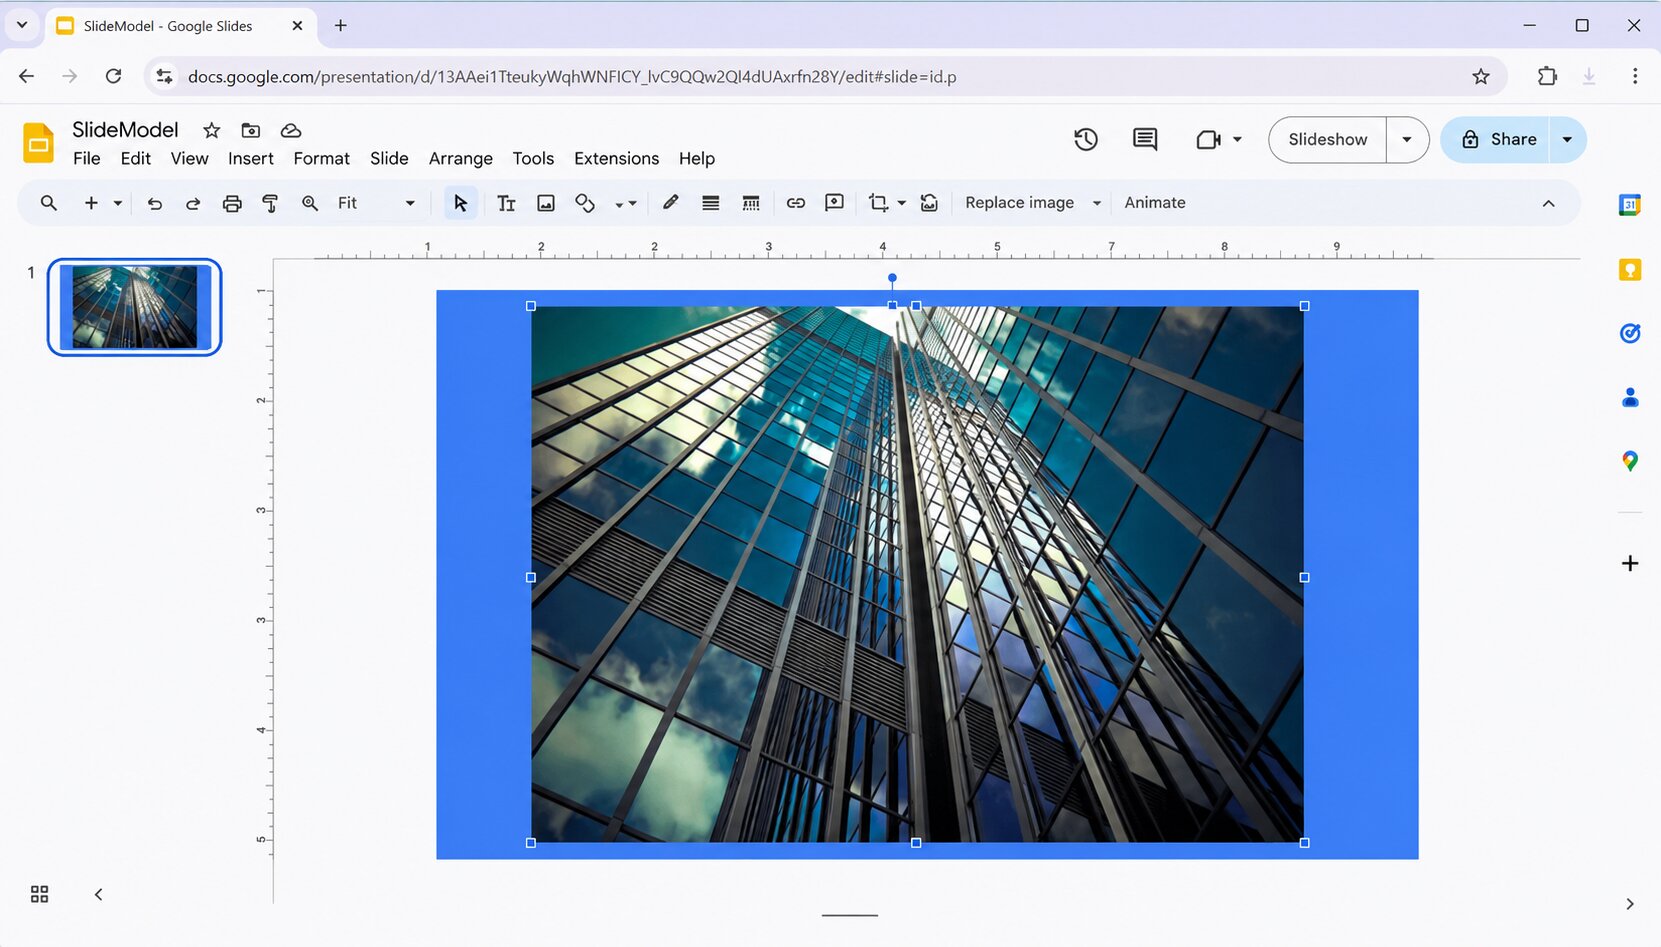
Step 3: Adjust transparency
Move the Transparency slider until the image has the right level of opacity for your slide. Small adjustments generally give the most professional results, so don't make the image too faint unless it is just going to be a background. How to make a picture transparent in Google Slides? This is the main setting you will be using no matter what type of presentation you are making.
The following ranges work well in most presentations:
|
Use Case |
Transparency |
|---|---|
|
Background image |
40-70% |
|
Watermark |
70-90% |
|
Text overlay background (Soft plate behind text) |
30-50% |
Step 4: Apply and reuse your design
Once you are satisfied with the transparency of your image, duplicate the slide so you can use the same layout for the rest of your presentation. This saves you time and keeps your branding consistent, especially if you are creating sales decks, marketing presentations, or product showcases with multiple slides. It also provides you with a consistent look without having to change opacity every time you put in a new image.
Can Google Slides remove image backgrounds?
Google Slides can adjust the transparency of an image, but does not have a built-in feature to remove image backgrounds. If you need to remove an unwanted background or create a transparent PNG or isolate a subject, you need to edit the image before adding it to your presentation. Use this for product photos, logos and other graphics that need to blend into your slide design.
What Google Slides can and cannot do
|
Feature |
Google Slides |
|---|---|
|
Adjust image opacity |
Yes |
|
Crop/recolor/brightness |
Yes |
|
Remove background (native) |
Often yes via Edit image > Remove background (rollout varies by account) |
|
Export a reusable transparent PNG file |
Prefer preparing PNG outside Slides for asset libraries |
If your goal is removing the background in Google Slides, using an external editing tool before importing the image is the simplest solution.
How to remove a background before adding an image to Google Slides
If you need a transparent background instead of simply lowering an image's opacity, it's best to edit the image before importing it into Google Slides. This gives you a cleaner result and makes the image easier to reuse across presentations.
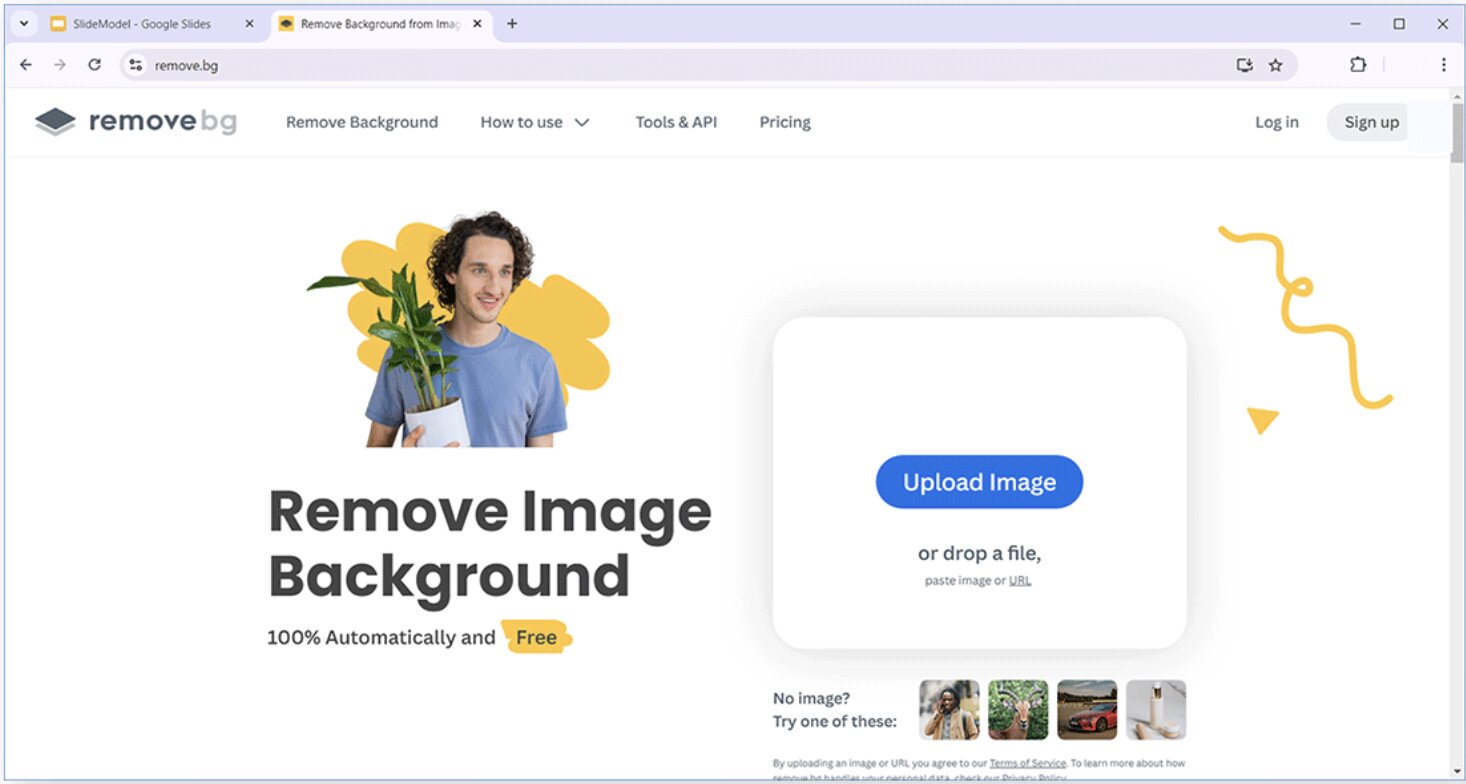
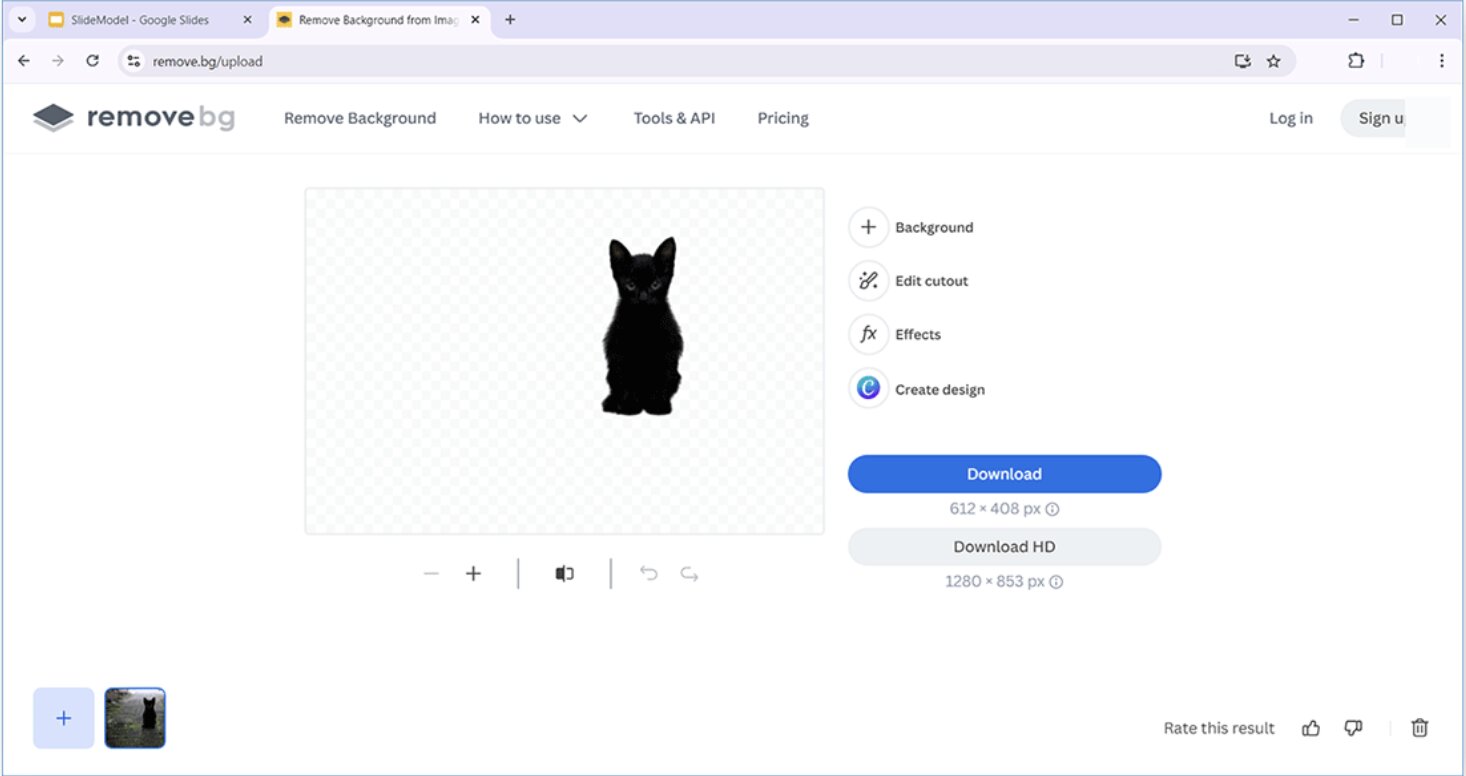
Step 1: Remove the background
Another option is to use an AI background remover tool or image editor that automatically cuts out the subject from the background. This is great for product photos, company logos, profile images and marketing graphics.
Step 2: Export as transparent PNG
After removing the background, save the image as a PNG file to preserve transparency. Unlike JPG files, PNGs support transparent backgrounds, making them ideal for presentations.
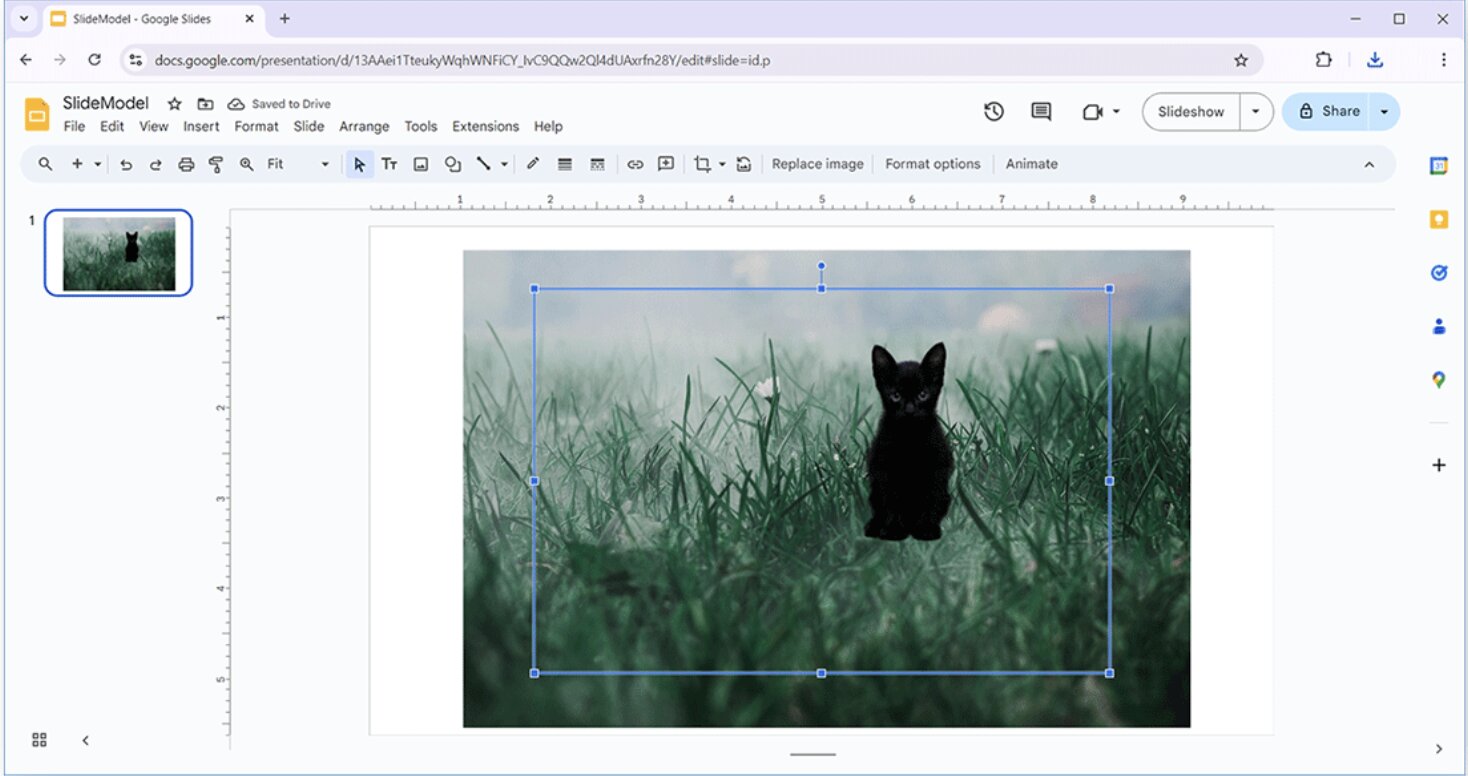
Step 3: Insert the image into Google Slides
Insert the transparent PNG into Google Slides via Insert → Image. Resize, reposition, or combine it with other elements without having to worry about unwanted background colors or edges.
Best alternatives for background removal
If you do a lot of presentations, prepping images ahead of time and importing them into Google Slides can save you time and improve visual quality. AI-based background removal tools automatically detect the subject and create transparent PNGs that are ready to go in a presentation without any manual editing.
Designkit is one tool that can help you do this workflow by removing backgrounds, enhancing image quality and preparing presentation-ready visuals before you add them to Google Slides. Since the editing is done ahead of time, your images are more easily repurposed across sales decks, marketing presentations, product showcases, and branded templates.
Tips for creating cleaner transparent images in Google Slides
Making an image transparent is only one part of creating a polished presentation. These best practices will help your slides look cleaner, improve readability, and maintain a consistent design.
-
Choose high-quality images. Start with clear, high-resolution images so they remain sharp after editing and resizing.
-
Avoid busy backgrounds. Images with too many details can make text difficult to read. Select simple visuals or reduce distractions before adjusting transparency.
-
Don't overdo transparency. Lower the opacity just enough to keep the image visible without competing with your text or other slide elements.
-
Increase text contrast. Use dark overlays, contrasting text colors, and larger font sizes to ensure your content remains easy to read.
-
Use transparent PNGs when appropriate. PNG files are ideal for logos, icons, and graphics because they preserve transparent backgrounds.
-
Keep branding consistent. Apply similar transparency levels to logos, background images, and overlays throughout your presentation for a cohesive look.
-
Preview your presentation. Check your slides in presentation mode and on different screens to make sure images and text remain clear.
Create presentation-ready transparent visuals with Designkit
Google Slides is great for arranging content, but preparing polished visuals often requires a few extra steps before you build your presentation. Product images, logos, and marketing graphics look cleaner when their backgrounds are removed, and high-quality visuals help maintain a professional appearance across every slide. By preparing your assets first, you can reuse them in presentations, sales decks, proposals, and other branded materials without repeating the same edits.

How to create transparent visuals for Google Slides with Designkit
Step 1: Upload your image
Upload the image you want to use in your presentation. Whether it's a product photo, company logo, promotional graphic, or marketing asset, you can prepare it before importing it into Google Slides.

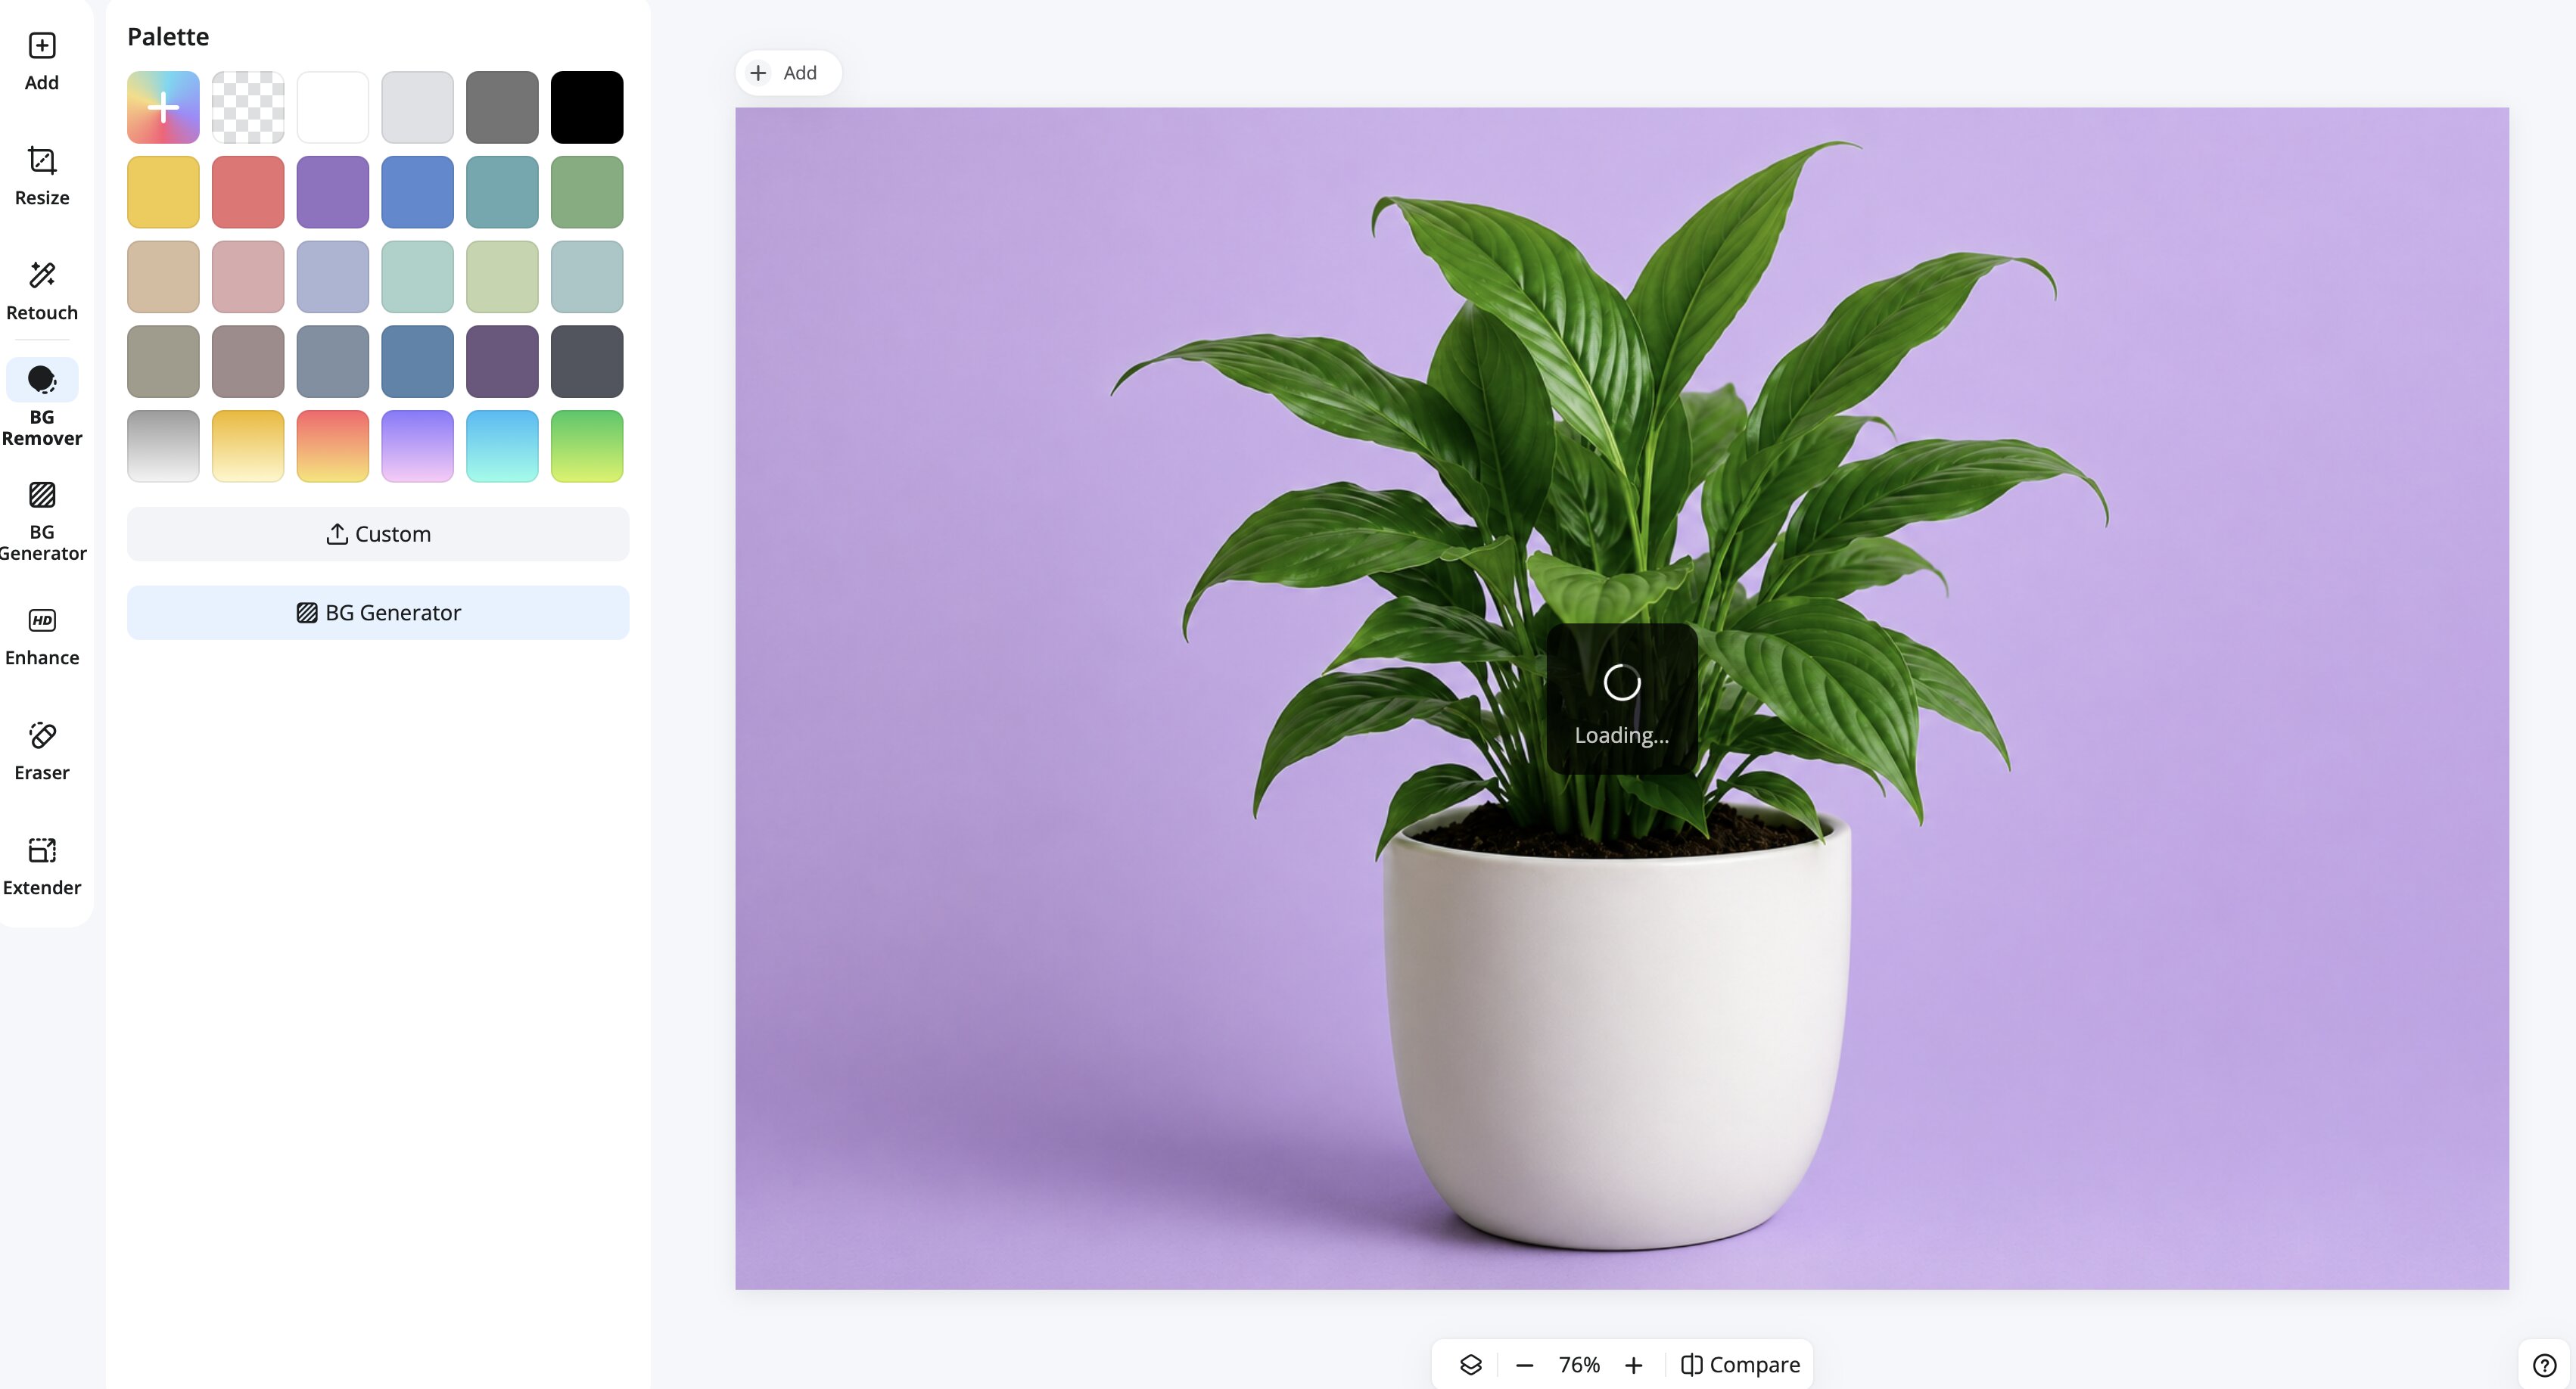
Step 2: Remove the background
Use Designkit's Background Remover to remove the background and create a transparent PNG. If the image looks blurry or low resolution, enhance it with Image Enhancer before downloading, so your visuals remain sharp on larger presentation screens.
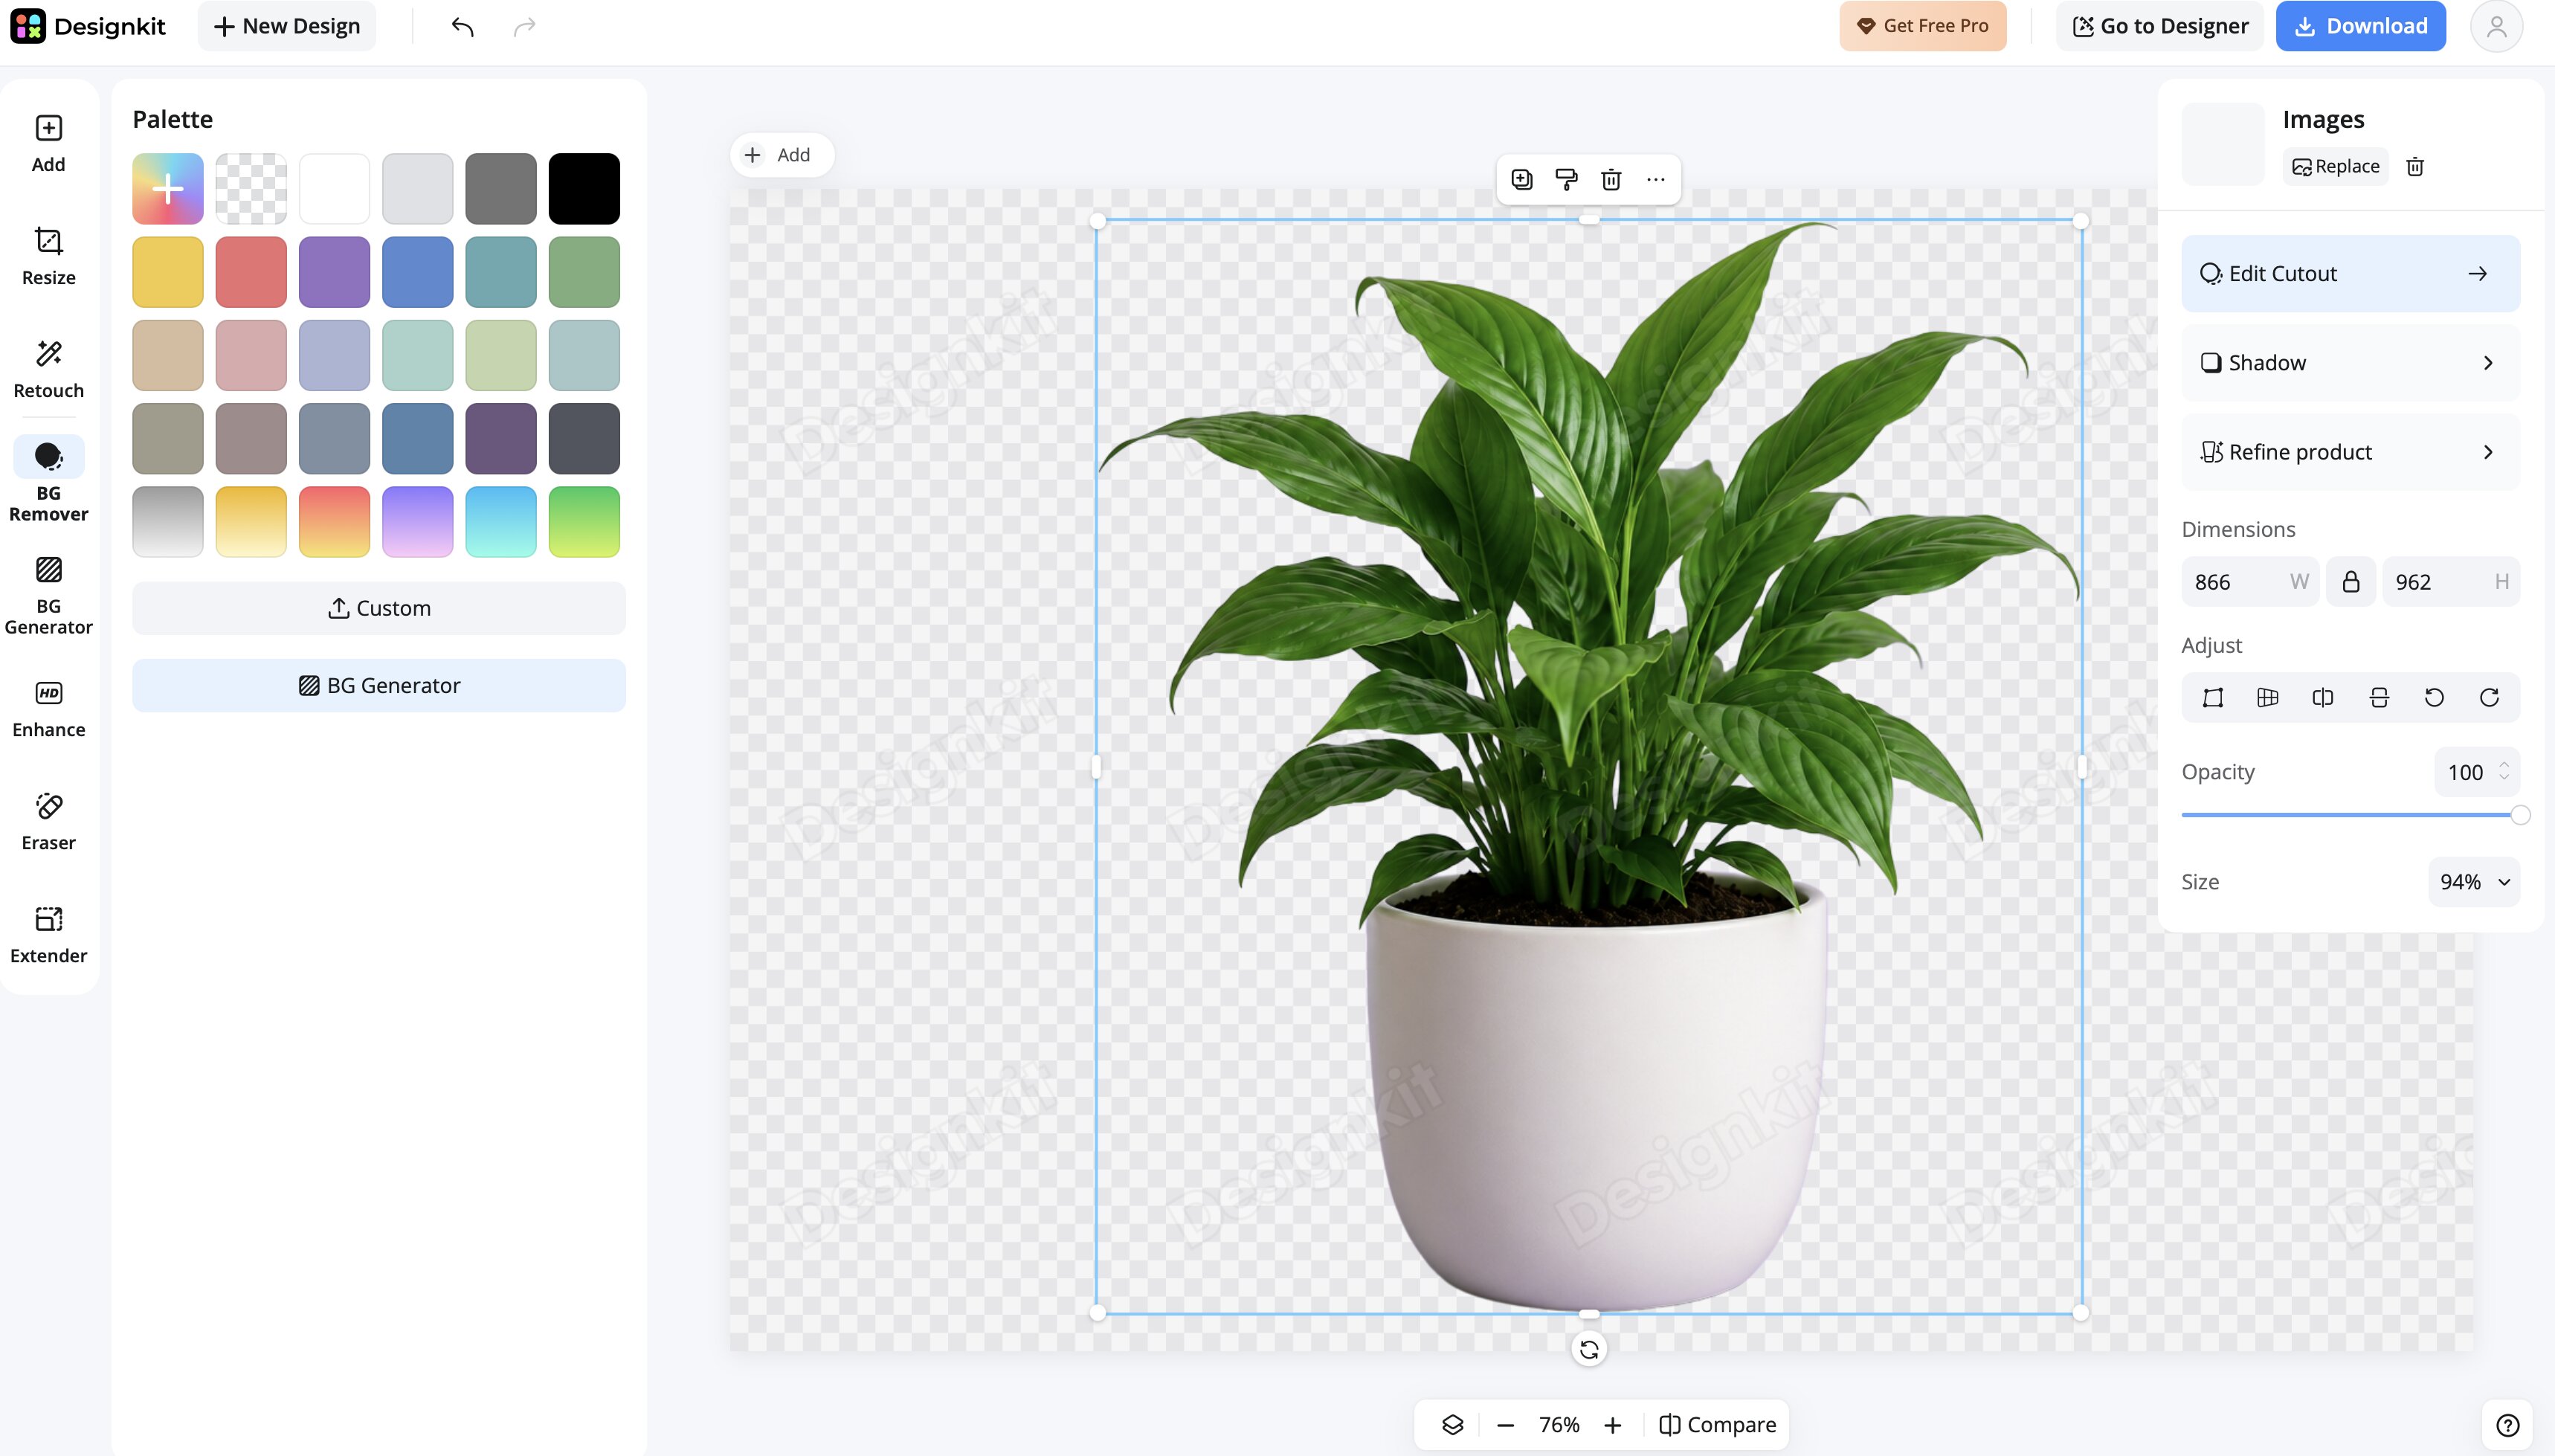
Step 3: Export and add the image to Google Slides
Download the edited image as a transparent PNG and insert it into Google Slides. Your image is now ready to place over colored backgrounds, shapes, or other design elements without distracting background clutter.
Designkit features for transparent presentation assets
Designkit helps you prepare images before they reach Google Slides, making it easier to create polished presentations with minimal editing.
-
Clean product visuals: Remove distracting backgrounds to create presentation-ready product images.
-
Presentation graphics: Prepare logos, icons, and illustrations with transparent backgrounds for seamless placement.
-
Sharper image quality: Improve blurry or low-resolution photos with Image Enhancer before exporting, so your visuals remain crisp on larger presentation screens.
-
Multiple aspect ratios: Export images in the dimensions needed for different presentation layouts.
-
Reusable branded assets: Save transparent PNGs for consistent branding across multiple slide decks.
-
Marketing-ready image variations: Build different versions of the same image for use in different campaigns and presentation styles.
Final thoughts
Learning how to make an image transparent in Google Slides is a great way to improve the look and readability of your presentations. The built-in transparency slider allows you to fade background images to create subtle overlays and make text easier to read. It is a fast and effective editing choice for most presentation needs.
If you need transparent backgrounds for logos, product photos or other graphics in your design, you'll get better results if you prepare the image before you import it into Google Slides. You can blend transparent PNGs with Google Slides opacity controls, giving you more flexibility and helping you to produce professional presentations with little effort.
Frequently Asked Questions
How do you make an image transparent in Google Slides?
Can I make multiple images transparent in Google Slides?
Yes. Each image will need to be adjusted individually, as Google Slides doesn't allow you to change the transparency of multiple selected images at once. Preparing your visuals before import can help when you're dealing with several similar visuals.
Can Google Slides remove an image background?
No. Google Slides only provides basic image editing features such as transparency, cropping, and resizing. If you need a transparent background, you can remove it with Designkit before adding the image to your presentation.
What's the difference between transparency and background removal?
Transparency makes the whole image less opaque, while background removal literally just removes the background and retains the main subject. If you are doing presentations with logos, product images or graphics, then generally background removal results in a cleaner result.
Can I export transparent images from Google Slides?
Nope. Google Slides does not export individual images with transparency preserved. To make a transparent PNG for reuse, you should create one before uploading the image to your presentation.
How can I remove the background before adding an image to Google Slides?
Use an AI background removal tool to remove the background and save the image as a transparent PNG before inserting it into Google Slides. Designkit makes this process quick, giving you presentation-ready images that are easy to place on any slide.
Can Google Slides make only part of an image transparent?
No. The transparency adjustment applies to the entire image rather than selected areas. If you want only the subject to remain visible, remove the background first and use the resulting transparent PNG.
What is the best image format for transparency in Google Slides?
PNG is the best format because it supports transparent backgrounds while maintaining image quality. It's ideal for logos, icons, product photos, and other graphics that need to blend seamlessly into your presentation.
Why don't I see the opacity slider in my image?
The transparency slider is available only after selecting an image and opening Format options. If the option isn't visible, make sure you're using the desktop version of Google Slides and that you've selected an image rather than another object, such as a shape or text box.
You May Also Like

Remove.bg Shutting Down Dec 1, 2026: What Users Are Saying

7 Best Remove.bg Alternatives in 2026: Free & Paid Tools

Instagram Carousel: What It Is, How to Post & Create One

Nano Banana Prompts: 20+ Examples for Better AI Images

Ideogram AI Review 2026: Features, Pricing & Alternatives

Free Mac Photo Editor: 5 Tools Compared for Mac Users

How to Crop a Photo Into a Circle Online (Keep Quality)

How to Make an Image Transparent Online (AI Guide)

Pixlr Background Remover Review 2026: Features, Pricing & Alternatives

How to Fix Overexposed Photos: Recover Highlights Fast

OpenArt AI Review 2026: Features, Pricing & Alternatives

Best AI Headshot Generator: 9 Tools Compared for 2026

Best Stencil Maker Tools 2026: Turn Photos Into Stencils

Pixelbin Watermark Remover Review: Image & Video Results Tested

How to Make a Sticker on iPhone: Easy Step by Step Guide

Best AI Logo Generator in 2026: 10 Tools Compared

How to Turn a Photo Into a Cartoon: A Beginner-Friendly Guide

Landscape vs Portrait: Key Differences & Best Uses in 2026

How to Remove Watermark From Photo: AI, Photoshop & More

How to Fix Pixelated Photos: Photoshop, AI Tools & Tips

Bing Image Creator: How It Works, Features, Uses & Alternatives

How to Remove People from Photos with AI: A Step-by-Step Guide

How to Increase Image Resolution: AI, Photoshop & PPI

How to Add Text to a Photo: 8 Tips for Better Results

How to Fix Grainy Photos: Easy Ways to Clear Images

Creative Profile Picture Ideas for Every Style and Platform

Evoto AI Review 2026: Features, Pricing, Pros & Cons

Pixlr Photo Editor Review: Features, Pricing & Alternatives

Best AI Image Extender Tools in 2026: Expand Photos with AI

How to Make a Collage on iPhone: Easy Guide for 2026

How to Sharpen an Image in Photoshop (Smart Sharpen and Unsharp Mask)

Best Image Background Remover Tools in 2026: AI Tools Compared

How to Make Transparent Background in Paint: Step-by-Step Guide

How to Resize an Image: Best Methods, Tools & Quality Tips

Best AI Image Generator Tools in 2026: Top AI Platforms Compared

Remove.bg Review 2026: Features, Pricing & Is It Worth It?

Luminar Neo Photo Editor Review 2026: AI Features, Price & Pros

How to Post Multiple Photos on Instagram (2026 Guide)

25 Facebook Cover Photo Ideas for Personal & Business Pages

What Is a PFP? Meaning, Examples & How to Create One

Can You Edit an Instagram Post After Posting?

11 Best Canva Alternatives in 2026 for AI Design & Marketing

8 Best Midjourney Alternatives in 2026: Features, Pricing & Comparison

How to Restore Old Photos: AI Tools, Tips & Best Methods

Pixelcut AI Review 2026: Features, Pricing, Pros, Cons & Alternatives

How to Apply Watermark to Photos: Methods, Tips & AI Tools

How to Remove a Background in Illustrator: 4 Easy Methods

How to Change Background Color on Instagram Story (Easy Guide)

8 Best AI Poster Generators in 2026: Create Posters Faster with AI

10 Best AI Image Enhancers in 2026: Tested & Compared

10 Best AI Image Editors in 2026: Features, Pricing & Comparison

7 Best AI Background Changer in 2026: Remove & Replace Photo Backgrounds

Luminar Neo vs Lightroom: Features, Pricing & Comparison 2026

Kittl Review 2026: Is It Worth It? Features & Pricing

How to Make a Blurry Image Clear: 5 AI & Manual Ways

How to Remove Background on iPhone: 5 Easy Methods (2026)

Photoroom Background Remover Review 2026: Features & Alternatives

How to Remove Background in Canva: A Step-by-Step Guide

How to Remove Background in GIMP: Beginner-Friendly Guide

Funny Dog Memes to Try: Doge Meaning and 10 Original Ideas

Back to School Checklist 2026: Supplies, Timeline, and Planning

Recraft AI Review 2026: Features, Pricing, Pros, Cons & Alternatives

How to Make an Image Transparent in Google Slides: Opacity & Background Removal

VanceAI Photo Enhancer Review: Features, Pricing & Alternatives in 2026

What Does Emojify Mean? Text, Photos, & Emoji Art Explained

Top 8 Online Background Removers for Ecommerce Photos (2026)

How to Remove Background in Photoshop: 7 Easy Methods

6 Best AI Image Upscalers 2026: Tools Tested & Compared

Project Indigo Review: Is It Better Than iPhone Camera?

How Big Is an 8x10 Photo? Size, Pixels & Frame Guide

How Big Is a 4x6 Photo? Dimensions, Pixels & Printing Tips

Picsart AI Review: Features, Pricing, Pros, Cons & Alternatives

Lovart AI Review: AI Design Agent Features, Pricing & Alternatives

Fotor AI Image Generator Review: Features, Pricing & Alternatives

How to Add Emoji to Photo Online for Free

Emoji Wallpaper Ideas & How to Make One Online (2026)

Minimalist Poster Design: How to Make a Clean Poster (2026)

How to Make a Custom Poster That Is Ready to Print

Instagram Image Size Guide 2026: Post, Reel, Story & Carousel Specs

LinkedIn Image Size Guide: Profile, Post & Banner Dimensions

YouTube Profile Image Size: Best Dimensions & Safe Area 2026

How to Edit Amazon Product Photos That Boost Sales Fast
Create Presentation-Ready Visuals with AI
Google Slides makes it easy to adjust image transparency, but preparing professional visuals often requires background cleanup, layout refinement, and multiple creative variations. Designkit helps you produce presentation-ready assets with less manual editing.


