
How to Remove Background in GIMP: Step-by-Step Guide
Learn how to remove backgrounds in GIMP with step-by-step guidance and compare manual editing methods with AI-powered tools.

Clean, white, or transparent backgrounds are a strict requirement for e-commerce platforms like Amazon and Shopify. While GIMP is a powerful, free image editor, figuring out how to remove background in GIMP using manual paths or fuzzy selection can be frustrating and slow for beginners.
In this guide, we break down the best manual methods, how to handle complex edges like hair and glass, how to export correctly, and how upgrading to AI-powered tools can turn an hour of editing into a one-click process.
Before You Start: Open Your Image and Add an Alpha Channel
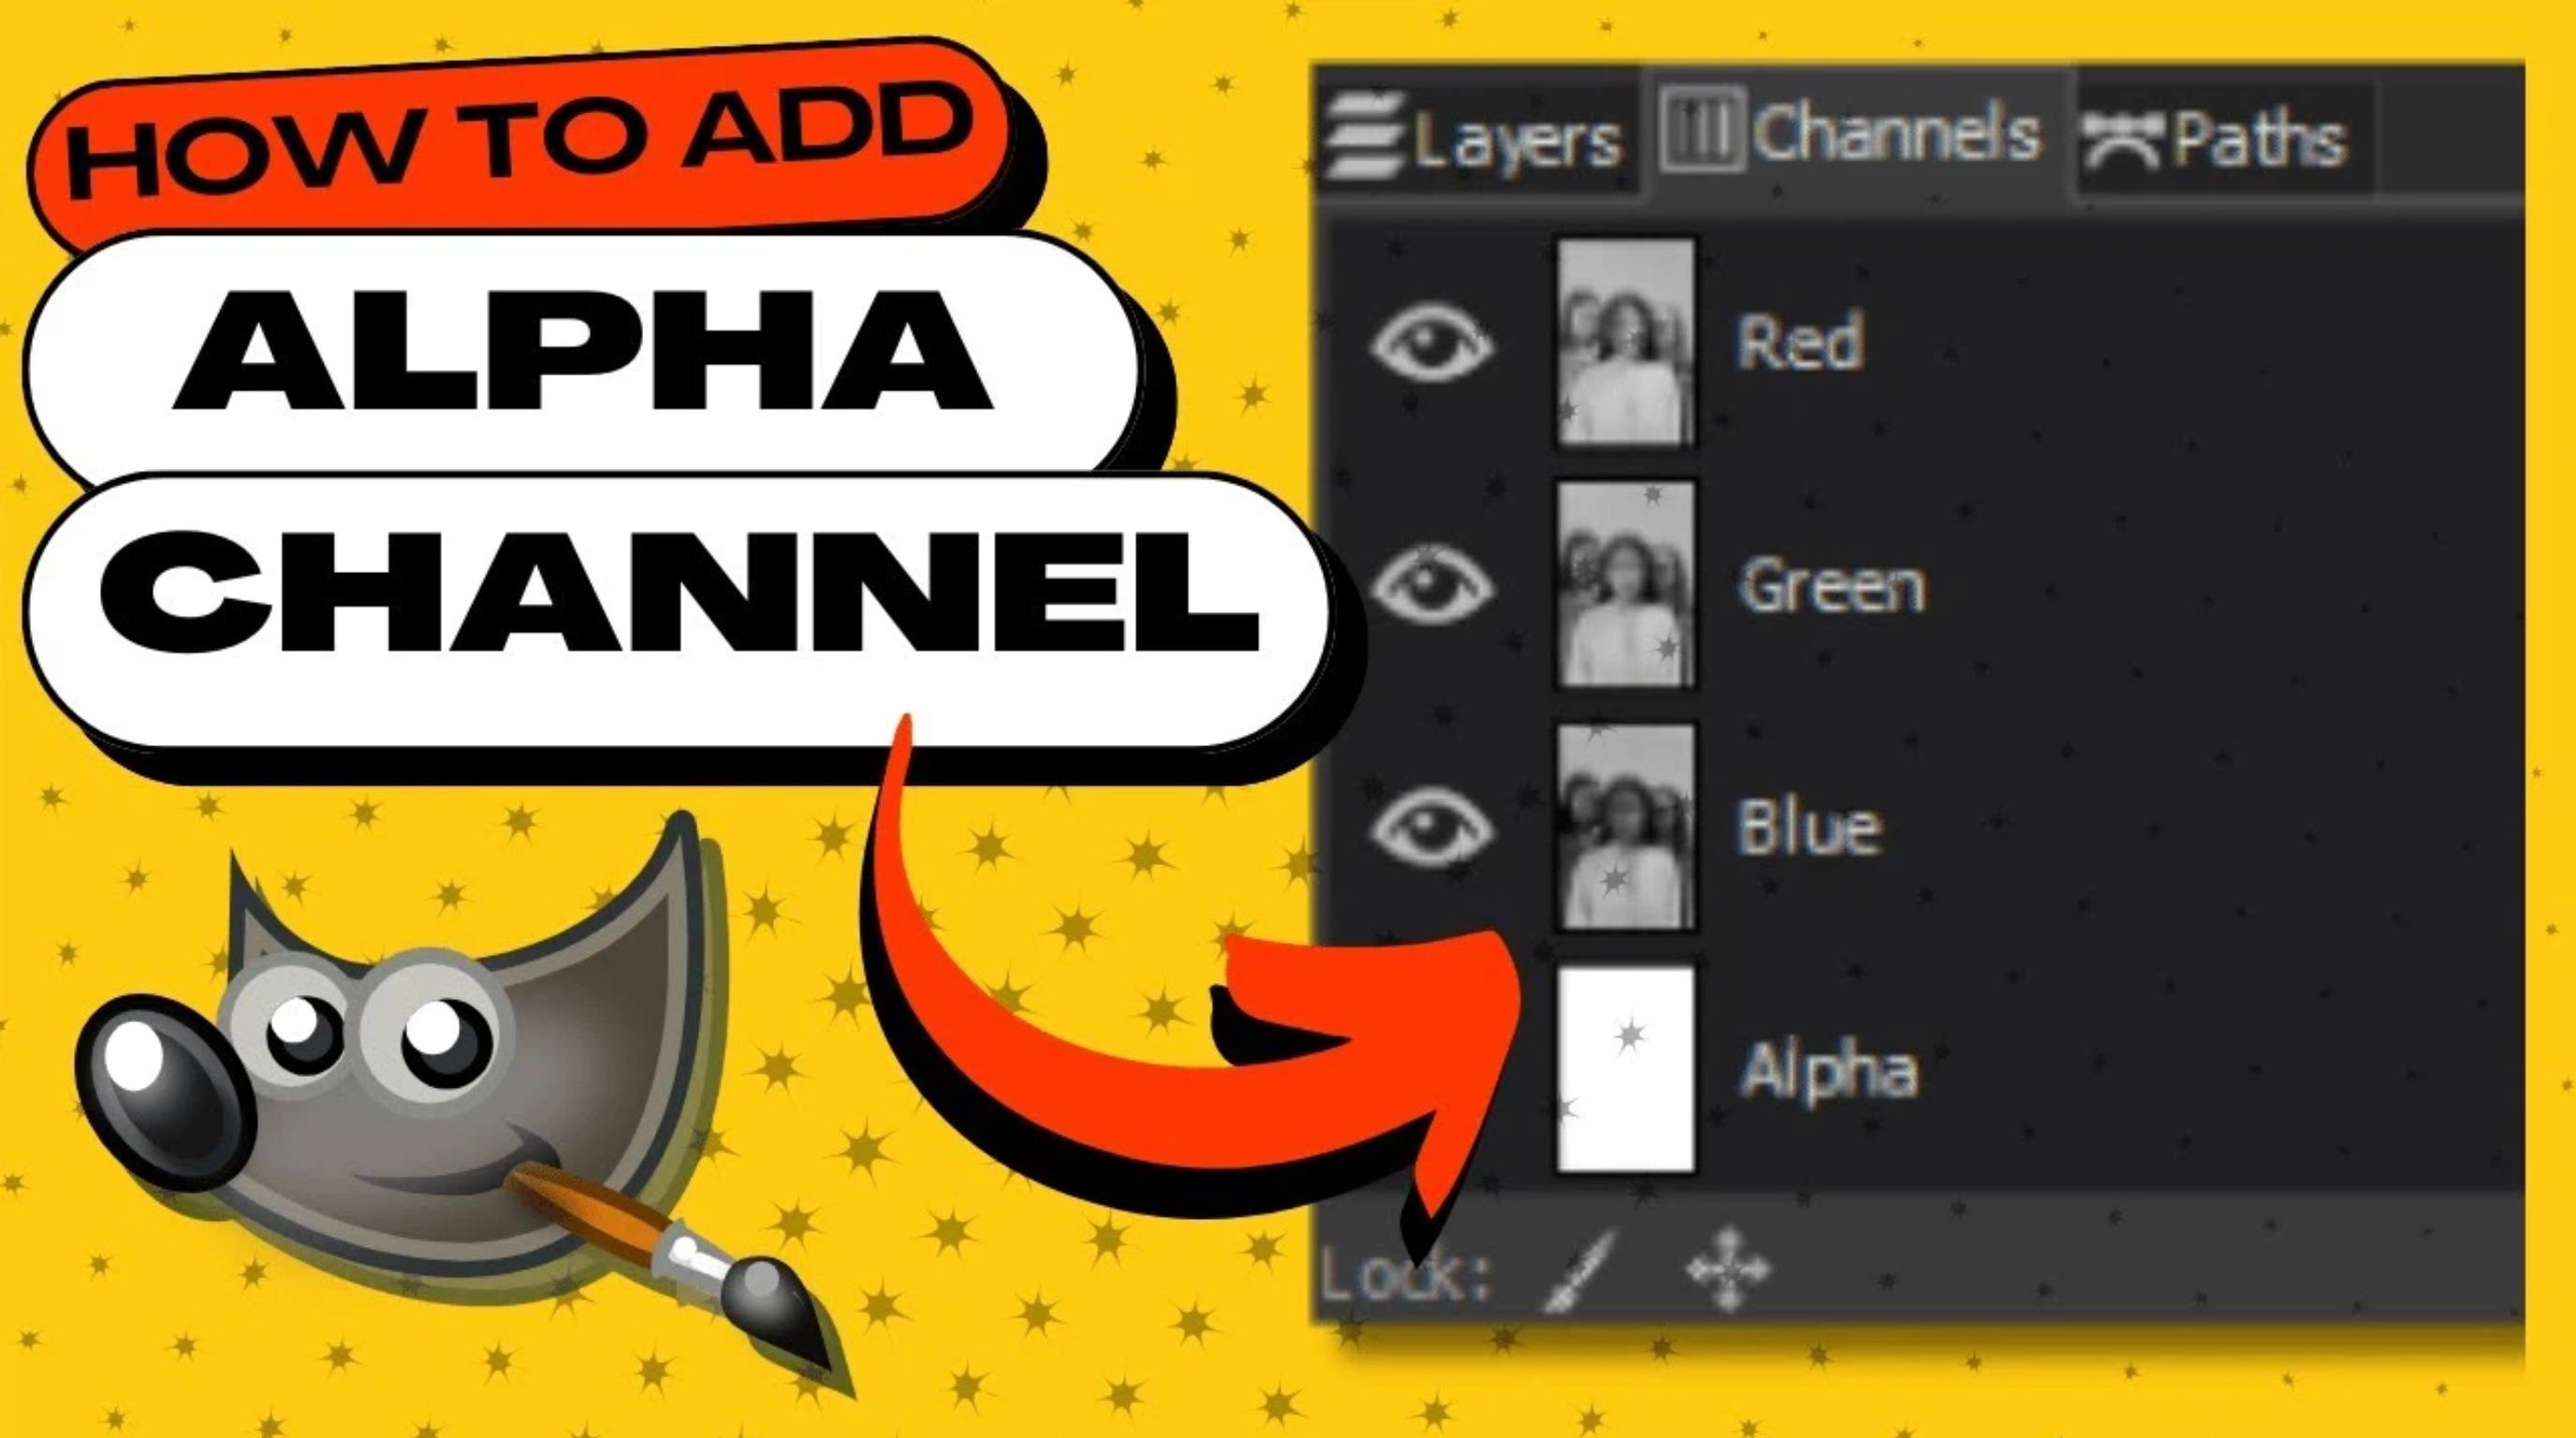
Before you remove the background in GIMP, you need to add an Alpha Channel to your image. This allows GIMP to make the background transparent instead of filling the removed area with white.
Why Does the Background Turn White?
If your image does not have an Alpha Channel, deleting the background will leave a white area instead of a transparent one. Adding an Alpha Channel lets GIMP keep the removed area transparent, which is useful for logos, product photos, and graphics.
How to Add an Alpha Channel
-
Open your image in GIMP.
-
In the top menu, click Layer.
-
Select Transparency.
-
Click Add Alpha Channel.
Once you've done this, you're ready to remove the background in GIMP without getting a white background.
3 Methods to Remove Background in GIMP
Because GIMP doesn't have a single "auto-remove" button, you have to choose the right tool based on your image's complexity.
|
GIMP Tool |
Best Used For |
Pros |
Cons |
|---|---|---|---|
|
Fuzzy Select Tool (Magic Wand) |
High-contrast images (e.g., a black shoe on a solid white wall). |
Fast and simple for beginners. |
Leaves jagged edges on complex products. |
|
Paths Tool (Pen Tool) |
Products with smooth, hard edges (electronics, boxes). |
Highly accurate, professional-grade cutouts. |
Extremely slow; steep learning curve. |
|
Foreground Select Tool |
Complex edges like hair, fur, or fuzzy clothing. |
Captures fine details better than the Magic Wand. |
Requires multiple steps of painting over the product. |
Method 1: Using the Fuzzy Select Tool
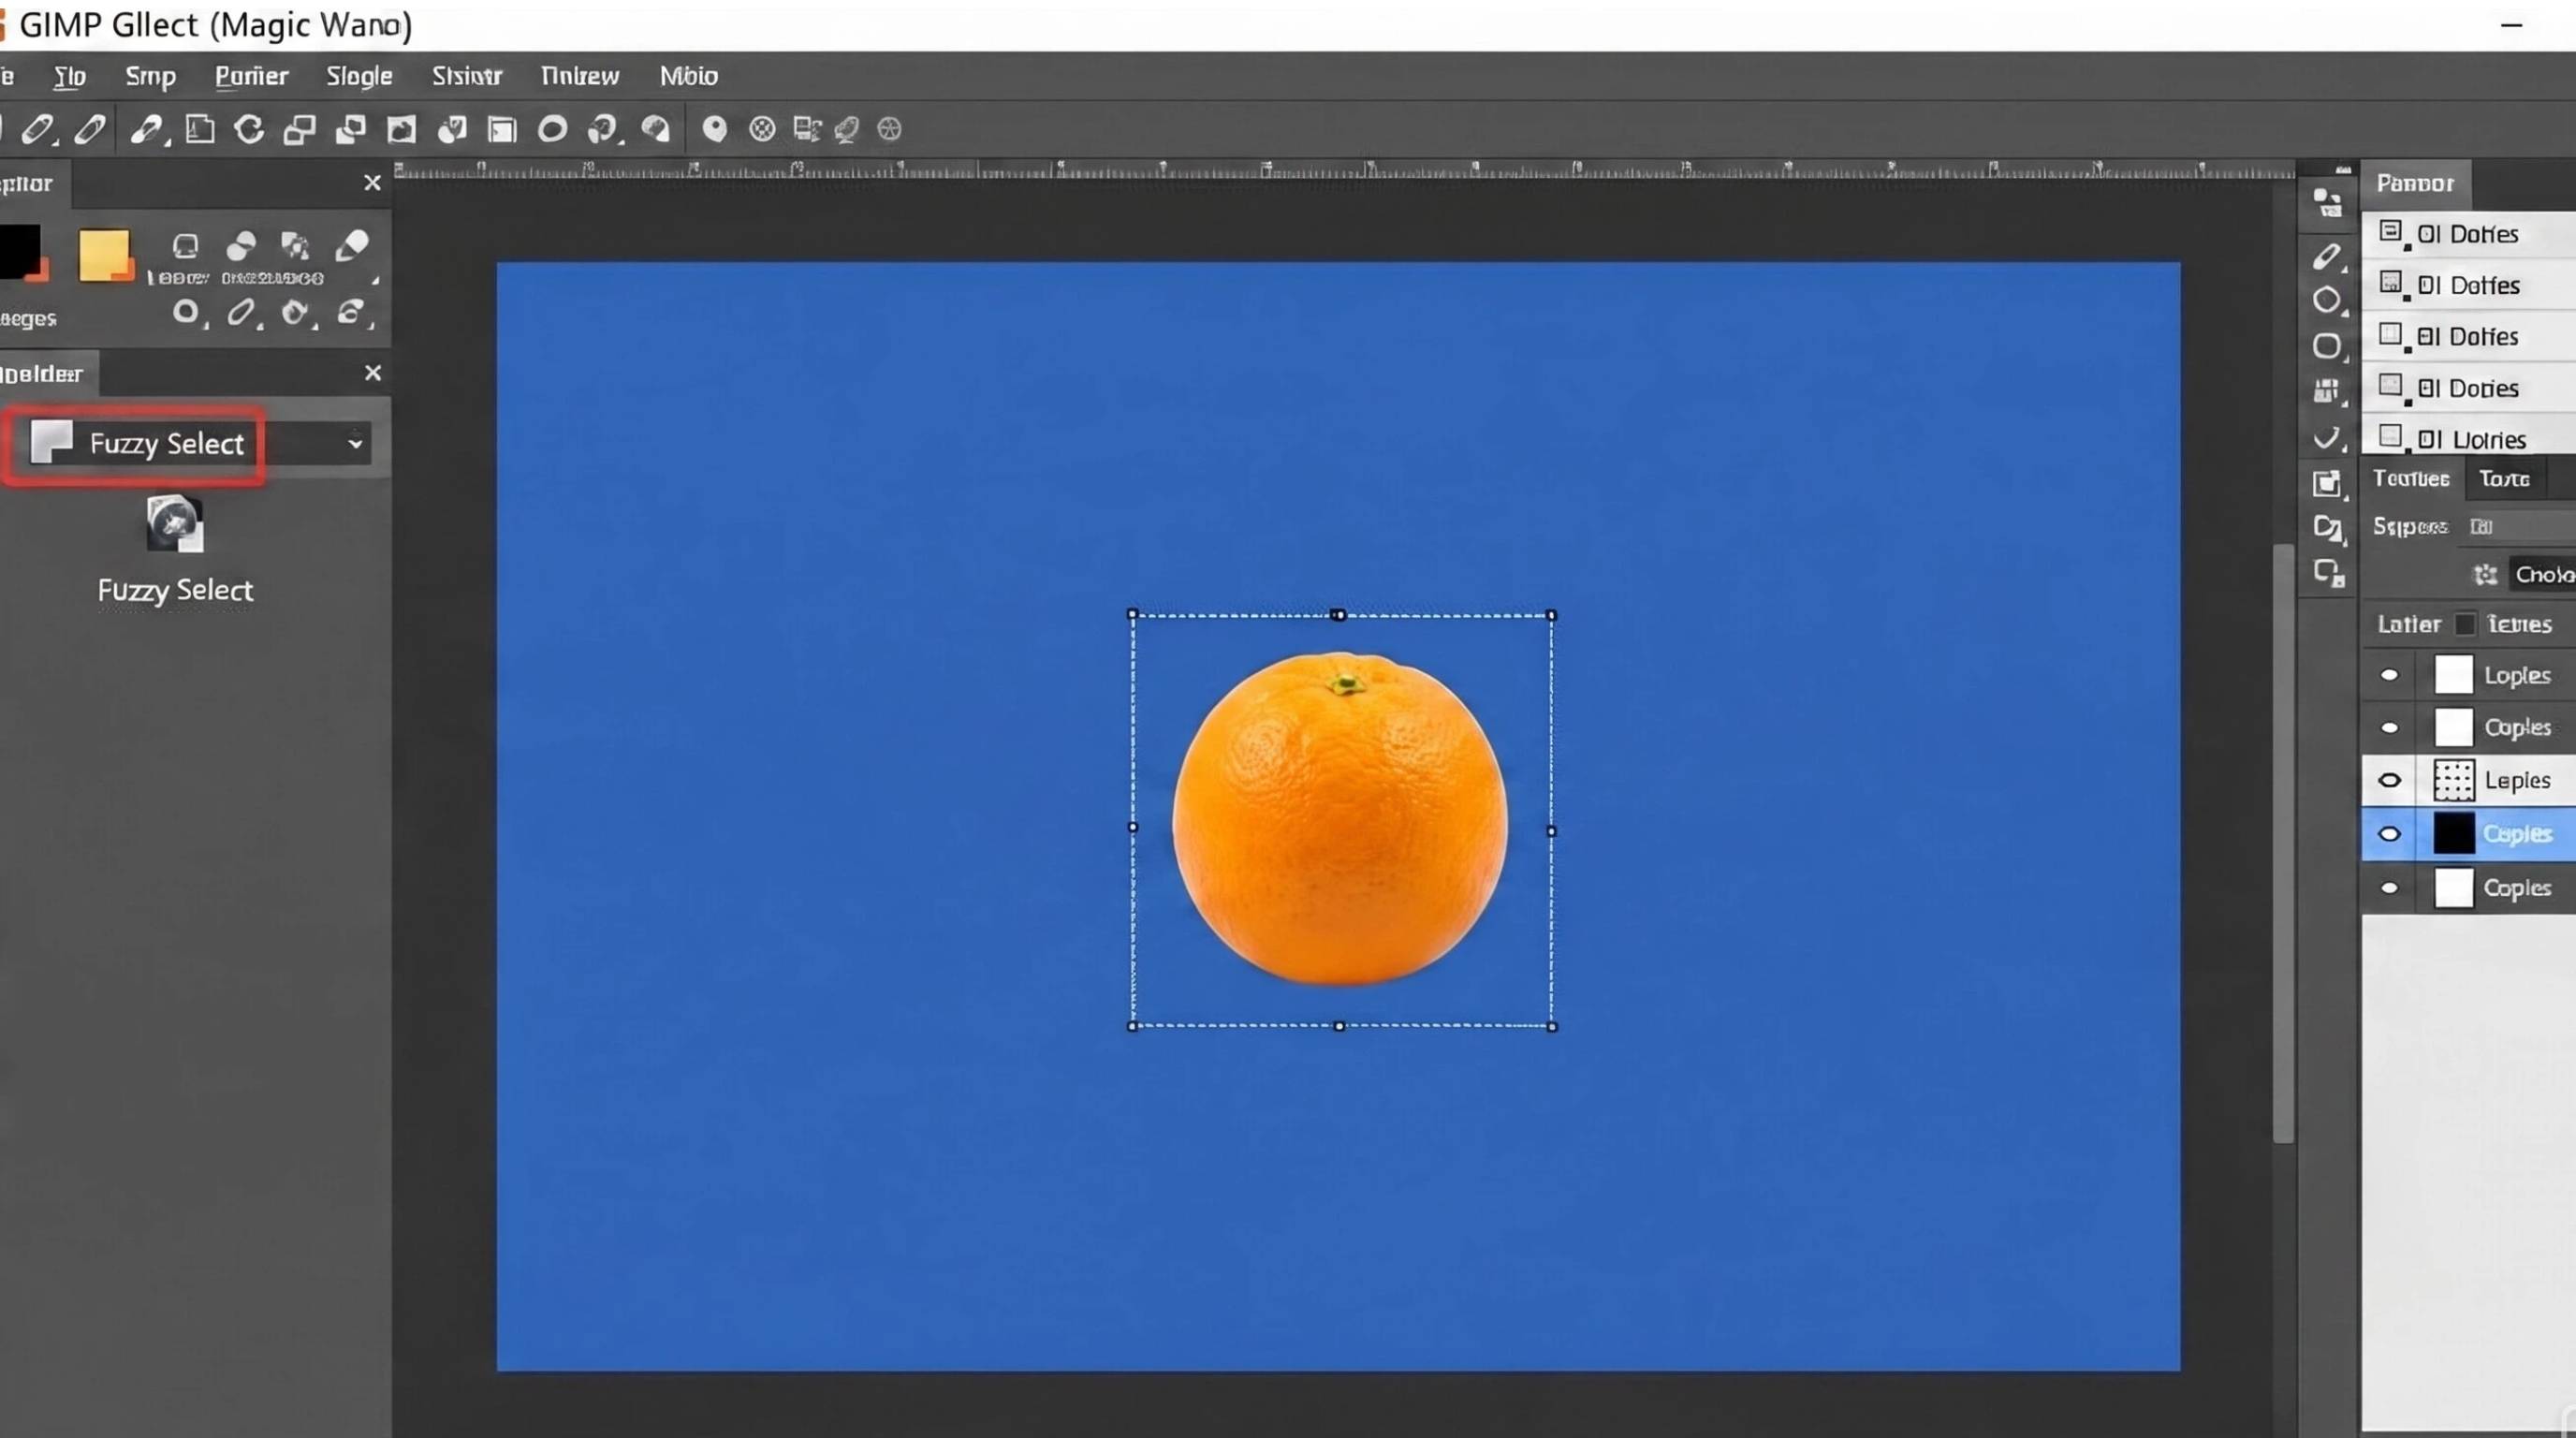
The Fuzzy Select Tool is the easiest option for beginners. It works best when the subject and background have strong color contrast.
Step 1: Open your image in GIMP and make sure the layer has an alpha channel.
Step 2: Select the Fuzzy Select Tool from the toolbox, or press U on your keyboard.
Step 3: Click on the background area you want to remove. GIMP will select pixels with similar colors.
Step 4: Adjust the threshold in the tool options if the selection is too small or too large.
Step 5: Press Delete to gimp erase background, then check the edges and clean up any missed spots.
Method 2: Using the Paths Tool for Precision
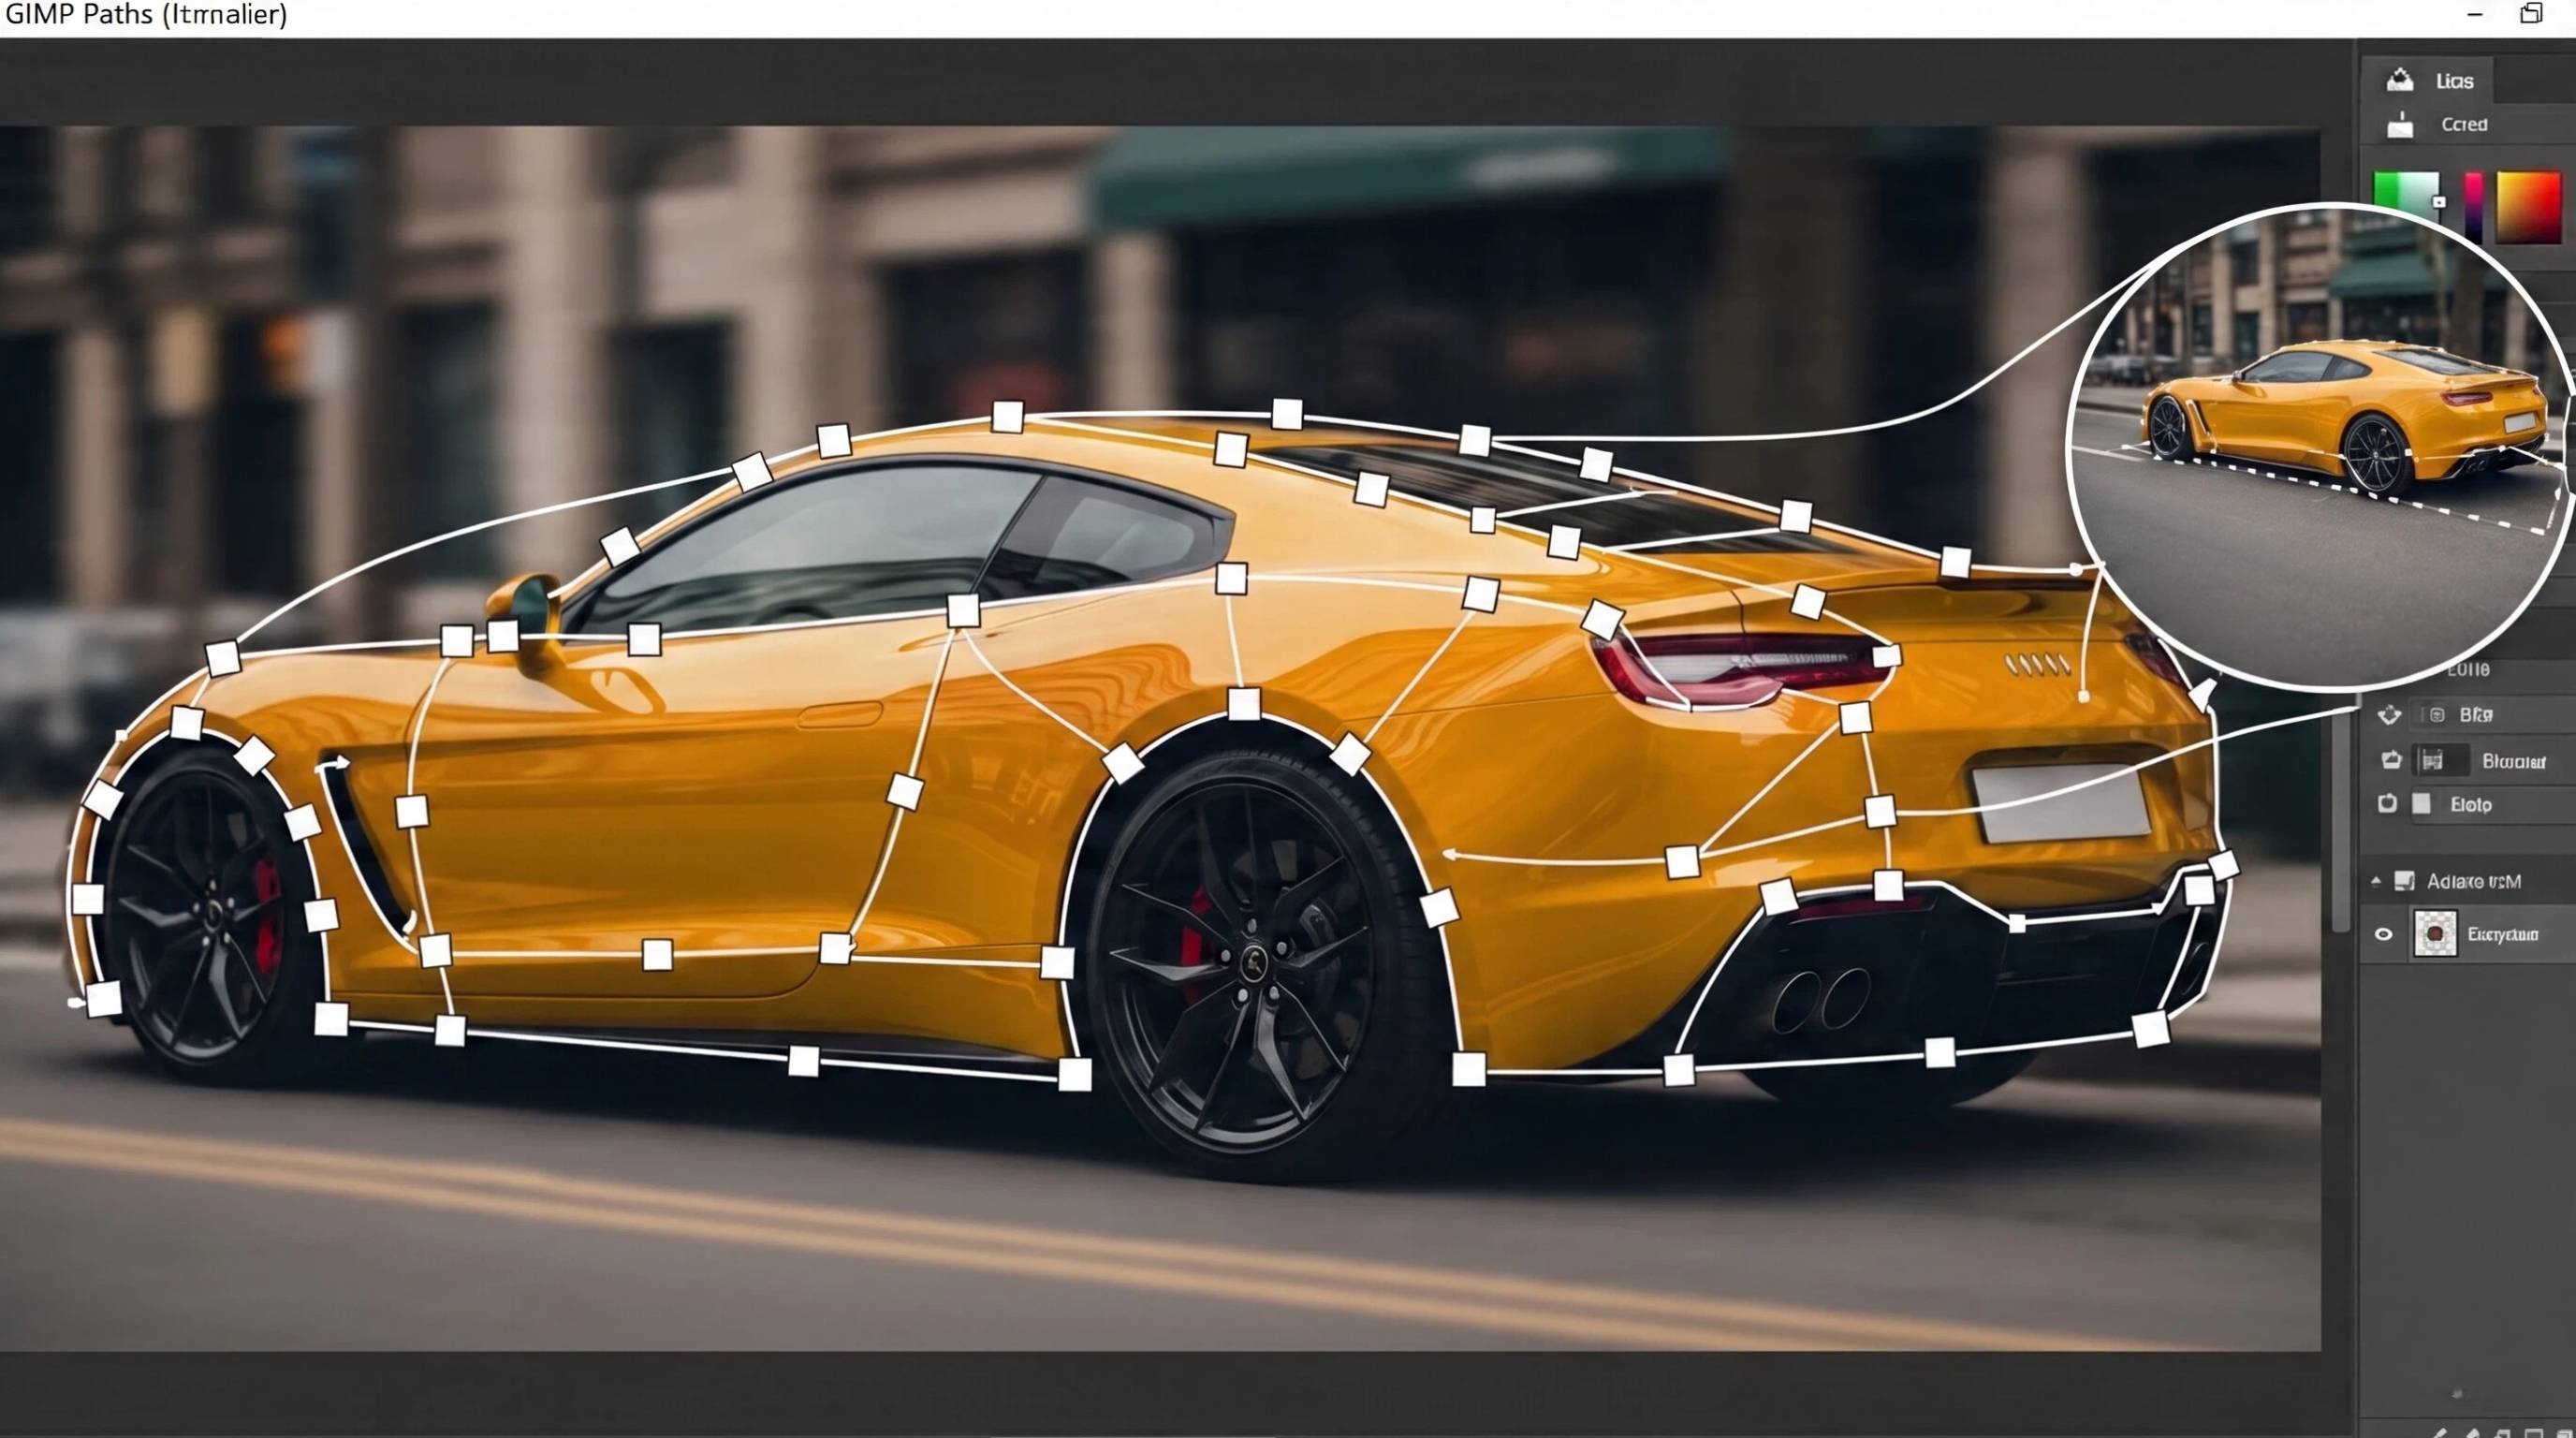
The Paths Tool is the best choice for products with clear, smooth edges. It takes more time, but it gives very clean results.
Step 1: Open your image and add an alpha channel if you have not done that already.
Step 2: Choose the Path Tool from the toolbox, or press B on your keyboard.
Step 3: Click around the edge of your object to place points and follow the outline closely.
Step 4: Close the path, then right-click and choose Path to Selection.
Step 5: Invert the selection if needed, then press Delete to remove the background in GIMP and leave only the subject.
Method 3: Using the Foreground Select Tool
Use the Foreground Select Tool when your image has detailed edges, such as hair, fur, or textured clothing.
Step 1: Open the image in GIMP and make sure the layer has an alpha channel.
Step 2: Select the Foreground Select Tool from the toolbox.
Step 3: Draw a rough outline around the subject. You do not need to be exact at this stage.
Step 4: Paint over the subject area with the brush tool, so GIMP knows which part is the foreground.
Step 5: Press Enter to detect the edges, then invert the selection if needed and delete the background.
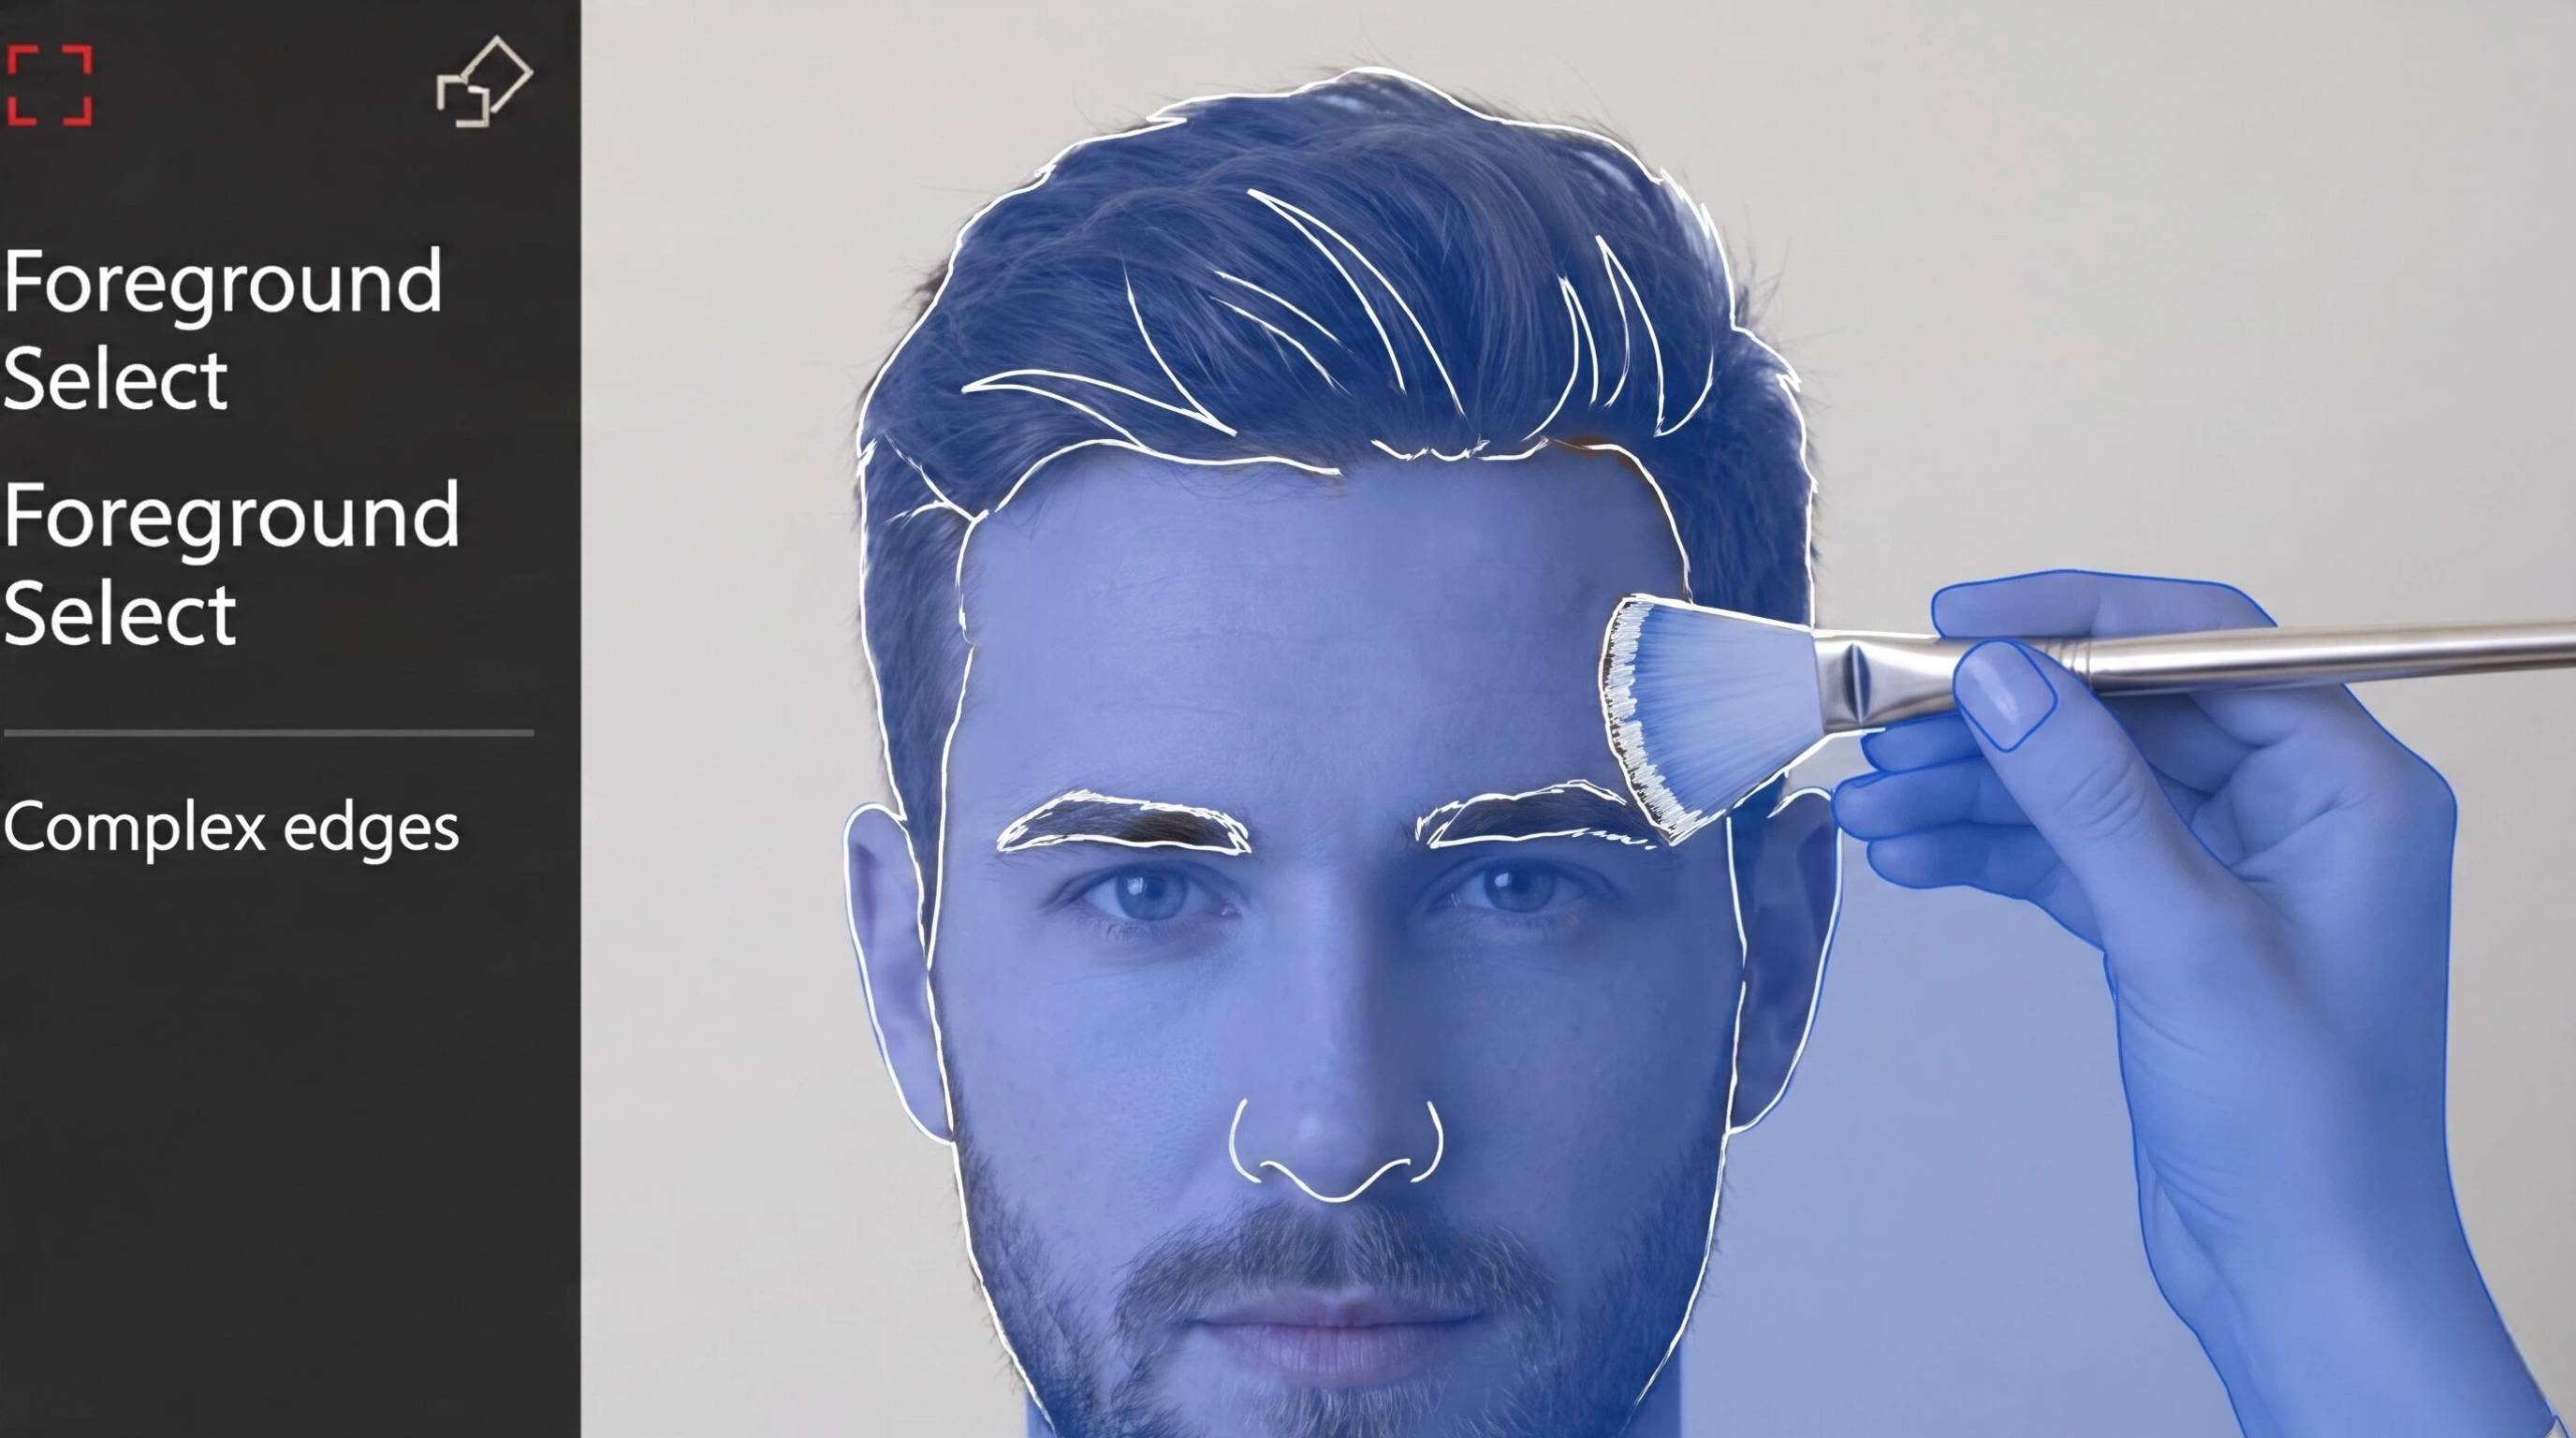
How to Handle Complex Edges in GIMP (Hair, fur, and glass)
Some images are harder to edit than others. Hair, fur, glass, and other transparent objects need more careful editing because their edges contain fine details.
Fixing the "Halo" Effect Around Hair and Fur
When you use the Fuzzy Select Tool to gimp remove the background from image files with hair or fur, a light halo can stay around the edges. This happens because small bits of the old background remain between the strands.
To fix it, zoom in, use a soft brush or layer mask, and clean the edge slowly. The Foreground Select Tool can also help with finer details.
Removing Backgrounds Behind Glass and Transparent Objects
Glass and other transparent objects are harder because they show what is behind them. If you delete the background in GIMP without care, the object can look flat or fake. Use layer masks instead of simply erasing, and adjust the opacity by hand where needed.
This keeps the edges soft and helps the glass stay clear, natural, and realistic in the final image.
When to Switch to an AI Background Remover
If your image has hair, fur, glass, or other fine details, GIMP may take too long for a clean result. For these high-complexity images, sellers may spend 20+ minutes using the Refine Edge tool in GIMP to clean the edges by hand.
In many cases, it is easier to switch to an AI background remover trained to recognize transparent pixels and micro-textures. Designkit is a simple option that can detect small details and transparent areas faster, so you spend less time fixing edges by hand and getting a clean cutout more quickly.
How to Export a Transparent Image (Alpha Channels and File Formats)
After using GIMP to remove the background, you need to export the image correctly. If you choose the wrong file format, the transparent background can turn white again.
The Alpha Channel rule
Before you export, make sure the image has an Alpha Channel. This setting tells GIMP to keep transparent areas instead of filling them with a solid color. Without it, deleted parts may appear white or blocked out. You can add the Alpha Channel from the Layer menu before saving. This small step is necessary if you want the final image to stay transparent and look professional in any background later.
Never export as JPEG
JPEG is not a good choice for transparent images because it does not support transparency. If you save your file as JPEG, GIMP will replace the clear background with white or another solid color. This can ruin logos, cutouts, and product images. Use JPEG only when transparency is not needed. For background removal work, choose a format that keeps the empty space visible and clean after export every time properly.
Always export as PNG
PNG is the best format for transparent images because it keeps the Alpha Channel and preserves clear edges. After you remove the background in GIMP, export the file as PNG, so the transparent area stays intact. This format works well for websites, online stores, and design projects. It gives you a clean result without turning the background white, making it the safest choice for most transparent image files overall in daily use.
Remove Backgrounds Faster with Designkit
Removing product backgrounds manually can take significant time, especially when managing multiple SKUs or updating listings frequently. Designkit simplifies this workflow with AI-powered editing tools built for eCommerce sellers. Instead of tracing products or creating manual selections, users can quickly remove backgrounds, create clean product images, and prepare assets for marketplaces, ads, and social content in a few simple steps.
3 Steps to Removing Backgrounds Instantly with Designkit
If you don't have the time to trace paths in GIMP, Designkit's AI Agent automates the entire process for you.
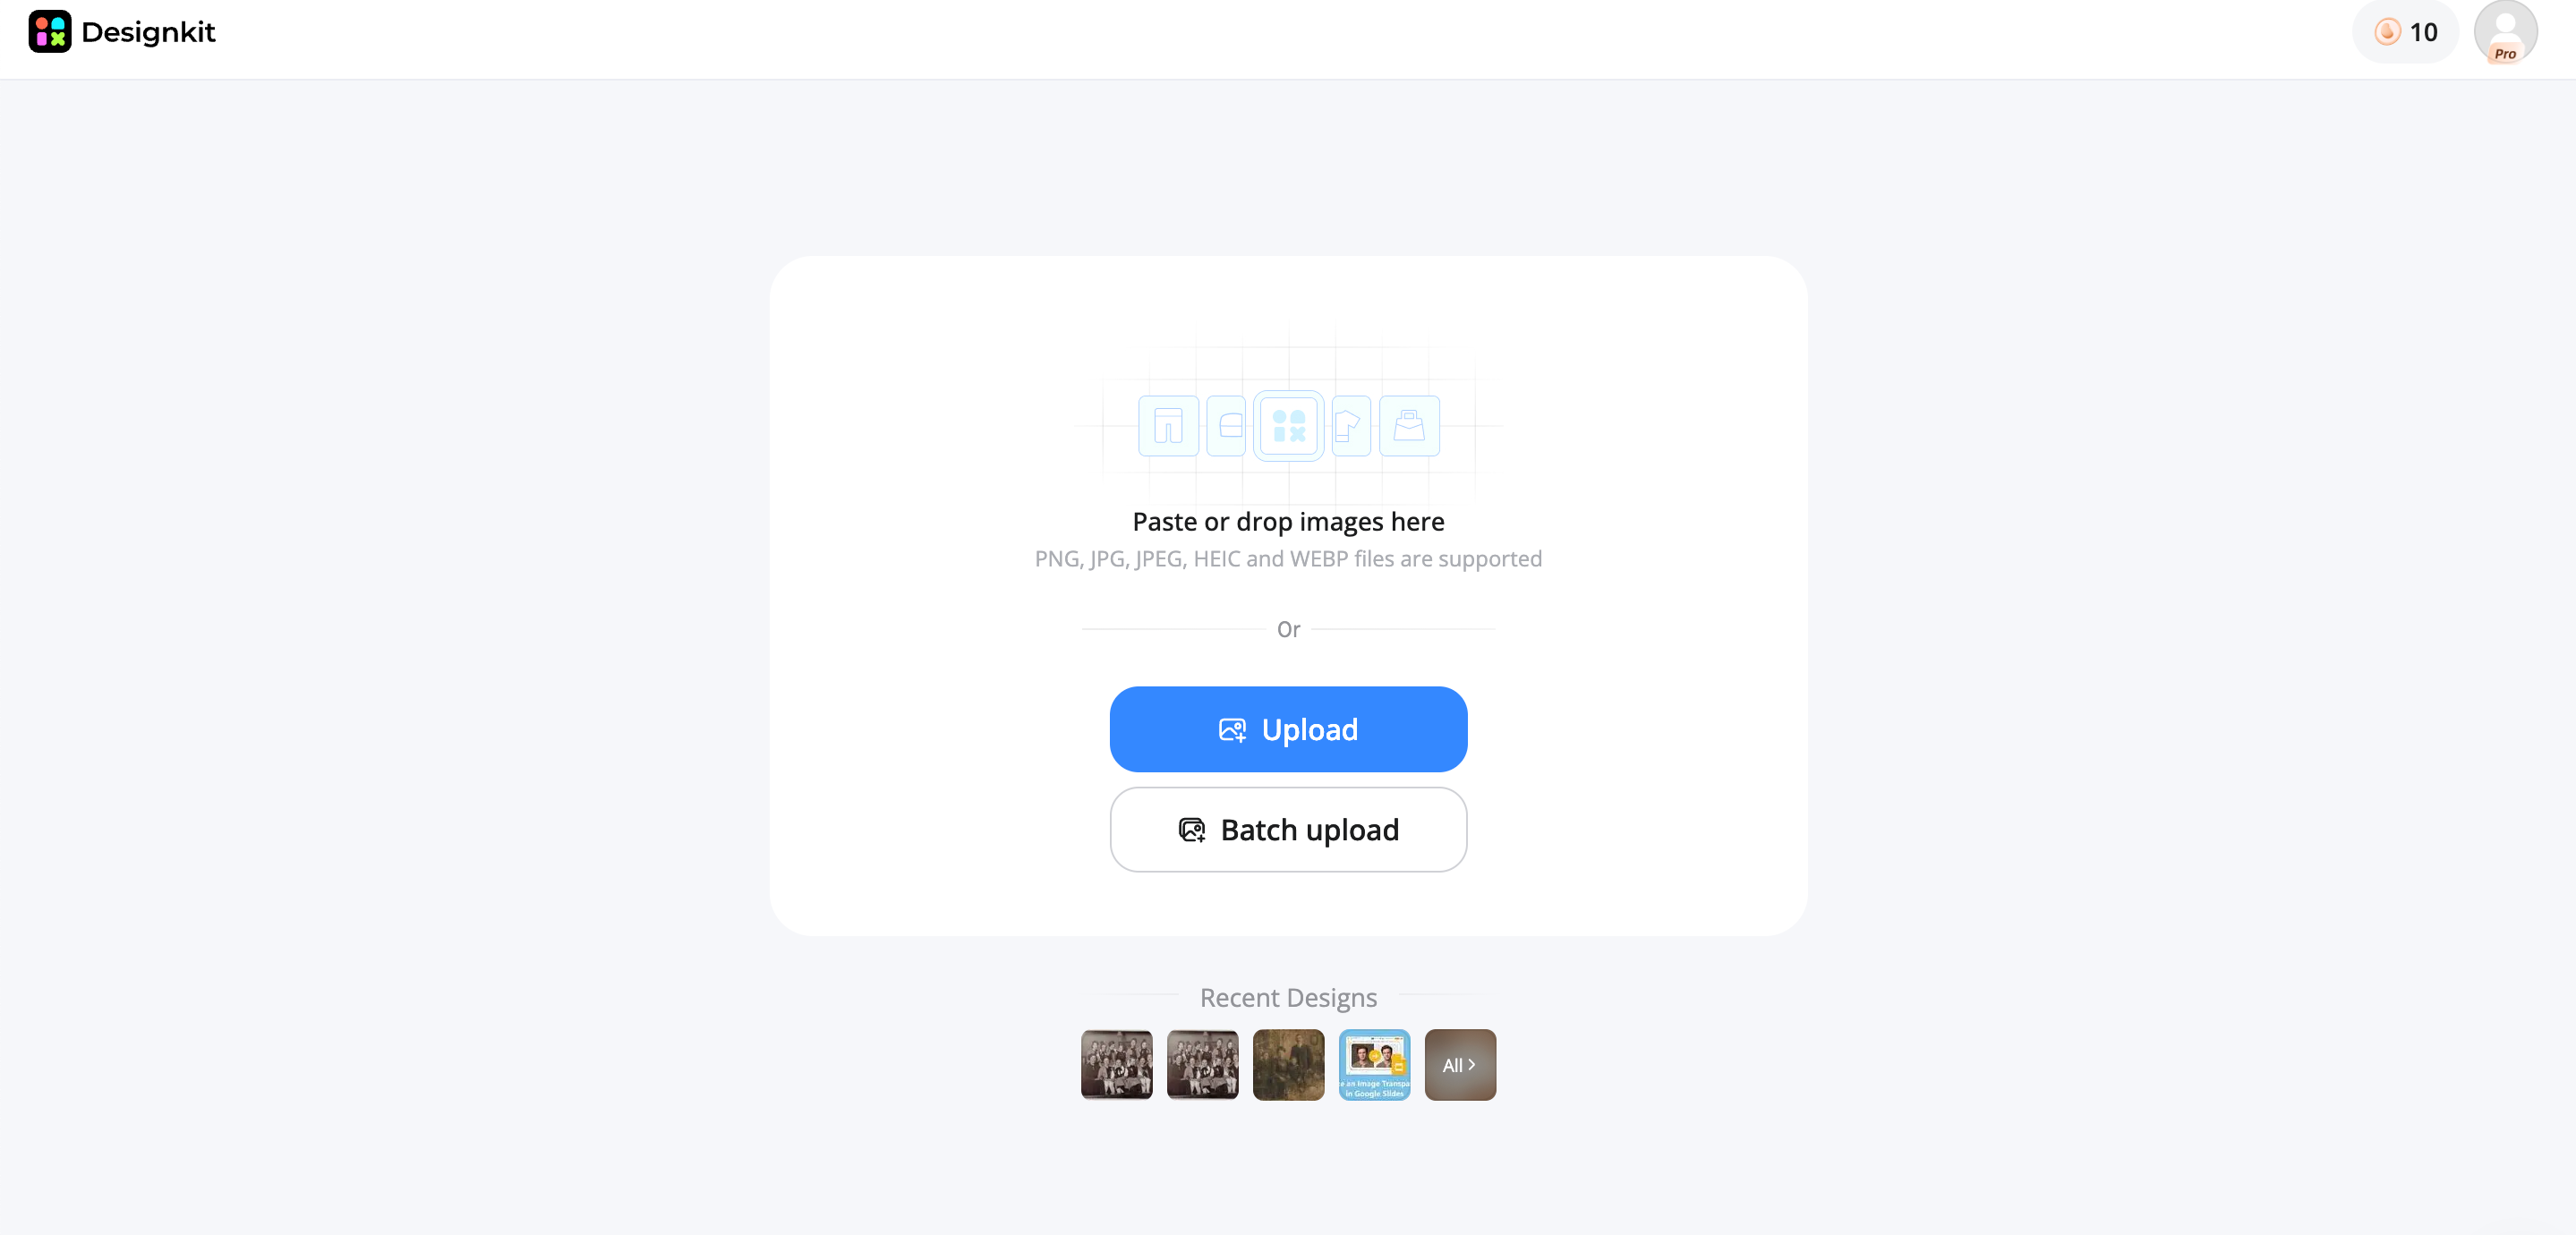
Step 1: Upload Your Image
Go to the Designkit workspace and open the AI Photo Editor. Upload your raw product photo. You can also add multiple photos for bulk editing.
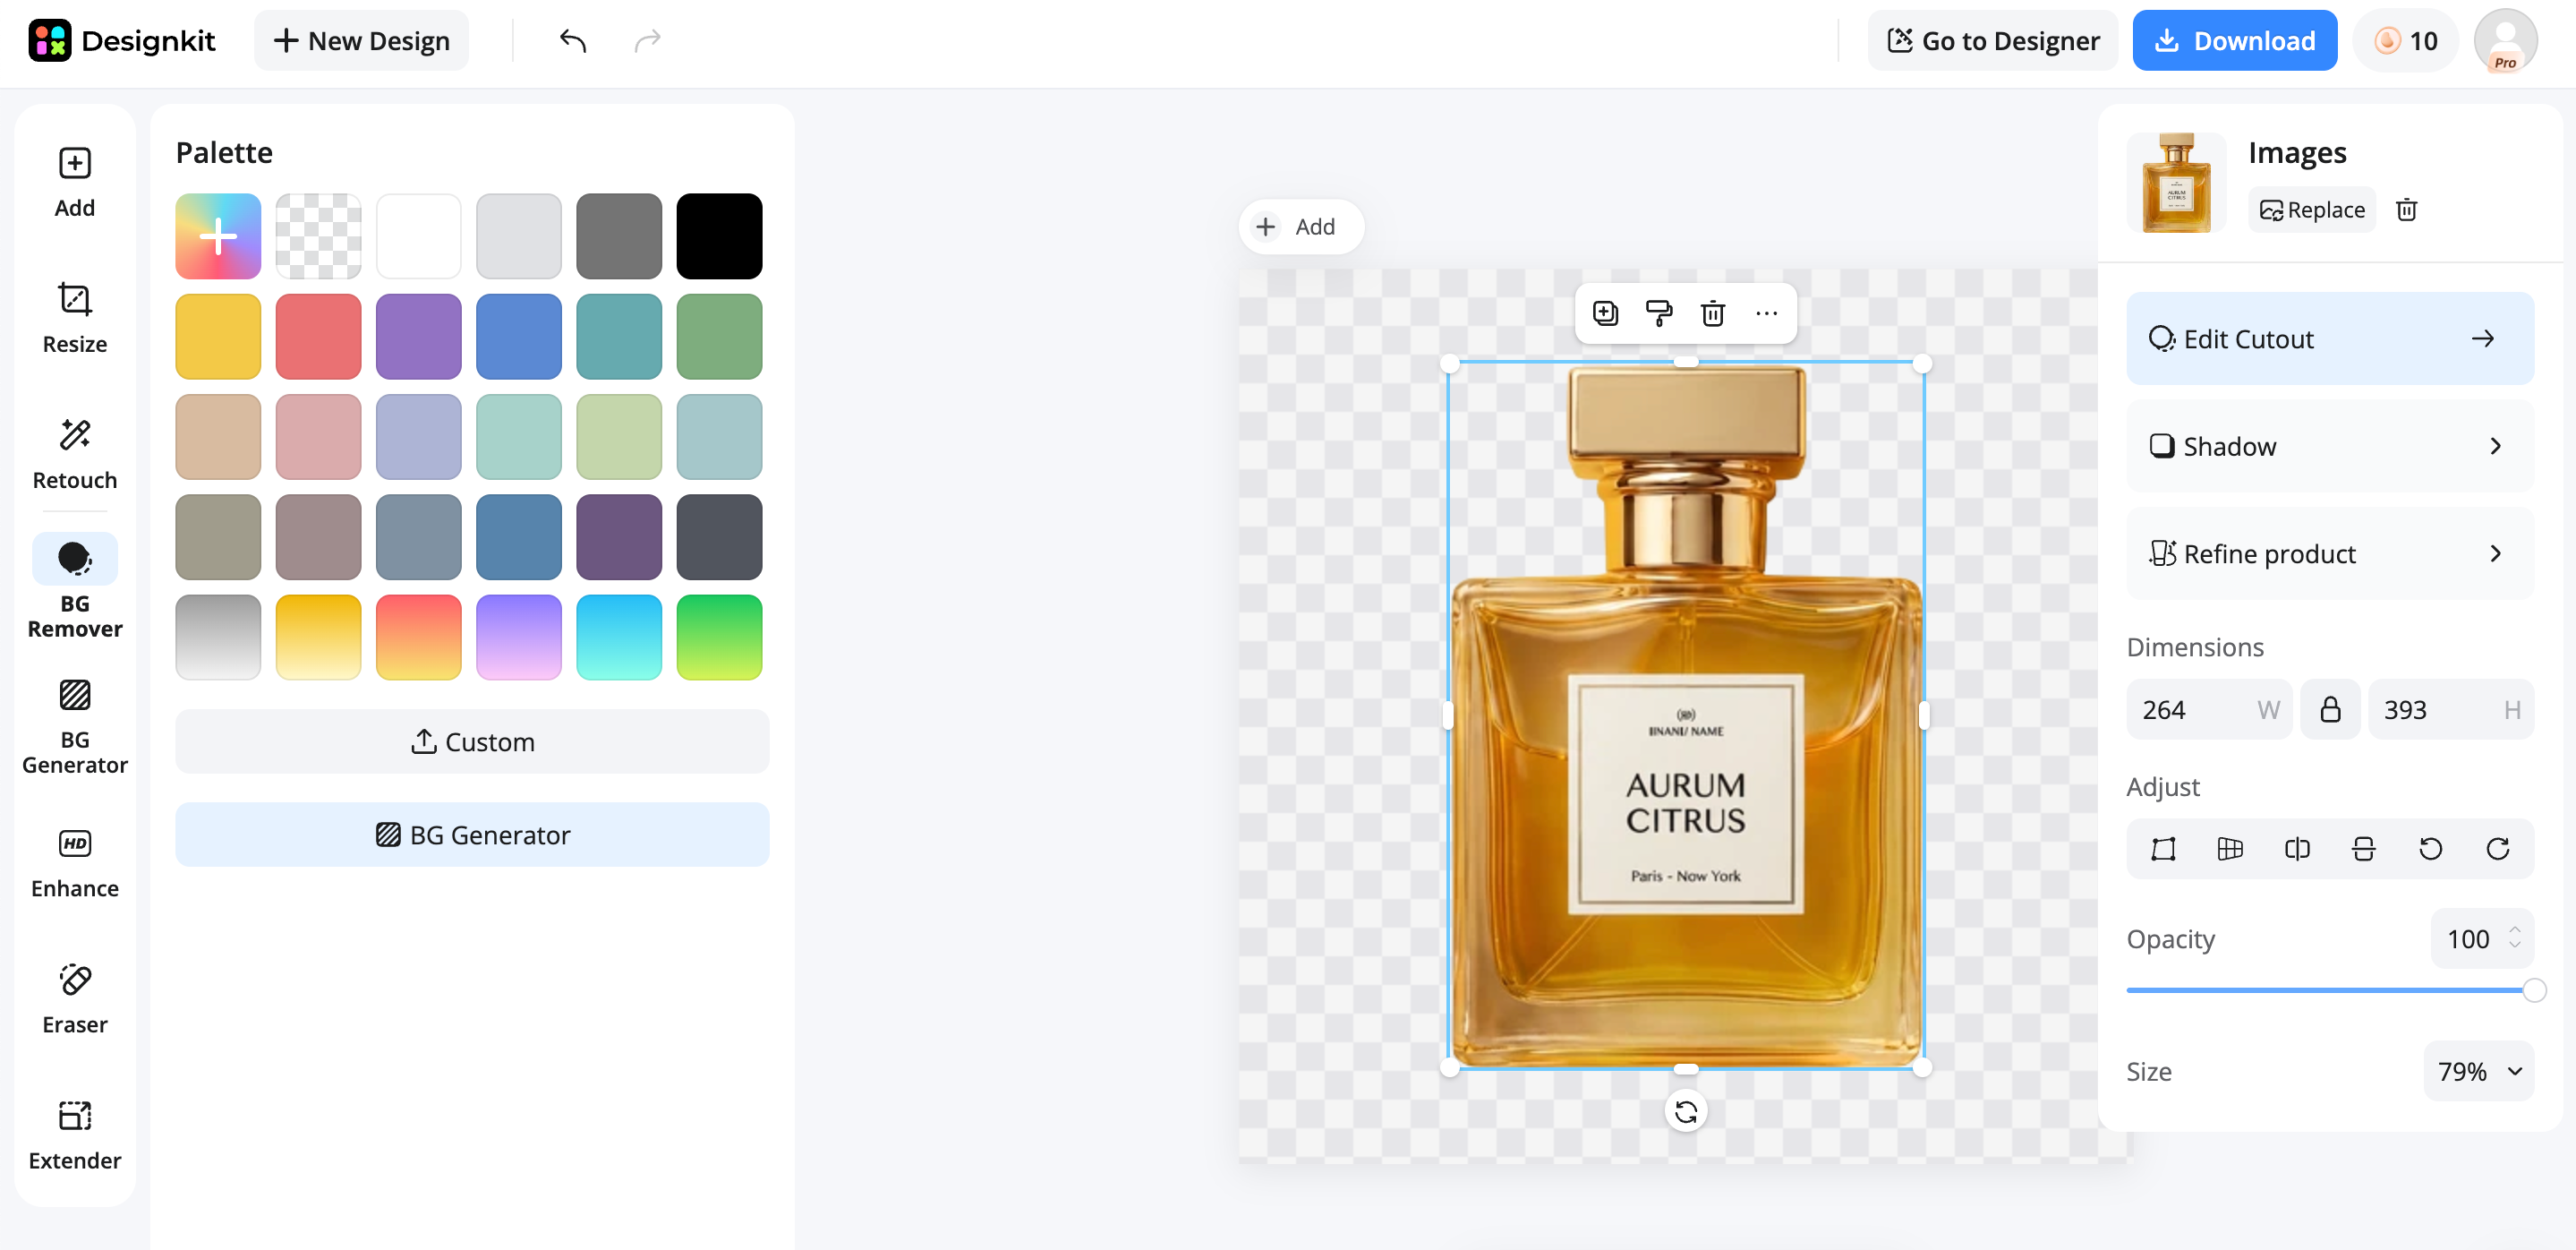
Step 2: Remove Your Image Background
Instead of manually outlining the product with the Paths tool, click the BG Remover tool. The AI instantly detects the main subject and cleanly extracts it, flawlessly handling complex edges like fur or transparent glass.
Remove Backgrounds Online Free
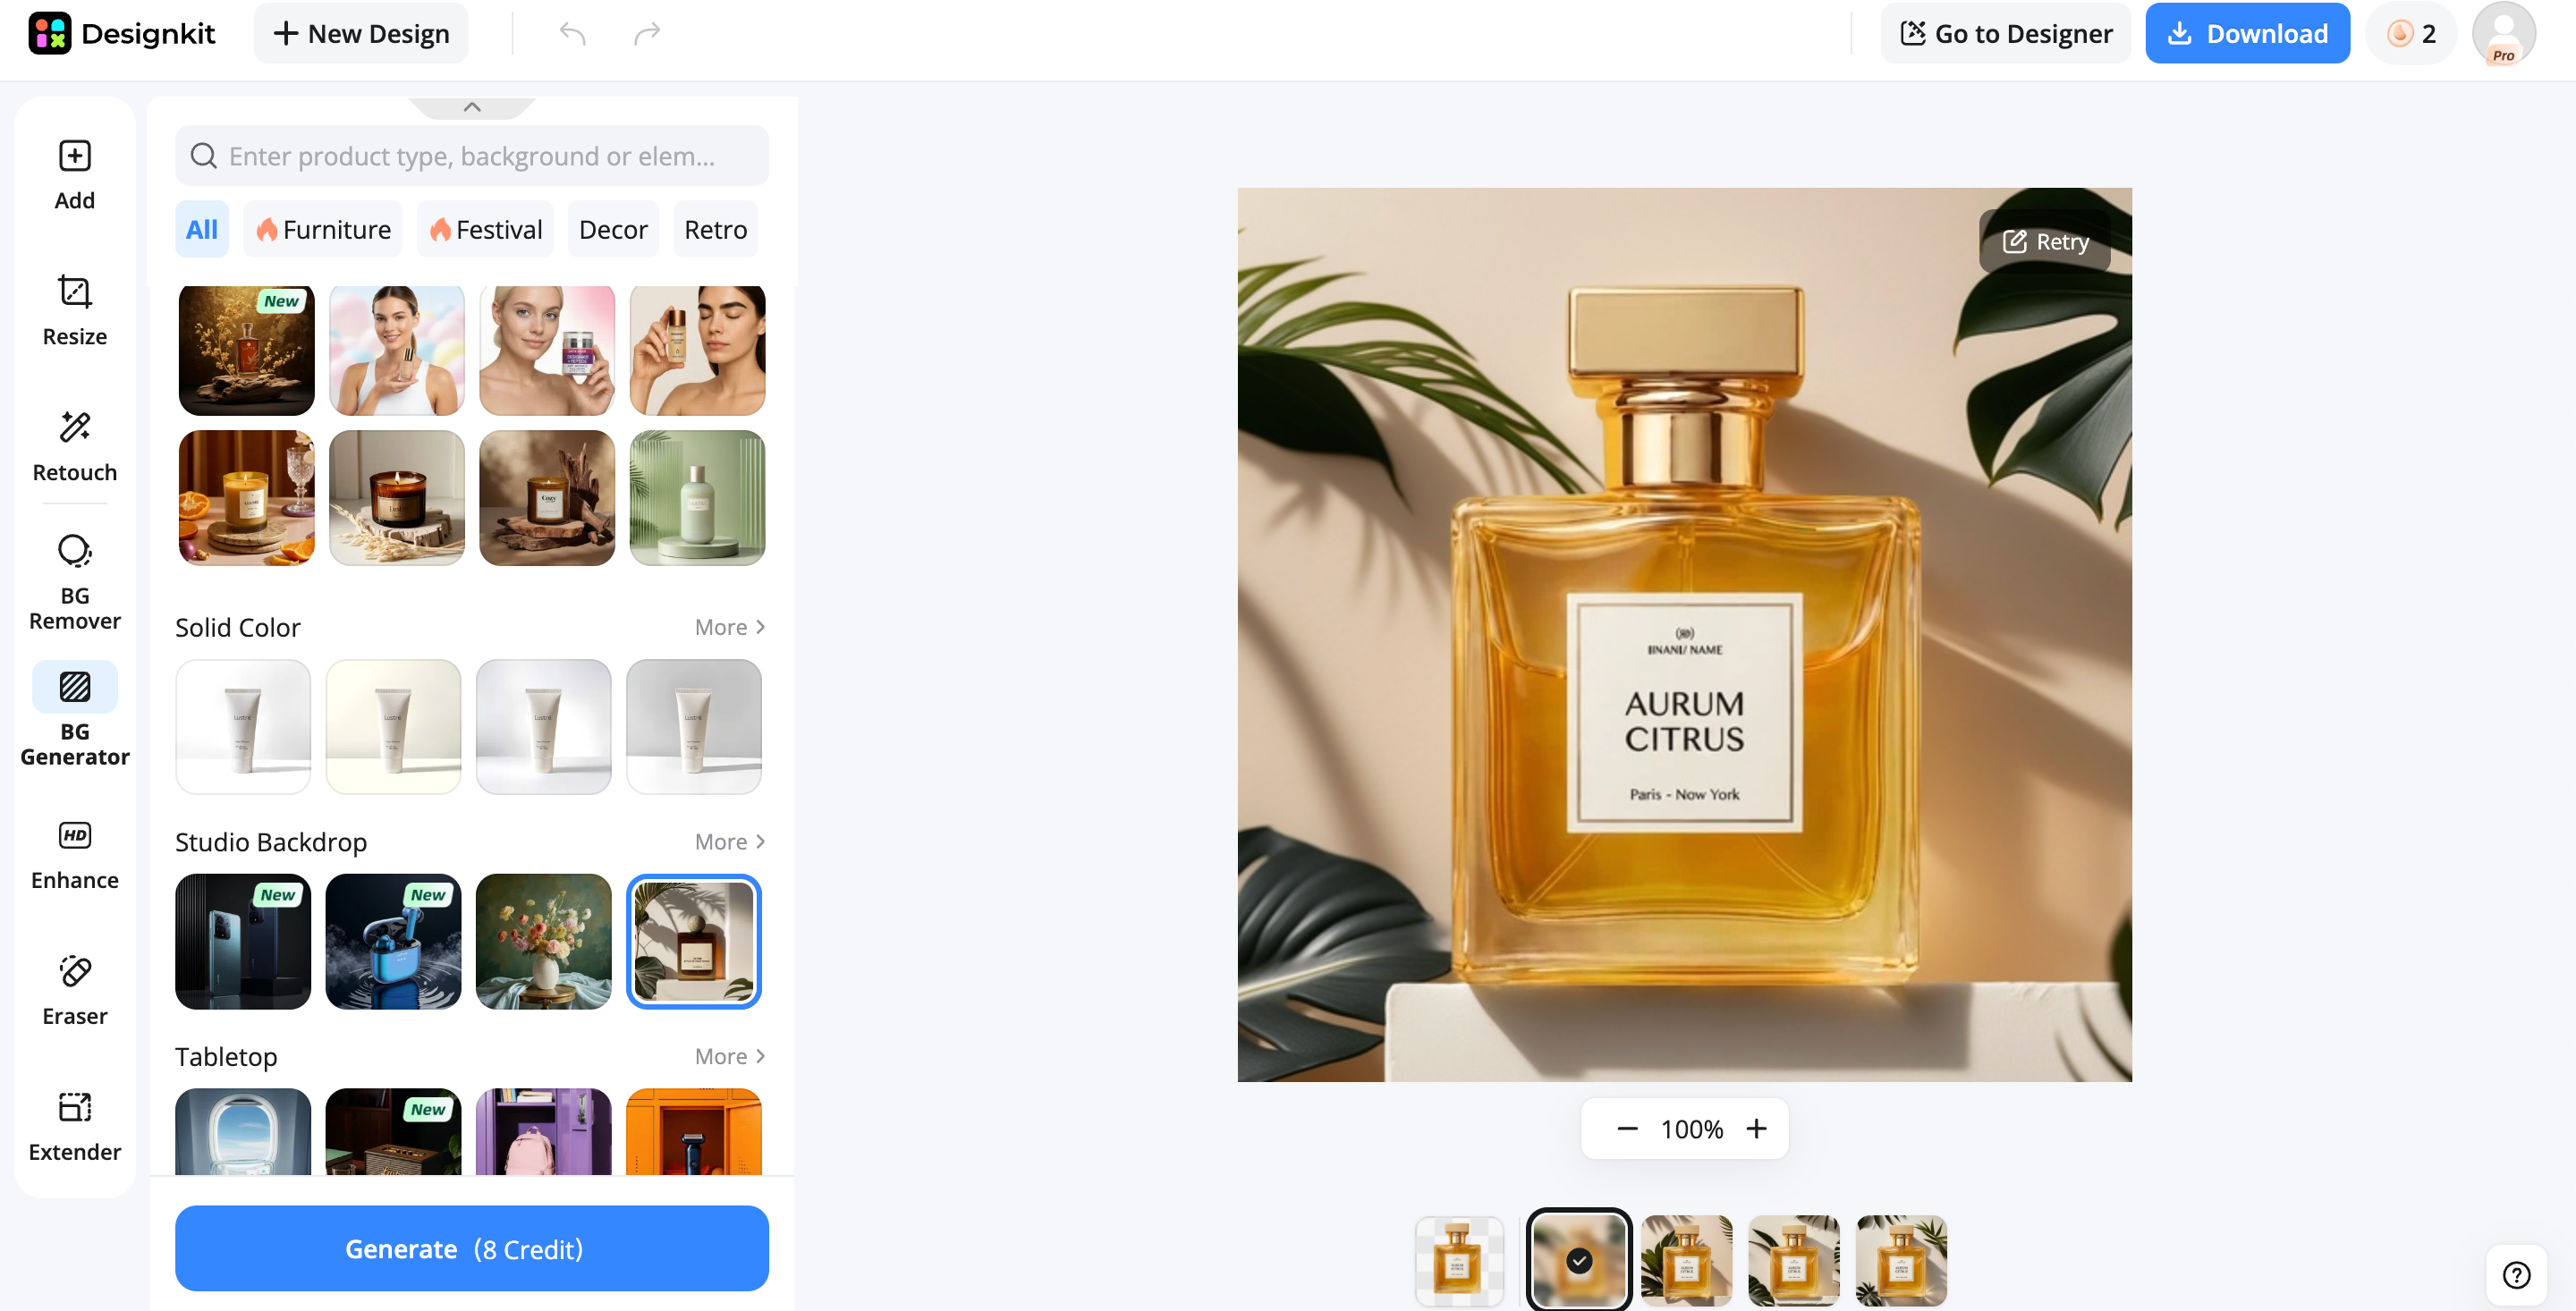
Step 3: Add a New Backdrop and Export
You can export it as a transparent PNG, apply a pure white background for Amazon compliance, use the AI Background Generator to create a background, or use the AI Background Extender to place the product into a photorealistic lifestyle setting. Click Download to export your listing-ready asset.
How Designkit Helps Background Editing without Manual Editing
AI-powered Background Removal
Remove backgrounds in one click with AI. Designkit finds the subject automatically and creates clean edges without manual selection. It works well for products, portraits, and everyday photos, helping you finish edits much faster than traditional tools.
Batch Editing for Multiple Images
Edit backgrounds for many images at the same time instead of repeating the same steps one by one. This is useful for product catalogs, online stores, and large photo sets, saving time while keeping every image consistent.
AI Background Generation and Replacement
Generate a new background or extend an existing one with AI in seconds. Add solid colors, realistic scenes, or creative designs without advanced editing skills. This helps you create polished images for marketing, social media, and eCommerce.
Fast Image Export Workflow
Export edited images quickly in high-quality formats without extra steps. Designkit keeps the workflow simple, making it easy to save transparent PNGs or other file types that are ready to share, upload, or use in your next project.
eCommerce-ready Product Editing Tools
Prepare product photos for online stores with clean backgrounds, consistent lighting, and professional results. Designkit helps create images that meet marketplace requirements, making products look polished and ready for websites, ads, and product listings.
Best Practices for Clean Background Removal
Whether you remove the background with GIMP tools or use AI, starting with a good-quality image makes editing much easier and gives better results.
Ensure High Contrast
Choose a background color that clearly contrasts with your subject. For example, place a dark product on a light background or a light product on a dark background. This makes it easier to detect the edges and create a clean cutout.
Avoid Harsh Shadows
Use soft, even lighting when taking your photo. Strong shadows can be mistaken for part of the subject, making the background harder to remove. Good lighting helps create cleaner and more accurate results.
Check the Edges at 100% Zoom
Before exporting your image, zoom in to 100% and inspect the edges carefully. Remove any leftover background, rough edges, or light halos with a soft eraser or layer mask for a cleaner, more professional finish.
Conclusion
GIMP is a powerful free tool for removing image backgrounds, but it often requires manual work and practice to achieve clean results. Choosing the right tool, handling complex edges carefully, and exporting your image as a PNG with an Alpha Channel are all important steps. If you edit images regularly or need to process many product photos, an AI tool like Designkit can save time with one-click background removal, batch editing, and AI-powered background generation. The right workflow depends on your editing needs, image complexity, and the amount of time you want to spend.
Frequently Asked Questions
Is GIMP free to use for removing backgrounds?
How do I remove a background in GIMP without it turning white?
Add an Alpha Channel before deleting the background. This allows GIMP to keep the background transparent instead of replacing it with white. After editing, export the image as a PNG. If you want to skip these manual steps, Designkit removes the background automatically and keeps transparency when exporting.
How do I save a GIMP image with a transparent background?
Export the image as a PNG file. Before exporting, make sure the image has an Alpha Channel because PNG supports transparency while JPEG does not. This keeps the background clear after saving. Designkit also exports transparent PNG files automatically, making the process faster and easier.
How do I remove a background from hair or fur in GIMP?
Use the Foreground Select Tool or layer masks. These tools help keep fine details like hair and fur, but they often require careful manual editing. Zoom in and clean the edges for the best result. If you work with detailed images often, Designkit's AI can detect fine edges automatically and save editing time.
Is GIMP or Photoshop better for removing backgrounds?
It depends on your needs. GIMP is free and works well for manual editing, while Photoshop offers more advanced selection and editing tools. Both require some editing experience. If your goal is speed and simplicity, Designkit provides AI-powered background removal without the learning curve of traditional editors.
Can I remove backgrounds automatically instead of using GIMP?
Yes. AI background removers can detect the subject and remove the background automatically in just a few seconds. This is especially useful for product photos, portraits, and bulk image editing. Designkit combines one-click background removal, batch processing, and AI background generation to simplify the entire workflow.
You May Also Like

7 Best Remove.bg Alternatives in 2026: Free & Paid Tools

Instagram Carousel: What It Is, How to Post & Create One

Nano Banana Prompts: 20+ Examples for Better AI Images

Ideogram AI Review 2026: Features, Pricing & Alternatives

Free Mac Photo Editor: 5 Tools Compared for Mac Users

How to Crop a Photo Into a Circle Online (Keep Quality)

How to Make an Image Transparent Online (AI Guide)

Pixlr Background Remover Review 2026: Features, Pricing & Alternatives

How to Fix Overexposed Photos: Recover Highlights Fast

OpenArt AI Review 2026: Features, Pricing & Alternatives

Best AI Headshot Generator: 9 Tools Compared for 2026

Best Stencil Maker Tools 2026: Turn Photos Into Stencils

Pixelbin Watermark Remover Review: Image & Video Results Tested

How to Make a Sticker on iPhone: Easy Step by Step Guide

Best AI Logo Generator in 2026: 10 Tools Compared

How to Turn a Photo Into a Cartoon: A Beginner-Friendly Guide

Landscape vs Portrait: Key Differences & Best Uses in 2026

How to Remove Watermark From Photo: AI, Photoshop & More

How to Fix Pixelated Photos: Photoshop, AI Tools & Tips

Bing Image Creator: How It Works, Features, Uses & Alternatives

How to Remove People from Photos with AI: A Step-by-Step Guide

How to Increase Image Resolution: AI, Photoshop & PPI

How to Add Text to a Photo: 8 Tips for Better Results

How to Fix Grainy Photos: Easy Ways to Clear Images

Creative Profile Picture Ideas for Every Style and Platform

Evoto AI Review 2026: Features, Pricing, Pros & Cons

Pixlr Photo Editor Review: Features, Pricing & Alternatives

Best AI Image Extender Tools in 2026: Expand Photos with AI

How to Make a Collage on iPhone: Easy Guide for 2026

How to Sharpen an Image in Photoshop (Smart Sharpen and Unsharp Mask)

Best Image Background Remover Tools in 2026: AI Tools Compared

How to Make Transparent Background in Paint: Step-by-Step Guide

How to Resize an Image: Best Methods, Tools & Quality Tips

Best AI Image Generator Tools in 2026: Top AI Platforms Compared

Remove.bg Review 2026: Features, Pricing & Is It Worth It?

Luminar Neo Photo Editor Review 2026: AI Features, Price & Pros

How to Post Multiple Photos on Instagram (2026 Guide)

25 Facebook Cover Photo Ideas for Personal & Business Pages

What Is a PFP? Meaning, Examples & How to Create One

Can You Edit an Instagram Post After Posting?

11 Best Canva Alternatives in 2026 for AI Design & Marketing

8 Best Midjourney Alternatives in 2026: Features, Pricing & Comparison

How to Restore Old Photos: AI Tools, Tips & Best Methods

Pixelcut AI Review 2026: Features, Pricing, Pros, Cons & Alternatives

How to Apply Watermark to Photos: Methods, Tips & AI Tools

How to Remove a Background in Illustrator: 4 Easy Methods

How to Change Background Color on Instagram Story (Easy Guide)

8 Best AI Poster Generators in 2026: Create Posters Faster with AI

10 Best AI Image Enhancers in 2026: Tested & Compared

10 Best AI Image Editors in 2026: Features, Pricing & Comparison

7 Best AI Background Changer in 2026: Remove & Replace Photo Backgrounds

Luminar Neo vs Lightroom: Features, Pricing & Comparison 2026

Kittl Review 2026: Is It Worth It? Features & Pricing

How to Make a Blurry Image Clear: 5 AI & Manual Ways

How to Remove Background on iPhone: 5 Easy Methods (2026)

Photoroom Background Remover Review 2026: Features & Alternatives

How to Remove Background in Canva: A Step-by-Step Guide

How to Remove Background in GIMP: Beginner-Friendly Guide

Funny Dog Memes to Try: Doge Meaning and 10 Original Ideas

Back to School Checklist 2026: Supplies, Timeline, and Planning

Recraft AI Review 2026: Features, Pricing, Pros, Cons & Alternatives

How to Make an Image Transparent in Google Slides: Opacity & Background Removal

VanceAI Photo Enhancer Review: Features, Pricing & Alternatives in 2026

What Does Emojify Mean? Text, Photos, & Emoji Art Explained

Top 8 Online Background Removers for Ecommerce Photos (2026)

How to Remove Background in Photoshop: 7 Easy Methods

6 Best AI Image Upscalers 2026: Tools Tested & Compared

Project Indigo Review: Is It Better Than iPhone Camera?

How Big Is an 8x10 Photo? Size, Pixels & Frame Guide

How Big Is a 4x6 Photo? Dimensions, Pixels & Printing Tips

Picsart AI Review: Features, Pricing, Pros, Cons & Alternatives

Lovart AI Review: AI Design Agent Features, Pricing & Alternatives

Fotor AI Image Generator Review: Features, Pricing & Alternatives

How to Add Emoji to Photo Online for Free

Emoji Wallpaper Ideas & How to Make One Online (2026)

Minimalist Poster Design: How to Make a Clean Poster (2026)

How to Make a Custom Poster That Is Ready to Print

Instagram Image Size Guide 2026: Post, Reel, Story & Carousel Specs

LinkedIn Image Size Guide: Profile, Post & Banner Dimensions

YouTube Profile Image Size: Best Dimensions & Safe Area 2026

How to Edit Amazon Product Photos That Boost Sales Fast
Remove Backgrounds Faster Without Manual Editing
Stop struggling with manual editing. Designkit lets you remove backgrounds instantly, create clean product images, and prepare eCommerce-ready visuals in seconds.
