
How to Create Print-On-Demand Designs: From Idea to Mockup
Turn a strong idea into print-ready artwork that fits the product, meets provider specs, and stays clear on a realistic mockup.

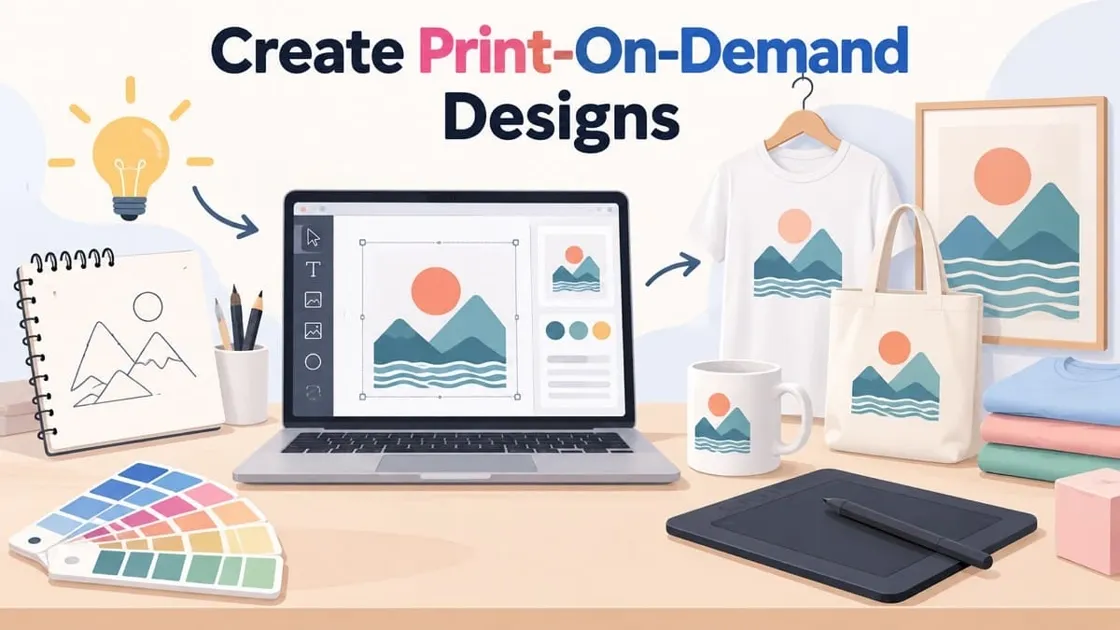
A strong idea only works when the final design fits the product. The artwork must match the print area, meet provider requirements, and stay clear on a realistic mockup. Creating print-on-demand designs requires more than making artwork that looks good on screen.
Size, placement, file quality, and product appearance all shape the final result. The guide covers the complete workflow, from developing your idea and preparing print-ready artwork to adapting designs and reviewing the final product mockup.
Plan Your Print-On-Demand Design Before You Create It
Before you make POD designs , decide what product you are designing for, who will buy it, and what the print provider allows. These choices affect size, layout, colors, and detail from the start. The following steps help you plan these elements before creating the artwork:
1. Choose the Product First
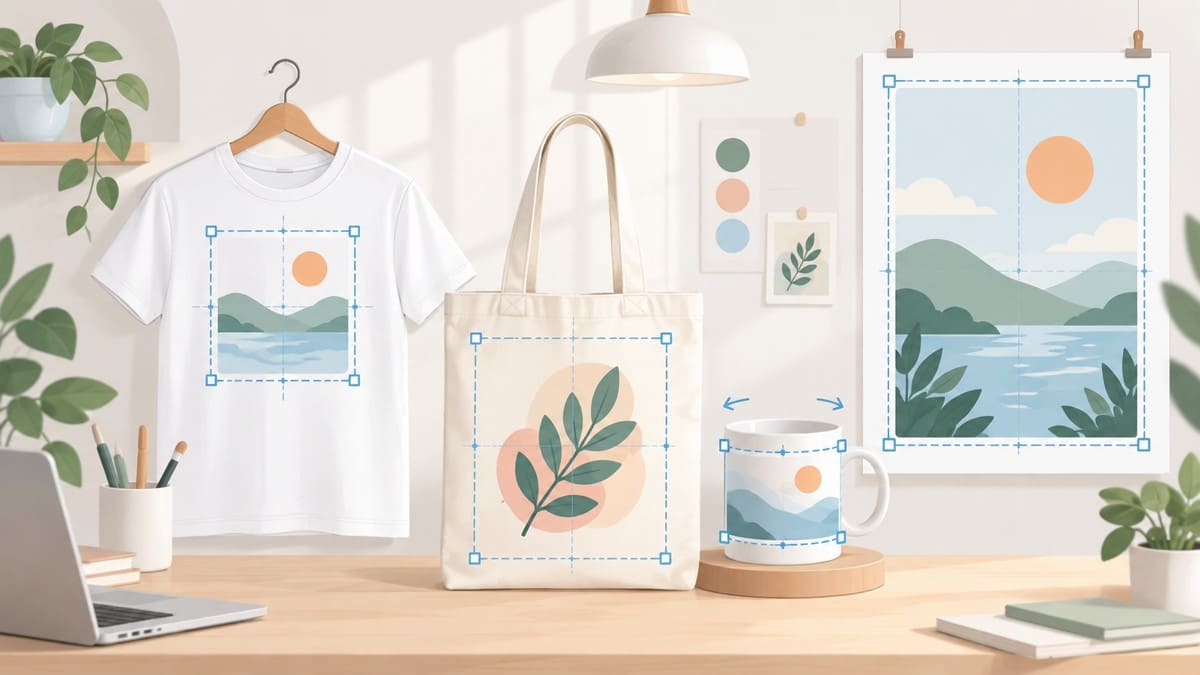
To create print-on-demand designs , start with the product. A layout that works on a T-shirt may need a different shape, scale, or placement on a tote bag, mug, or poster. Print areas vary by product and provider. For example, some T-shirt print areas are roughly 12 by 16 inches, while larger options may extend to 15 by 18 inches.
2. Define the Audience and Theme
Next, define who the design is meant for. A specific theme, profession, hobby, or interest gives the artwork a clear direction. Your target audience influences the style, wording, colors, and visual elements you choose. Strong print-on-demand design ideas usually focus on a recognizable group rather than a broad audience, making the final design more relevant to potential buyers.
3. Check the Product Template
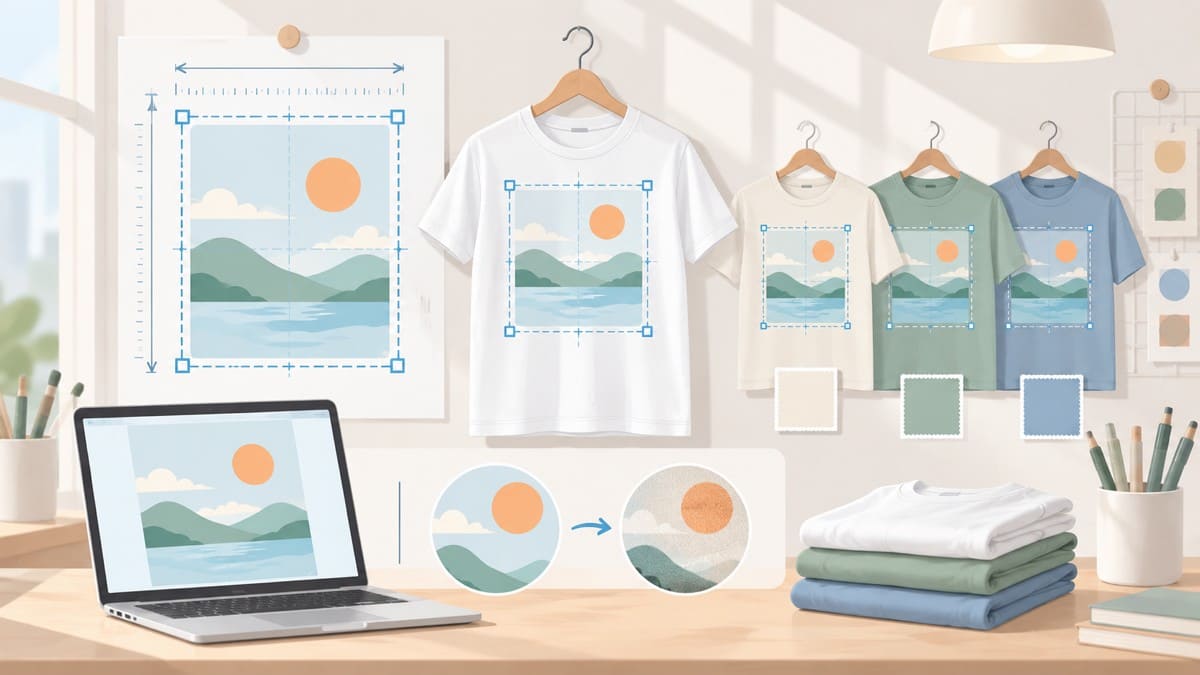
With the product and audience defined, open the provider’s template for the selected item and review the key requirements:
· Printable area in inches and pixels.
· Safe area for keeping important elements away from trim boundaries.
· Product colors the design needs to complement.
Consider how the artwork will look once printed on the physical product. Colors may appear different on fabric, while fine details can lose clarity on textured materials such as cotton.
4. Decide What Buyers Should Notice First
Choose one element to attract attention first, such as a phrase, illustration, or central graphic. Keep supporting details smaller so the POD design remains clear and balanced on the actual product. For more guidance, explore our guide to choosing POD products and niches to understand how product selection can shape your design direction.
How to Create Print-On-Demand Designs?
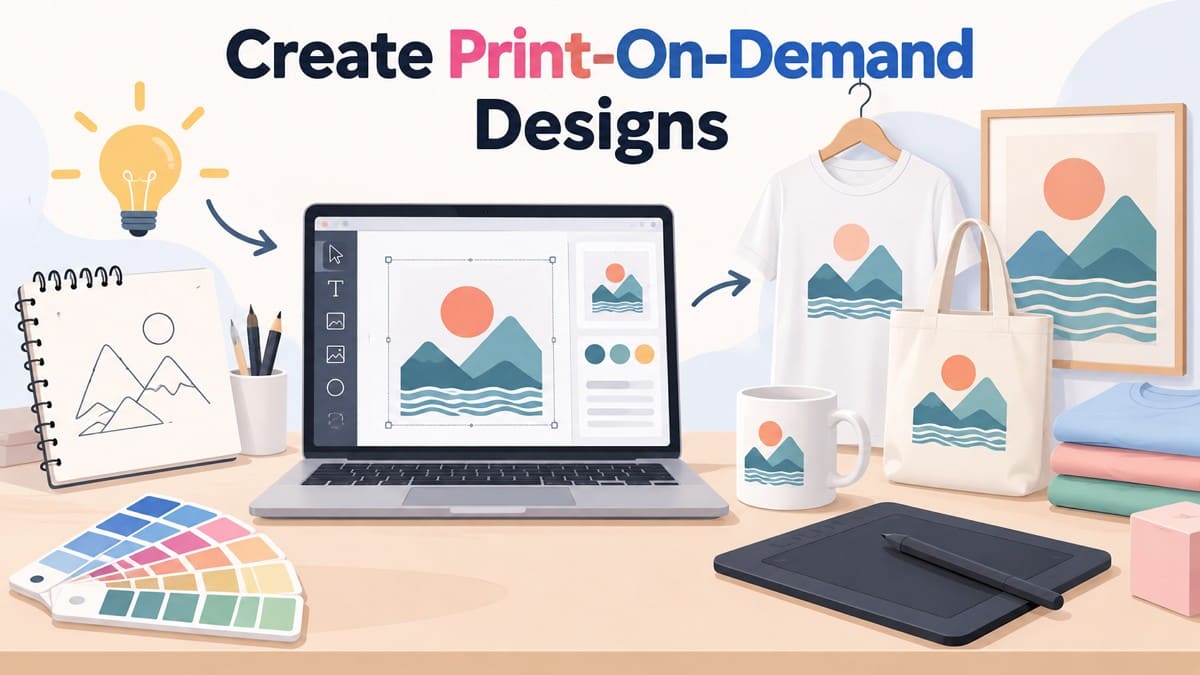
Once you have defined the product and audience, you can begin creating the artwork. Learning how to create print-on-demand designs becomes easier when you divide the process into four clear stages. Each stage helps refine the artwork and prepare it for the final product.
1. Choose a Suitable Creation Method
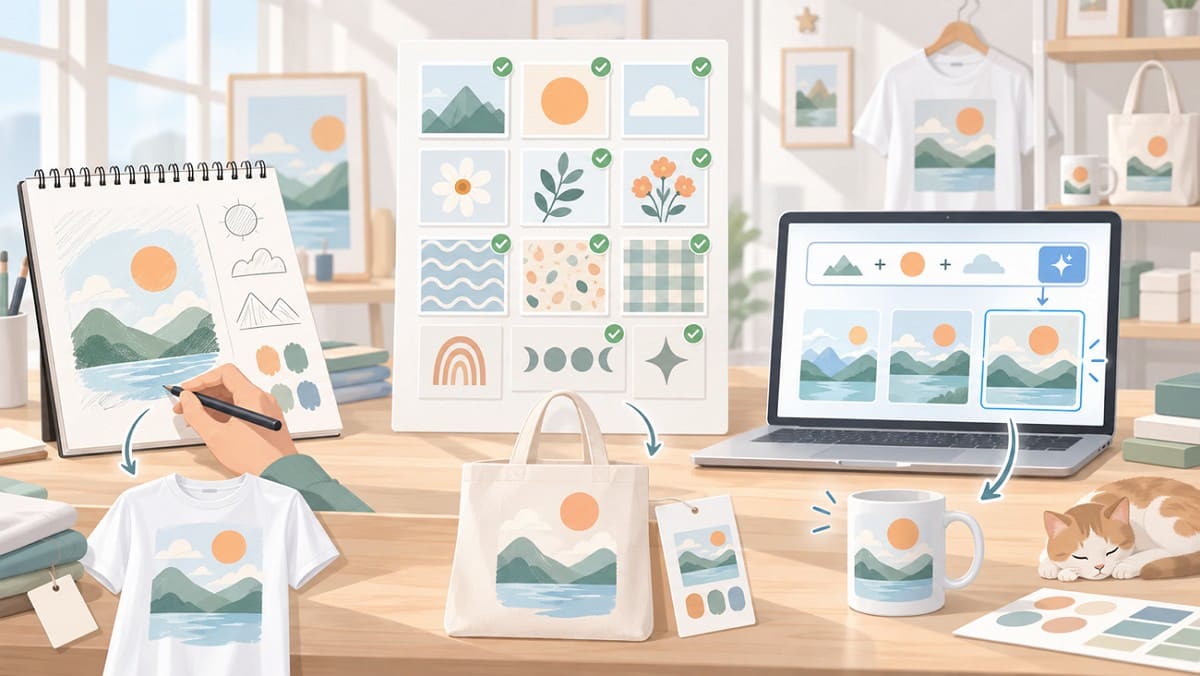
There are three main ways to turn an idea into print-ready artwork. Choose the approach that best matches your design skills, available resources, and creative direction.
1. Original Artwork: Create the design yourself through drawing, lettering, or other techniques. It offers greater creative control but requires more time and design skills.
2. Licensed Templates and Assets: Customize purchased templates, fonts, or graphics to create your design. Check the license carefully to confirm the assets allow commercial use.
3. AI-Assisted Concepts: Use AI tools to generate a starting concept and refine it into finished artwork. This approach can help when you have an idea but need support visualizing it.
Choose the creation method that best matches your skills and available resources. Sellers with design experience may prefer original artwork, while those who need a starting point can use Designkit’s AI Product Design tool to generate an editable merchandise concept from a brief or reference materials. You can then refine the concept for your selected product.
Treat AI-generated concepts as starting points rather than finished print files. Before using any template, font, stock element, or generated asset commercially, review its usage terms and confirm that your final artwork meets the provider’s print requirements.
2. Compose the Design for a Physical Product
A print-on-demand design idea may look sharp on a screen but lose impact once printed. Keep the composition clear and balanced so it works well on fabric, paper, or other physical surfaces. Use the following checks to make sure the design translates well from screen to product:
· Use One Clear Focal Point: Decide which element should attract the buyer’s attention first.
· Keep Key Elements Away from Edges: Leave enough space around important text and graphics.
· Make Text Readable: Check whether the lettering remains clear at the intended print size.
· Avoid Very Fine Details: Thin lines and tiny text may lose clarity on textured materials.
· Check Contrast: Test the artwork against every product color you plan to offer.
Among these factors, contrast needs extra attention when the same design appears on multiple product colors. Artwork that looks clear on white may become difficult to see on heather gray or navy. Test each color variation before finalizing the design. For product-specific dimensions and positioning, see our T-shirt design size and placement guide.
3. Clean and Refine the Artwork
Before preparing the final print-on-demand design file, inspect the artwork carefully. Small errors are easier to correct at this stage than after resizing the design or adapting it to multiple products. Focus on the following visual checks before moving forward:
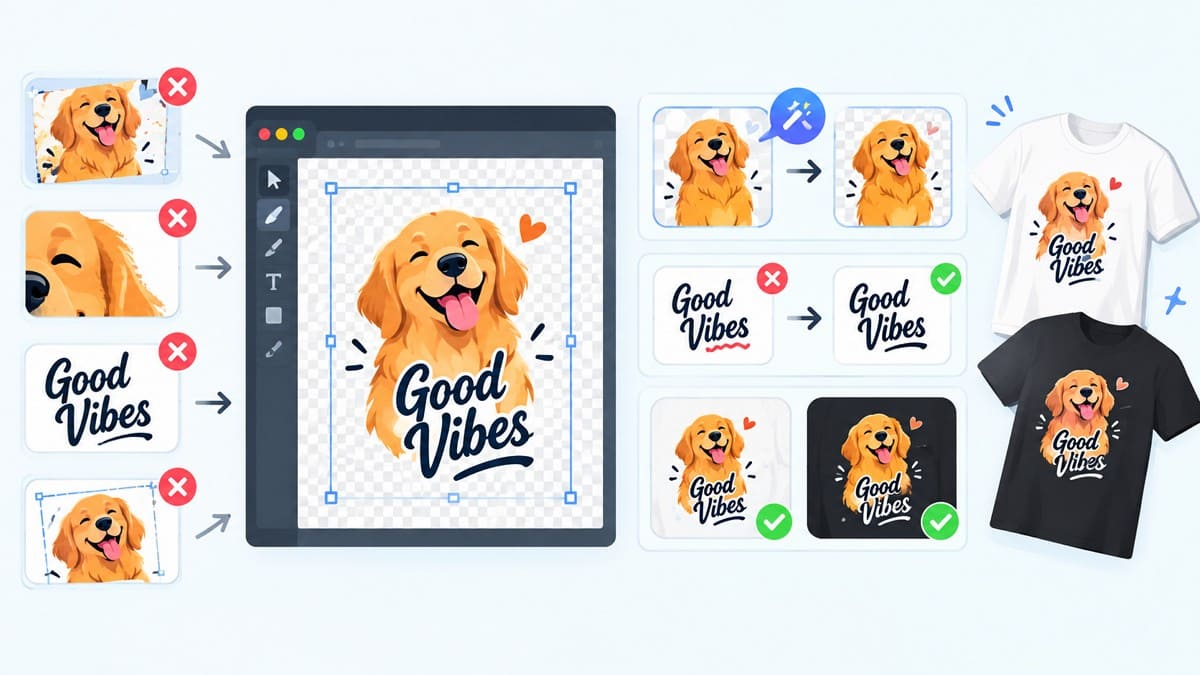
· Check for unintended backgrounds, rough or feathered edges, accidental marks, misalignment, and inconsistent spacing.
· Review all text for spelling errors and confirm that the elements remain properly aligned.
· View the artwork against both light and dark backgrounds when offering the product in multiple colors.
Background issues may require additional cleanup before the artwork is ready. Use Designkit’s Background Remover to create a transparent cutout when needed. Review the edges afterward for pale fringes, clipped details, or lost definition around hair, fur, and fine linework.
4. Review the Design at Its Intended Print Size
For the final visual check, view the artwork at approximately the size it will appear on the product. Detailed illustrations may look sharp on a monitor but lose clarity when scaled down. Remove unnecessary details, thicken thin lines, and resize or remove text that becomes difficult to read at the intended print size.
Reviewing the artwork at its actual scale also helps create clearer print-on-demand mockup presentations. Simplify any elements that become difficult to recognize, while keeping the main design intact. Once the artwork remains clear at the intended size, you can move on to checking its pixel dimensions, resolution, and other technical file requirements.
Prepare a Print-Ready Design File
After completing the visual review, focus on preparing the artwork for printing. A design can look perfect and still fail during upload without the right technical setup. The following sections cover print on-demand file requirements , size and resolution, file format, and background settings.
1. Check the Provider's File Requirements
Requirements vary between providers, so a file accepted by one may not meet another’s specifications. Common supported formats include JPEG, PNG, and SVG, with 300 DPI often recommended for high-quality printing. Some products may accept lower resolutions, while larger items such as blankets can use around 120 to 150 DPI. Before finalizing the file, review the key requirements in the table below and why each one matters.
|
What to Check |
Why It Matters |
|---|---|
|
Accepted Formats |
Decides whether transparency is possible |
|
Pixel Dimensions |
Fixed on some platforms, flexible on others |
|
Resolution |
Varies by product and printing method |
|
Maximum File Size |
Large transparent files fail this often |
|
Background Settings |
Controls whether the product color shows |
|
Product Templates |
Gives the real print area, not an estimate |
2. Set the Correct Size and Resolution
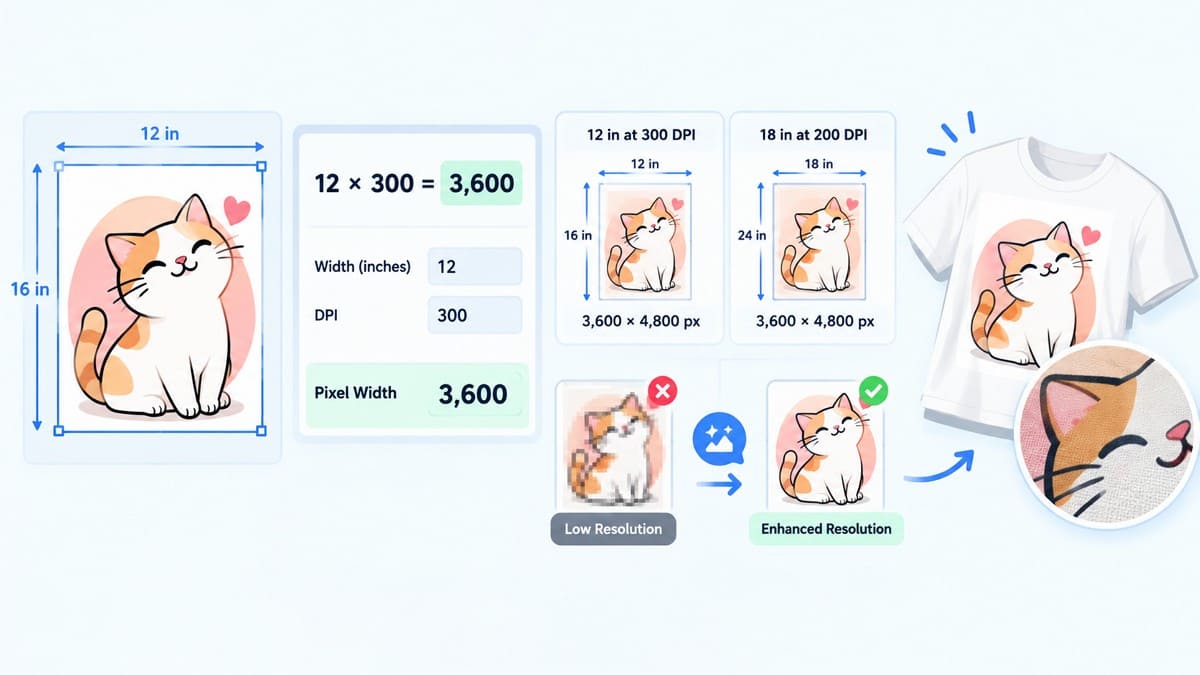
With the provider’s specifications in hand, the numbers behind them are worth understanding. DPI describes print resolution in relation to physical size. Multiply the print width in inches by the target DPI to calculate the required pixel width. A 12-inch print at 300 DPI needs 3,600 pixels across. Printing the same 3,600-pixel image at 18 inches reduces the effective resolution to 200 DPI.
That relationship explains why enlarging an image at the last moment rarely solves a resolution problem. Image data remains unchanged unless you resample it. Changing the print on demand design DPI value alone adjusts the print size without adding detail.
For artwork that is slightly soft or too small, Designkit’s Image Enhancer can increase its resolution before the final review. Inspect the enhanced result carefully, since upscaling cannot fully recover detail missing from the original.
3. Choose the File Format and Background
The final export depends on how the artwork should appear on the product. A transparent PNG for print on demand works well when the product color needs to remain visible around the design. A solid background may instead appear as a visible rectangle, especially on contrasting product colors. Not every design needs transparency, as some products and print methods work better with other background settings.
Full-area designs and products with fixed backgrounds may support other formats. Choose the print on demand design file format recommended by your provider for that product. Before submission, reopen the exported file and confirm the transparency works correctly, colors match the original artwork, and image quality remains intact.
Adapt the Design to Different POD Products
A single design may need adjustments before it works across different products. Print areas, dimensions, and proportions can change how the artwork appears on a T-shirt, mug, tote bag, or other item. Your print on demand design software can help adapt the artwork for each format. Before creating separate product versions, consider the following adjustments:
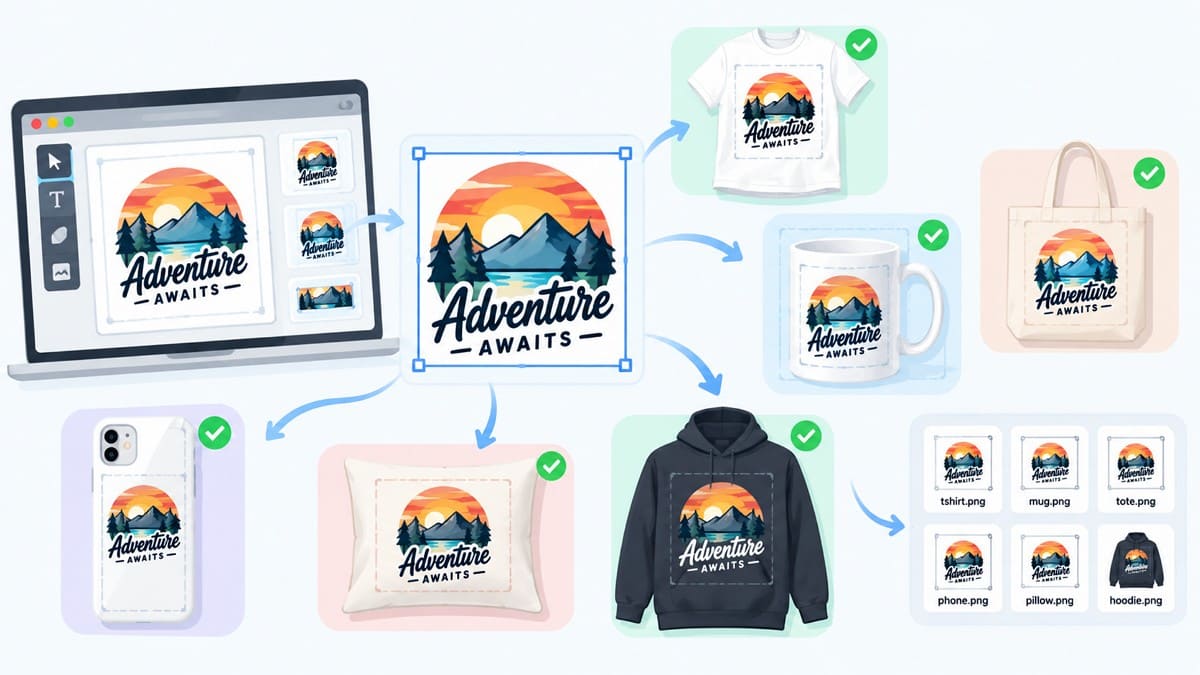
1. Resize and Reposition for the New Print Area: Fit the artwork within the available space instead of stretching it. Keep the main focal point properly positioned.
2. Rework the Composition for the Format: Rearrange elements for vertical, horizontal, or wraparound products rather than simply scaling the original layout.
3. Recheck Text Size and Letter Spacing: Make sure text remains readable after resizing. Letter spacing that works on a T-shirt may feel crowded on smaller products.
4. Adjust Colors for the Product: Check whether the artwork remains visible against each product color. A design created for a white T-shirt may lose contrast on a dark hoodie.
5. Reposition Elements Near Physical Boundaries: Move important elements away from seams, handles, folds, and crop areas where they could become distorted, hidden, or cut.
6. Save Each Version Separately: Keep a clean master file and save each product-specific variation separately. This makes future adaptations easier without altering the original artwork.
For faster resizing, use Designkit’s Image Resizer to create separate copies for different product dimensions. Review each resized version afterward to ensure the composition, placement, and proportions still fit the new print area.
Create Print-On-Demand Mockups for Your Product Listing
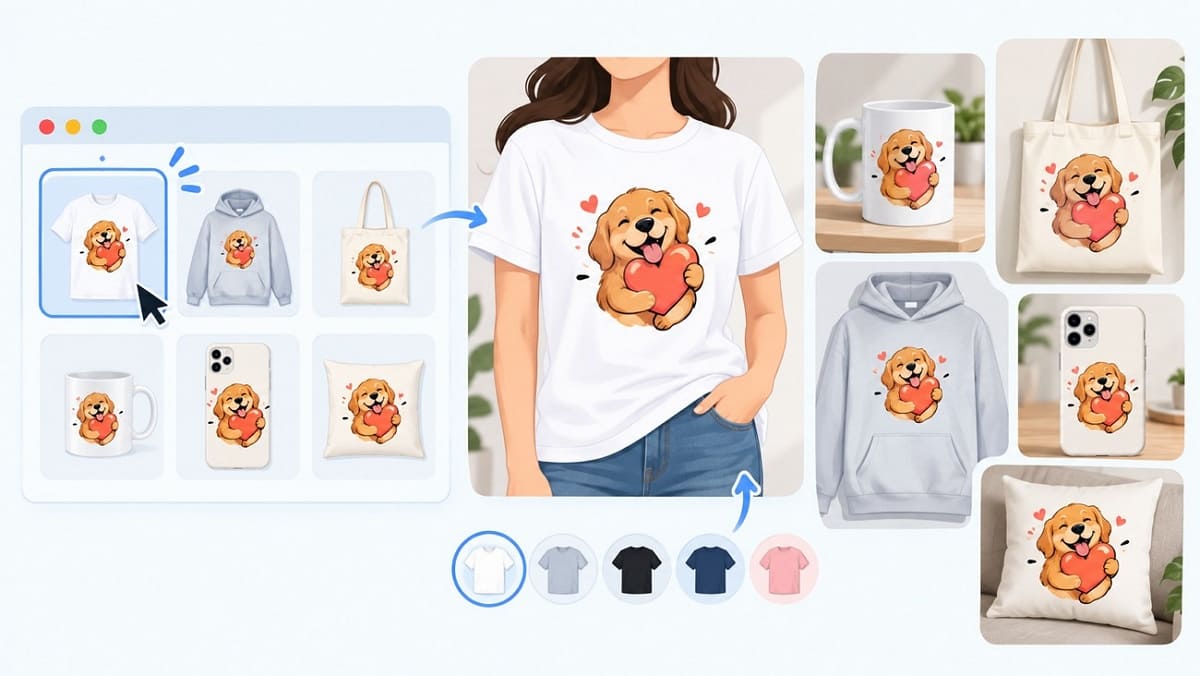
After adapting the design for each product, review how it looks in a realistic setting. A mockup shows the artwork on the selected item, helping you check it from a buyer’s perspective. It also gives shoppers a clearer view of the expected product appearance while creating more accurate AI print-on-demand previews.
1. Select a Mockup That Matches the Product
A mockup should closely match the product you plan to sell, including its type, color, shape, and overall appearance. Using a premium heavyweight T-shirt mockup for a lighter garment can create unrealistic buyer expectations. Avoid images that make the design appear larger, sharper, or better positioned than the final print. Accurate print-on-demand mockups support final design review while giving shoppers a realistic product preview
2. Check Placement, Scale, and Visibility
Mockups can reveal problems that are difficult to spot in the original design file. Review the product preview carefully and check for these common issues:
· The design sits too high or too low.
· Text becomes difficult to read at the placed size.
· The product color reduces the design’s contrast.
· Parts of the artwork appear cropped or distorted.
· The overall design scale looks unsuitable for the product.
When the mockup reveals a problem, correct the design file itself. Adjusting only the listing image leaves the printed product unchanged and can disappoint buyers, which is exactly what the final mockup review is meant to prevent.
3. Prepare Mockups for the Product Listing
Once the design passes the final review, prepare mockups that clearly present the product and artwork. Start with a clean product view where shoppers can easily see the design, placement, and scale. Add lifestyle or detail views for more context, but make sure every image accurately represents the product customers can expect to receive.
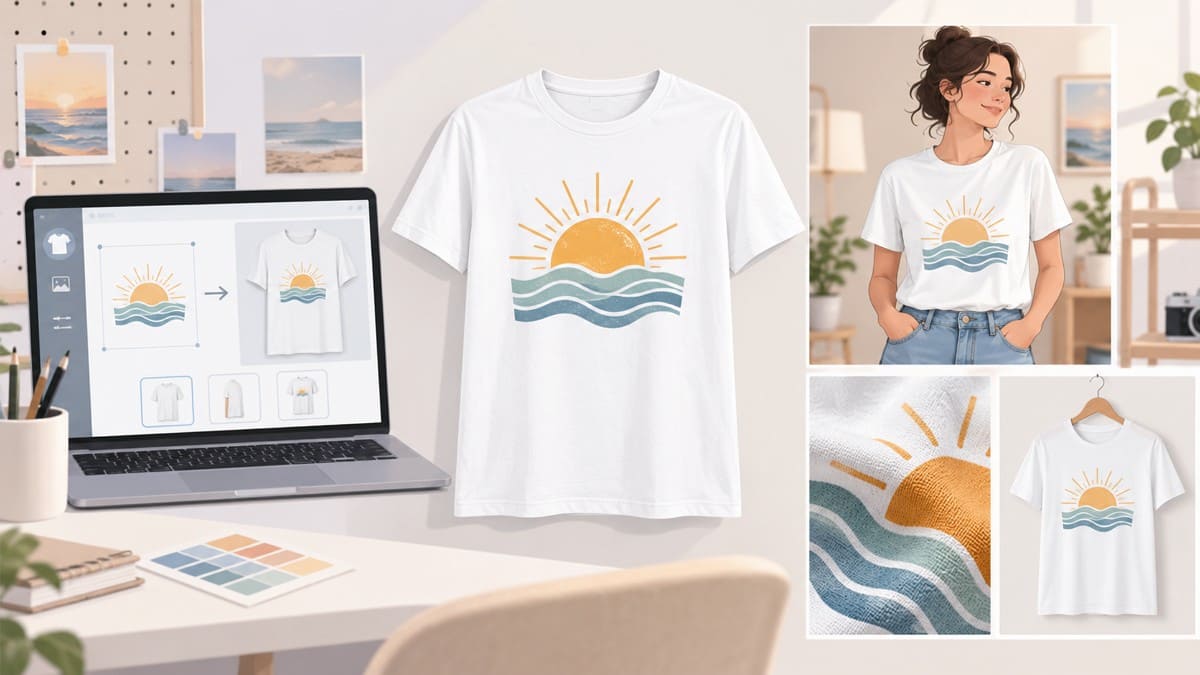
Once the print file is ready, use Designkit’s print-on-demand mockup generator to place the artwork on the selected product. Review the final preview against the file you plan to send to your POD provider, checking that the design’s size, position, colors, and overall appearance remain consistent.
Conclusion
Strong print-on-demand designs require more than appealing artwork. Start with the right product and audience, refine the artwork, and prepare the file according to your provider’s requirements. Follow the specifications for each item and adapt successful designs deliberately rather than applying the same version across different products.
Finish by reviewing placement, scale, contrast, and overall appearance through a realistic mockup. Following this workflow helps turn an initial idea into artwork prepared for the selected product. When you are ready, create your product design in Designkit and prepare a matching mockup for the final review.
Frequently Asked Questions
What file format is best for print-on-demand designs?
Do print-on-demand designs always need to be 300 DPI?
No. High resolution is important, but 300 DPI is not a universal requirement. Some products, especially larger items, may support lower resolutions. Follow the pixel dimensions and resolution your provider recommends for the specific product you are selling.
What size should a print-on-demand design be?
There is no universal size for a print-on-demand design. The right dimensions depend on the product, available print area, and provider’s template. Use the template for your selected product as the starting point. For apparel-specific dimensions and positioning, see our T-shirt design size and placement guide.
Can I use the same design on different products?
Yes, but the design may need adjustments for each product. Different print areas and proportions often require resizing, repositioning, or rearranging the artwork. Save each adapted version separately to keep the original design intact for future use.
Do I need professional design skills to create POD designs?
No. You can create effective POD designs with simple layouts, typography, and basic artwork. Focus on composition, readability at the intended print size, file quality, and your provider’s requirements before preparing the design for sale.
Do I need mockups for print-on-demand products?
Mockups are strongly recommended because they help identify placement, scale, and visibility issues before production. They also give shoppers a clearer idea of how the design may look on the finished product.
You May Also Like
Amazon A+ Content Dimensions: Module Image Sizes
Print-On-Demand Designs: Create, Prepare, and Preview Your Work
Amazon A+ Content: What It Is and What to Build First
Is Print on Demand Profitable in 2026? Products and Niches
Amazon Brand Registry Application: How to Submit and Pass Review
How to Ship to Amazon FBA: Your First Shipment
What Is Amazon FBA? Should Beginners Use It in 2026

How to Get Ungated on Amazon: Restricted Category Approval Steps
Amazon Backend Keywords: Title, Bullets & Search Terms
What Is A/B Testing? A Practical Guide to Running Better Experiments
Best Time to Post on Instagram in 2026: Data & Tips
How to Get Verified on Instagram: Complete Guide

TikTok Monetization in 2026: Requirements & Ways to Earn

Instagram Desktop Posting Guide: Upload Posts, Stories & Reels

YouTube Shorts Monetization Requirements & Rules 2026
How Much Does YouTube Pay Per View? 1K, 100K & 1M Views

How to Make Money on Snapchat: 7 Ways to Earn
How to Get More Followers on Instagram in 2026

Best Time to Post on TikTok in 2026 for More Views
How to Repost on Instagram in 2026: A Simple Guide
Multichannel Marketing Guide: Strategy, Tools & Examples
How to Create Digital Products That Sell in 2026
Cyber Monday Marketing Ideas & Strategies (2026 Guide)
Black Friday Marketing Ideas for Ecommerce Brands (2026)
Instagram Marketing Guide: Strategies, Tips & AI Tools in 2026
Influencer Marketing Guide: Strategy, Campaigns & Creator Tips

15 Best Things to Sell on Etsy in 2026 (Listing Tips Included)
WooCommerce vs Shopify 2026: Pricing, Features & Which Is Better
How to Sell on Facebook Marketplace: Beginner Guide (2026)
How to Use Pinterest for Business: Strategy, Tips & Growth Guide
How to Sell on Etsy in 2026: Setup, Listings & Growth Tips
What Is a Target Audience? Types, Examples & How to Find Yours
TikTok Marketing Guide 2026: Strategies, Ideas & AI Tools
Vibe Marketing Explained: Strategy, Examples & AI Tools
How to Sell on Depop: Beginner Guide to Getting Your First Sale
Online Advertising Guide: Types, Costs & Examples (2026)

Facebook Advertising Guide: Costs, Strategy & Tools 2026
What Are E-commerce Ads? Examples, Strategy & Tools (2026)
Where to Sell Handmade Items Online (2026): Etsy, Amazon, or Shopify?
Shopify vs Amazon (2026): Brand Store or Marketplace FBA?
Amazon Handmade vs Etsy (2026): Which Is Better for Makers?
Etsy vs eBay (2026): Handmade, Vintage, or Secondhand?
Selling on Amazon vs eBay (2026): Fees, Profit & Where to Sell
What Is Brand Awareness? Examples, Strategies & Tools 2026

10 Best Online Selling Platforms (2026): Pick by What You Sell
Shopify vs Etsy (2026): Which Is Better for Handmade Sellers?
YouTube Automation Step-by-Step AI Guide for Beginners
What Is Brand Identity? Examples, Elements & Strategy

AI Marketing Agent: How It Works, Benefits & E-Commerce Examples
What Is Personalized Advertising? Examples & How It Works
How to Build a Shopify Store That Actually Converts Visitors

Amazon Marketing Guide 2026: Strategies, Tips & Tools
Local Advertising: Strategies, Examples & Tools (2026)
What Is Branded Content? Examples, Strategy & Tools 2026

What Is Performance Marketing? Strategies & Examples 2026

Inbound Marketing: Strategies, Examples & Tools (2026)
Create Print-On-Demand Designs in Designkit
Generate a merchandise concept from your brief, refine the artwork for print size and contrast, then preview it on a product mockup before you upload to your POD provider.
