
Facebook Event Creation Guide: Setup, Tips & Cover Photos
Create and manage Facebook Events with confidence. Follow the setup process, optimize event details, and design eye-catching cover photos that help your event stand out.

If you want to pull people together in 2026, dropping a regular post on your timeline just does not cut it anymore. A dedicated event page gives your guests one specific place to find out where to go, what time to show up, and how to RSVP. Creating a Facebook Event is a simple way to organize online gatherings, local activities, business events, and community discussions. Whether you plan on hosting a small local meetup or a massive virtual product launch, the platform handles all the heavy lifting for you. This guide shows you exactly how to make an event on Facebook step by step. We will cover how to customize your settings, avoid common mistakes, and design cover photos that actually make people want to click and attend.
Key Takeaways
-
You can set up your gathering from a personal account, a business Page, or a Group. It all depends on who you want to invite.
-
Getting the details right matters. Accurate locations, the correct privacy settings, and an attractive cover image keep things running smoothly.
-
The platform handles in-person parties, virtual online broadcasts, and even recurring weekly schedules.
-
Adding co-hosts and managing your permissions helps take the stress off your plate while improving your reach.
-
A professional event cover photo builds trust. It is the first thing people see, so a great design encourages more RSVPs.
What Is a Facebook Event?
Think of it as a digital landing page built entirely inside the social network. It acts as an interactive invitation where you can share dates, times, and location details. Guests use the page to lock in their attendance and chat with other attendees in the discussion thread. Nailing your Facebook event creation means you get access to a tool that tracks your guest list and sends out automatic reminders without any extra effort on your part.
Why Create a Facebook Event?
Standard timeline posts disappear into the feed within a few hours. A dedicated page sticks around. When someone marks themselves as "Interested" or "Going," the platform actively reminds them about your gathering as the date gets closer. It also centralizes all your updates. If a venue changes at the last minute, you only have to update one page to notify your entire guest list. Plus, public events show up in local search results so you can attract people completely outside of your current network.
Who Can Create a Facebook Event?
Pretty much anyone with an active account can start organizing. The specific tools you get just depend on the type of profile you use.
Personal accounts
Regular user profiles work best for birthdays, private dinners, or casual local meetups. When you decide to create an event on Facebook from your personal profile, you get complete control over the guest list. You can keep things entirely hidden or open the doors to the public.
Facebook Pages
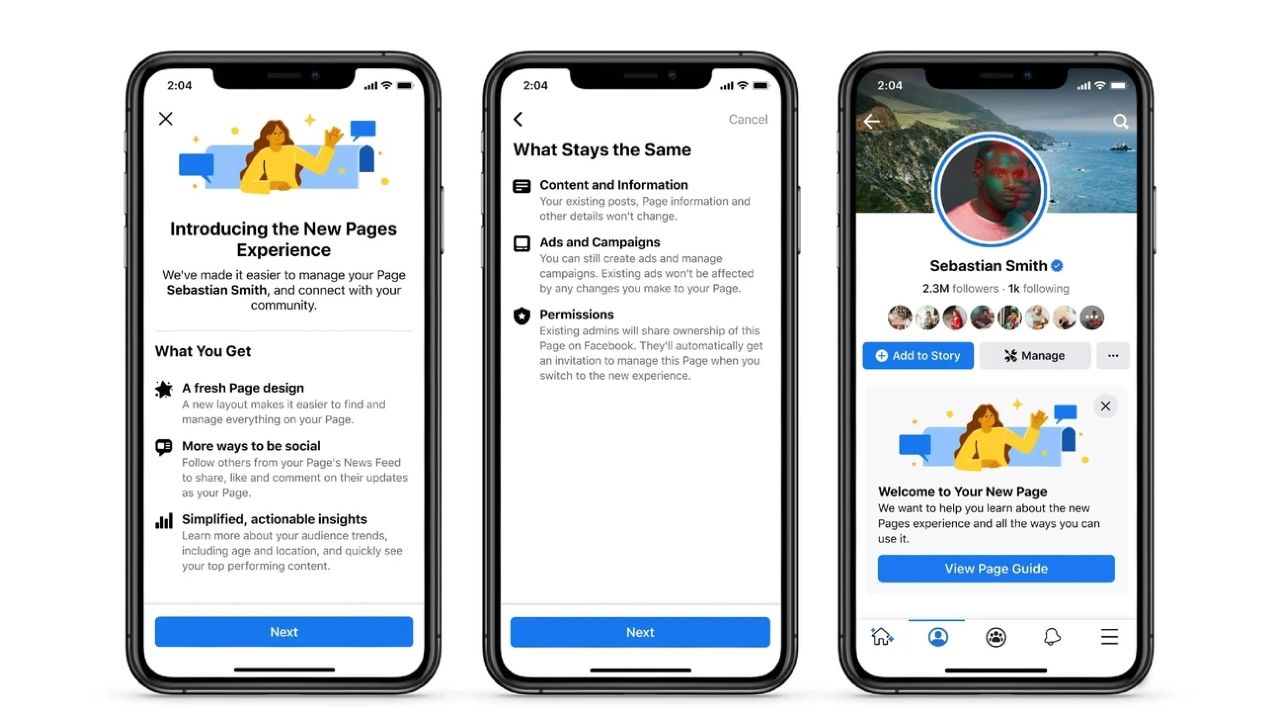
Businesses and brands rely on Pages to host professional functions. Just keep in mind that gatherings hosted by a Page are always public. This makes it the perfect option for store openings, brand webinars, and product launches where your main goal is getting as many eyes on the page as possible.
Source: Facebook
Facebook Groups
Community leaders use Groups to organize activities specifically for their own members. The privacy defaults to whatever the Group settings are. This allows private communities to host exclusive digital or physical meetups without leaking the details to the general public.
How to Make an Event on Facebook Step by Step
The setup process changes slightly depending on whether you are at your computer or using your phone. Follow these directions to get your page live.
On desktop (personal profile)
-
Log in and find the left side menu on your home feed.
-
Click Events .
-
Click the Create New Event button.
-
Choose either In Person or Online for your format.
-
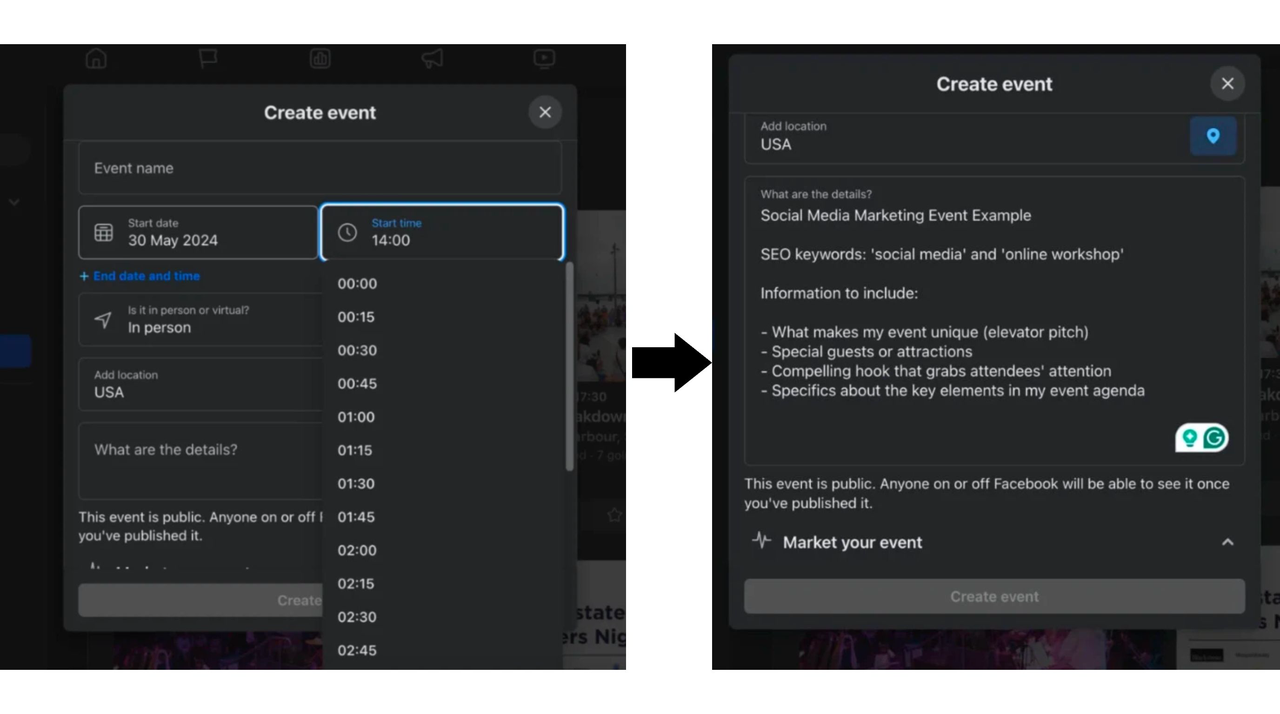
Type in the core details like your event name, date, time, and description.
-
Click the privacy dropdown menu. Choose your privacy carefully right now, because Facebook does not let you switch between public and private after you hit publish.
-
Upload your custom cover photo so the page looks finished.
-
Click Publish to complete the setup. That is exactly how to create a Facebook event from your computer.
On the Facebook mobile app
-
Open up the app on your phone and tap your Menu icon.
-
Tap the Events shortcut.
-
Tap Create near the top of the screen.
-
Pick whether the gathering is In Person or Online .
-
Fill out the text boxes with your dates and location details.
-
Set your privacy level. Just like on desktop, choose privacy carefully before you tap Create because Facebook does not let you switch it later.
-
Upload a cover photo straight from your phone gallery.
-
Tap Publish to launch the page.
From a Facebook Page
-
Open your business Page.
-
Click the Events tab located right under your main cover photo.
-
Click Create Event .
-
Select your format (either In Person or Online ).
-
Add your location, time, description, and any ticketing links. Keep in mind that Page-hosted events automatically default to public visibility.
-
Upload a branded cover photo.
-
Click Publish . If you are figuring out how to post an event in Facebook to reach the most people, doing it through a Page gives you the best organic reach.
From a Facebook Group
-
Go to your community Group.
-
Click the Events tab in the main group navigation menu.
-
Click Create Event .
-
Choose In Person or Online .
-
Enter all the required information so your members know what is happening.
-
Verify the privacy setting. This automatically matches the overall privacy level of your Group. Choose privacy carefully before you click Create because Facebook does not let you switch this after publishing.
-
Upload a relevant cover photo.
-
Click Publish to send an alert to your group members.
Facebook Event Settings You Should Customize Before Publishing
Setting up the basic page is just the start. You need to optimize the backend settings to make sure your attendees have a great experience.
Optimize Your Event Description
Tell people exactly what they are walking into. Break down the schedule, mention any specific dress codes, and clarify the parking situation if you are meeting up in person. Use short paragraphs so the text stays easy to read on mobile phones.
Choose the Right Privacy Settings
Privacy controls who gets to see your gathering and who can invite their friends. A private setting locks the page down to invited guests only. A public setting lets anyone discover the page through search. You absolutely must lock this choice in early because the platform restricts you from changing it later.
Add Co-hosts and Manage Permissions
If you are working with other brands, adding co-hosts saves you a ton of time. Go to the event settings and use the co-host search bar to add your partners. Co-hosts can edit the details, invite their own audience, and answer questions in the discussion thread.
Add Registration or Ticket Information
Hosting a paid workshop requires a clear path for users to buy a ticket. Look for the ticketing section in the setup menu and paste the URL to your external registration page. This adds a highly visible button right at the top of your layout.
Create a Strong Event Cover Photo
The header graphic is the very first thing people judge. A bad image crops out your important text and makes the whole page look a bit spammy.
|
Specification |
Dimension / Details |
|---|---|
|
Recommended upload |
1920 × 1005 px (≈1.91:1) |
|
Minimum viable |
1200 × 628 px |
|
Center safe zone |
Keep title/date/logo centered (mobile screens crop the sides) |
Note: Always preview the cover photo on a mobile device before clicking publish to ensure critical information isn't cropped. If your starting image is the wrong size, you can easily resize image files to fit these exact dimensions before uploading.
Create Better Facebook Event Cover Photos With Designkit
A well-designed cover photo helps your Facebook Event make a stronger first impression. After setting up the event details, the next step is creating a visual that clearly communicates the theme and attracts attention. Designkit helps you create Facebook Event cover photos by generating, editing, and enhancing visuals based on your ideas or existing images. You can adjust styles, layouts, and image elements to create a cover that matches your event needs.
How to Create a Facebook Event Cover Photo With Designkit in 3 Steps
Designkit helps simplify content creation by combining visual design and AI-assisted copy creation in one workflow. You can start with a simple idea, then create ready-to-publish visuals that match your specific goal.
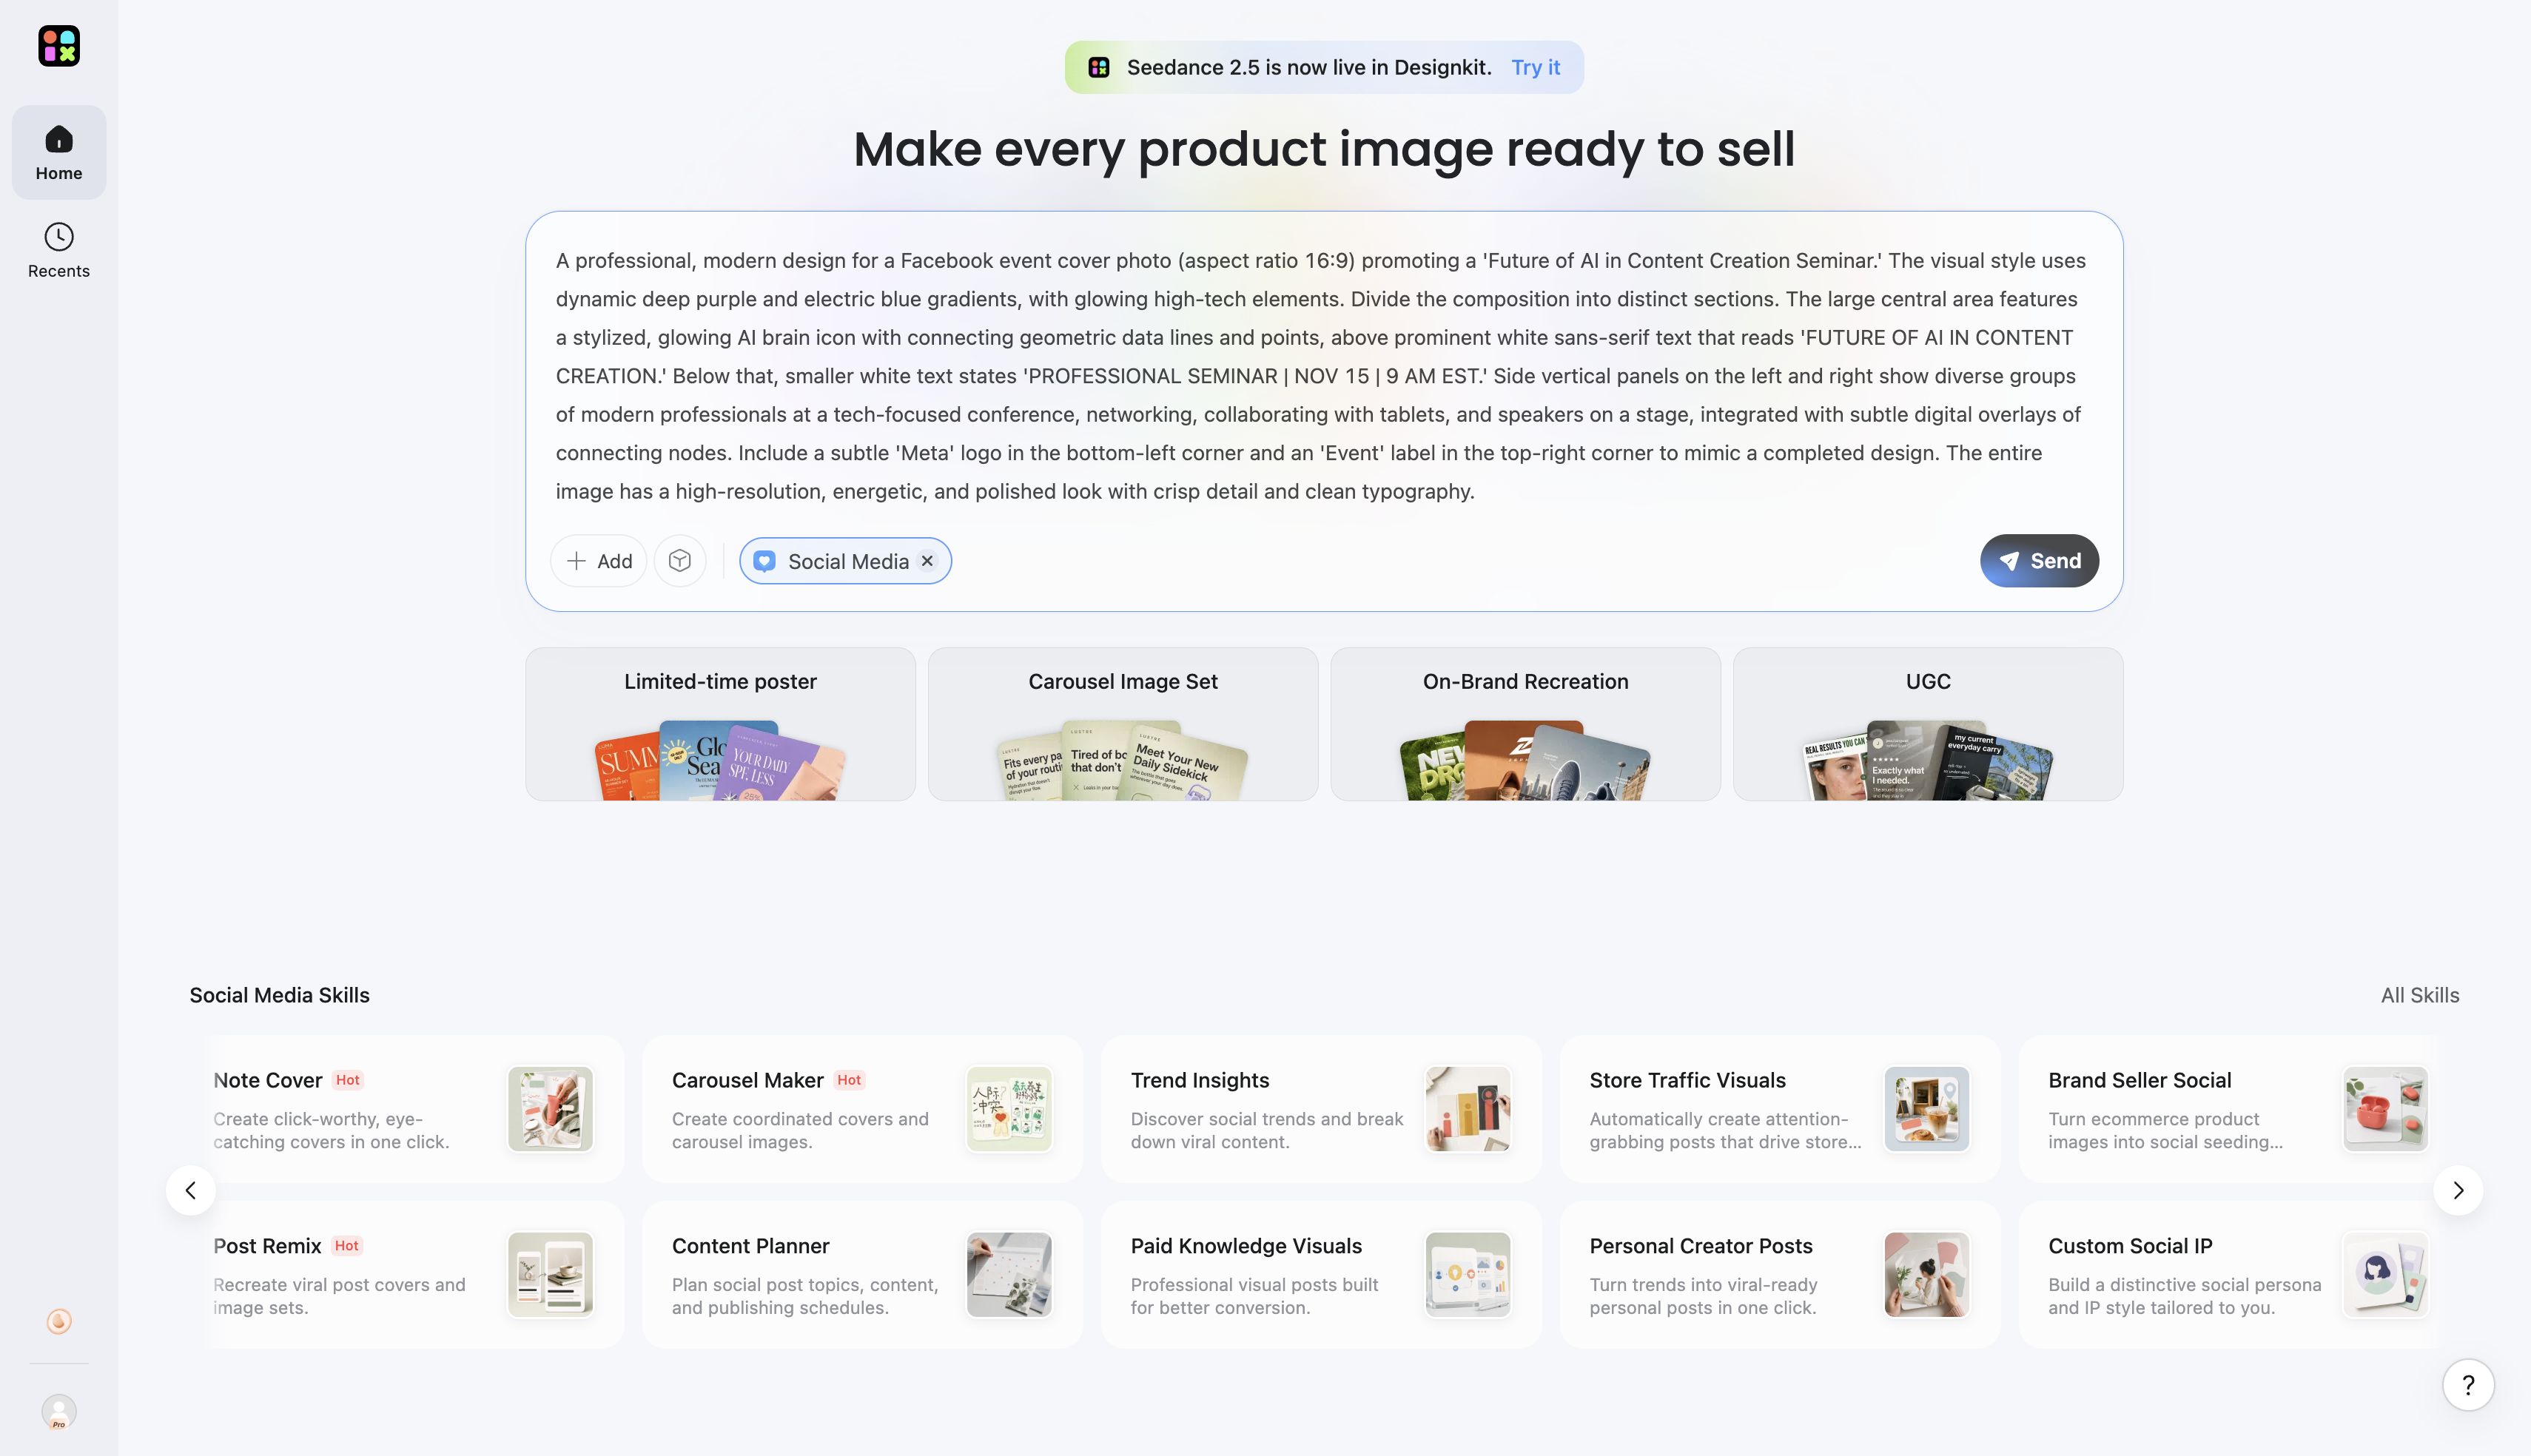
Step 1: Upload Your Image or Describe Your Event Idea
On the main Designkit dashboard, click the Social Media button below the central prompt box. Choose a quick layout style or browse tailored workflows. Then, upload an optional reference image via + Add , type your event cover concept into the prompt box, and click Send .
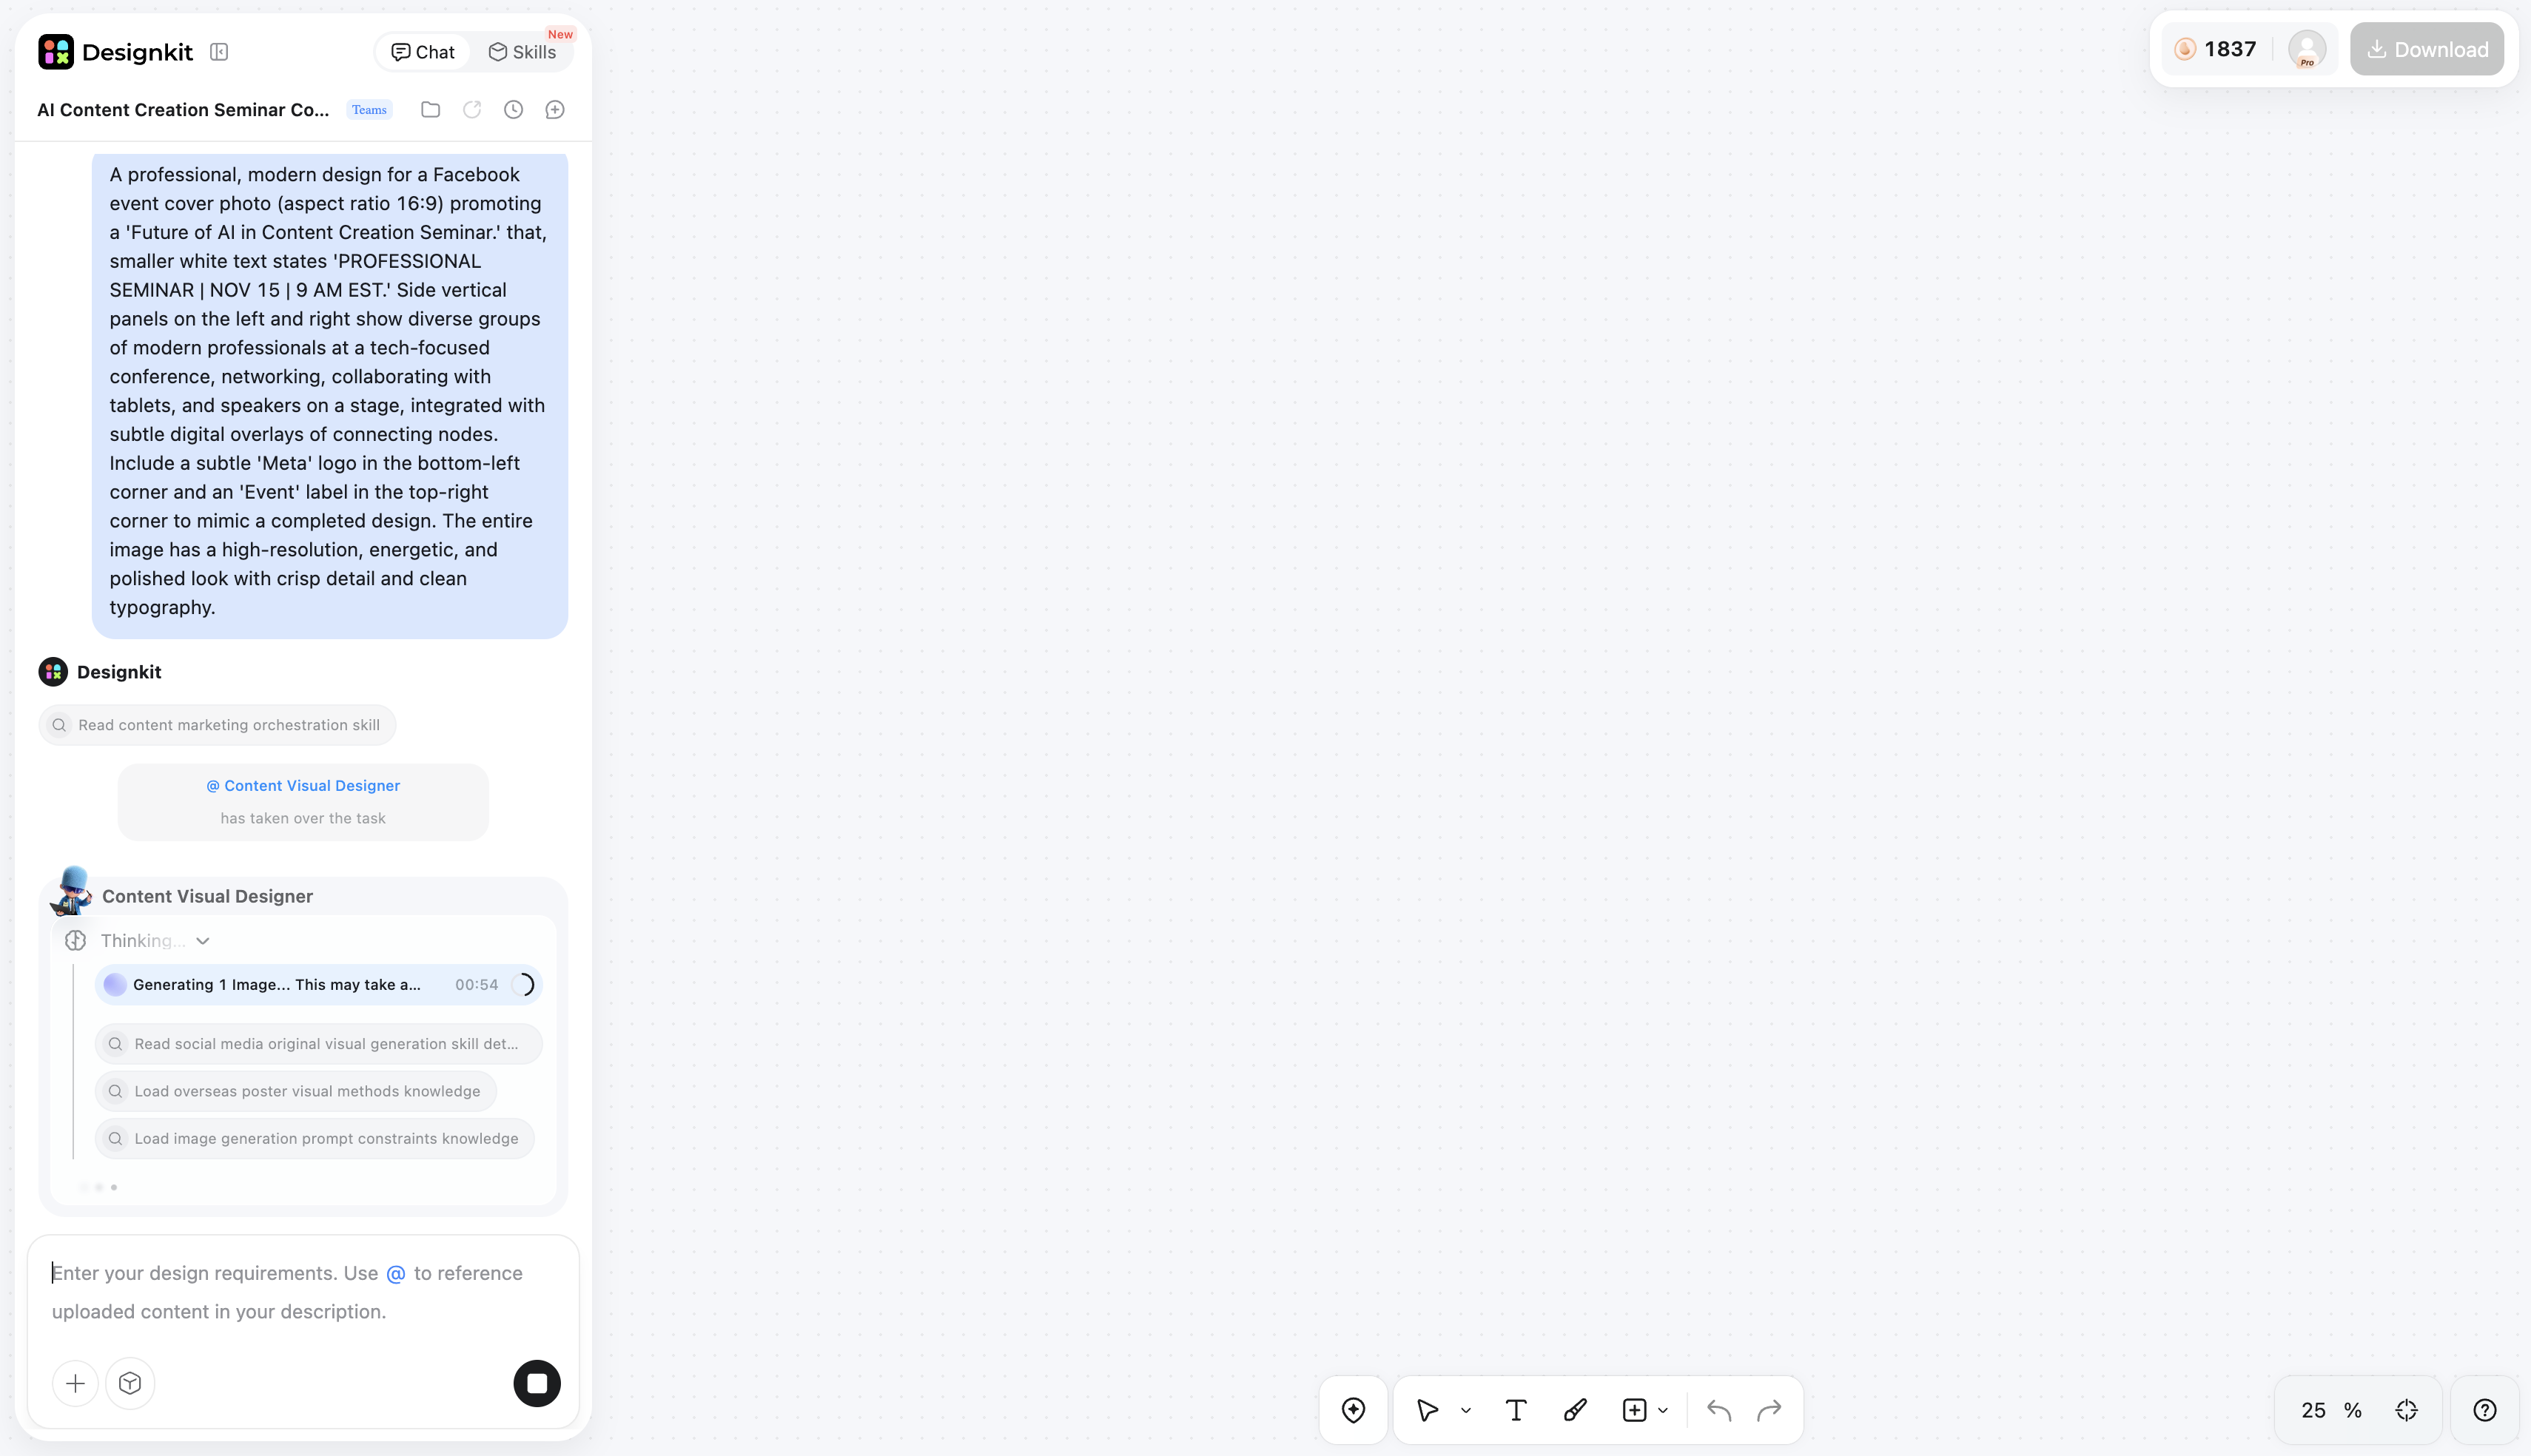
Step 2: Customize Your Visual Style
Create social media copy and visual concepts for your layout, based on the same creative direction. Try different layouts, messages, and creative approaches, and then review the visuals and copy together so you can hone them to convey the same idea.
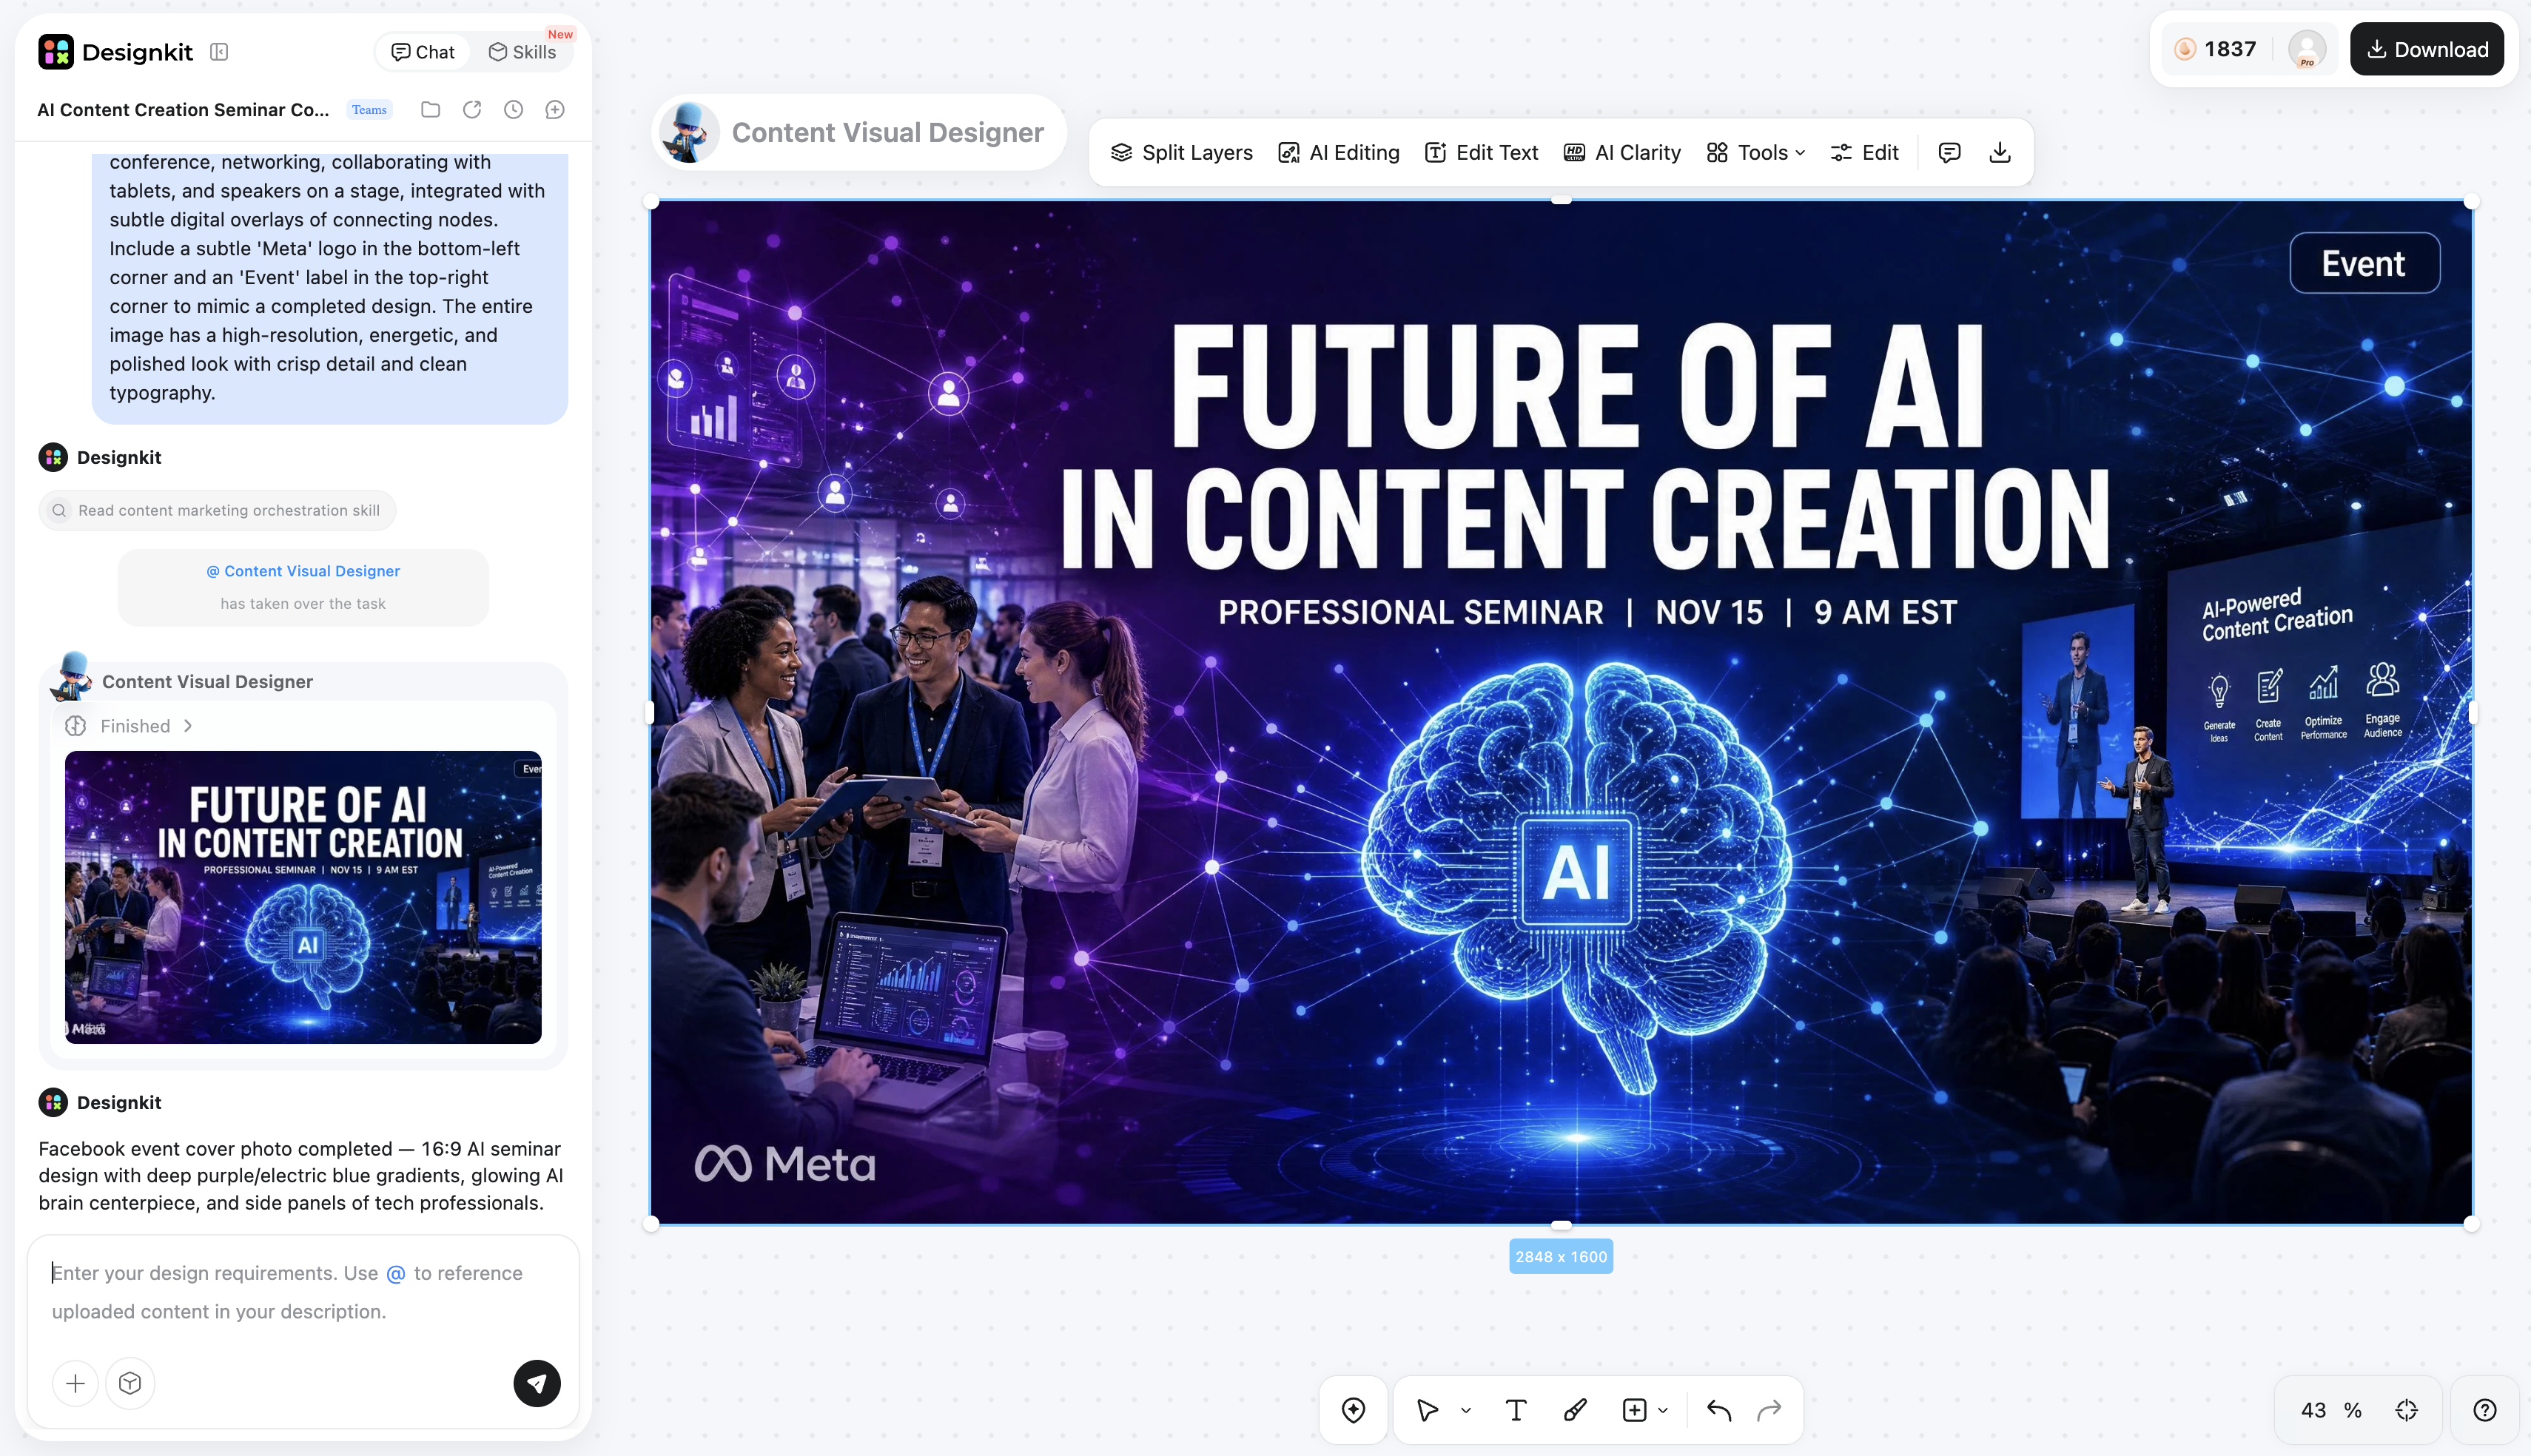
Step 3: Review and Export Your Event Cover
Review the complete post and make adjustments to the design, branding, imagery, and text as needed. If you need to tweak the typography, you can use the image text editor to get the fonts exactly right. Compare different versions and select the creative that best fits your message, then export the finished creative for use on your page.
Create a Facebook Event Cover Photo Free
How Designkit Helps Create Facebook Event Covers
Getting the graphics right usually takes up the most time. Here is how specialized tools speed up the entire workflow.
Generate Event Visual Ideas Quickly
Staring at a blank canvas wastes time. By using an event poster generator , you can feed it a few keywords and get multiple structured layout ideas back in seconds.
Create Platform-Friendly Designs
Social media platforms are notoriously strict about ratios. Design tools automatically apply the correct center-safe zones so your logos and text never get cropped out on a mobile screen.
Enhance Existing Event Images
If you already have great photos from last year's meetup, you can clean them up. Upscale the resolution, fix the lighting, and drop out messy backgrounds to create a fresh cover photo for this year.
Maintain Consistent Branding
Keeping your colors and fonts consistent builds trust. Saving your brand assets in a dedicated workspace ensures every graphic you produce aligns with your corporate identity.
Tips to Get More People to See Your Facebook Event
Once the page is live, your next priority is getting people to actually show up.
Share Your Event in Relevant Communities
Do not just post the link on your own timeline and call it a day. Drop the link into local community Groups where promotional posts are allowed. This gets your gathering in front of a highly targeted local audience.
Invite the Right Audience
Do not spam your entire friends list. Curate your invitations. A smaller list of people who actually RSVP "Going" signals to the platform that your page is relevant. This can actually boost your organic reach.
Post Updates Before the Event
Keep the energy high in the discussion tab. Post some behind-the-scenes setup photos or run a quick poll. Every time you post, the platform notifies your attendees.
Use Visual Content to Improve Engagement
Plain text announcements get scrolled past. Pair your updates with fun graphics. You can use a social media poster generator to create quick countdown graphics that maintain excitement in the days leading up to the gathering.
Common Facebook Event Problems and How to Fix Them
Even when things seem straightforward, you might hit a few bumps. Here is how to fix the most frequent issues.
Unable to Create a Facebook Event
If the button is grayed out, check your permissions. Group members often need admin approval to create things. If you are on a Page, make sure you actually have editor or admin access in the business settings.
Low Visibility After Publishing a Facebook Event
If nobody is seeing your page, double-check your privacy settings. It needs to be Public for organic discovery. Make sure you added a clear location so the local search algorithm knows where to rank you.
Blurry or Low-Quality Facebook Event Cover Photos
Blur happens when you upload a tiny file and the platform stretches it to fit. Always start with a canvas sized at 1920 by 1005 pixels. Export a high-quality file before you upload it.
Event Not Appearing in Facebook Search
Sometimes it takes a few hours for a brand new page to show up in search results. Make sure your title uses clear, searchable words. If you try to make an event Facebook searchers can find, avoid using obscure inside jokes in the title.
Final Thoughts
A packed room starts with a solid foundation. Lock in your exact location and double-check those privacy options before publishing. The platform itself is great at handling all the automated reminders, but getting people to commit requires a bit of convincing. A great visual header is your best tool for earning those RSVPs. A polished header image makes a massive difference here. Designkit helps you build professional graphics at the correct sizes instantly, freeing up your schedule to focus on hosting instead of tweaking layouts.
Frequently Asked Questions
Why can't I create an event on Facebook?
Can I create a Facebook event without a business page?
Yes, you certainly can. Any user can organize a gathering straight from their personal profile. If you want to know how to create a Facebook event for a private birthday or casual local meetup, your standard account is all you need.
Can I change a Facebook event after publishing it?
You can edit the time, description, and cover photo anytime. But you cannot change the privacy setting from Private to Public once the page goes live.
How do I add a co-host to a Facebook event?
Go to your event page, click Edit, and scroll to the Options area. Search for your friend or partner Page in the co-host bar and save the changes.
What size should a Facebook event cover photo be?
Aim for 1920 by 1005 pixels. Using Designkit makes it easy to start with these exact dimensions so your graphics never get cropped awkwardly on mobile phones.
How do I make my Facebook event private?
While you are filling out the details, click the privacy dropdown and choose Private. You have to do this before hitting publish.
Can I create a Facebook event from my phone and edit it on desktop?
Yes, everything syncs perfectly. You can figure out how to create an event on Facebook using the mobile app and then clean up the text description later on your laptop.
You May Also Like

25 Facebook Cover Photo Ideas for Personal & Business Pages
Facebook Advertising Guide: Costs, Strategy & Tools 2026

How to Make a Slideshow for Facebook: Photos, Music & Tips 2026
How to Sell on Facebook Marketplace: Beginner Guide (2026)
Design My Next Facebook Event Cover Today
Transform simple ideas or existing images into polished Facebook Event covers with Designkit. Customize layouts, styles, and visuals without starting from scratch.
