

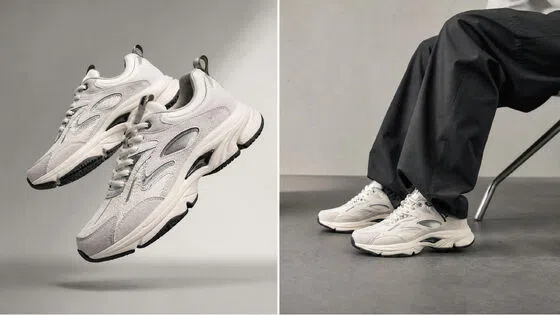
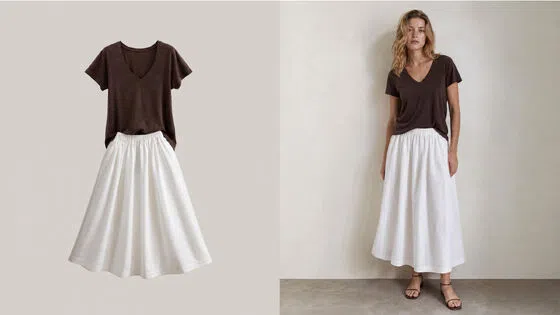
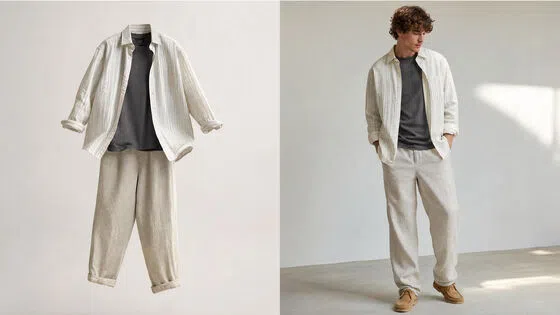
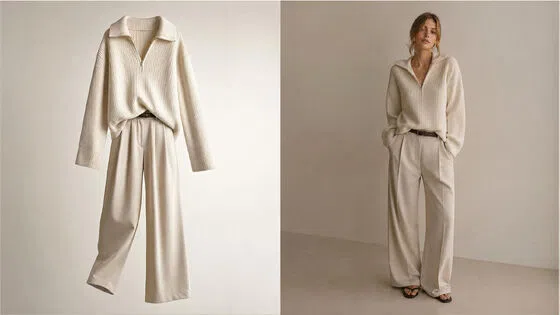
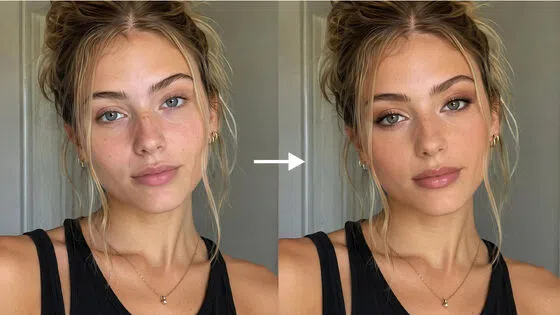
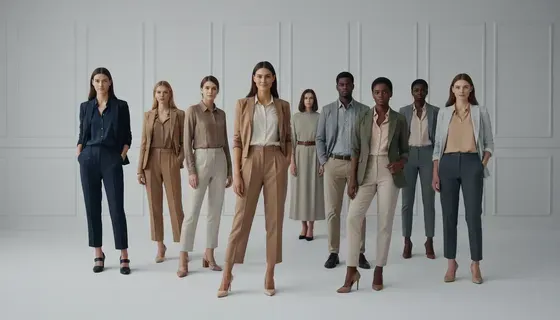
Creating visuals to convert involves more than just nice pictures in modern ecommerce. Brands are required to create an organized system to bridge the gap between creativity and quantifiable business results. That is where lifestyle product photography becomes essential for storytelling and persuasion. It shows products in real contexts to help shoppers imagine everyday usage scenarios clearly.
According to Shopify research, quality product images increase conversion rates significantly for ecommerce stores. However, without a repeatable workflow, teams often face inconsistent quality and frequent reshoots. Thus, this guide provides a complete system from planning to publishing and testing images.
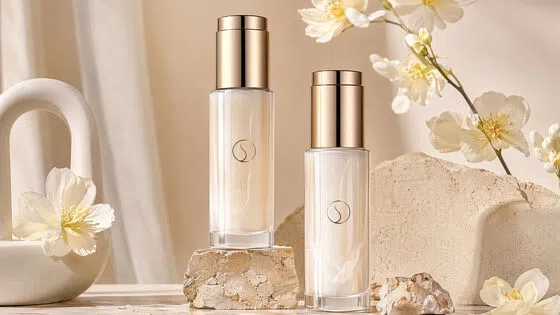
Part 1. What is Lifestyle Product Photography?
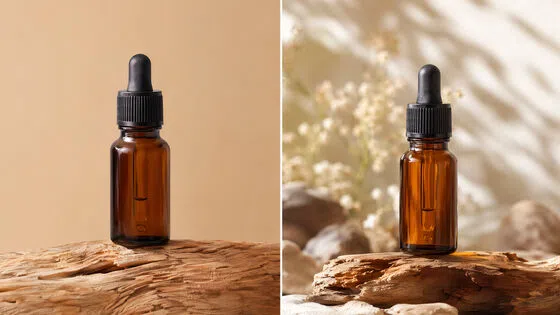
Professional lifestyle product photography is the way to capture your products in a realistic and relatable context. As one of the key lifestyle product photography trends, it is based on the idea of storytelling to help customers imagine real usage situations and everyday experiences. Unlike studio shots, it builds emotional connection while maintaining clarity and strong brand consistency. Moreover, good images balance conversion intent and accurately represent the actual product.

1.1 Where Lifestyle Product Photography Works Best
To better understand its impact, consider the following use cases across channels:
1. PDP Persuasion Focus: Product detail pages benefit from visuals that emphasize real usage over technical details.
2. Ad Performance Driver: Paid ads use emotional storytelling in order to enhance the conversion and engagement rate.
3. Social Media Engagement: Visual content is 40 times more likely to get shared on social media platforms, according to HubSpot.
4. Email Conversion Support: Email campaigns use storytelling visuals to capture attention and improve conversion outcomes.
One case study showed a 40% increase in conversions after replacing plain shots with lifestyle photography.

1.2 Where Studio Images are Still Necessary
Despite its strengths, there are specific scenarios where studio images remain essential for compliance and clarity:
1. Compliance Categories: Regulated or sensitive products require strict accuracy and clear presentation.
2. Detail-Focused Products: Items with intricate textures or components need clarity studio shots for precision.
3. Platform Main Image Rules: Marketplace listings often require clean white background images for the primary display.
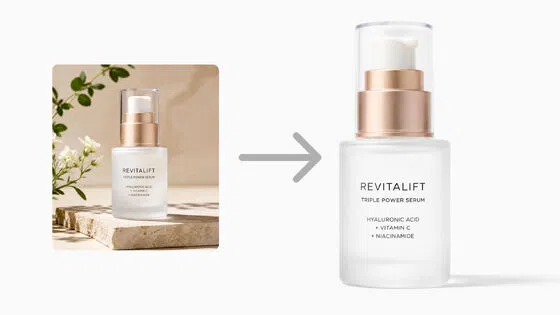
So, good product photography lifestyle balances total clarity with very authentic brand storytelling. However, you must maintain conversion intent while following strict platform image compliance rules. Later, you can combine real shots with AI-assisted variations for a better workflow.
1.3 Lifestyle vs Studio: Goals, Metrics, and Common Use Cases
Product and lifestyle photography serve different goals depending on channel and user intent. Studio images focus on clarity, while lifestyle images focus on desire and emotional engagement.
So, use the following decision table to prioritize your specific visual assets by channel:
|
Aspect |
Lifestyle Images |
Studio Images |
|
Goal |
Build desire and relatability |
Provide clarity and accuracy |
|
Metrics |
CTR, engagement, ROAS |
Conversion rate, trust |
|
Amazon Use |
Secondary images, A+ modules |
Main image requirement |
|
DTC Use |
Hero banners, ads, storytelling |
Product detail support |
According to Skywall Photography, product pages that combine lifestyle and studio images achieve roughly a 30% higher conversion rate.
1.4 Mistakes That Make Lifestyle Product Photos Look Fake
Many lifestyle product photos fail when visual appeal outweighs clarity and real product communication. To improve results, you must identify key issues before applying structured fixes consistently:
1. Overpowering Props Issue: Props dominate the frame, reducing product visibility and distracting viewer attention significantly.
2. Story Mismatch Problem: Environment and usage context fail to align with the actual product purpose clearly.
3. Color Temperature Conflict: Mixed lighting tones create unrealistic colors and inconsistent visual presentation across images.
4. Harsh Lighting Effect: Strong shadows or reflections reduce clarity and make products appear unnatural visually.
5. Unnatural Hand Positioning: Forced or awkward poses make product usage look unrealistic and less believable.

Fixes for Professional and Authentic Results
To correct these issues effectively, apply the following practical rules during every shoot:
1. Primary Focus Rule: Keep the product as the central subject with minimal supporting props included.
2. Context Alignment Rule: Match environment, lighting, and story with audience expectations and real use cases.
3. Color Consistency Rule: Maintain uniform color temperature across all images for visual harmony and accuracy.
4. Soft Lighting Rule: Utilize controlled lighting setups to create natural and effortless shadows.
5. Natural Interaction Rule: Guide hand models to show realistic and comfortable product usage positions.
These structured rules ensure lifestyle product photos remain authentic and consistent across platforms.
Part 2. Requirements for a Lifestyle Product Shoot
A successful lifestyle product shoot depends on strong planning before any camera setup begins. To avoid delays and reshoots, you must define structure and clear execution steps.
2.1 Core Requirements for a Lifestyle Product Shoot
To build a reliable system, focus on these essential pre-production components below:
1. Creative Brief Foundation: Define the audience, followed by the key product story direction clearly.
2. Budget Planning Strategy: Allocate resources based on DIY setups or professional production needs.
3. Team Structure Setup: Assign roles like photographer and editor for smooth workflow execution.
4. Asset Preparation Checklist: Gather product details, along with claims and compliance notes.

You can also use a pre-visualization tool to align creative direction before actual shooting begins. At this point, Designkit AI Image Generator helps with mock scene ideas and mood boards efficiently.
2.2 A Simple Creative Brief Template for Ecommerce Operators
You should use this structured template to guide your lifestyle photography product preparation to simplify planning:
1. Objective Definition: Clarify whether the goal is conversions or engagement improvement.
2. Target Audience Profile: Identify customer preferences and real-life usage expectations clearly.
3. Scene and Story Concept: Define setting and emotional tone supporting product storytelling.
4. Do and Don’t Guidelines: Specify restrictions for props and compliance requirements clearly.
5. Deliverables Specification: Define image sizes and platform-specific requirements upfront.
10 Pre-Shoot Questions Checklist
You should answer these important questions to avoid common workflow issues before starting production:
1. Audience Clarity Check: Who is the product designed for, and how will they use it?
2. Use Case Validation: What scenarios best represent product functionality and customer needs?
3. Visual Consistency Check: Does the concept align with brand identity and existing image assets?
4. Platform Compliance Check: Are all images aligned with marketplace rules and visual requirements?
5. Shot Coverage Review: Does the plan include all necessary angles, features, and storytelling visuals?
6. Resource Availability Check: Are all props, locations, and tools ready before the shoot begins?
7. Lighting Condition Plan: Will natural or artificial lighting best support the desired visual outcome?
8. Editing Style Decision: What color tone and finishing style will maintain consistency across images?
9. Timeline Feasibility Check: Can all steps be completed within the planned production schedule?
10. Risk Assessment Review: What potential issues could delay production, and how can they be prevented?
2.3 Gear Checklist: Phone vs Camera
The best gear for product photography and lifestyle photography depends on your specific goals and budget. Beginners can achieve impressive results using a modern smartphone and consistent natural window light.
Thus, the following table compares different gear tiers to help you choose the right setup:
|
Setup Tier |
Core Gear |
Must-Haves |
Lens Guide |
Key Focus |
|
Starter |
Phone + window light |
Tripod, reflector, clean background |
Built-in/portrait mode |
Light consistency over expensive gear |
|
Entry |
Entry camera + basic lighting |
Tripod, diffuser, softbox |
35mm / 50mm |
Controlled lighting and stable setup |
|
Pro |
Advanced camera + studio lights |
Tripod, multiple lights, flags |
50mm / 85mm |
Consistency and workflow efficiency |
Apart from that, always remember that lighting and consistency are more important than an expensive camera body.
Part 3. Lifestyle Product Photography Workflow
A professional lifestyle product photography workflow requires a very structured and repeatable standard procedure. You must build your shot list first before moving into the set design phase. Next, establish your lighting setup before you begin the actual shooting process for assets. The post-production phase involves careful editing to maintain total visual consistency across every frame. You should later publish and test your images in order to identify the performing variants.

Step 1: Build a Conversion-focused Shot List
Mapping your technical features to specific scenes is essential for every lifestyle product shoot. It ensures every image answers a specific buyer question and supports conversion decisions.
The following table outlines the minimum viable shot set for a successful product launch:
|
Shot Type |
Purpose |
Channel Priority |
|
Hero Scene |
Establish emotional context |
DTC hero, Amazon slot 3 |
|
In-use Action |
Show genuine functionality |
Social ads, PDP secondary |
|
Scale Reference |
Demonstrate realistic size |
Amazon slots 4-5 |
|
Detail Closeup |
Highlight materials, texture |
All channels detail |
|
Bundle Display |
Clarify included items |
Amazon slot 6 |
|
Unboxing Moment |
Set delivery expectations |
Email, social proof |
|
UGC-style Candid |
Build social authenticity |
Instagram, TikTok ads |
Building an expanded set of lifestyle product photos supports your paid social media advertisements. Yet, channel-specific variants for Amazon and DTC platforms ensure that your visuals perform very well.
Step 2: Set Design and Props
In addition, set design plays a critical role in making visuals look authentic. To maintain balance and clarity, follow these structured styling rules carefully:
1. Story Alignment Rule: Choose props that clearly support the product use case and narrative.
2. Minimalism Rule: Limit prop quantity to avoid distractions and maintain product visibility.
3. Color Harmony Rule: Match prop colors with the brand palette for a consistent visual identity.
4. Layering Rule: Use foreground and even background elements to add depth naturally.
5. Compliance Rule: Avoid branded or trademarked props that may create legal or platform issues.
Besides the above, use this quick prop selection checklist to simplify decisions:
|
Criteria |
Guiding Question |
Action |
|
Relevance |
Does this prop support the product story clearly? |
Keep only relevant items |
|
Visibility |
Does the product remain the main focus? |
Remove distracting elements |
|
Consistency |
Does it match brand colors and tone? |
Adjust styling if needed |
|
Simplicity |
Is the scene clear and uncluttered visually? |
Reduce unnecessary props |
Hence, proper set design ensures that your lifestyle product photography remains both beautiful and high-performing.
Step 3: Lighting Setups for Lifestyle Scenes
Mastering professional lifestyle product photography requires a very deep understanding of light behavior. Follow these 3 repeatable lighting recipes to ensure your visual assets remain consistent:
1. Window Light + Reflector: Position the product near a window and use foam board reflectors.
2. One-Softbox 45° + Fill: Place your main light at an angle and add a simple fill.
3. Two-Light Separation: Use a secondary light to separate the product from your scene background.

Moreover, consistent white balance control keeps lifestyle product photography clean and professional. You can also use black flags to block unwanted shadows and light spill. Furthermore, troubleshoot mixed color temperatures and specular highlights to maintain accurate, polished visuals.
Step 4: Composition and Angles that Sell
Strong visual hierarchy helps you direct the shopper's eye toward your primary product features. Apply the rule of 3rd to create balanced and engaging lifestyle photography product assets. Plus, you should choose specific camera angles that represent the actual product size very truthfully. So, review the following table to select the best angles for your ecommerce visual strategy:
|
Angle Type |
Best Use Case |
Benefit |
|
Eye-Level |
Standard hero scenes |
Creates a very natural and direct product connection. |
|
45-Degree |
Feature highlighting shots |
Shows depth and multiple sides of the product clearly. |
|
Flat Lay |
Social media bundles |
Organizes many items in a clean and graphic layout. |
|
Hero Close-up |
Material texture views |
Highlights premium quality and small technical product details. |
Beyond that, avoid wide-angle distortion by using longer lenses for every single lifestyle product photo session. In addition, keep important subjects away from the edges to ensure safe margins for mobile cropping.
Step 5: Post-production: Color, Cleanup, Resizing, and Consistency
According to Electro IQ, clear and sharp lifestyle product photography can drive 33% higher conversion rates versus low‑quality visuals. So, following a structured editing order also improves efficiency and maintains visual cohesion across images.
Post-Production Workflow Steps
Follow this specific sequence to ensure every frame remains sharp and visually balanced:
1. Cull Assets: Select only the best images from your shoot to avoid unnecessary work.
2. Base Corrections: Adjust exposure and contrast to create a balanced foundation for every shot.
3. Color Matching: Align every image to a consistent look using a custom preset or LUT.
4. Cleanup Phase: Remove distracting dust and distracting reflections to maintain a very high standard.
5. Final Export: Apply sharpening and noise reduction before exporting your final product files.

Platform-Specific Constraints:
To ensure compliance and optimal performance, follow recommended platform image sizes:
|
Platform |
Recommended Image Size |
Notes |
|
Amazon |
2000 x 2000 px |
Supports main image compliance and zoom functionality |
|
Meta Ads |
1080 x 1080 px |
Square format preferred for feeds and ads |
|
Google Shopping |
800 x 800 – 1200 x 1200 px |
High-resolution images for thumbnails and product detail |
Alongside this, effective file management includes clear naming conventions and organized folder structures for your team. Here, Designkit serves as a practical accelerator for background variations or specific scene iterations. Use its AI Product Photography Generator to quickly produce compliant and ready sets. Besides, the Amazon Listing Images Generator creates perfectly sized variants while maintaining quality.
Step 6: Upload and Test: Image Order, A/B Tests, and Refresh Cycles
Correct image ordering enhances conversion and improves performance for product and lifestyle photography. Moreover, testing variants allows teams to identify the performing visual assets for different channels.
Best Practices for Upload & Testing
Before implementing your images online, it’s essential to establish a structured upload and testing process.
1. Image Order: Arrange hero scene first, followed by functional, detail, and lifestyle shots.
2. A/B Testing: Compare hero shots, prop intensity, copy space, and cropping variations.
3. Refresh Cadence: Rotate or update images periodically to prevent creative fatigue.
4. Repurpose Assets: Use one shoot to produce multiple placements, sizes, and marketing visuals.

At this particular stage, Designkit can speed up the process by letting you generate multi-size variants for extensive testing cycles. Yet, emphasize a human review pass to ensure accuracy and compliance before final publishing.
Part 4. Tools for Product Photography Lifestyle Teams (2026)
A structured approach to lifestyle product photography helps your team scale visual assets effectively. Below, you will explore a few categorized tool stacks for product photography:
1. Planning/Organization: Use Notion or Google Sheets for detailed project management and tracking.
2. Visual Direction: Pinterest serves as a perfect platform for building mood boards and finding inspiration.
3. Color Management: Use Coolors to create a consistent color palette aligned with your brand identity
4. Capture Aids: Mobile tripod apps and light meters ensure technical accuracy during every single shoot.
5. Editing: Adobe Lightroom and Photoshop remain essential for quality final image processing today.
6. AI for Scale: You should use Designkit as a primary option for scaling your production creative.

Along with that, begin with a pilot SKU to set quality assurance rules for your workflow. Plus, avoid using technology to invent features that do not exist on the actual product.
4.1 Must-Have Templates: Shot list, Mood board, Retouch QA, Export specs
Using standardized templates prevents technical errors and reduces the need for expensive reshoots. Align your templates with downstream deliverables to ensure fewer re-exports for different channels. Moreover, Designkit output presets can match these technical specifications to speed up your delivery. Every lifestyle product photography project should begin with these core copy-paste blocks today. The following table outlines the essential headers you need for your internal templates:
|
Template Type |
Key Columns / Fields |
Strategic Goal |
|
Shot List |
SKU, Scene Type, Shot Priority, Required Props, Camera Angle, Framing, Lighting Setup, Background Type, Notes |
Ensure complete shot coverage and eliminate missing angles. |
|
Mood Board |
Brand Colors, Lighting Style, Reference Images, Model Direction, Environment/Setting, Textures, Composition Style |
Maintain a cohesive and recognizable visual identity. |
|
Retouch QA |
Color Accuracy, White Balance, Dust/Spots Removal, Sharpness, Exposure, Alignment/Margins, Logo Placement, Consistency Check |
Deliver polished, consistent, and publication-ready images. |
|
Export Matrix |
Platform/Channel, Resolution, Aspect Ratio, File Format, File Size Limit, Naming Convention, Compression Settings, Color Profile (sRGB) |
Ensure compliance with platform specs and avoid re-exports or rejections. |
Sharing these standardized headers with your team ensures consistent execution and keeps everyone aligned with the same production guidelines.
4.2 A Practical Designkit AI Workflow
The given hybrid workflow combines traditional photography with modern scaling tools for maximum team efficiency:
1. Source Capture: Photograph the physical product in a neutral or simple lifestyle setting.
2. Scene Generation: Use the AI Product Photography Generator to swap backgrounds for multiple seasonal looks.

3. Listing Layout: Opt for the AI Product Listing Images Generator to create consistent infographic-style layouts.

4. Marketplace Export: Utilize the Amazon Listing Images Generator for perfectly sized and compliant file sets.
5. Final Quality Pass: Conduct a human QA review to ensure colors and textures remain accurate.
This workflow focuses on lifestyle product photos production acceleration rather than replacing photography fundamentals.
Generate Product Lifestyle Images
Part 5. Checklist for Lifestyle Product Photos: Props, Lighting, Angles & Must-have Shots
The master checklist helps your team reduce expensive reshoots and missing angles. You should organize your production by prep, on-set, post, and final publish stages for success. At the same time, a suggested shoot day timeline typically ranges from 2 to 4 hours total. Effective planning ensures that every lifestyle product shoot meets your specific business goals.

If any required placements are missing, use Designkit to create additional background variants. This structured approach allows your creative team to maintain a very high standard. According to Business Research Insights, 60% of online consumers base their final purchase decisions specifically on visual quality.
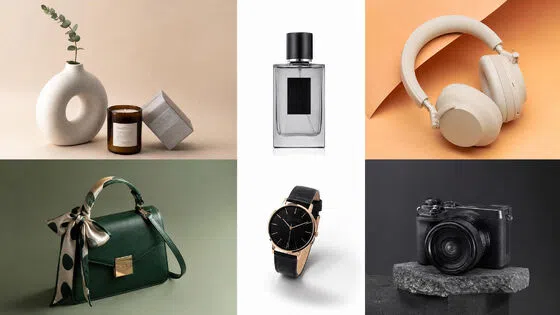
5.1 Props Checklist
Select universal props that match your specific product category and target audience expectations. Follow these specific rules to keep your lifestyle photography product story very believable:
1. Category Relevance: Choose items that naturally exist within the product usage environment today.
2. Color Control: Use neutral or brand-aligned colors to avoid any distracting visual clashes.
3. Believability Factor: Ensure every supporting item makes sense for the intended real-world use.
4. Quantity Limit: Use only 2 or 3 props per scene to maintain clarity.
Besides that, review the following categorization to select the most effective styling elements for your SKU:
|
Category |
Suggested Props |
Strategic Goal |
|
Beauty |
Dried flowers, linens, mirrors |
Create a soft and premium feeling for skincare items. |
|
Tech |
Clean desks, notebooks, and coffee |
Show productivity and modern functionality in a home office. |
|
Home |
Plants, candles, soft textiles |
Establish a cozy and relatable atmosphere for household goods. |
5.2 Lighting Checklist
Pre-shoot checks are essential for maintaining a high standard of lifestyle product photography. You can use the following checklist to manage your highlights and shadows during the shoot:
1. Color Consistency: Check that all bulbs match to avoid unnatural and mixed tones.
2. Key Positioning: Place your main light source to highlight the most important features.
3. Shadow Direction: Ensure shadows fall naturally and do not obscure any critical product details.
4. Highlight Control: Use diffusers to manage reflections on glossy or metallic product surfaces.
Indoor and outdoor notes also help you adjust for changing natural light conditions quickly. In addition, controlled lighting setups ensure that every product photography asset remains sharp and professional.
5.3 Angles and Framing Checklist
You must ensure every shot remains clear and avoids any unwanted lens distortion. Thus, explore this technical checklist to maintain high visual standards across your entire set:
1. Eye-Level Angle: Capture the product as the customer would see it in person.
2. 45-Degree View: Show depth by highlighting both the front and side product surfaces.
3. Overhead Flat Lay: Arrange several items clearly for bundle displays or social media posts.
4. Extreme Close-Up: Focus on intricate textures and premium materials to build shopper trust.

In addition, you should leave enough negative space for marketing copy and various platform crops. Correct framing ensures that your product photography lifestyle assets look great on mobile.
5.4 Must-have Shot List
Every successful e-commerce launch requires a minimum viable set of quality visual assets. Review the table to ensure your shoot covers all essential customer needs:
|
Shot Type |
User Question Answered |
Strategic Benefit |
Channel Priority |
|
Hero Scene |
What is this product? |
Establishes the primary emotional connection. |
DTC Hero, Amazon Slot 3 |
|
In-Use Action |
How do I use it? |
Demonstrates functionality and real-world value. |
Social Ads, PDP Secondary |
|
Scale Reference |
How big is this? |
Prevents returns by showing dimensions accurately. |
Amazon Slots 4-5 |
|
Bundle Shot |
What is included here? |
Clarifies exactly what the customer will receive. |
Amazon Slot 6, Email |
Expand your set with lifestyle product photos designed specifically for paid social advertisements.
5.5 Pre-publish QA Checklist
Conducting a final quality pass is essential for professional lifestyle product photography standards. Discover the given categories to organize your final review process before publishing:

1. Truthfulness and Compliance
Ensure the product colors are accurate, and all functional claims are fully supported. Check for any accidental logo or trademark conflicts within your supporting background props.
2. Visual Quality Control
Review every frame for visible defects, distracting reflections, or unwanted sensor dust spots. Confirm that all cropping levels maintain the intended visual hierarchy for the product.
3. Technical Specifications
Verify that file sizes and aspect ratios align with your specific platform rules. You should also check that all your file naming follows your internal SOP. Even when using Designkit tools, keep a human review pass for final quality.
Conclusion
To conclude, mastering a structured workflow is the best way to improve your lifestyle product photography. Follow the provided checklists to maintain professional brand consistency. When you need more variants and faster turnaround, add Designkit to your post-production. A Skywall Photography research report states that professional photography investments typically deliver a 400% ROI within six months. This integration allows you to scale your product and lifestyle photography very effectively.
Frequently Asked Questions
What is lifestyle product photography in ecommerce?
How many lifestyle product photos do I need per SKU?
A standard launch set usually includes 3 to 5 quality lifestyle product photos. You should expand this set to 10 or more for active advertising campaigns. Furthermore, diverse visuals allow you to perform A/B testing across different social media channels.
Can I shoot lifestyle product photography with a phone?
You can create product photography lifestyle assets using a modern mobile device. Yet, focus on using consistent natural light and a stable tripod for the best results. Moreover, apply manual exposure settings to ensure your final images remain sharp.
How do I choose props without distracting from the product?
Select props based on a "story first" criterion to support your lifestyle product shoot. Limit your prop count to avoid clutter and maintain focus on the item. Alongside this, match all materials and colors with your brand identity to ensure visual harmony.
Can AI help lifestyle product photography without hurting trust?
AI tools accelerate lifestyle product photography by generating background variants and different layouts. Acceptable uses include resizing and creating diverse scene placements from your real photos. Tools like Designkit support scalable outputs, but always perform human review for product photography accuracy.
You May Also Like

7 Best AI Virtual Makeup Try-On Tools for Realistic Results in 2026

AI Virtual Makeup Try-On: Boost Beauty E-Commerce Sales in 2026

Free Online Glasses Try-On Tools: See Yourself in Glasses Instantly

Top Virtual Ring Try-On Tools for Engagement and Wedding Rings in 2026

How to Try Shoes On Virtually: A Step-by-Step Guide
Best Virtual Shoe Try-On Tools for Ecommerce: 2026 Guide

How to Try On Wigs and Bangs Virtually to Find Your Perfect Style

How to Photograph Shoes for Your Ecommerce Store in 2026
Create Model Outfit Photos Instantly With AI Outfit Generator
Best AI Virtual Try-On Clothes Tools for Any Body Type
Product Photography Ideas: Creative Tips & Techniques for Better Shots
Product Photography Pricing 2026: Full Cost Guide by Type
How to Try On Clothes Online with AI for Better Fit & Style
Virtual Nose Ring Try On Online Before Your Piercing
White Background Product Photography Guide & Tips 2026

Product Photography Starter Package: Gear Checklist 2026
How to Try Makeup Online with AI and Virtual Makeup Try-On Apps (2026)
How to Use Virtual Earring Try-On for a Flattering Look in 2026
How to Try On Engagement Rings Online with AI in 2026
Scale Your Jewelry Brand with Virtual Jewelry Try-On Solutions
How to Try Hairstyles on Your Face Online (Step-by-Step Guide)
Best Virtual Hairstyle Try-On Tools Online for Realistic Previews 2026

How to Use a Free AI Hairstyle Generator to Find Your Perfect Look

Virtual Hair Color Try-On Guide for Every Skin Tone (2026)
Virtual Wedding Dress Try-On Online for Brides in 2026

How to Choose the Right Sunglasses for Your Face Shape Online
How Accurate Is Virtual Glasses Try-On? AI vs AR Compared

Best Virtual Try-On Glasses Apps in 2026 (Free & Paid Tools)
How AI Virtual Try-On Is Transforming Eyewear Ecommerce

5 Best Virtual Try-On Glasses Tools for Ecommerce and Consumers 2026
How to Try On Glasses Online with AI in 2026 (Easy Guide)

How to Create Jewelry Photos with AI Models That Drive Sales in 2026
Shopify Product Photography Guide with Tips & Setup
AI-Generated Fashion Models: Technology, Brand Adoption & Trends
How to Batch Generate 100+ AI Clothing Model Photos Fast

7 Best AI Fashion Model Generators for Ecommerce in 2026
Amazon Main Image Requirements: Size, Guidelines & Tips
Shopify Image Size 2026: Complete Guide and Tips for Better Product Display
Studio Product Photography vs AI Product Photography in 2026
7 Product Photography Mistakes That Hurt Ecommerce Sales

AI Clothing Model Photos for E-Commerce: Platform Rules & Best Practices

How AI Virtual Try-On Helps Fashion Brands Boost Sales & Reduce Returns

AI Fashion Models vs Real Models: Which Is Better for Brands?

Best Free AI Fashion Model Generators for Real Product Photos

Virtual Outfit Try-On Guide: Plan Outfits Before You Buy

What Is an AI Clothing Model Generator? Full Guide for Sellers

Change Outfit Colors Online for Outfit Preview with AI Clothes Color Changer

Virtual Try-On Technology in 2026: How It Works & Key Trends

How to Create Amazon Infographics: Boost Sales with Compelling Visuals

10 Best Virtual Try-On Apps & Tools for Online Shopping in 2026

How to Create AI Fashion Models: Complete Step-by-Step Guide

How to Use AI Fashion Models for E-Commerce Product Photos: A Complete 2026 Guide

How to Virtually Try On Clothes Online: A Complete Guide

How to Create Outdoor Product Scenes Without a Photoshoot Using AI

Optimize Etsy Images for Mobile: Listing Photos That Convert

Amazon 7-Image Listing Strategy: Boost Sales by Optimizing Every Image

Etsy Thumbnail Optimization: Keep Your Product Fully Visible

The Etsy Thumbnail Formula That Drives More Clicks and Sales

How to Create Pro Amazon Listing Photos Without a Studio

10 High-Converting Lifestyle Product Images for Amazon Listings

How to Automate Your E-commerce Visuals with OpenClaw Workflow

Top 5 AI Tools to Generate Amazon Product Listing Images in 2026

How to Turn One Photo into 10 Etsy Listing Images Fast: Batch Workflow

Etsy Listing Photo Size Guide (2026): Mobile, Desktop & Shop View Specs

Turn White Background Images into Lifestyle Amazon Listings

Fix Etsy Image Cropping: Optimize Listing Photos for Every Device

Amazon Listing Images: Essential Shot List & Optimization Guide

How to Create Lifestyle Product Images Without a Studio

Lifestyle Product Photography Trends 2026: Authentic Looks at Scale

How to Master Lifestyle Product Photography in 2026

Amazon Listing Images Guide 2026: 7-Slot Strategy & Requirements

360 Product Photography Guide 2026: Setup, Shoot and Workflow

Beginner's Guide to Generate Product Photos from Different Angles

AI Product Photography: Create Ecommerce Images Without a Photoshoot

How to Create Realistic AI Product Photos: Step-by-Step Pro Guide

Keep AI Product Images Consistent Across SKUs: Lighting, Color, Background

How to Scale E-commerce with a Product Image Generator

How to Use AI for Spring Product Photography: 2026 Amazon Guide

How to Create a Budget Home Product Photography Setup with AI

How to Achieve Professional Product Photography Standards in 2026

How to Take Product Photos with Phone: Pro Guide for Amazon & AI

Best AI Product Image Generator 2026: Top Tools for Amazon Sales

Amazon Photography Service vs. AI Generator: Best Choice for Sales

What Is Product Photography? Angles, Lighting & Editing Guide

Amazon Spring Sale 2026: Create High-Converting Listing Images (Guide)

AI Agents Transform Amazon Product Photography in 2026

Amazon Photoshoot in 2026: Do You Still Need a Studio?

11 Must-Have Tools for Amazon Product Photography in 2026

2026 Amazon Image Trends Shaping Seller Success and Conversions

Amazon Product Photography Requirements & Best Practices 2026
Make every product image ready to sell
Designkit is an all-in-one AI platform for ecommerce visuals. Create product photos, AI videos, virtual try-ons, and Amazon listing images in seconds. Generate HD backgrounds, batch edit photos, and scale your brand with studio-quality content.