How to Take Product Photos with a Phone: Lighting, Angles, and Editing for Listings
Simple Smartphone Guide: Professional Product Photography Tips


Good quality product photography is essential to sell your products on any online store. Small store owners and Amazon sellers struggle with high photography costs. However, your smartphone can capture professional images when you learn the right techniques. Many times, bad light or shaky hands ruin shots, but simple fixes solve these issues.
We tested every phone camera setting to find the perfect lighting for listings. So, this simple workflow helps you learn how to do product photography and makes your listings look clear. By learning these practical methods, even small brands and Shopify sellers can produce photos that meet Amazon and ecommerce standards.

Part 1. Phone Product Photography Setup
Before you turn on any lights, a proper setup ensures every shot works well. Taking product photos starts here to avoid common mistakes from the beginning. This section covers what listing-ready images need and your pre-shoot checklist:
What a “Listing-Ready” Photo Actually Looks Like
A listing-ready photo is a professional image that meets specific technical criteria to boost conversion rates. It displays accurate colors and perfect sharpness when viewed at full zoom. These photos must follow marketplace guidelines to ensure your product remains visible and competitive. Achieving this level of quality is the foundation of effective product photography for any growing ecommerce business:

1. Platform Standards
Marketplace requirements ensure a consistent experience for shoppers across all devices:
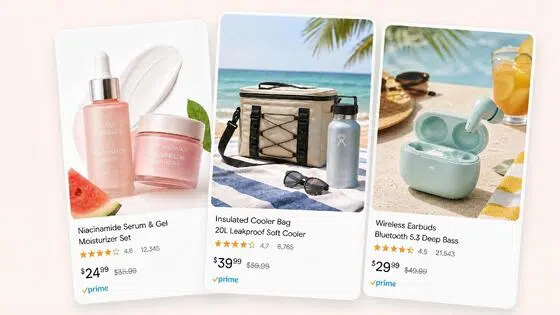
1. Amazon Main Image: Use a pure white background with an RGB color profile of 255, 255, 255. The maximum visibility of the product should be at least 85% of the entire frame. In the case of images, use at least 500 pixels and not more than 10,000 pixels on the longest side.
2. Shopify: Optimal display is at 2048 x 2048px, although you should at least have 800 x 800px to zoom effectively. Your files may not exceed 5000x5000px, but never exceed the 20MB file size limit, as this will guarantee quick page loading.
3. Universal Quality Standards: Every quality photo must avoid crushed shadows, regardless of the platform. The image should display believable, crisp detail even at 100% zoom.
2. Most Common Beginner Fails
Avoid these frequent mistakes to keep your listing images clean and compliant:
1. Mixed Lighting: Using different light sources creates distracting and very unnatural color casts.
2. Handheld Shake: Even tiny vibrations cause motion blur, ruining your overall perceived quality.
3. Digital Zoom: This camera feature significantly destroys fine edge detail and overall image clarity.
4. Improper Backgrounds: Poor lighting issues cause white backgrounds to appear quite muddy.
5. Dirty Lens: Smudges on your camera lens are a major cause of reduced contrast and overall image quality.
Your Pre-Shoot Checklist: Setting Up the Scene
Proper preparation is the vital first step for achieving a quality image. So, use this essential guide to master how to do product photography effectively:
1. Phone Preparation Checklist
Before you begin, ensure your device is optimized for high-quality capture:
1. Clean the Lens: Facial oils and dust on your lens can reduce perceived contrast by around 20%. Alongside this, use a microfiber cloth for a clear surface.
2. Disable Auto-Features: It is also recommended to turn off "Beauty Mode" and auto HDR. These computer programs make details soft and distort textures.
3. Master Manual Settings: Whenever possible, you should use Manual or Pro mode. Use apps such as Lightroom Mobile or the native Pro mode in your phone to lock your ISO and shutter speed. This prevents the camera from "hunting" for settings between shots.

2. Window-Light Timing Guidance
Natural light is your best free tool, provided you use it at the right time:
1. Optimal Windows: The best natural light occurs between 9:00–11:00 AM and 2:00–4:00 PM. During these windows, the sun is at an angle that provides softer, diffused illumination.
2. Diffusion Control: In case the light is too bright, put a sheer curtain or piece of tracing paper over the window. This softens harsh shadows and creates a professional "studio-box" effect.
3. Budget Bounce and Fill Tools
You don't need costly studio lights to light up shadows effectively:
1. DIY Reflectors: Use an A4 sheet of white paper or a white foam board as a simple bounce card.
2. Placement Technique: Place the bounce card opposite the window beside the product. This reflects light into shadows and gives a balanced look with proper depth.
4. Background Options
Your background choice dictates the cleanliness of your final shot:
1. Matte Poster Board: When you are looking for a background option, this is the one for beginners. It offers a clean surface that is not competing with your product for attention.
2. Avoid Wrinkling Fabrics: While cloth backgrounds seem like a great idea, they show wrinkles that have to be edited out. If you must use fabric, you need to ensure it is steamed perfectly smooth.

Part 2. Lighting: Make Phone Photos Look Like Studio Shots
Mastering lighting is essential to achieving professional results in your product photography. As follows, we take the simple lighting formulas that you can repeat confidently:
1. Window Light Formula: Soft Studio Look at Zero Cost
You can use these exact settings to master how to do product photography:
1. Measurable Setup: Place your product roughly 40 to 80 centimeters from the bright window. Moreover, position the front of your product at a 30 to 45 degree angle.
2. Technique: Rotate the product itself instead of moving the camera to control highlights.
3. Failure Comparison: Harsh noon light causes ugly shadows compared to soft and diffused window light.
2. Continuous Light Formula: Consistent Results Any Time of Day
Follow this specific light placement guide to achieve better product photography results.
1. Light Placement: It is recommended to position your light at a 45-degree angle from the side. Keep the light source positioned 30 to 45 degrees above the product.
2. White Balance Workflow: Lock your camera's white balance to 5500 Kelvin for consistency. In addition to this, shoot a white reference card to batch apply settings across your photos.

3. Reflective & Metallic Products: How to Kill Unwanted Reflections
Apply these physics tips for taking product photos that look very clean:
1. Physics Principle: Larger light sources relative to your product will create much softer reflections.
2. Negative Fill: Use black card flags to control undesirable reflections on your metallic surfaces.
3. Reflections Prevention: Always use a sturdy tripod with a remote shutter to avoid camera reflections.
Part 3. Angles: A Repeatable Shot List for Every Listing
Consistent angles improve your brand image when you are taking product photos. Learn how to stabilize your camera and use universal angles for every single product:
1. Lock Consistency First: Stabilization & Fixed Camera Position
Follow these crucial steps to ensure stable images during your shooting session:
1. Stability Research: Baymard Institute research confirms that image stability drastically improves your online store conversion rates.
2. Tripod Purchase: Purchase a simple budget tripod to eliminate blur and keep your framing very consistent.
3. Remote Timer: Always use a remote shutter timer to prevent shake when touching the mobile device.
4. Height Standard: Establish a fixed camera height to make your product catalog appear consistent and professional.
2. Use the Right Focal Length: Optical Zoom & Correct Distance
Explore these essential distance guidelines for your different product sizes and types:
1. Digital Avoidance: Avoid using digital zoom because it destroys your edge detail and image quality.
2. Jewelry Distance: Small items like jewelry should be shot from about 30 to 40 centimeters away.
3. Electronics Range: Larger electronics and flat lay apparel require 60 to 100 centimeters of distance.
4. Composition Priority: Compose your shot correctly to avoid heavy cropping and loss of total resolution.

3. The Universal Shot List: Every Angle Your Listing Needs
The following structured table provides a clear priority list for your listing image needs:
|
Capture Type |
Primary Objective |
What It Builds |
When It’s Critical |
|
Hero Front View (Straight-On) |
Establish a clear product identity |
Immediate trust and clarity |
Always mandatory for the main image |
|
Depth Angle (30°–45°) |
Reveal thickness and dimension |
Realistic shape perception |
Highly recommended for all categories |
|
Profile / Reverse View |
Show connectors, labels, and backside |
Transparency and completeness |
Required for electronics and packaged goods |
|
Overhead Layout |
Display arrangement or set contents |
Organization clarity |
Essential for apparel, bundles, and food |
|
Macro Detail Frame |
Highlight texture, stitching, ports |
Premium quality perception |
Critical for high-ticket products |
|
Scale Reference Shot |
Demonstrate real-world size context |
Reduced return risk |
Strongly advised for small items |
|
In-Box Presentation |
Confirm included accessories |
Purchase confidence |
Mandatory for kits and gift sets |
In addition to this, leave a 10-15% margin around products for cropping flexibility. This prevents edge cuts during platform resizing automatically.
Part 4: Editing & Output: Clean, Consistent, Listing-Ready Files
Finalize your images with simple edits to perfect your professional product photography workflow. Hence, follow these helpful steps to ensure your files are ready for every marketplace:
1. Correct First: Exposure, White Balance & Cleanup
Start with a toolchain recommendation for your professional product photography editing workflow. Open your master images within Lightroom Mobile to begin the necessary color adjustments. Use the eyedropper tool on a neutral white area to correct white balance. Moreover, adjust the exposure carefully while keeping the histogram clear of the clipping edge.

Later on, move files to Snapseed for local healing adjustments and removal of unwanted dust. In addition, apply sharpening with detail at 30 and masking at 40 to prevent digital noise. Along with that, save your edit as a preset to sync batch updates across every image.
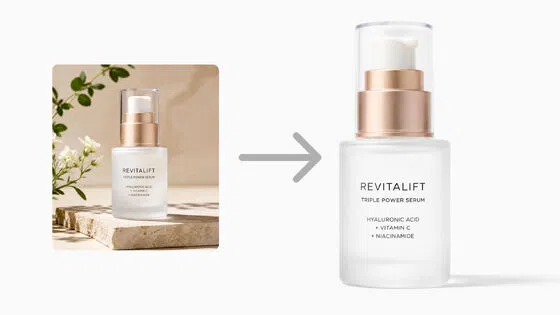
2. Extend Your Master Shot: Background Replacement & Scene Variations
You must prioritize a sharp master image before you apply any advanced edits. The following sections explain how you should use AI to enhance your photos:
1. Mastering the Base Image: AI background replacement demands sharp, lit master images first. Blurry source files create unusable lifestyle variants every single time.
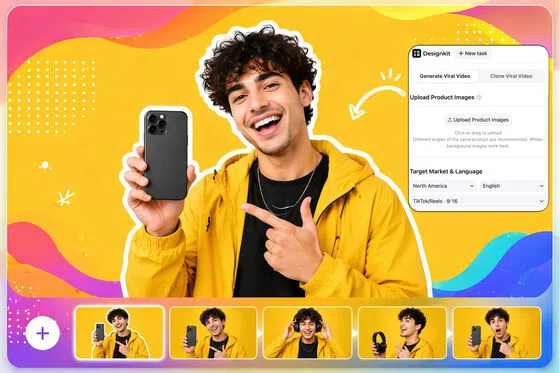
2. Leveraging AI for Lifestyle Scenes: Use the Designkit AI Product Photography Generator to create professional lifestyle or scene variants. This AI-powered tool replaces your product background while keeping the important product details consistent.

3. Ensuring Platform Compliance: AI images are generally safer for secondary listing images rather than main ones. You should always verify the latest platform policies before replacing your white background.
Want to skip the hours of manual editing and generate a complete, high-converting Amazon image set in seconds?
The video below demonstrates how Designkit’s AI transforms a single product shot into a full suite of listing images and A+ content—including professional model shots and lifestyle gift box scenes—with just one click.
3. Scale Output: Infographics, Multi-Size Export & Batch Templates
This part helps you scale your images to ensure consistent branding across multiple platforms:
- Infographic Design Basics: Functional products require features and usage step graphics. Apparel needs the fabric type and care instruction diagrams to be clear. Also, food items demand ingredient lists and nutrition facts prominently.
- Platform Size Standardization: Every marketplace requires specific image sizes to ensure your store looks truly professional. Besides, use the provided table to format all your listing images for platforms:
|
Platform |
Recommended Size |
Aspect Ratio |
|
Amazon Main |
2000×2000 px |
1:1 Square |
|
Amazon Secondary |
2000×2000 px |
1:1 Square |
|
Shopify Product |
2048×2048 px |
1:1 Square |
|
Facebook/Instagram |
1080×1080 px |
1:1 Square |
|
|
1000×1500 px |
2:3 Vertical |
- Batch Template Automation: Batch templates allow repeated layouts for multiple SKUs efficiently. Designkit AI Product Listing Images Generator simplifies scaling after learning how to do product photography. Upload master shots for platform-compliant batch processing instantly.
Conclusion
To summarize, master your product photography by starting with a sharp master image first. Use a tripod and consistent angles to maintain stability and professional framing. Moreover, correct exposure and clean up imperfections before moving to advanced edits. Alongside that, leverage AI tools like Designkit for secondary images or batch scaling efficiently. This workflow ensures clear and conversion-ready listing photos every single time.
Frequently Asked Questions
Q1. What is the ideal file format for product photos?
Q2. How do I show accurate color for my online customers?
Consistent white balance settings are the best way to ensure your colors look accurate. Always shoot a neutral color card to adjust your final white balance during edits. This simple habit helps you avoid returns caused by customers seeing the wrong colors.
Q3. Can I use natural light for all my products?
Although natural light is great, it does not work for every single hour of the day. Designkit AI Product Photography Generator helps you create perfect lighting for your secondary images. This tool saves you time while providing consistent results for all your brand photos.
You May Also Like

Back to School Ad: 7 Creative Ideas for Better Campaign Results

Top 7 Back-to-School Sales Ideas to Boost Retail Sales (2026)

How to Create a Complete World Cup Product Listing Image Set

How to Create Amazon Summer Sale Posters and Banners with AI
Amazon Summer Sale 2026: Listing Design Trends & Product Image Ideas
Ecommerce Video Ads: 7 Strategies That Drive Higher Conversions

How to Photograph Shoes for Your Ecommerce Store in 2026
Product Photography Ideas: Creative Tips & Techniques for Better Shots
Product Photography Pricing 2026: Full Cost Guide by Type
White Background Product Photography Guide & Tips 2026

Product Photography Starter Package: Gear Checklist 2026

Shopify Product Photography Guide with Tips & Setup

Amazon Main Image Requirements: Size, Guidelines & Tips

Shopify Image Size 2026: Complete Guide and Tips for Better Product Display

Studio Product Photography vs AI Product Photography in 2026

7 Product Photography Mistakes That Hurt Ecommerce Sales

Change Outfit Colors Online for Outfit Preview with AI Clothes Color Changer

How to Create Amazon Infographics: Boost Sales with Compelling Visuals

How to Create Outdoor Product Scenes Without a Photoshoot Using AI

Optimize Etsy Images for Mobile: Listing Photos That Convert

Amazon 7-Image Listing Strategy: Boost Sales by Optimizing Every Image

Etsy Thumbnail Optimization: Keep Your Product Fully Visible

The Etsy Thumbnail Formula That Drives More Clicks and Sales

How to Create Pro Amazon Listing Photos Without a Studio

10 High-Converting Lifestyle Product Images for Amazon Listings

How to Automate Your E-commerce Visuals with OpenClaw Workflow

Top 5 AI Tools to Generate Amazon Product Listing Images in 2026

How to Turn One Photo into 10 Etsy Listing Images Fast: Batch Workflow

Etsy Listing Photo Size Guide (2026): Mobile, Desktop & Shop View Specs

Turn White Background Images into Lifestyle Amazon Listings

Fix Etsy Image Cropping: Optimize Listing Photos for Every Device

Amazon Listing Images: Essential Shot List & Optimization Guide

How to Create Lifestyle Product Images Without a Studio

Lifestyle Product Photography Trends 2026: Authentic Looks at Scale

How to Master Lifestyle Product Photography in 2026

Amazon Listing Images Guide 2026: 7-Slot Strategy & Requirements

360 Product Photography Guide 2026: Setup, Shoot and Workflow

Beginner's Guide to Generate Product Photos from Different Angles

AI Product Photography: Create Ecommerce Images Without a Photoshoot

How to Create Realistic AI Product Photos: Step-by-Step Pro Guide

Keep AI Product Images Consistent Across SKUs: Lighting, Color, Background

How to Scale E-commerce with a Product Image Generator

How to Use AI for Spring Product Photography: 2026 Amazon Guide

How to Create a Budget Home Product Photography Setup with AI

How to Achieve Professional Product Photography Standards in 2026

How to Take Product Photos with Phone: Pro Guide for Amazon & AI

Best AI Product Image Generator 2026: Top Tools for Amazon Sales

Amazon Photography Service vs. AI Generator: Best Choice for Sales

What Is Product Photography? Angles, Lighting & Editing Guide

Amazon Spring Sale 2026: Create High-Converting Listing Images (Guide)

AI Agents Transform Amazon Product Photography in 2026

Amazon Photoshoot in 2026: Do You Still Need a Studio?

11 Must-Have Tools for Amazon Product Photography in 2026

2026 Amazon Image Trends Shaping Seller Success and Conversions

Amazon Product Photography Requirements & Best Practices 2026
Make every product image ready to sell
Designkit is an all-in-one AI platform for ecommerce visuals. Create product photos, AI videos, virtual try-ons, and Amazon listing images in seconds. Generate HD backgrounds, batch edit photos, and scale your brand with studio-quality content.