Create AI Product Photos That Look Real: Step-by-Step + Prompt Templates


Creating quality pictures for your online store is often very expensive and slow. Many sellers now use new technology to create their own digital images quickly. However, making AI product photos look like real photography can be quite difficult.
If the images look fake, customers will not trust your brand or items. Therefore, you need a simple plan to ensure your pictures look natural and professional. So, this guide will teach you how to create realistic visuals for your shop easily.

Part 1. What “Real-Looking” AI Product Photos Mean
Realism in digital pictures means making every small detail look like a true photograph. Yet many results still show obvious artificial patterns that break photographic realism. These issues include plastic surfaces or even melted edges.
According to Baymard Institute research, 56% of users began exploring product images as their first action after arriving on a product page, not necessarily shoppers' sitewide. So, this section explains the difference between realistic visuals and obvious AI product images:
1. Realistic vs AI-Looking: What You’ll Learn
To master product photos, you must first learn to identify low-quality digital artifacts. Use the following table to understand the visual criteria for creating a great AI product photo:
|
Criterion |
Realistic Result |
AI-Looking Problem |
|
Shadows |
Grounded shadow from one clear light source |
Floating shadows or incorrect shadow direction |
|
Materials |
Believable textures with subtle natural imperfections |
Plastic-like shine with no visible micro details |
|
Lighting |
Consistent lighting across the entire image |
Mixed color tones or overly harsh bright spots |
|
Proportions |
Correct scale with a natural camera lens perspective |
Stretched shapes or unnatural camera angles |
|
Details |
Logical details consistent with real photography |
Melted edges, warped textures, or extra parts |
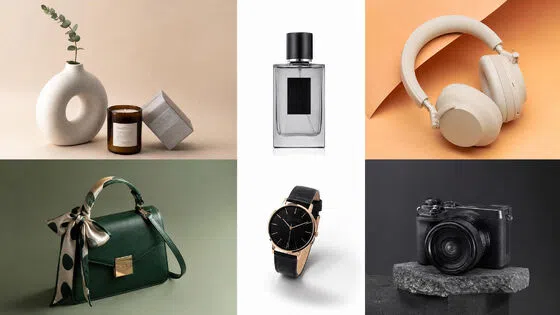
2. When to Use AI-Generated Product Images
Understanding the best timing for AI-generated product images helps protect your brand's reputation. Focus on these use cases to maximize the value of your product image AI assets:
1. Lifestyle Scenes: Use these tools to place products into beautiful home or outdoor settings.
2. Ad Variations: Create many different versions of social media ads to test your audience.
3. Pre-launch Concepts: Build early visual models for new items before you start official production.
4. Color Kits: Quickly generate every color variation for your store without a new photoshoot.
5. Background Replacement: Instantly place the same product into different backgrounds to match seasonal campaigns or marketplace requirements.
Apart from that, various reports state that a product image made by AI cuts down around 90% expenses.

Part 2. How to Tell If AI Product Images Look Real: 5-Dimension Checklist
To achieve total realism, you must evaluate your work across 5 specific technical areas. Each dimension below helps you identify and fix common digital errors in your results. So, follow these specific rules to maintain a high standard for your product image AI:
1. Scale & Perspective: Proportions, Camera Angle, and “Nothing Feels Off”
Visual realism depends on correct proportions and a natural camera angle for the product. The given table helps you explore the realistic proportions in AI Product Photos:
|
Feature |
Realistic Standard |
Common AI Failure |
|
Camera Angle |
Eye-level or natural 3/4 product view |
Stretched shapes or unnatural tilting |
|
Lens Focal Length |
Natural 50mm to 85mm perspective |
Extreme wide-angle or fisheye distortion |
|
Horizon Line |
Flat, level surface with correct perspective |
Misaligned perspective or mismatched vanishing points |
2. Lighting Consistency: One Light Direction, Shadow Softness, and Color Temperature
A single light source is the key to making an AI product's images look real. According to Shopify, proper lighting and shadow consistency are critical factors in perceived product authenticity for online shoppers. So, check these specific lighting signals to avoid a "cut and paste" digital appearance:
1. Unified Direction: Check that all shadows and highlights follow one clear and logical light path.
2. Shadow Softness: Use terms like “softbox” to create natural edges for your product image AI.
3. Color Balance: Avoid mixed color temperatures to prevent the image from looking like a fake collage.
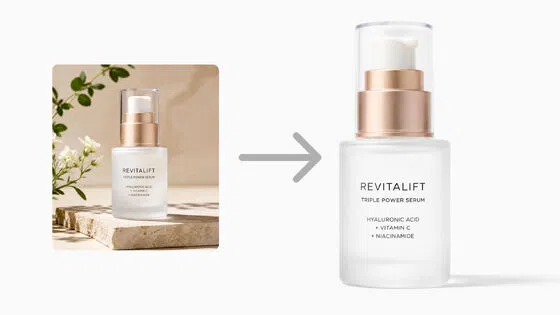
3. Materials + Micro-Imperfections: How to Avoid the “Plastic” Look
Real items have small flaws that prevent a cheap and artificial plastic surface look. Expert designers use a specific word bank to define surfaces in AI product photos. You should add subtle texture descriptions when generating product photos. Along with that, mention micro scratches or dust for realistic AI-generated product images.

Pro Tip on Textures: Build a material word bank for your prompts. Use terms like “brushed stainless steel” or “frosted glass,” and add details like “subtle dust specks” to reduce the overly perfect digital look.
4. Lens Cues: Depth of Field, Focal Length, Grain, and Dynamic Range
Photographic cues like depth of field help sell the realism of your product images. Focus on these camera-specific settings to give your AI product photo a professional feel:
1. Natural Bokeh: Ensure the background blur looks soft and matches the chosen lens aperture settings.
2. Sensor Grain: Add a tiny amount of "film grain" to make the digital file look organic.
3. Dynamic Range: Avoid “HDR” styles that make every corner of the image equally bright.
5. Contact Shadows + Reflections: Grounding and Real Reflection Logic
Apart from the above, grounding your product on a surface is essential for quality AI product image results. So, verify that the physics of the scene makes the item appear physically present:
1. The "Sit" Test: The product must have a dark contact shadow exactly where it touches the floor.
2. Environment Match: Reflections on glass or metal must show the surrounding scene for product image AI logic.
3. Floating Fix: If the shadow is too far away, the product will appear to be floating.

Hence, this varied checklist makes it easy for teams to audit their work before publishing. It also helps maintain consistent visual quality across all AI-generated product images.
Part 3. Step-by-Step Workflow: From Reference to E-commerce-Ready AI Product Photos
Building a repeatable system is the best way to handle large catalog projects. It ensures your AI product images stay consistent across every page. So, this section outlines the exact path from initial ideas to finished store listings:
Step 1: Gather Inputs: Product Facts, Brand Style, and Reference Images
You must collect all the physical facts about your item before you begin. Thus, prepare a clear list of non-negotiable details for your AI product photo project as per the given points:
1. Product Facts: List the exact name and materials to keep the shape true.
2. Brand Style: Define if your look is premium or value to guide the output.
3. Style Anchors: Select 3 credible reference images to act as your primary visual guide.
Step 2: Start With a Compliant White-Background Main Image
Begin with a white-background hero image to check proportions and materials clearly. You need to ensure product edges are crisp and free from extra artifacts. Apart from that, it is advisable to avoid props or badges in the first main image. Moreover, using specialized tools helps you generate clean drafts for your AI product images.

Expert Recommendation: Use Designkit’s AI Product Photography Generator or AI Product Listing Images Generator for fast first drafts. This advanced tool automatically analyzes your product features to create complete, platform-ready visual sets. It also supports bulk generation to help you manage hundreds of different SKUs efficiently.
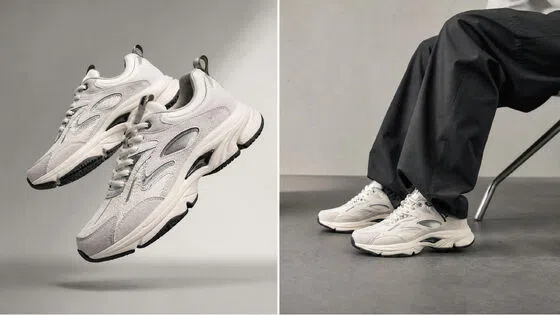
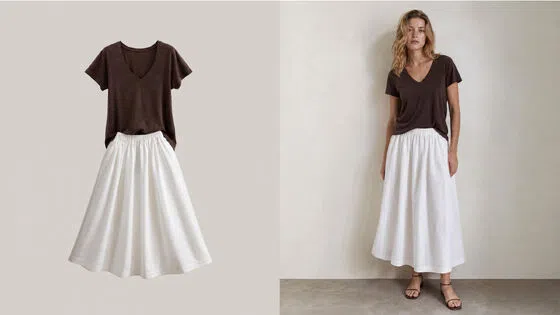
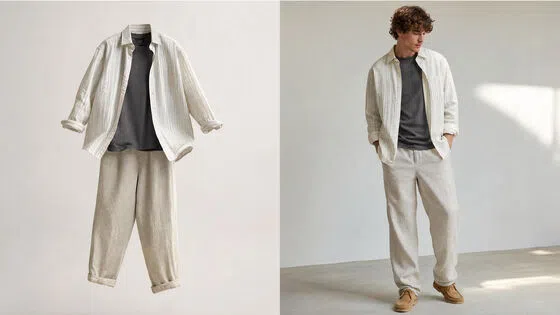
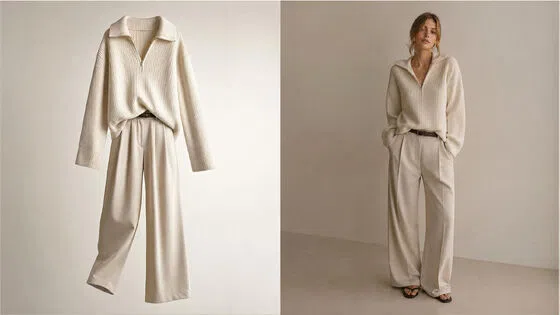
Step 3: Move to Lifestyle Scenes: Keep Lighting and Lens Language Consistent
Place your item into a natural setting to show how customers use it. Maintain a unified visual language to keep your AI Product Photos looking professional. The following table shows how to match your props and lighting to specific categories:
|
Scene Type |
Prop Selection |
Lighting Goal |
|
Home & Kitchen |
Natural wood or stone surfaces |
Soft natural window-light effect |
|
Electronics |
Modern office desk setup |
Clean studio softbox lighting |
|
Fitness |
Workout mats or a water bottle |
Bright, energetic daylight |
Step 4: Iterate and Finalize: Small Changes, Fast Cycles
Small changes during each round will help you reach the perfect final result. Building a strong library of prompt blocks allows you to scale your production. Use the following checklist to improve your AI-generated product images effectively:
1. Single Variables: Change only the lighting or the lens settings during each prompt round.
2. Prompt Blocks: Build a library of winning descriptions for materials and camera lens cues.
3. Selection Rule: Choose the top 2 winners from every 10 generated product image AI.
At this particular point, you can use the Designkit AI Image Generator to run these fast variations easily. This powerful AI tool uses the Nano Banana model to handle text-to-image tasks with high fidelity. You can also opt for its dedicated image-to-image feature, powered by models like Kling 3.0 and Veo 3.1. It even allows you to refine your images iteratively through conversation to reach your brand goals.

Step 5: Export and Compliance Checks
The final stage ensures your images are ready for a live Amazon listing. You must verify every file against the technical requirements on Amazon ’s official website to avoid any account issues. So, check your AI product images against these strict marketplace rules before you publish:
1. Resolution Check: Verify the aspect ratio and long edge pixels meet the zoom requirements.
2. Subject Occupancy: Ensure the product fills 85% of the total image frame space.
3. Prohibited Items: Remove any misleading badges or text that might violate official platform rules.
4. Color Profile Check: Ensure the image uses the standard sRGB color profile for consistent display across Amazon devices.
In such cases, using the Designkit Amazon Listing Images Generator helps you format these files very quickly. This tool provides intelligent concepting to deliver a ready-to-use product image package. It automatically interprets platform requirements to generate main images, lifestyle scenes, and feature graphics.
Part 4. Prompt Templates: Copy-Paste AI Product Photo Prompts
Having a reliable set of instructions is the key to achieving professional results. These templates save hours on AI product photo creation every day. Fill blanks for any item with a product image AI structure that works. To achieve high-speed production, many brands use Designkit to execute these structured prompt scripts. Anyhow, this section provides a library of templates for every stage of your project:
1. Universal Prompt: Works for Any Product
A logical structure helps the generator understand exactly what you want to create. Alongside this, you can paste these structures into the Designkit interface for instant results. So, follow this fill-in-the-blank formula for a consistent product image AI every time:

● Template: [Product] made of [Material] in [Color] placed in [Scene] with [Lighting]. In addition to this, use a [Camera/Lens] at [Angle] with [Realism Cues] and [Negative Constraints].
Moreover, always avoid generating readable text as logos and labels often fail in AI product photos.
2. White-Background Ecommerce Main Image Prompts
Clean hero shots are essential for meeting the strict requirements of most marketplaces. Use the following phrases to create a compliant AI-generated product image set:
1. Single Product: Pure white seamless color background with a soft and natural contact shadow.
2. Product Bundle: Grouped items centered in frame with sharp details and true-to-scale proportions.
3. Natural Finish: High-resolution shot with a clean subject crop and no extra decorative props.
3. Lifestyle Scene Prompt Templates: By Category
Place your items in relatable settings to show customers how they function daily. So, match your lighting and lens cues to these category-specific AI product image scenes:
|
Category |
Environment Scene |
Recommended Lighting |
|
Beauty |
Modern marble bathroom vanity setup |
Soft, flattering natural window light |
|
Home |
Minimalist wooden coffee table setting |
Warm golden-hour sunlight |
|
Electronics |
Clean white office workstation desk |
Neutral, bright studio softbox lighting |
4. Hands / In-Use Prompt Templates
Showing human interaction helps buyers understand the actual size and feel of items. You must use specific negatives to ensure a realistic AI product photo result:
1. Holding Item: Detailed human hand holding the product with natural skin and nail textures.
2. Using Product: Realistic grip on the item while performing a simple and believable action.
3. Negatives: Avoid extra fingers or deformed hands to keep your product photo professional.
5. Advanced Material Prompt Templates: Glass, Metal, Reflective, Transparent, Fabric
Different surfaces require unique descriptions to avoid a fake or plastic-looking digital finish. Try these specific prompts for complex product image AI materials like glass or metal:

1. Reflective Glass: High-quality glass with realistic refraction and thick edges in a scene.
2. Brushed Metal: Anisotropic highlights on a metallic surface with subtle and natural micro scratches.
3. Soft Fabric: Woven cotton texture with visible lint and natural folds for AI product images.
6. The “AI Look” Negative List: Problems → Prompt Fixes
Even with good prompts, you may encounter common issues that need a fix. Use this table to correct common errors in your AI-generated product images:
|
Problem |
Cause |
Negative Prompt |
Positive Fix |
|
Plastic Look |
Over-smoothed material surfaces |
“Avoid plastic-like shine” |
Add subtle micro-texture details |
|
Floating Object |
Missing or weak contact shadow |
“Enforce natural contact shadow” |
Anchor the object to the surface |
|
Melted Edges |
Low-resolution or unstable generation |
“Avoid melted or warped edges” |
Refine and sharpen edges subtly |
|
Wrong Reflections |
Lighting or environment mismatch |
“Reflections must match scene lighting” |
Align reflections with the light direction |
|
Extra Parts |
AI hallucination artifacts |
“Remove extra elements or appendages” |
Verify correct object structure |
Conclusion
In summary, building a successful online brand requires a strong and consistent visual strategy. You must follow our 5-part checklist to ensure your digital pictures look real. Mastering AI product photos allows you to grow your online business much faster. Apart from that, to scale your production, we recommend using Designkit for your daily creative work. This dedicated tool automatically interprets your brand needs to deliver complete image sets.
Frequently Asked Questions
Why does it look like a 3D render?
How do I keep a consistent style across images?
You should always lock your camera angle and lighting direction in every single prompt. In addition, saving your winning prompt blocks as templates ensures a unified look for your entire brand. Consistency is the most important factor when creating a professional AI product image catalog.
Can I use AI images as Amazon's main images?
Yes, you can use them if they feature a pure white background with no props. Always verify that the item fills 85% of the frame to remain fully compliant. Moreover, verify final AI product photos against Amazon rules before publishing or listing online.
How to prevent logo/text distortion?
AI generators often struggle with rendering small and readable text on complex product labels. It is better to generate a clean product and add your logo during post-editing cycles. This method ensures your product image AI looks sharp and remains professional for buyers.
Why are glass/metal hard, and how can we reduce failures?
Reflective surfaces often show strange environments that do not match your chosen lifestyle scene. Specify the exact environment reflections and light sources to keep physics very logical. This technical step significantly improves the overall quality of your advanced
AI Product Photos.
Do I still need retouching?
While modern AI is very powerful, a final human review ensures every detail is perfect. So, use a quick digital editor to fix small artifacts or to adjust final color levels. Polishing your AI product images manually helps maintain the highest possible standard for shoppers.
How to keep color variants consistent?
Use the same base prompt for every version and only change the color keyword used. This ensures that the lighting and shadows remain identical across your entire product image set. Moreover, consistent lighting is vital for making your AI product photo collection look like real photography.
How to avoid fake-looking backgrounds?
Avoid overly stylized or surreal settings that compete with your product for the user's attention. Stick to realistic and category-appropriate scenes with natural lighting to maintain high customer trust. Authentic backgrounds make your product image AI assets feel much more believable and premium.
You May Also Like

7 Best AI Virtual Makeup Try-On Tools for Realistic Results in 2026

AI Virtual Makeup Try-On: Boost Beauty E-Commerce Sales in 2026

Free Online Glasses Try-On Tools: See Yourself in Glasses Instantly

Top Virtual Ring Try-On Tools for Engagement and Wedding Rings in 2026

How to Try Shoes On Virtually: A Step-by-Step Guide
Best Virtual Shoe Try-On Tools for Ecommerce: 2026 Guide

How to Try On Wigs and Bangs Virtually to Find Your Perfect Style

How to Photograph Shoes for Your Ecommerce Store in 2026
Create Model Outfit Photos Instantly With AI Outfit Generator
Best AI Virtual Try-On Clothes Tools for Any Body Type
Product Photography Ideas: Creative Tips & Techniques for Better Shots
Product Photography Pricing 2026: Full Cost Guide by Type
How to Try On Clothes Online with AI for Better Fit & Style
Virtual Nose Ring Try On Online Before Your Piercing
White Background Product Photography Guide & Tips 2026

Product Photography Starter Package: Gear Checklist 2026
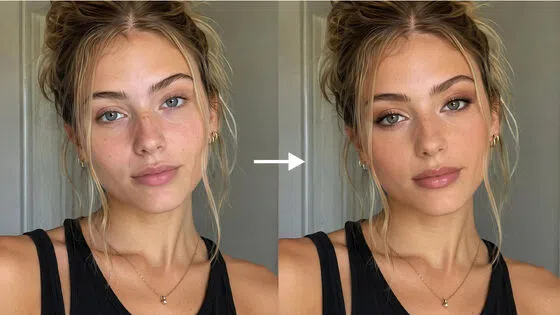
How to Try Makeup Online with AI and Virtual Makeup Try-On Apps (2026)
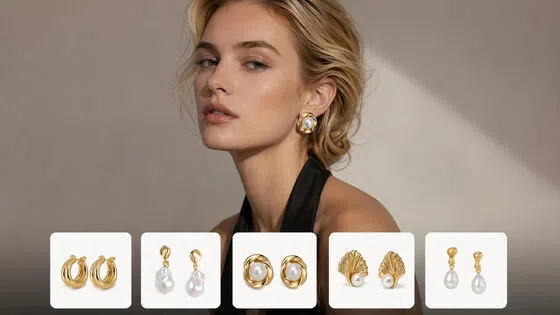
How to Use Virtual Earring Try-On for a Flattering Look in 2026
How to Try On Engagement Rings Online with AI in 2026
Scale Your Jewelry Brand with Virtual Jewelry Try-On Solutions
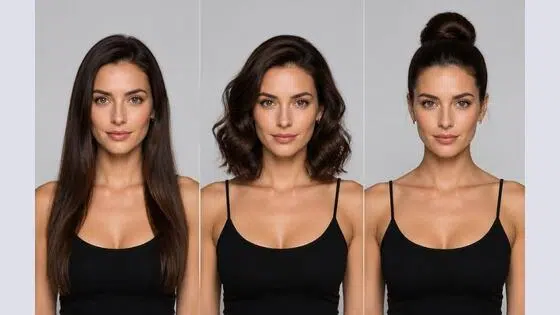
How to Try Hairstyles on Your Face Online (Step-by-Step Guide)
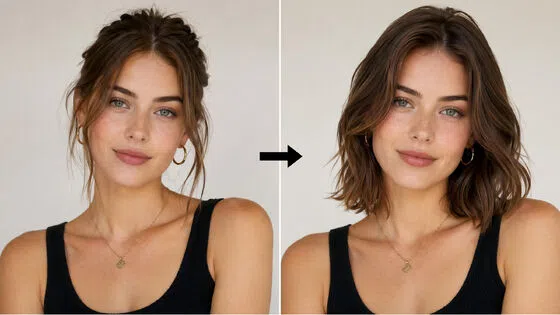
Best Virtual Hairstyle Try-On Tools Online for Realistic Previews 2026

How to Use a Free AI Hairstyle Generator to Find Your Perfect Look

Virtual Hair Color Try-On Guide for Every Skin Tone (2026)
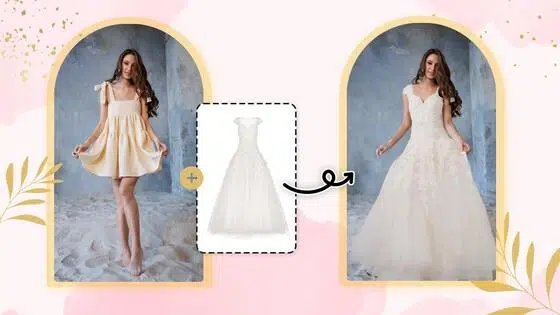
Virtual Wedding Dress Try-On Online for Brides in 2026

How to Choose the Right Sunglasses for Your Face Shape Online
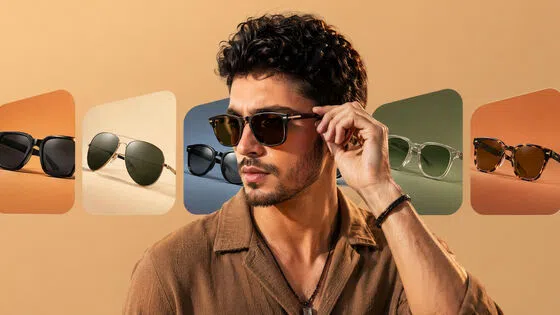
How Accurate Is Virtual Glasses Try-On? AI vs AR Compared
Best Virtual Try-On Glasses Apps in 2026 (Free & Paid Tools)
How AI Virtual Try-On Is Transforming Eyewear Ecommerce

5 Best Virtual Try-On Glasses Tools for Ecommerce and Consumers 2026
How to Try On Glasses Online with AI in 2026 (Easy Guide)

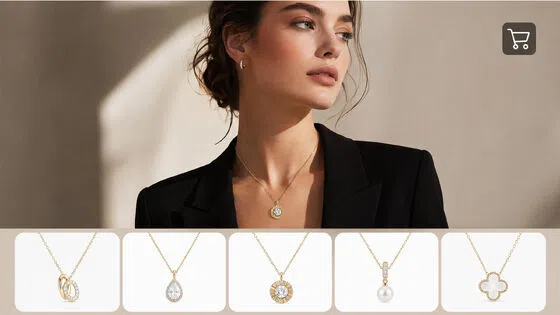
How to Create Jewelry Photos with AI Models That Drive Sales in 2026
Shopify Product Photography Guide with Tips & Setup
AI-Generated Fashion Models: Technology, Brand Adoption & Trends
How to Batch Generate 100+ AI Clothing Model Photos Fast

7 Best AI Fashion Model Generators for Ecommerce in 2026

Amazon Main Image Requirements: Size, Guidelines & Tips
Shopify Image Size 2026: Complete Guide and Tips for Better Product Display
Studio Product Photography vs AI Product Photography in 2026

7 Product Photography Mistakes That Hurt Ecommerce Sales

AI Clothing Model Photos for E-Commerce: Platform Rules & Best Practices

How AI Virtual Try-On Helps Fashion Brands Boost Sales & Reduce Returns

AI Fashion Models vs Real Models: Which Is Better for Brands?

Best Free AI Fashion Model Generators for Real Product Photos

Virtual Outfit Try-On Guide: Plan Outfits Before You Buy

What Is an AI Clothing Model Generator? Full Guide for Sellers

Change Outfit Colors Online for Outfit Preview with AI Clothes Color Changer

Virtual Try-On Technology in 2026: How It Works & Key Trends

How to Create Amazon Infographics: Boost Sales with Compelling Visuals

10 Best Virtual Try-On Apps & Tools for Online Shopping in 2026

How to Create AI Fashion Models: Complete Step-by-Step Guide

How to Use AI Fashion Models for E-Commerce Product Photos: A Complete 2026 Guide

How to Virtually Try On Clothes Online: A Complete Guide

How to Create Outdoor Product Scenes Without a Photoshoot Using AI

Optimize Etsy Images for Mobile: Listing Photos That Convert

Amazon 7-Image Listing Strategy: Boost Sales by Optimizing Every Image

Etsy Thumbnail Optimization: Keep Your Product Fully Visible

The Etsy Thumbnail Formula That Drives More Clicks and Sales

How to Create Pro Amazon Listing Photos Without a Studio

10 High-Converting Lifestyle Product Images for Amazon Listings

How to Automate Your E-commerce Visuals with OpenClaw Workflow

Top 5 AI Tools to Generate Amazon Product Listing Images in 2026

How to Turn One Photo into 10 Etsy Listing Images Fast: Batch Workflow

Etsy Listing Photo Size Guide (2026): Mobile, Desktop & Shop View Specs

Turn White Background Images into Lifestyle Amazon Listings

Fix Etsy Image Cropping: Optimize Listing Photos for Every Device

Amazon Listing Images: Essential Shot List & Optimization Guide

How to Create Lifestyle Product Images Without a Studio

Lifestyle Product Photography Trends 2026: Authentic Looks at Scale

How to Master Lifestyle Product Photography in 2026

Amazon Listing Images Guide 2026: 7-Slot Strategy & Requirements

360 Product Photography Guide 2026: Setup, Shoot and Workflow

Beginner's Guide to Generate Product Photos from Different Angles

AI Product Photography: Create Ecommerce Images Without a Photoshoot

How to Create Realistic AI Product Photos: Step-by-Step Pro Guide

Keep AI Product Images Consistent Across SKUs: Lighting, Color, Background

How to Scale E-commerce with a Product Image Generator

How to Use AI for Spring Product Photography: 2026 Amazon Guide

How to Create a Budget Home Product Photography Setup with AI

How to Achieve Professional Product Photography Standards in 2026

How to Take Product Photos with Phone: Pro Guide for Amazon & AI

Best AI Product Image Generator 2026: Top Tools for Amazon Sales

Amazon Photography Service vs. AI Generator: Best Choice for Sales

What Is Product Photography? Angles, Lighting & Editing Guide

Amazon Spring Sale 2026: Create High-Converting Listing Images (Guide)

AI Agents Transform Amazon Product Photography in 2026

Amazon Photoshoot in 2026: Do You Still Need a Studio?

11 Must-Have Tools for Amazon Product Photography in 2026

2026 Amazon Image Trends Shaping Seller Success and Conversions

Amazon Product Photography Requirements & Best Practices 2026
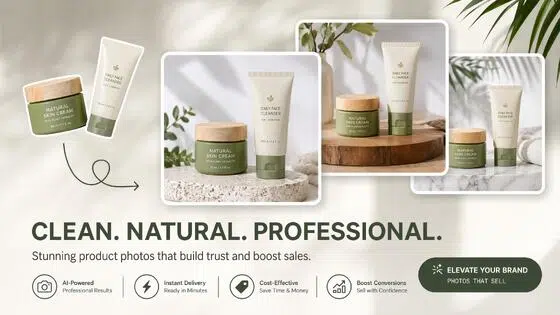
Make every product image ready to sell
Designkit is an all-in-one AI platform for ecommerce visuals. Create product photos, AI videos, virtual try-ons, and Amazon listing images in seconds. Generate HD backgrounds, batch edit photos, and scale your brand with studio-quality content.