How to Shoot Product Photography Step-by-Step (Angles, Lighting, Editing & Consistency)


Blurry images, inconsistent lighting, and a lack of diversity in the angles can be very detrimental to your product listings' conversion rate. A lot of sellers are aware that visuals play an important role; nevertheless, they are not sure how to do product photography that not only meets the marketplace standards but also gains customer trust.
If you have considered how to do product photography right, without using professional equipment or spending a lot of time on trial and error, this article is for you. Here you will find a product photography definition for e-commerce, choosing the correct angles, the right lighting, editing to achieve a clean, compliant look, and making sure visual consistency is maintained across SKUs. Tools like Designkit is there to assist you in producing studio-quality, compliant product image sets without the conventional photoshoots.
Part 1. What Is Product Photography & Why It's Your Best Salesperson
1.1. What is product photography?
Product photography refers to the technique of taking clear, precise, and attractive photos of a product with the sole objective of helping it sell online. In comparison to snapping random photos, product photography is very deliberate. Hence, every angle, shadow, background, and detail is meant to highlight features, minimize doubts, and allow customers to make buying decisions confidently.
When it comes to e-commerce, your photos are like the shop floor experience to customers. As buyers can't physically touch, test, or inspect your product, your photos are, in fact, your most effective and persuasive salespeople.

1.2. Product photography vs commercial photography
Even though the terms are often used interchangeably, they refer to different things.
- Product photography is all about the product itself, its features, texture, size, functionality. The aim is to be clear and to drive conversions.
- On the other hand, commercial photography takes a broader approach. It can be a brand campaign, a billboard, a lifestyle ad, or a storytelling visual where the product is only one of the elements of the overall marketing message.
You can think of it this way: product-first vs brand-first.
1.3. Product image photography vs lifestyle photography
Here is a critical distinction:
- The product image photography should be the product shown separately or isolated, usually on a plain background, to show accuracy and detail.
- Lifestyle photography shows the product in real-life use.

1.4. Where product photography is used in e-commerce
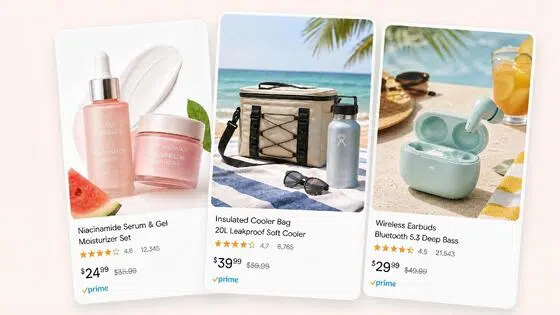
- Amazon listing images: The main image is used for compliance while the secondary images are used for showing features, infographics, and lifestyle context.
- Shopify product pages: Images are used as a gallery, zoom views, and variant images that keep the brand consistent across the catalog.
- Social commerce (Instagram/TikTok Shops): Lifestyle-centric pictures, ads, and UGC-style content that are crafted to grab attention and encourage impulse purchases.
1.5. Why product photography drives ROI
Excellent visuals are not only eye candy, but they also influence revenue and customer experience.
- Higher ecommerce conversion rate: Letting customers view enhanced product images provides them with a deeper understanding and shortens the decision-making process. So, changing visuals to be more attractive can result in a significant increase in your ecommerce conversion rate.
- Lower return rates: If the customers get a clear picture of the size, texture, and function, the cases of misunderstanding will be reduced. If there are less surprises, the returns will also be fewer.
- Stronger reviews and account health: On one hand, having good pictures means fewer complaints for "not as described." On the other hand, these help with the seller ratings and thus the marketplace standing is protected.
1.6. Platform expectations: what changes where
Platforms emphasize different styles even though the basics don't change:
- Amazon: The main picture has very strict rules (usually a pure white background, product-focused, compliance-driven).
- Instagram: Lifestyle and aesthetic storytelling are the main features.
- Shopify: The most important aspect is having very consistent branding and visual coherence throughout the whole catalog.

Part 2. Essential Equipment for Product Photography
2.1. The budget setup (smartphone product photography)
Perfect for beginners who are taking product photos at home.
- Smartphone basics: Set the highest resolution on your iPhone or phone, clean the lens very well, and don't use digital zoom.
- Window light: Get light from a window (morning/late afternoon) and put a sheer curtain to soften a strong light.
- Foam board reflector: Use light bouncing from it to the product to reduce the shadows.
- Simple backgrounds: Get a paper sweep or poster board; don't use textured or wrinkled fabric.
This smartphone product photography setup costs you next to nothing and it is quite effective.
3.2. The professional setup
A brand on the rise that requires professional and consistent product photos.
- DSLR or mirrorless camera: More control, better dynamic range, and lenses with greater versatility.
- Lens choice: 50mm or 85mm for most products; macro for tiny, detailed ones.
- Product photography lighting setup: Softboxes or diffused LEDs for lighting that is even and can be easily repeated.
- Reflection control: Changing angles and using diffusers can help to manage shiny or metallic products.

Part 3. 5 Essential Types of Product Photography Every Seller Needs
Strong product listings cannot be created with a single image only. A diverse combination of pictures will earn trust, provide clear understanding, and increase the number of sales.
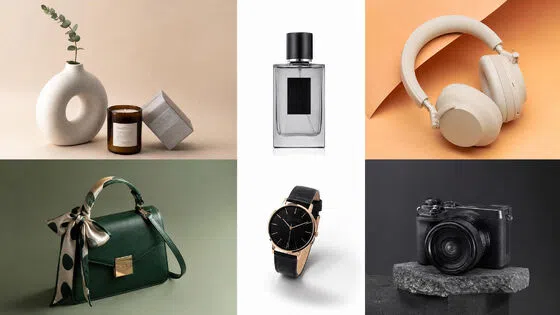
3.1. Studio white background
The hero shot is the core basis of the product shot photography. A clean, white background, true colors, and no distractions focus the attention on the product. Such a professional product photo gives a sense of trust and meets the requirements of platform compliance like Amazon and Walmart.

3.2. Lifestyle & contextual shots
Lifestyle shots depict the product used in real life, thus giving more emphasis to the benefits rather than the features. Using the same setting as the target audience, home, outdoor, or office, makes the product more appealing and therefore a persuasive product photoshoot.
3.3. Detail & macro shots
Close-up pictures reveal the texture, stitching, fabrics, and labels that are used, thus raising the quality of the perceived product. These pictures are extremely necessary in product image photography to help lower the level of customer returns due to disappointment or product mismatch.

3.4. Scale & comparison shots
Using a hand model, a common object, or a variant comparison to depict size not only accomplishes the clearness of dimensions but also avoids misunderstanding. This is a good way to allow customers to make decisions confidently and informed ones.
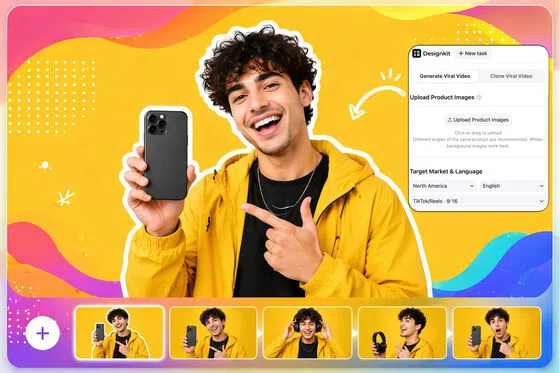
3.5. 360° & short video snippets
360° spins and short videos are very useful in showing different angles thus making the customer more interested and less prone to doubt. They can be used on product pages, ads, and social platforms, and are a great supplement for old-fashioned photos.
Bringing together such a combination of five product photography styles guarantees the listings to be effective, convincing, and able to generate sales.
Part 4. How to Shoot Product Photography: The 6-Step Professional Workflow
The six-step workflow helps sellers produce consistent, professional product photos from planning to final optimization.
Step 1: Pre-production & shot planning
Great product photography starts with a well thought-out plan.
- Make sure to completely clean the product with steam or microfiber cloths
- Write up a comprehensive shot list for each platform, Amazon, Shopify, or social media
If you set brand consistency rules before the shoot, all images will be in line with your visual identity. Planning thoroughly is the secret behind how to shoot product photography quickly and effectively.
Step 2: Lighting setup (the make-or-break factor)
The lighting is what will change the product's appearance the most. A basic three-point light system, key, fill, and backlight, gives a sense of volume and visually separates the product from the background.

Learning how to light product photography is a must if you want professional-grade images.
Step 3: Camera settings for sharp product photos
Appropriate usage of the settings will help you to make fewer edits and get more satisfying results. You could use an aperture of around f/8, f/11 so the depth of field will be enough. Also, keep your ISO low (≈100) to avoid noise and set white balance either with a gray card or with a fixed Kelvin value.
Step 4: Mastering angles & composition
Each angle can have a different interpretation. For instance, hero shots taken at eye-level are the most effective for main thumbnails, whereas a 45-degree angle can be used to add some space and show the product in real-life situations.
The top-down or flat-lay shots are the most suitable for bundles, kits, and accessories, and close-up macro shoots will detail the fine product features.
Step 5: Editing for professional results
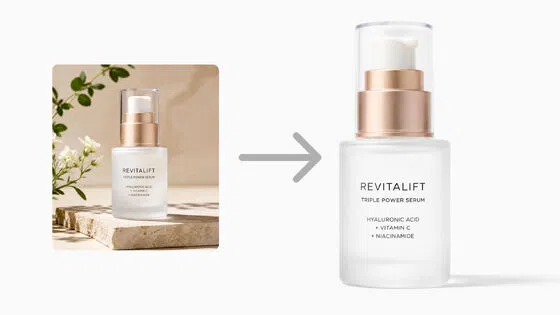
Editing is the bridge that transforms raw captures into high-converting visuals. By standardizing cropping and aspect ratios across your entire catalog, you create a tidy, professional grid that builds buyer confidence. High-quality product image editing can even salvage a non-prime photo by correcting exposure or distracting elements.
For brands managing large volumes of imagery, Designkit’s AI Photo Editor streamlines this process by automating the heavy lifting. You can use its Retouch tools to refine product details and adjust light or color, while the Background Remover and AI Product Photography Generator allow you to swap cluttered shots for clean, professional presets or custom scenes. If an original photo’s composition is too tight, the Extend feature can intelligently expand the image ratio, ensuring every product fits perfectly into your design.

Step 6: E-commerce image optimization
The final optimization step ensures your images perform flawlessly across every digital touchpoint. To provide a smooth shopper’s experience and faster page loading, it is essential to use descriptive file names and compress images correctly without sacrificing quality.
Platform-specific requirements can be a major hurdle, but Designkit simplifies this through its specialized Amazon Listing Images Generator and AI Product Listing Images Generator. These tools allow you to Resize dimensions and ratios automatically for Shopify galleries or social media catalogs in one click. Additionally, you can use the Enhance (HD/UHD) feature to ensure crystal-clear zoom capabilities and the Add Text or Elements function to highlight key selling points directly on your secondary images. By maintaining these technical optimization practices, you ensure your products look vibrant and professional on any screen.

Part 5. From Raw Photos to Professional Listings: Scaling Your Brand Consistency
Once your catalog has more than 100 SKUs, manual editing will be a serious holdup. Doing multiple platforms resizes and keeping a consistent style across teams or freelancers can take up a lot of time and money. Designkit, for example, can help you save time by automatically cutting out the background, creating main images that are in line with Amazon guidelines, and producing consistent listing-ready outputs across Shopify and social catalogs.
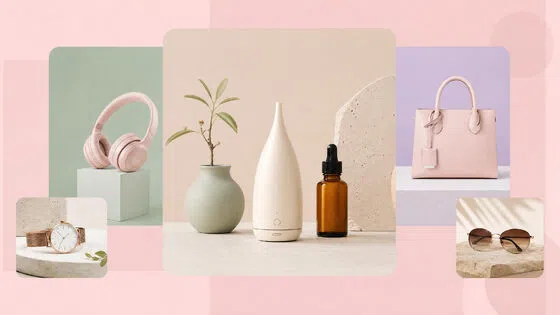
5.1 How AI enhances product photography
Artificial intelligence can make easy, repeated tasks easier, and keep the quality at the top. Designkit's AI product photography generator enables you to do the batch background optimization, so that for hundreds of SKUs you get clean, uniform images just in a snap. Besides, the platform helps to create lifestyle scenes that look very real, without models or physical sets, thus making your audience connect with the visuals which are true to the products.
By combining automated photo editing with an Amazon listing image creator, sellers can maintain consistency and speed up launch times.

5.2 The Secret to a Professional Store: Brand Consistency
Consistent visuals could play a big part in people trusting your brand, seeing product quality, and finding their way easily around your website. One way you might want to think about the whole thing is to create a Brand Visual Style Guide first. This is a document that very clearly sets out the lighting direction, the background, the props, and the overall mood of the pictures. A simple checklist to guarantee consistency: Match the light source direction and the amount of light in all pictures.
- Maintain same crop ratios and product size
- Keep the background style the same
- Use the identical color grading/look for all the images
Before vs after: Disorganized product pictures seem unprofessional and disoriented customers, whereas well-prepared, uniform product photos signal a professional and reliable store resulting in a higher perceived quality and an increase in sales.

5.3 Avoiding Mistakes That Make Products Look Cheap
- Gray or dirty backgrounds: Caused by poor white balance or uneven lighting.
- Messy or double shadows: Result from multiple uncontrolled light sources.
- Soft focus or blur: Often from handheld shooting or wrong shutter speed.
- Color shift: Occurs when mixed lighting is used without white balance calibration.
- Edge "ghosting": From poor cutouts or image compression, making products appear unprofessional.
Avoiding these product photography mistakes ensures polished images, helping your listings look professional.
Conclusion
Product photography of top-notch quality is the key to success in the world of online trading. Photographs that are simple, uniform and styled professionally, instantly gain the customer's trust and perceived value, hence lead to higher sales, and lower the number of product returns. If the scale of the work is large and efficiency is required, then tools such as Designkit come in handy as they automate background removal, create Amazon-compliant images, and allow consistent styling of different product lines thus, professional product photography is no longer a long and difficult process but rather fast and easy.
Product Photography FAQ
Q1: Can I use AI-generated images for my Amazon listings?
Q2: How many images of the product should I upload for a single listing?
Most platforms such as Amazon and Shopify suggest 5-8 photos: a hero shot, lifestyle/contextual images, detail/macro shots, scale/comparison views, and optionally 360° or short video snippets.
You May Also Like

Back to School Ad: 7 Creative Ideas for Better Campaign Results

Top 7 Back-to-School Sales Ideas to Boost Retail Sales (2026)

How to Create a Complete World Cup Product Listing Image Set

How to Create Amazon Summer Sale Posters and Banners with AI
Amazon Summer Sale 2026: Listing Design Trends & Product Image Ideas
Ecommerce Video Ads: 7 Strategies That Drive Higher Conversions

How to Photograph Shoes for Your Ecommerce Store in 2026
Product Photography Ideas: Creative Tips & Techniques for Better Shots
Product Photography Pricing 2026: Full Cost Guide by Type
White Background Product Photography Guide & Tips 2026

Product Photography Starter Package: Gear Checklist 2026
Shopify Product Photography Guide with Tips & Setup

Amazon Main Image Requirements: Size, Guidelines & Tips

Shopify Image Size 2026: Complete Guide and Tips for Better Product Display

Studio Product Photography vs AI Product Photography in 2026

7 Product Photography Mistakes That Hurt Ecommerce Sales

Change Outfit Colors Online for Outfit Preview with AI Clothes Color Changer

How to Create Amazon Infographics: Boost Sales with Compelling Visuals

How to Create Outdoor Product Scenes Without a Photoshoot Using AI

Optimize Etsy Images for Mobile: Listing Photos That Convert

Amazon 7-Image Listing Strategy: Boost Sales by Optimizing Every Image

Etsy Thumbnail Optimization: Keep Your Product Fully Visible

The Etsy Thumbnail Formula That Drives More Clicks and Sales

How to Create Pro Amazon Listing Photos Without a Studio

10 High-Converting Lifestyle Product Images for Amazon Listings

How to Automate Your E-commerce Visuals with OpenClaw Workflow

Top 5 AI Tools to Generate Amazon Product Listing Images in 2026

How to Turn One Photo into 10 Etsy Listing Images Fast: Batch Workflow

Etsy Listing Photo Size Guide (2026): Mobile, Desktop & Shop View Specs

Turn White Background Images into Lifestyle Amazon Listings

Fix Etsy Image Cropping: Optimize Listing Photos for Every Device

Amazon Listing Images: Essential Shot List & Optimization Guide

How to Create Lifestyle Product Images Without a Studio

Lifestyle Product Photography Trends 2026: Authentic Looks at Scale

How to Master Lifestyle Product Photography in 2026

Amazon Listing Images Guide 2026: 7-Slot Strategy & Requirements

360 Product Photography Guide 2026: Setup, Shoot and Workflow

Beginner's Guide to Generate Product Photos from Different Angles

AI Product Photography: Create Ecommerce Images Without a Photoshoot

How to Create Realistic AI Product Photos: Step-by-Step Pro Guide

Keep AI Product Images Consistent Across SKUs: Lighting, Color, Background

How to Scale E-commerce with a Product Image Generator

How to Use AI for Spring Product Photography: 2026 Amazon Guide

How to Create a Budget Home Product Photography Setup with AI

How to Achieve Professional Product Photography Standards in 2026

How to Take Product Photos with Phone: Pro Guide for Amazon & AI

Best AI Product Image Generator 2026: Top Tools for Amazon Sales

Amazon Photography Service vs. AI Generator: Best Choice for Sales

What Is Product Photography? Angles, Lighting & Editing Guide

Amazon Spring Sale 2026: Create High-Converting Listing Images (Guide)

AI Agents Transform Amazon Product Photography in 2026

Amazon Photoshoot in 2026: Do You Still Need a Studio?

11 Must-Have Tools for Amazon Product Photography in 2026

2026 Amazon Image Trends Shaping Seller Success and Conversions

Amazon Product Photography Requirements & Best Practices 2026
Make every product image ready to sell
Designkit is an all-in-one AI platform for ecommerce visuals. Create product photos, AI videos, virtual try-ons, and Amazon listing images in seconds. Generate HD backgrounds, batch edit photos, and scale your brand with studio-quality content.