
Add Realistic Shadows to Images With AI
Add realistic shadows to your images with Designkit’s AI shadow generator. Enhance product shape and texture, create a natural sense of depth, and elevate visuals for ecommerce and marketing.
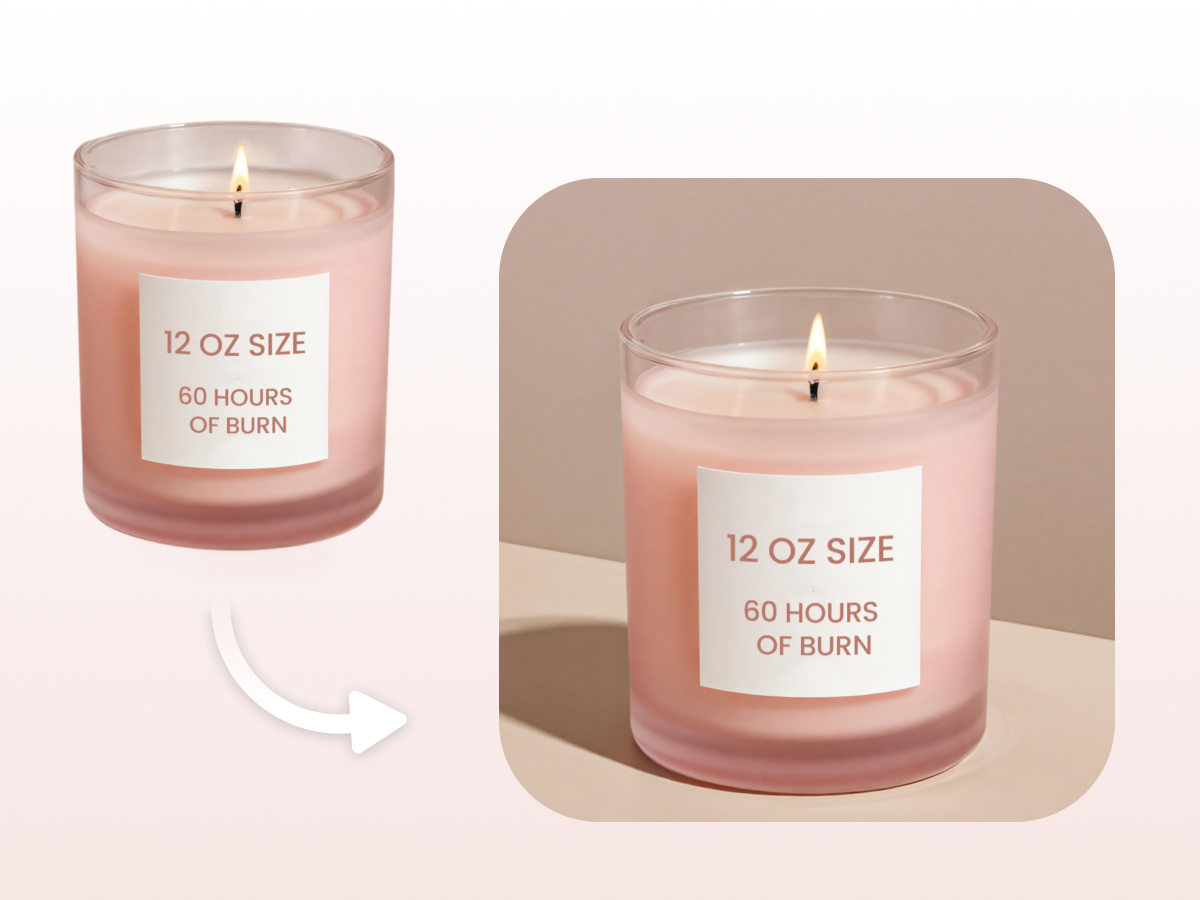
How to Add a Shadow to an Image Online
Step 1. Upload Your Image
Open Designkit’s Designer, and upload your product photo, portrait, or cutout, select Effect, and find the shadow options.
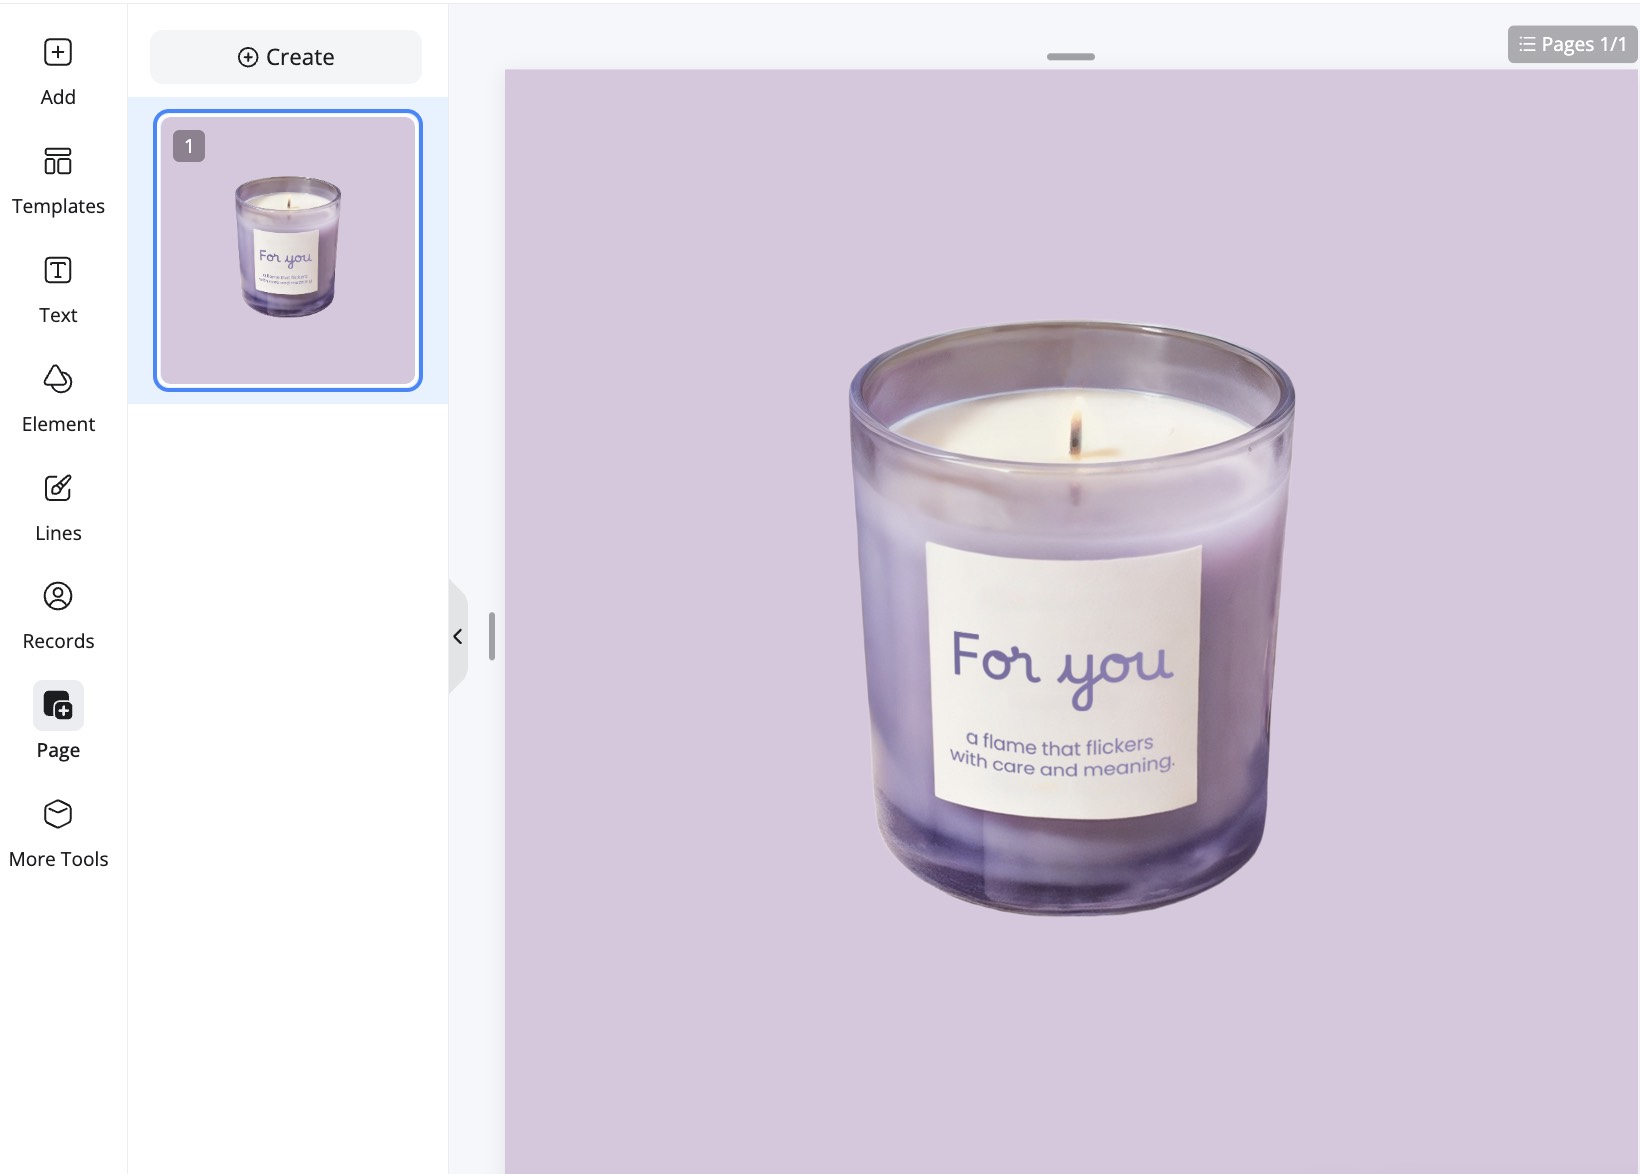
Step 2. Customize Your Shadow
Select Shadow and adjust the style, color, and distance to suit your image. Preview different settings to create a natural-looking shadow that adds depth without distracting from the subject.
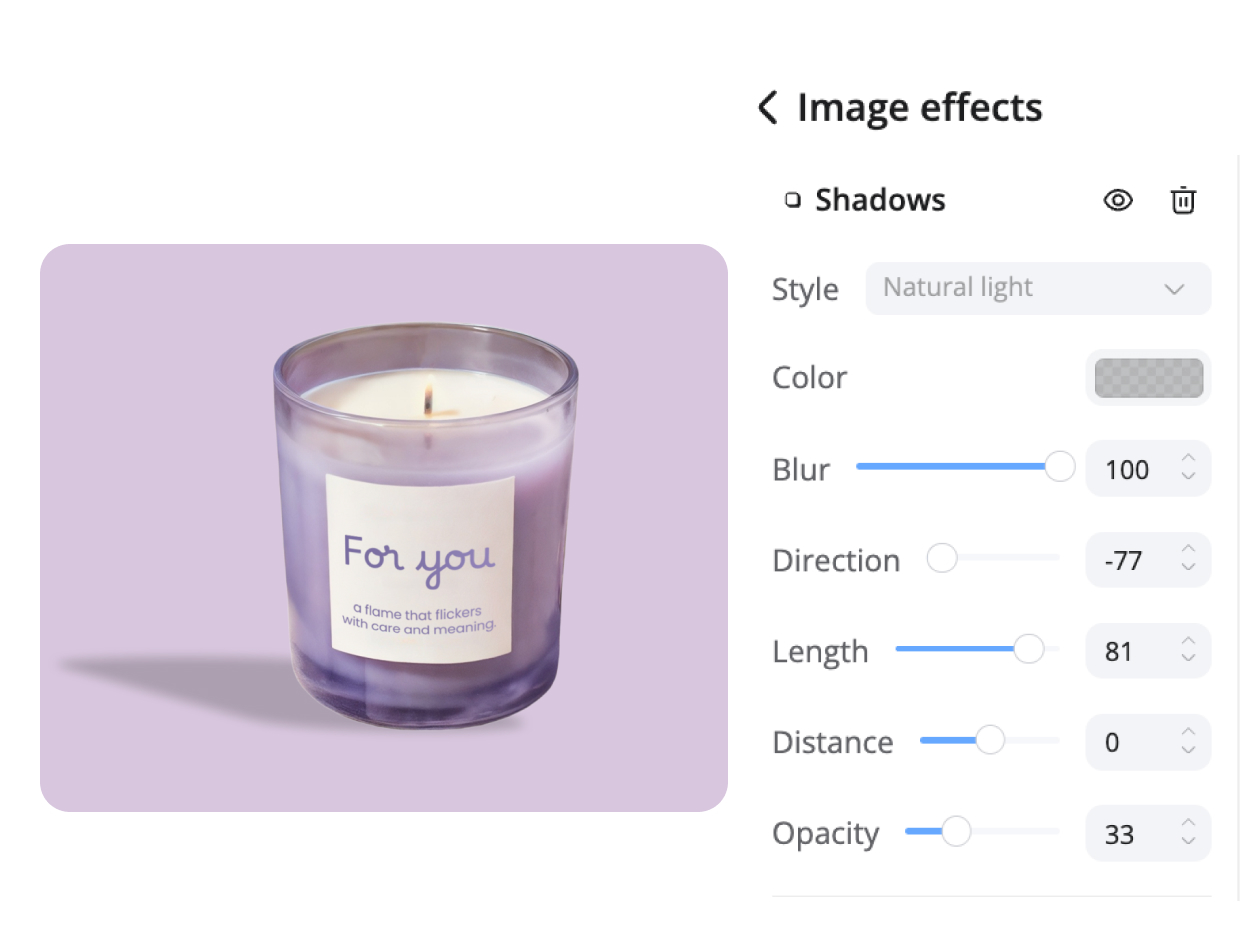
Step 3. Refine and Download Your Image
Check the shadow’s edges and overall appearance, making any final adjustments as needed. Download your finished image for product listings, marketing graphics, or social media posts.

Shadow Controls Built for Product Photos
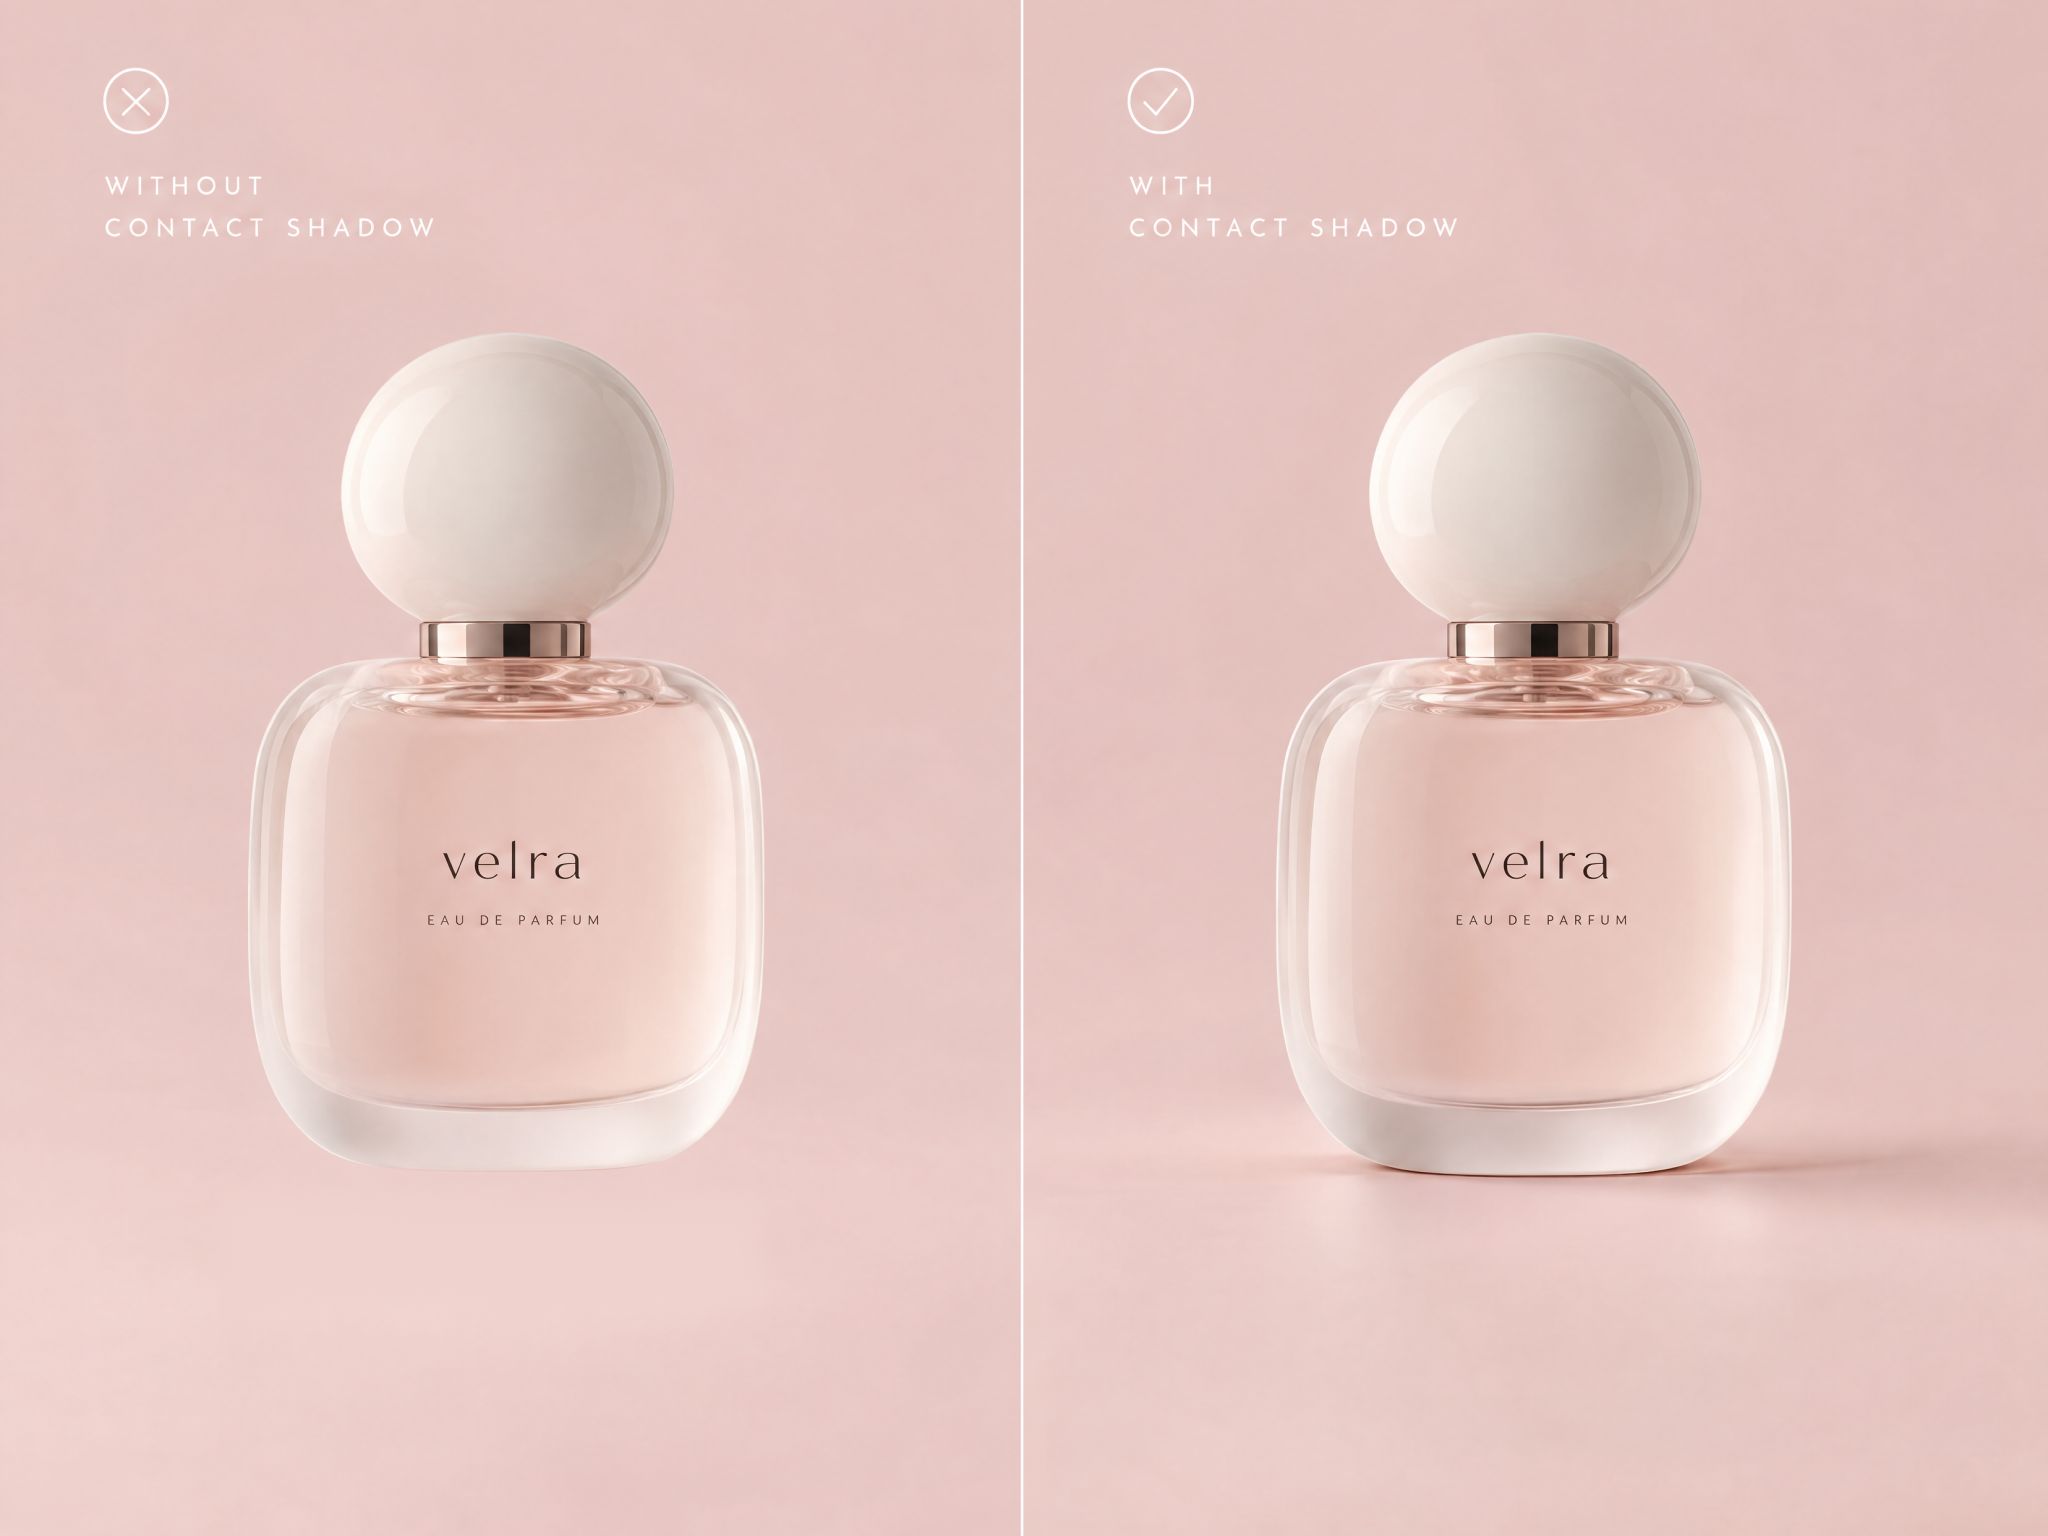
Give Floating Product Cutouts a Natural Point of Contact
A product cutout can look detached when there's no visible contact with the surface beneath it. Use Designkit to add a shadow to an image directly under the product's base, adjusting its placement and intensity to suit the item's shape. This helps shoes, bottles, and packaged goods look more grounded in product photography without distracting from their details.
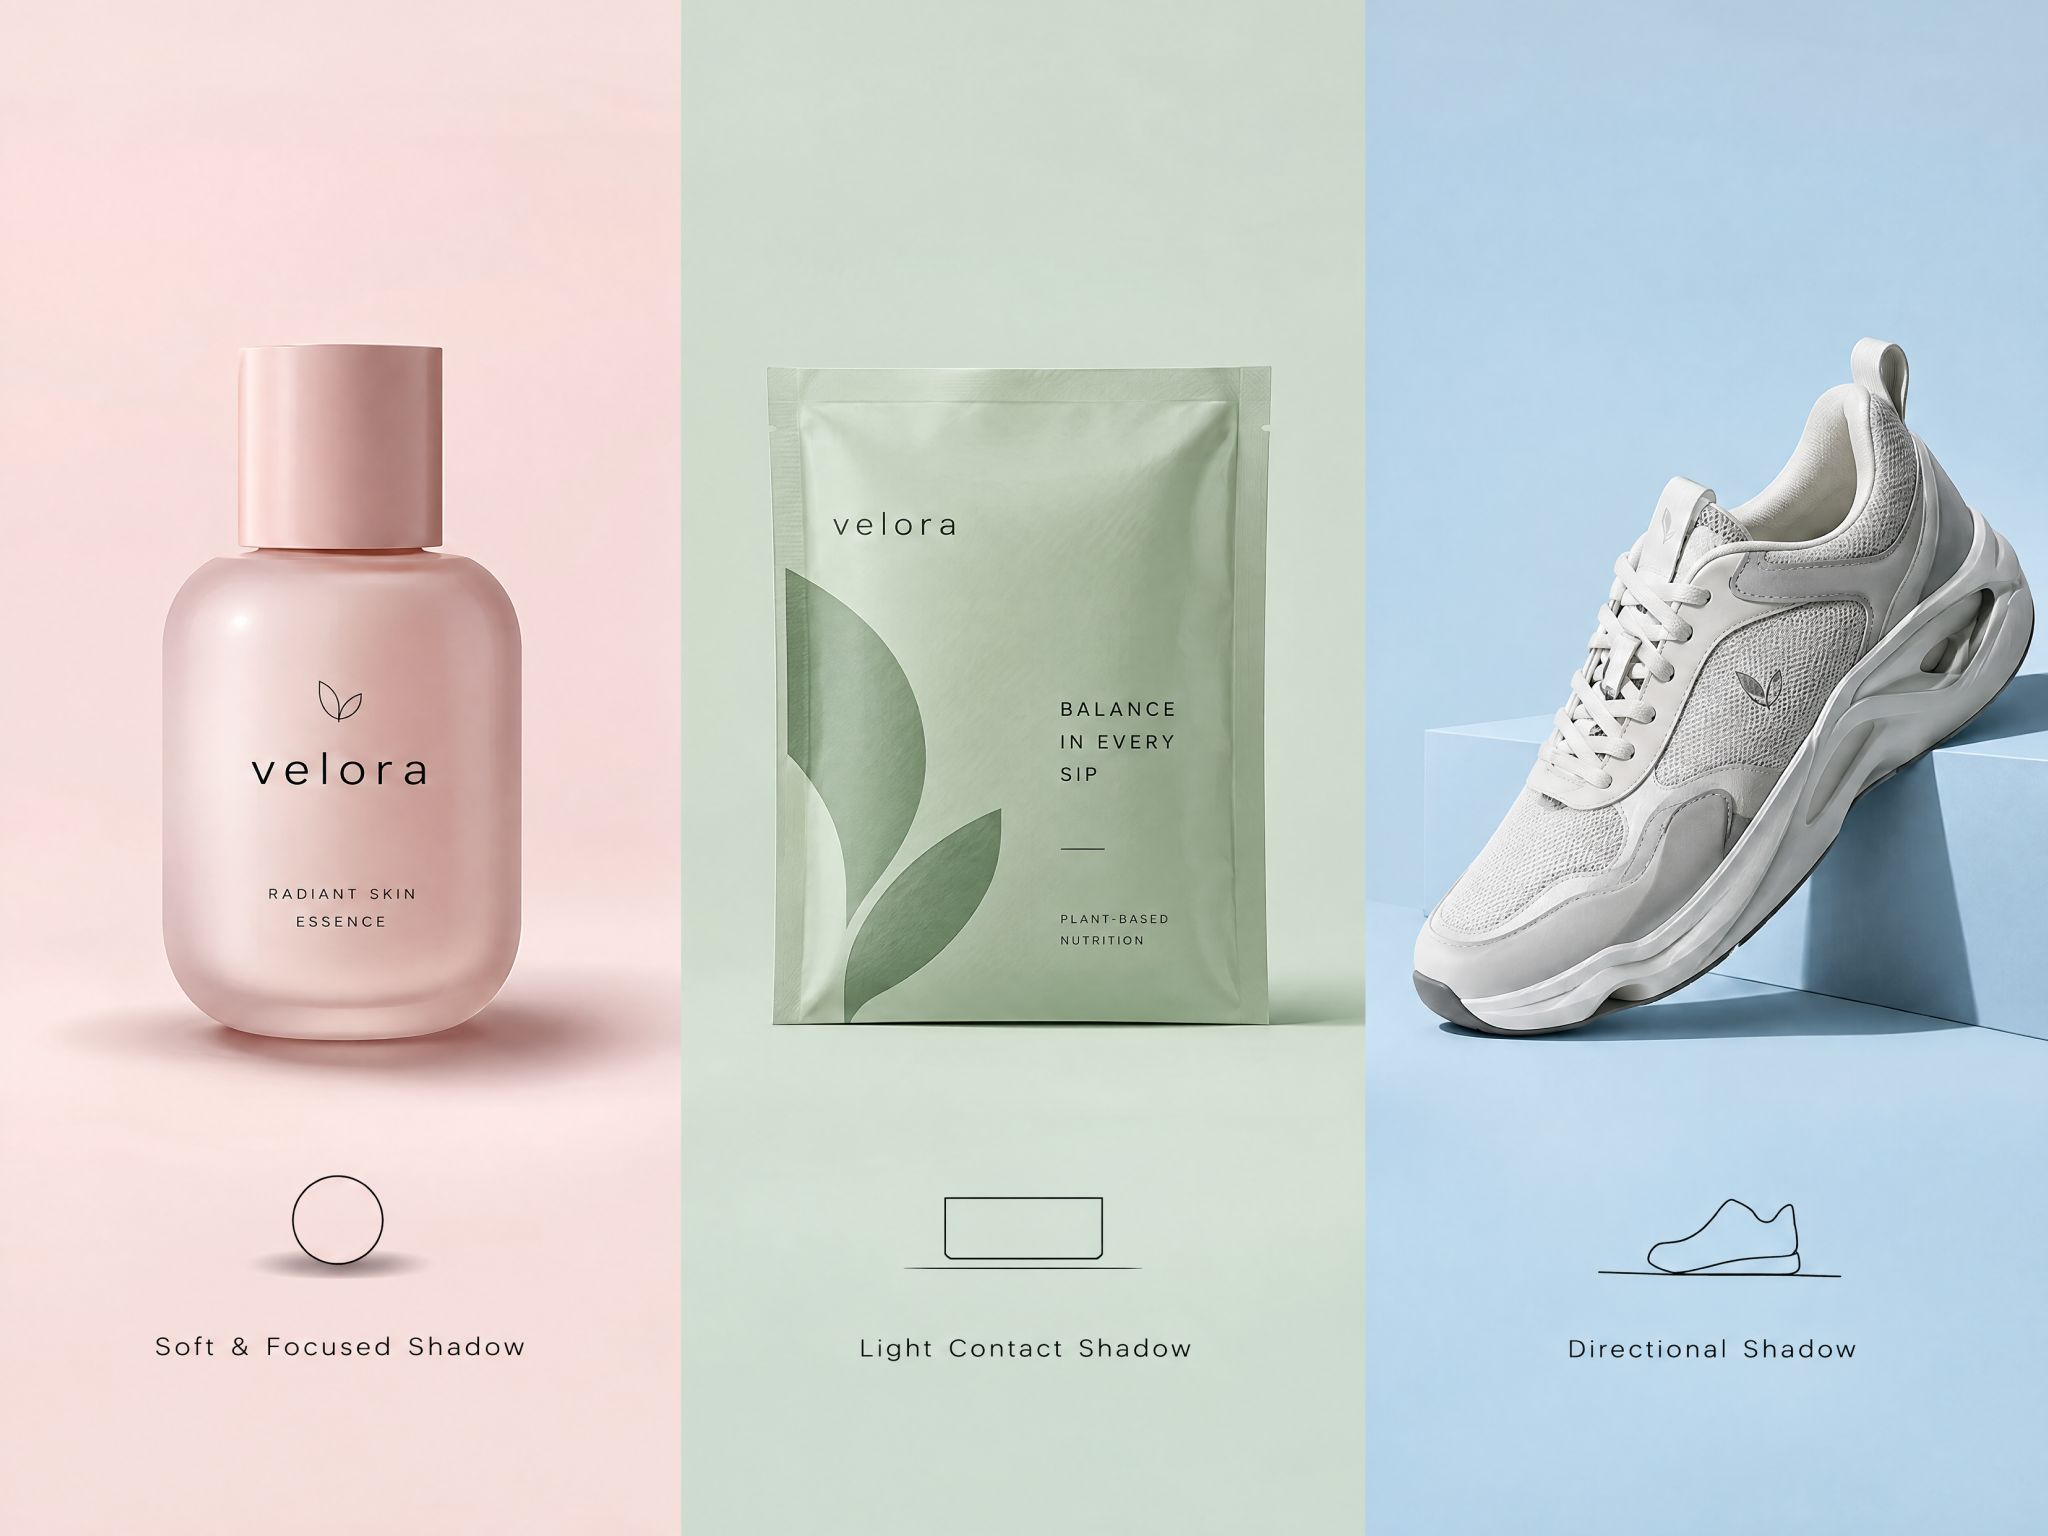
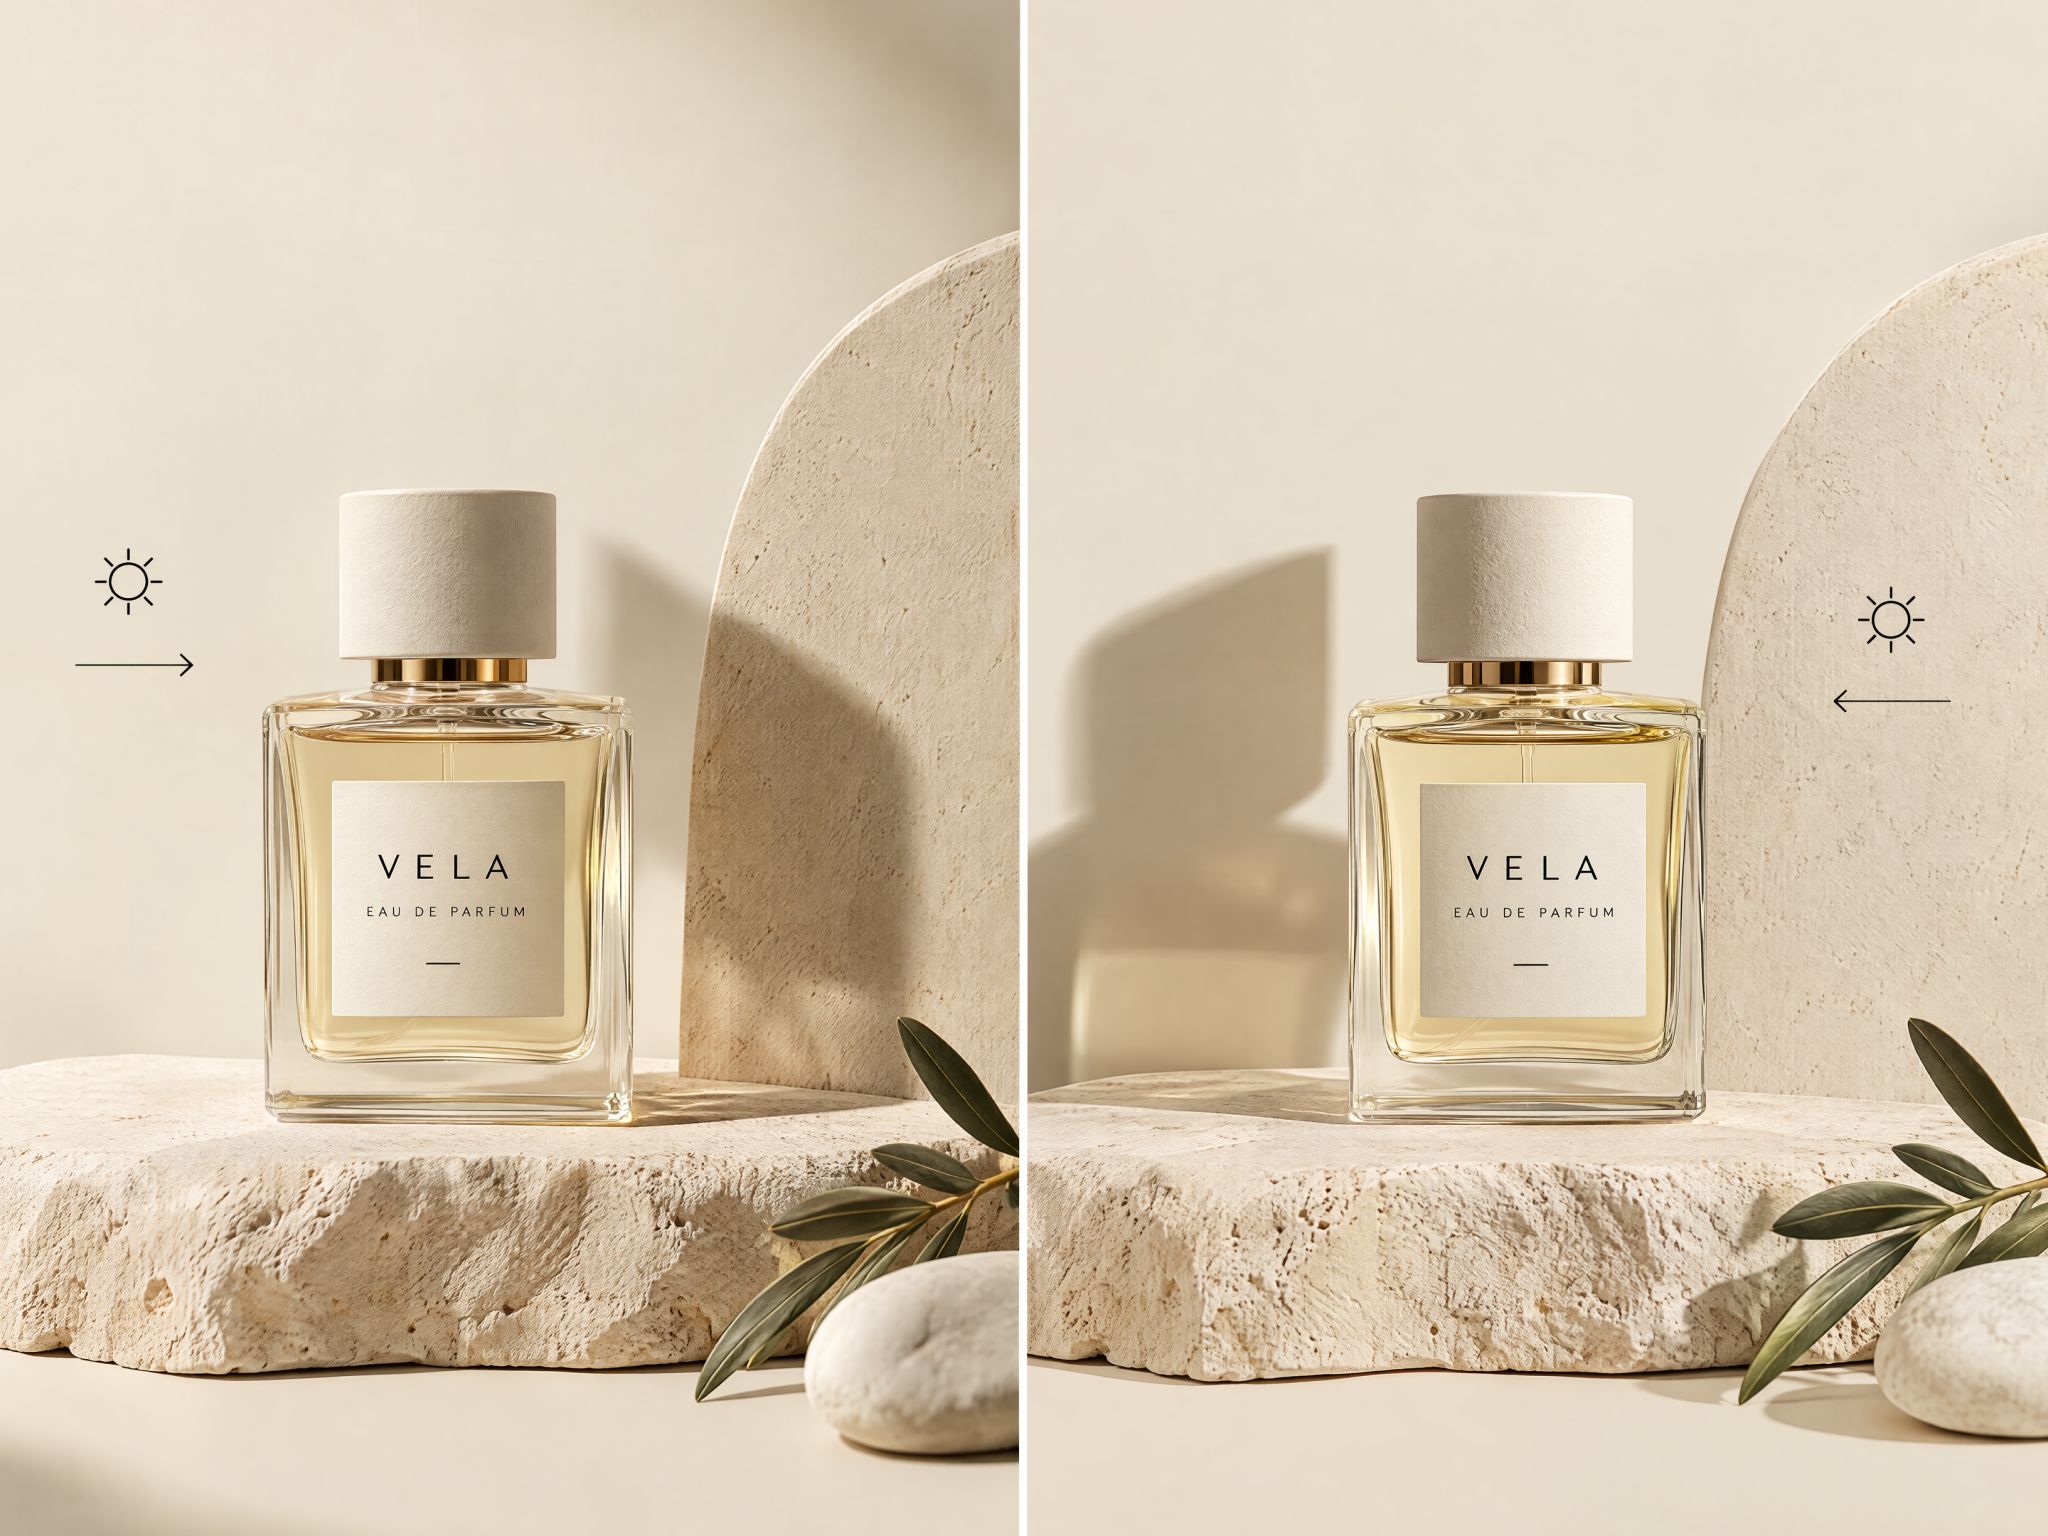
Make Cast Shadows Follow the Scene's Lighting
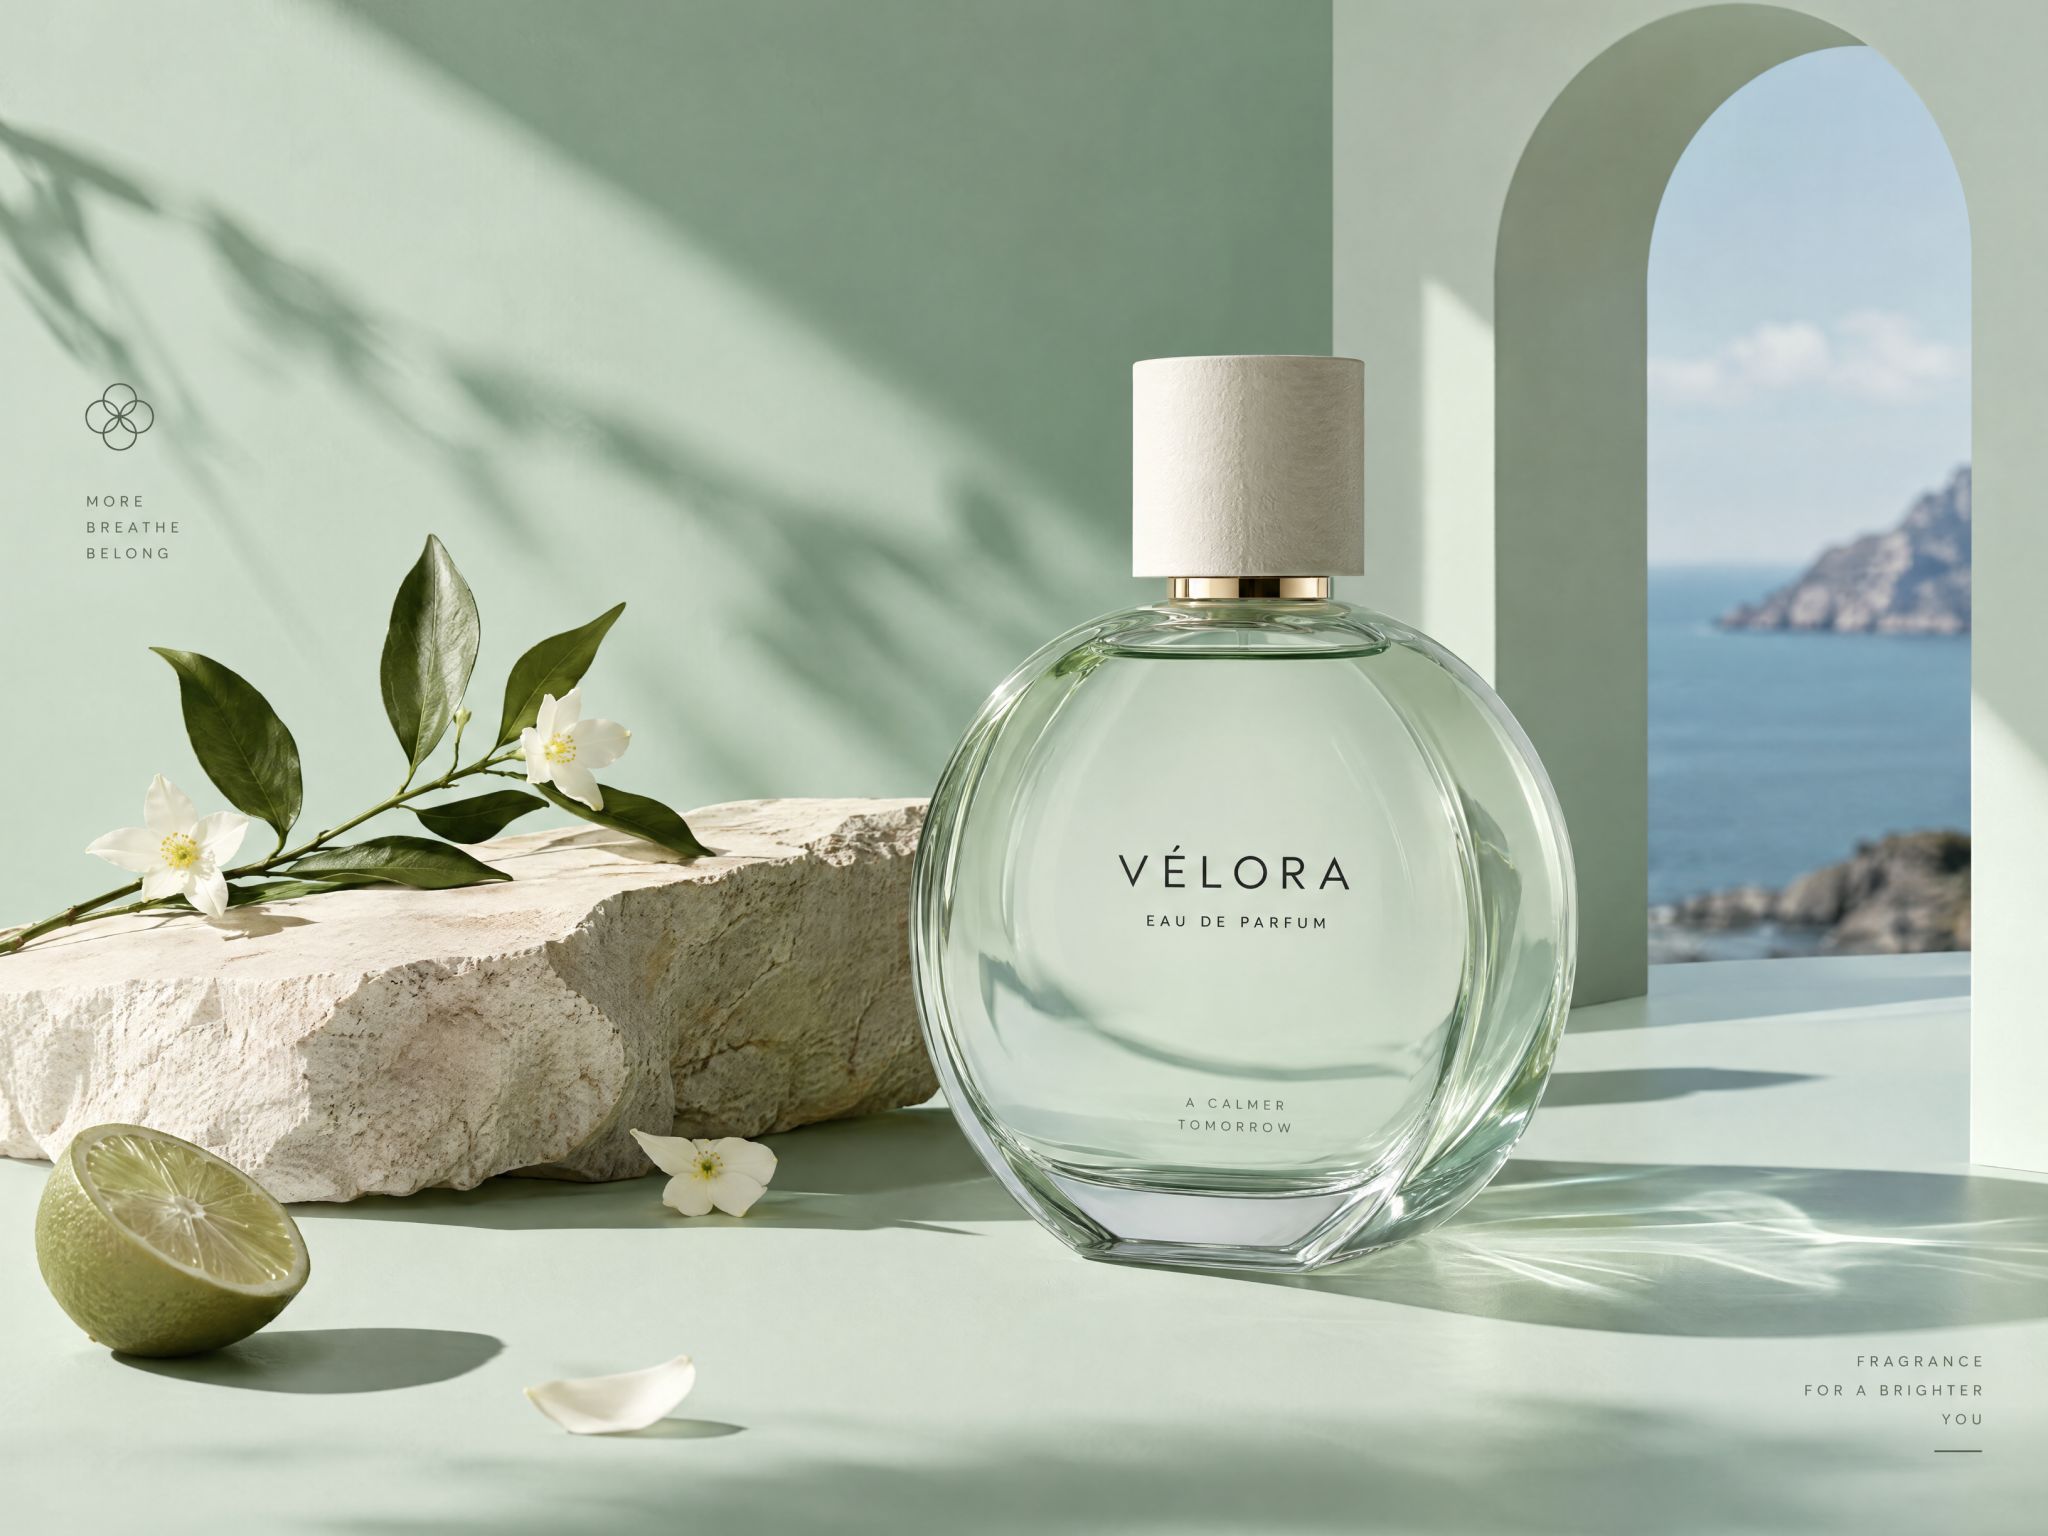
Shadows look more convincing when their direction matches the light falling on the product. Designkit helps you refine the angle and placement of shadows on pictures, so the result feels more consistent with the scene. When preparing storefront visuals, use this shadow image editor workflow alongside AI photo editing for ecommerce to create more cohesive product presentations.
Choose Shadow Treatments That Suit Each Product's Shape
Different products need different shadow treatments to look natural. Soft shadows can complement skincare bottles and cosmetics, while more defined shadows may suit boxes, shoes, and structured accessories. Designkit helps you apply a suitable shadow effect through a focused shadow image editing workflow, supporting polished visuals for product photo editing and promotional campaigns.
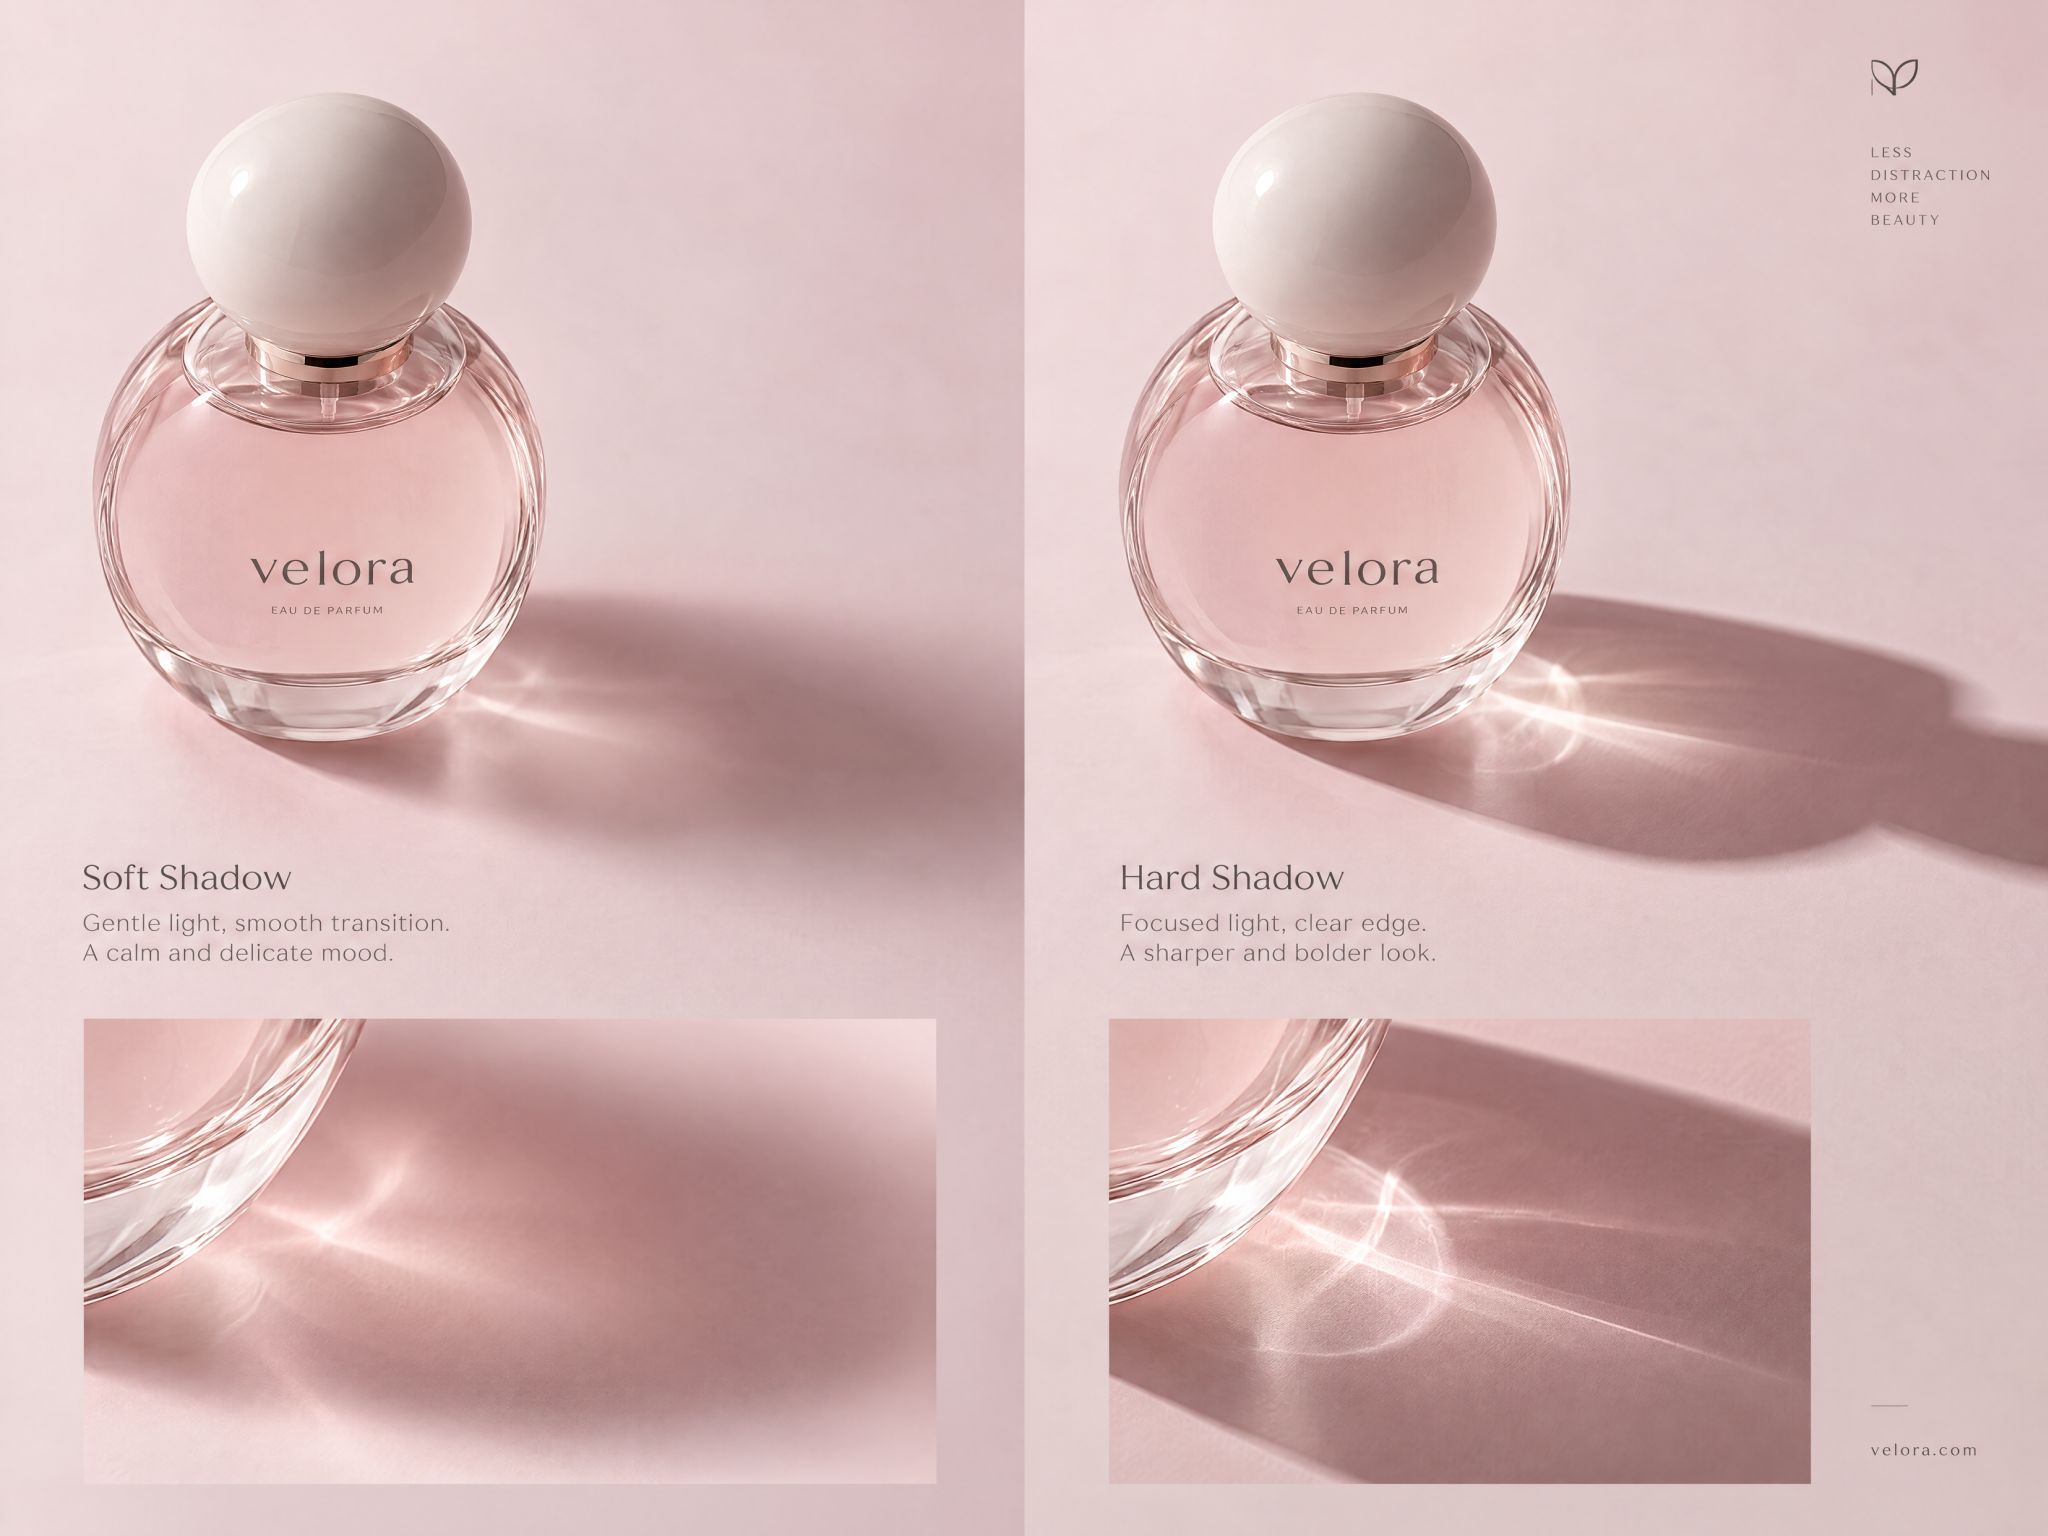
Soft or Hard Shadows Without Hiding Fine Edges
A shadow that's too dark or sharp can hide delicate product details, while excessive blur may make the item appear to float. Use Designkit to refine shadow softness and intensity according to the product's outline and background. This gives you greater control over shadows on pictures, whether you're preparing detailed jewelry shots or using an AI photo editor to polish catalog images.
Add Shadows to Product Photos, Ads, and Everyday Designs
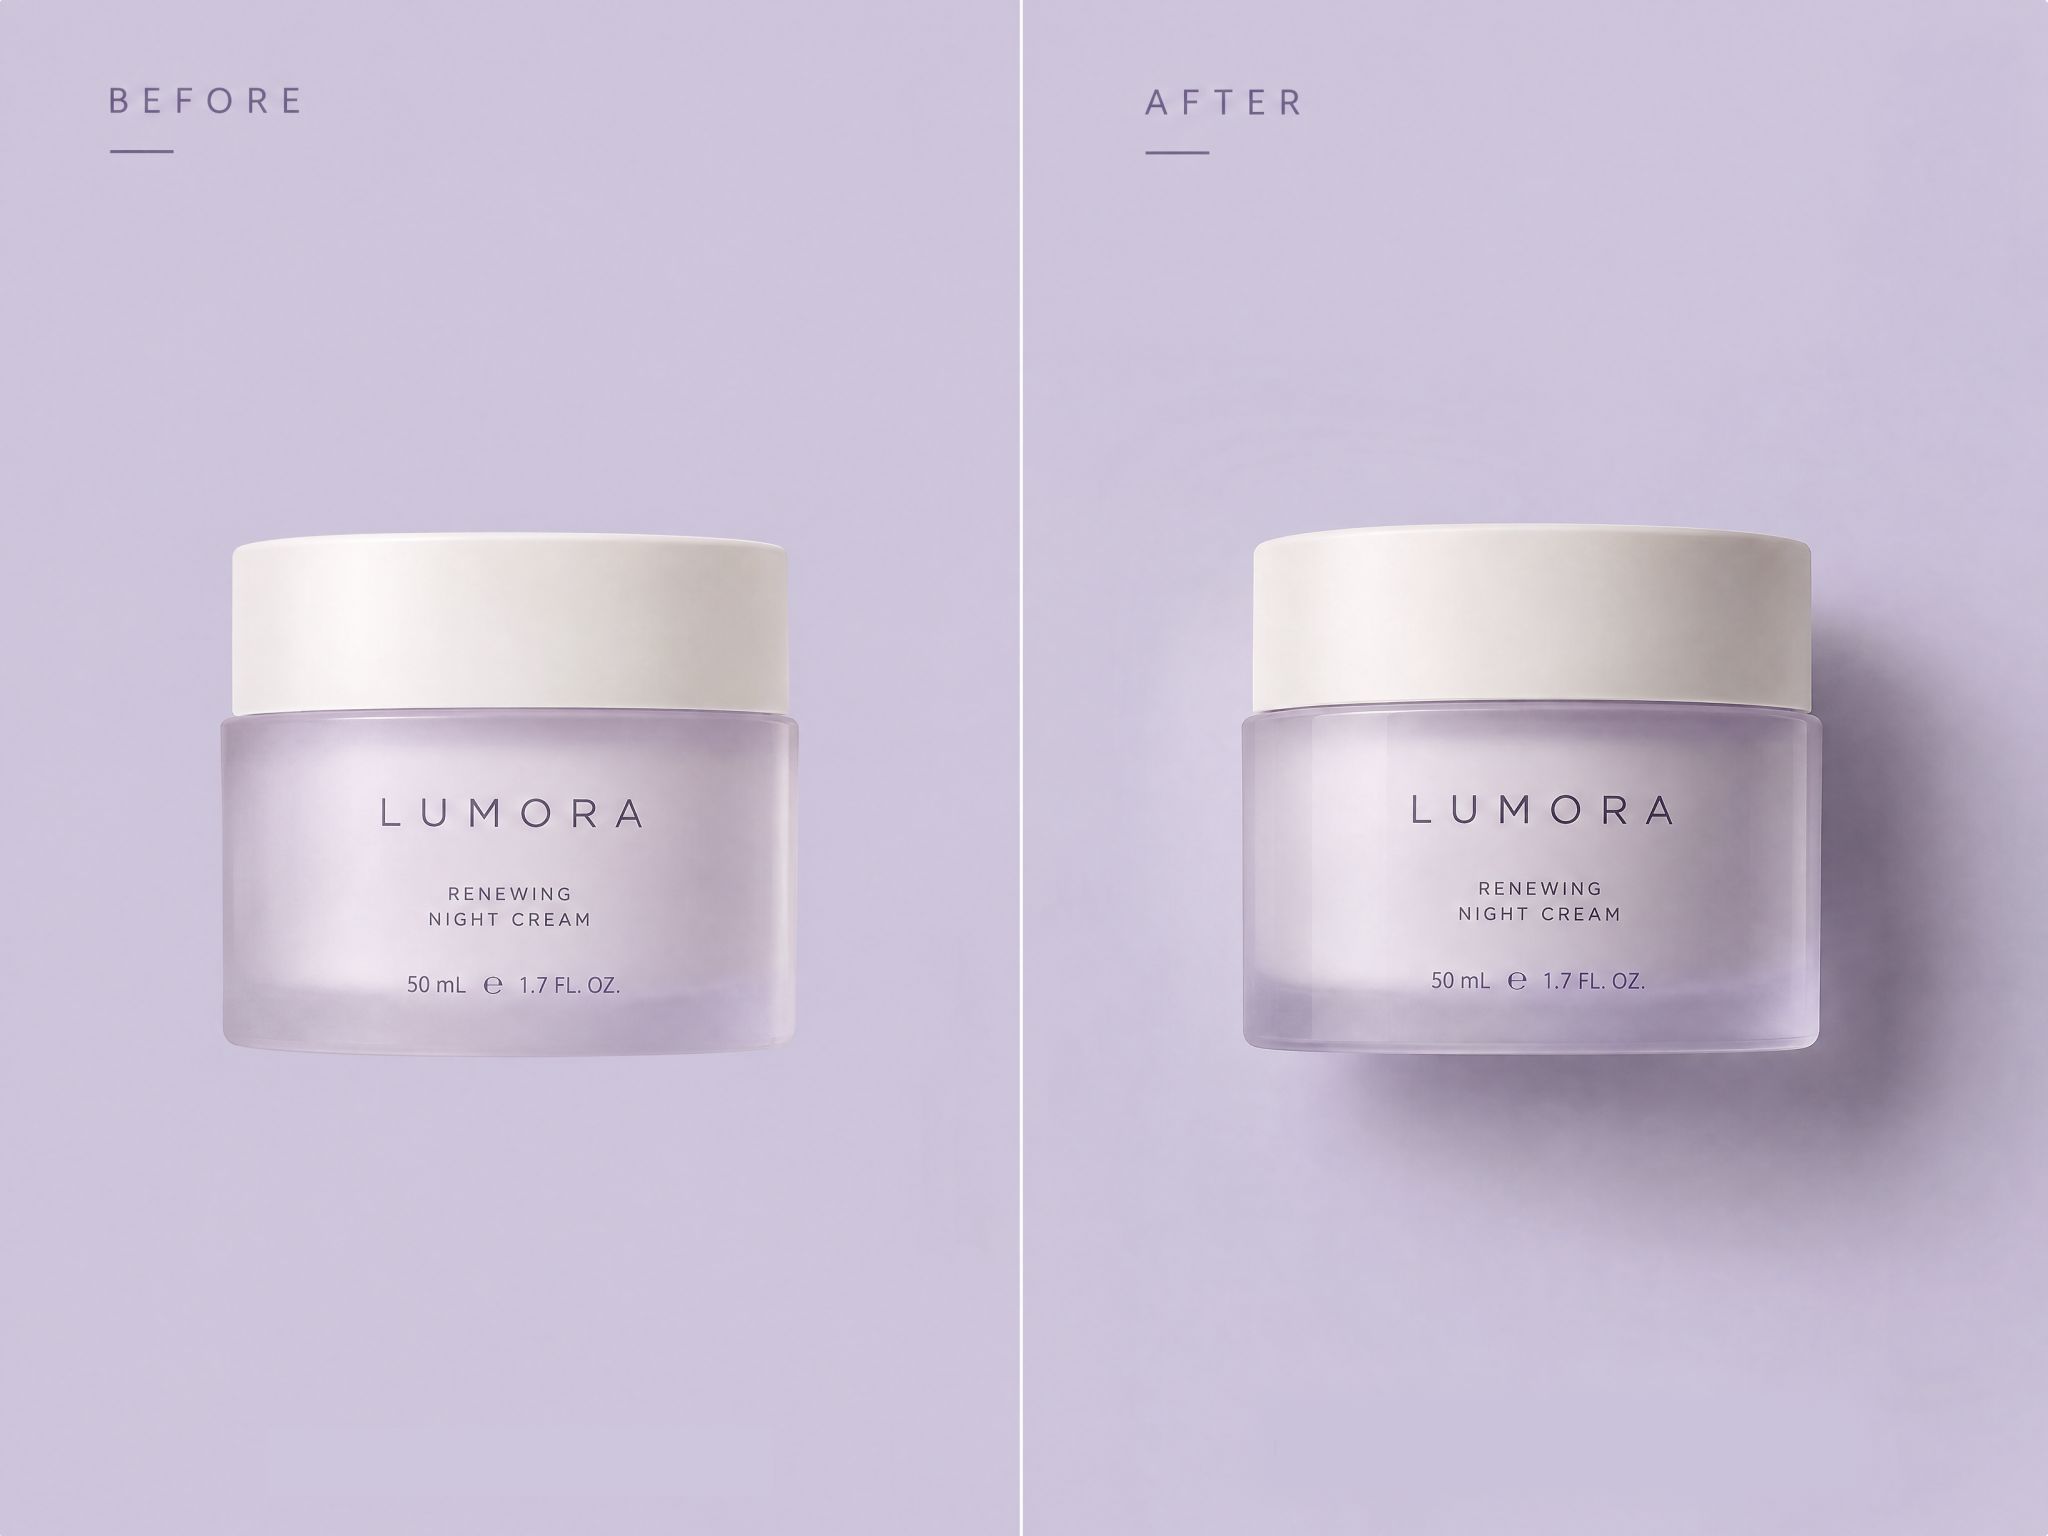
Make Product Listings Look Grounded and Complete
Add a soft shadow beneath isolated products to reduce the floating effect in online store photos. Designkit helps you create more natural-looking listings for clothing, cosmetics, and accessories, giving shoppers a clearer view of each item. Adjust the shadow to complement the product and keep its details visible.


Why Choose Designkit for Shadow Image Editing
Use Designkit to add realistic shadows to produce photos without mastering complex layer effects. Refine your images with fewer manual editing steps.
Reuse existing product photos instead of arranging new shoots for every visual update. Designkit helps simplify routine shadow editing for catalogs and campaigns.

Add shadows to product images, then incorporate them into listing visuals, advertisements, and social posts with Designkit's broader design workflow.


Frequently Asked Questions
How can I add a shadow beneath a product on a white background?
Will the shadow look natural on a white background?
Yes, a shadow looks natural on a white background when its softness, direction, and intensity match the product's lighting. Avoid harsh edges or overly dark tones that distract from the item. Designkit helps you apply a subtle shadow effect to product photos, creating a more realistic presentation for online stores and catalogs.
How do I make a product cutout look less like it's floating?
To make a product cutout look less like it's floating, add a soft contact shadow directly beneath its base and adjust the blur and opacity to suit its shape. Designkit helps you add a shadow to an image, so isolated products appear more grounded in listing photos, advertisements, and other commercial visuals.
Can I change the shadow color to match my product advertisement?
Yes, you can adjust a shadow's color to complement your advertisement, provided your editing tool supports color customization. Neutral gray works well for realistic product photography, while tinted shadows can suit creative campaigns. Designkit's shadow image editor workflow helps you refine product visuals to better match your intended design style.
How do I create a long shadow for a fashion product image?
To create a long shadow for a fashion product image, extend the shadow away from the subject in a consistent direction and adjust its opacity for the desired effect. Designkit helps you explore shadow image editing for clothing, shoes, and accessories, making it easier to create stylized promotional visuals without reshooting products.
How can I add shadows to jewelry without hiding small details?
To add shadows to jewelry without hiding small details, use a soft, low-opacity shadow and keep it concentrated beneath the item. Avoid heavy shading around delicate chains, gemstone settings, and reflective surfaces. Designkit helps you add shadow to image compositions while keeping the jewelry itself visually prominent for product listings and catalog photography.
How do I keep shadows consistent across a product catalog?
To keep shadows consistent across a product catalog, use similar shadow directions, softness, opacity, and distance from each product. Apply the same visual approach to different images and review them together before publishing. Designkit helps streamline shadow editing, so your storefront photos maintain a coordinated appearance across product categories.
Can I add a shadow to an existing product photo without retaking it?
Yes, you can add a shadow to an existing product photo without retaking it, especially when the product is clearly separated from its background. An AI shadow generator can help create a suitable grounding effect, depending on the available editing features. Designkit lets you enhance existing product images with shadows for updated listings and promotional materials.
Give Flat Product Photos a More Natural Finish
Add a shadow to your image online with Designkit. Explore shadow effects, bring more depth to product cutouts, and refine visuals for e-commerce listings, marketing campaigns, and creative projects.



How Creators Use Designkit to Refine Image Shadows
Explore how creators use Designkit to refine shadows and improve product photos, campaign graphics, and social visuals.
My Product Cutouts Sit Naturally on White Backgrounds
My product cutouts looked detached from the white backgrounds on our listings, especially the small bottles and boxed items. Designkit helped me add shadows beneath them so the products felt more grounded. I can now review the images in the context of the store before publishing, rather than treating every cutout as a finished product photo.
Designkit Gives Our Campaign Images the Depth They Were Missing.
Some of our campaign visuals looked flat when the featured product sat against a plain background. I used Designkit to explore a more directional shadow that drew attention to the product without competing with the headline. It gave us a more useful starting point for refining the final ad layout.
My Social Graphics Stand Out Without Looking Overdone.
My product posts sometimes looked flat on mobile, especially when the subject and background had similar colors. With Designkit, I could try a restrained shadow to create more separation around the main object. I check the image at the size people will actually see it so the effect adds depth without becoming distracting.
It Gives Me Another Way to Finish Product Images in Post-Production
Some catalog images need a little more depth after the main editing work is done. Designkit helps me explore shadow effects without manually building every shadow layer from scratch. I compare the result with the original lighting and refine it when necessary before delivering the final images.